Table of Contents
Advertisement
Advertisement
Table of Contents

Related Manuals for Pioneer SPH-DA360DAB


Summary of Contents for Pioneer SPH-DA360DAB
- Page 1 SPH-DA360DAB RDS AV RECEIVER Operation Manual...
-
Page 2: Table Of Contents
Contents Thank you for buying this Pioneer product. Please read through these instructions so you will know how to operate your model properly. After you have finished reading the instructions, keep this document in a safe place for future reference. - Page 3 Camera settings .................. 46 Phone Connectivity Settings ..............49 ■ Other functions ................. 50 ■ Appendix ..............51 - 3 -...
-
Page 4: Precaution
• If you notice smoke, a strange noise or odour from this product, or any other abnormal signs on the LCD screen, turn off the power immediately and consult your dealer or the nearest authorised Pioneer Service Station. Using this product in this condition may result in permanent damage to the system. - Page 5 • Please remember to fasten your seat belt at all times while operating your vehicle. If you are ever in an accident, your injuries can be considerably more severe if your seat belt is not properly buckled. • Never use headphones while driving. To ensure safe driving WARNING •...
- Page 6 • To prevent data loss and damage to the storage device, never remove it from this product while data is being transferred. • Pioneer cannot guarantee compatibility with all USB mass storage devices and assumes no responsibility for any loss of data on media players, iPhone, smartphone, or other devices while using this product.
- Page 7 The RDS-TMC service can also be used in the area where there is a station that broadcasts the RDS-TMC signal. • The Pioneer CarStereo-Pass is for use only in Germany. Protecting the LCD panel and screen • Do not expose the LCD screen to direct sunlight when this product is not used. This may result in LCD screen malfunction due to the resulting high temperatures.
-
Page 8: Parts And Controls
Parts and controls Main unit Touch to turn off the display information. To turn on the display information, touch again. Touch and hold to power off. To power back on, touch again. If you power the unit off, you can turn off almost all functions. The unit turns on by operating the following functions: •... -
Page 9: Basic Operation
Basic operation Resetting the microprocessor CAUTION • Pressing the RESET button restarts this product. In that case, some of the settings and recorded contents are reset to the factory settings. – Do not perform this operation when a device is connected to this product. •... - Page 10 Operating list screens video folder abcdefghi abcdefghi abcdefghi abcdefghi Touching an item on the list allows you to narrow down the options and proceed to the next operation. Appears when items cannot be displayed on a single page. Drag the side bar, the initial search bar or the list to view any hidden items. Operating the time bar 50:00 99:99...
- Page 11 Source icons You can display the hidden source icon(s) by swiping left on the screen. Setting the clock display (page 50) Settings (page 42) Displays the connected devices. : lights up when Apple CarPlay is available. : lights up when Android Auto is available. : lights up when hands-free phoning via Bluetooth is available.
-
Page 12: Bluetooth
Bluetooth® Bluetooth connection Turn on the Bluetooth function on the device. Display the connected Bluetooth device list screen on the device. Touch Touch The device search screen appears. Touch [Yes] to start searching. Touch if another device is already connected to the unit. Touch a desired device on the screen. - Page 13 Bluetooth Settings Touch Touch then [Bluetooth Settings]. CAUTION Never turn this product off and disconnect the device while the Bluetooth setting operation is being processed. Menu Item Description [Connection] Activate to connect the last connected Bluetooth device automatically. [Auto Answer] (page 15) [Search] Search for available devices.
- Page 14 TIPS • on the top menu screen is not available while Android Auto is on. In that case, use the Android Auto phone function. • Confirm whether hands-free phoning via Bluetooth is activated if on the top menu screen is not available (page 11).
- Page 15 Menu Item Description [Auto Answer] Activate to answer an incoming call automatically. Adjusting the other party’s listening volume This product can be adjusted to the other party’s listening volume. Touch to switch between the three volume levels. Notes for hands-free phoning ▶General notes •...
- Page 16 • If the phone book in the phone contains image data, the phone book may not be transferred correctly. • Depending on the mobile phone, phone book transfer may not be available. Bluetooth audio Before using the Bluetooth audio player, register and connect the device to this product (page 12).
- Page 17 Switches between playback and pause. Skips files forwards or backwards. Sets a repeat play range. Plays files in random order. - 17 -...
-
Page 18: Wi-Fi
Wi-Fi® By connecting your Wi-Fi certified mobile device to this product via Wi-Fi connection, you can use Apple CarPlay or Android Auto wirelessly. Wi-Fi connection See the following chapters for the procedure on how to make a Wi-Fi connection for each application. -
Page 19: Av Source
AV source Supported AV source You can play or use the following sources with this product. • Radio • Digital Radio • USB The following sources can be played back or used by connecting an auxiliary device. • iPhone • Bluetooth audio •... -
Page 20: Digital Radio
Digital Radio tuner operations For improved Digital Radio reception, make sure a Digital Radio aerial with phantom power input (active type) is used. Pioneer recommends using AN-DAB1 (sold separately) or CA-AN-DAB.001 (sold separately). Current consumption of Digital Radio aerial should be 100 mA or less. - Page 21 Basic operation Digital Radio screen Recalls the preset channel stored to a key from memory. Stores the current broadcast frequency to a key. Selects the DAB1, DAB2, or DAB3 band. DAB1 Manual tuning Switches the services one by one. Seek tuning Skips to the nearest station group.
- Page 22 Menu Item Description [Service Follow] Searches for another station group that supports the same station with better reception. - 22 -...
-
Page 23: Radio
Radio Starting procedure Press Touch [Radio]. The Radio screen appears. Basic operation Recalls the preset channel stored to a key from memory. XX.XX XX.XX Stores the current broadcast frequency to a key. Selects the FM1, FM2, FM3, AM1 or AM2 band. Performs BSM (best stations memory) function (page 24). - Page 24 Activates/deactivates the local seek mode. Local Recall a preset channel in order and broadcast each channel for 10 seconds. Storing the strongest broadcast frequencies (BSM) The BSM (best stations memory) function automatically stores the six strongest broadcast frequencies under the preset channel keys [1] to [6]. NOTES •...
-
Page 25: Compressed Files
Compressed files Plugging/unplugging a USB storage device You can play compressed audio, compressed video, or still image files stored in an external storage device. Plugging a USB storage device Pull out the plug from the USB port of the USB cable. Plug a USB storage device into the USB cable. - Page 26 You can also start this source by pressing then touching [USB]. Basic operation Audio source Switches between playback and pause. Skips files forwards or backwards. Performs fast forwards or fast reverse. Sets a repeat play range for all files/the current folder/the current file. Plays files or does not play in random order.
- Page 27 Video source CAUTION For safety reasons, video images cannot be viewed while your vehicle is in motion. To view video images, stop in a safe place and apply the handbrake. Switches between playback and pause. Skips files forwards or backwards. Performs fast forwards or fast reverse.
- Page 28 Still image source Switches between playback and pause. Skips files forwards or backwards. Rotates the displayed picture 90° anticlockwise. Sets a repeat play range for all files/the current folder/the current file. Selects a file from the list. Touch a file on the list to playback. TIPS •...
-
Page 29: Iphone
iPhone NOTE iPhone may be referred to as iPod in this manual. Connecting your iPhone When connecting an iPhone to this product, the settings are automatically configured according to the device to be connected. For details of the compatibility, refer to Compatible iPhone models (page 60). - Page 30 Skips files forwards or backwards. Sets a repeat play range for all in the selected list/the current song. Plays songs within the selected list/album randomly. Selects a song from the list. Touch the category then the title of the list to playback of the selected list. You can search a song in the songs list by dragging the initial search bar.
-
Page 31: Weblink
Using WebLink Important • Pioneer is not responsible for content or functions accessed via WebLink, which are the responsibility of the application and content providers. • Availability of non-Pioneer content and services, including apps and connectivity, may change or discontinue without notice. - Page 32 NOTE For USB connection, refer to the Installation Manual. For smartphone (Android™) users System requirement Android 7.0 or higher NOTE The video playback capability depends on the connected Android device. Unlock your smartphone and connect it to this product via USB. You can start this source by touching , swiping left on the screen, and touching [WebLink] if the screen except for WebLink appears after the USB connection.
-
Page 33: Usb Mirroring
Using USB Mirroring Important • Pioneer is not responsible for content or functions accessed via USB Mirroring, which are the responsibility of the application and content providers. • Availability of non-Pioneer content and services, including apps and connectivity, may change or discontinue without notice. -
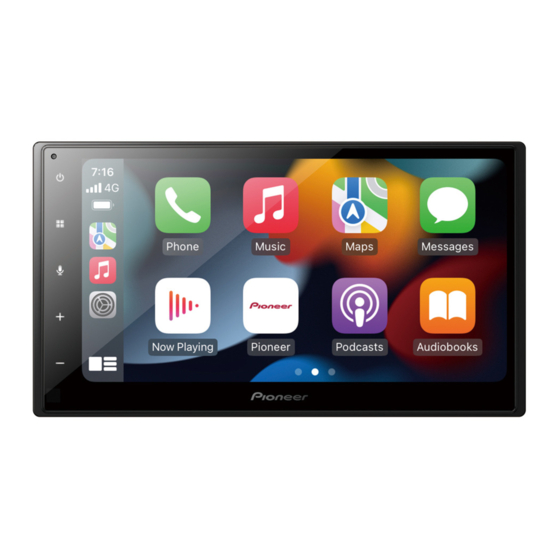
Page 34: Apple Carplay
• Apple CarPlay allows access to applications other than those listed that are subject to limitations while driving. • PIONEER IS NOT RESPONSIBLE AND DISCLAIMS LIABILITY FOR THIRD PARTY (NON-PIONEER) APPS AND CONTENT, INCLUDING WITHOUT LIMITATION ANY INACCURACIES OR INCOMPLETE INFORMATION. - Page 35 Touch [Driving Position]. [Left] Select for a left-hand drive vehicle. [Right] Select for a right-hand drive vehicle. Starting procedure Wired connection Connect an Apple CarPlay compatible device to this product via USB. The application screen appears. You can start this source by touching then touching [Apple CarPlay] if the screen except for Apple CarPlay appears after the USB connection.
- Page 36 Follow the on-screen instructions on the device to start the application. TIPS • When the USB connection with the other device has been made, the message that shows that the new device is available will appear. If you want to switch from the current device to the new one for use in the application, touch the pop-up message.
-
Page 37: Android Auto
• Android Auto allows access to applications other than those listed that are subject to limitations while driving. • PIONEER IS NOT RESPONSIBLE AND DISCLAIMS LIABILITY FOR THIRD PARTY (NON-PIONEER) APPS AND CONTENT, INCLUDING WITHOUT LIMITATION ANY INACCURACIES OR INCOMPLETE INFORMATION. - Page 38 Touch Touch Touch [Phone Connectivity Settings]. Touch [Driving Position]. [Left] Select for a left-hand drive vehicle. [Right] Select for a right-hand drive vehicle. Starting procedure Wired connection Connect an Android Auto compatible device to this product via USB. The application screen appears. You can start this source by touching then touching [Android Auto] if the screen except for Android Auto appears after the USB connection.
- Page 39 Touch [Start] to start Android Auto. The unit configures the connection then start the application. You can use voice recognition function by touching button once Android Auto is activated. NOTES • For details on USB connection, refer to the Installation Manual. •...
-
Page 40: Aux
You can display the video image output by the device connected to video input. CAUTION For safety reasons, video images cannot be viewed while your vehicle is in motion. To view video images, stop in a safe place and apply the handbrake. NOTE A Mini-jack AV cable (sold separately) is required for connection. -
Page 41: Camera View
Camera View You can display the video image output by the device connected to video or camera input. For details, refer to the Installation Manual. Starting procedure Touch then swipe left on the screen. Touch [Camera View] for connected camera view. The video image is displayed on the screen. -
Page 42: Settings
Settings You can adjust various settings in the main menu. Displaying the setting screen Touch Touch Touch one of the following categories, then select the options. System Settings (page 42) Display Settings (page 44) Audio & EQ Settings (page 45) Wi-Fi Settings (page 18) Bluetooth Settings (page 13) Camera settings (page 46) - Page 43 Menu Item Description [Radio settings] (page 24) [Factory Reset] Touch [OK] to restore the settings to the default settings. CAUTION Do not turn off the engine while restoring the settings. NOTES • This setting is available only when you stop your vehicle in a safe place and apply the handbrake.
-
Page 44: Display Settings
Menu Item Description [System Information] Displaying and updating the firmware version. CAUTION • The USB storage device for updating must contain only the correct update file. • Never turn this product off, disconnect the USB storage device while the firmware is being updated. •... -
Page 45: Audio & Eq Settings
Menu Item Description [Wallpaper] Touch the wall paper from the preset items in this product or original pictures via the external device and touch [Apply]. The wall paper can be set from selections for the top menu screen and AV operation screen. Preset Display Select the desired preset background display. - Page 46 Menu Item Description [EQ] Select or customise the equaliser curve. Select a curve that you want to use as the basis of [Super Bass] [Powerful] [Natural] [Vocal] [Flat] customising then touch the frequency that you want to [Custom] adjust. If you make adjustments when a curve [Super Bass], [Powerful], [Natural], [Vocal], or [Flat] is selected, the equaliser curve settings will be changed to [Custom] mandatorily.
- Page 47 To set the rear view camera as the camera for Camera View mode, activate [Rear Viewing Camera Input] (page 47). CAUTION Pioneer recommends the use of a camera which outputs mirror reversed images, otherwise the screen image may appear reversed. • Immediately verify whether the display changes to the rear view camera image when the gearstick is moved to REVERSE (R) from another position.
- Page 48 Menu Item Description [Parking Assist Guide Adjusting the guidelines by dragging or touching / Adjust] / on the screen. Touch [OK] to finish the settings. Touch [Reset] to reset the settings. CAUTION • When adjusting the guidelines, be sure to park the vehicle in a safe place and apply the handbrake.
- Page 49 Menu Item Description [Brightness] Adjust the black intensity. [-10] to [+10] [Contrast] Adjust the contrast. [-10] to [+10] [Colour] Adjust the colour saturation. [-10] to [+10] Phone Connectivity Settings Menu Item Description [Android Phone MSC] Set the USB connection mode for your smartphone (Android) to MSC (Mass Storage Class).
- Page 50 Other functions Setting the clock display You can set the time format, time zone, daylight saving, and the date format. However, the time and date are automatically adjusted by the GPS aerial and cannot be adjusted by the user. Touch the current time on the screen. Set the following items in the settings.
- Page 51 Park your vehicle in a safe place, and – authorised Pioneer service facility. then turn off the ignition switch (ACC OFF). Subsequently, turn the ignition Common problems switch to on (ACC ON) again.
- Page 52 Pioneer service Problems with Application centre. screen A black screen is displayed. While operating an application, the No Station application was ended on the The aerial connection is incorrect. smartphone side. Check the aerial connection and –...
- Page 53 Follow the USB storage device – Mobile phone is standby,any touch wake instructions to disable security. This product cannot recognise the The screen of the mobile device connected USB storage device. connected to the unit is turned off. Disconnect the device and replace it –...
- Page 54 Phone book access is not authorized Connection failed. Please check your phone to confirm connection. The Bluetooth PBAP of the mobile Wi-Fi connection failed and Android phone is not connected and the phone book cannot be downloaded. Auto app did not start. Make a PBAP connection.
- Page 55 • There may be a slight delay when starting Detailed information playback of audio files encoded with for playable media image data. • Some USB storage devices connected to this product may generate noise on the radio. Compatibility • Do not connect anything other than the USB storage device.
- Page 56 WMA compatibility display them with a reduced font size. However, the maximum number of the • This product is not compatible with the characters that you can display varies following: Windows Media™ Audio 9.2 according to the width of each character, Professional, Lossless, Voice and of the display area.
- Page 57 30 fps The Bluetooth® word mark and logos are registered trademarks owned by Bluetooth SIG, .wmv/.asf Inc. and any use of such marks by Pioneer Corporation is under license. Other trademarks Compatible video codec VC-1 and trade names are those of their respective Maximum resolution 1 920 ×...
- Page 58 ON ANY THEORY OF LIABILITY, WHETHER IN CONTRACT, STRICT LIABILITY, OR TORT (INCLUDING NEGLIGENCE OR OTHERWISE) • Pioneer accepts no responsibility for data ARISING IN ANY WAY OUT OF THE USE OF lost from an iPhone, even if that data is...
- Page 59 lost while using this product. Please back App Store up your iPhone data regularly. • Do not leave the iPhone in direct sunlight App Store is a service mark of Apple for extended amounts of time. Extended Inc., registered in the U.S. and other exposure to direct sunlight can result in countries.
- Page 60 Using app-based connected Content application(s) or service by its provider. connected content • Pioneer is not liable for any issues that may arise from incorrect or flawed app- Important based content. Requirements to access app-based •...
- Page 61 • Do not push the LCD screen with functionalities is determined by the App provider, and not determined by Pioneer. excessive force as this may scratch it. • USB Mirroring, WebLink, Apple CarPlay • Never touch the LCD screen with...
- Page 62 4 Ω (4 Ω to 8 Ω allowable) visible. In that case, please consult your Preout output level (max): 2.0 V dealer or the nearest authorised Pioneer Equaliser (13-Band Graphic Equaliser): Service Station. Frequency:...
- Page 63 Bluetooth AAC decoding format: MPEG-4 AAC (iTunes encoded only) (Ver. Version: 12.5 and earlier) Bluetooth 4.2 certified FLAC decoding format: Output power: Ver. 1.3.0 (Free Lossless Audio Codec) +4 dBm Max. (Power class 2) WAV signal format: Frequency band(s): Linear PCM 2 402.0 MHz to 2 480.0 MHz Sampling frequency: FM tuner...
- Page 64 Reception system: 64 channel Multi-channel reception system Reception frequency: 1 575.42 MHz/1 602 MHz Sensitivity: -140 dBm (typ) Frequency: Approx. once per second GPS aerial Aerial: Micro strip flat aerial/right-handed helical polarization Aerial cable: 3.55 m Dimensions (W × H × D): 47 mm ×...
- Page 65 © 2022 PIONEER CORPORATION <OPM_SPHDA360DABEU_EG_A> EU...