
Related Manuals for Bosch WT34A202IN


Summary of Contents for Bosch WT34A202IN
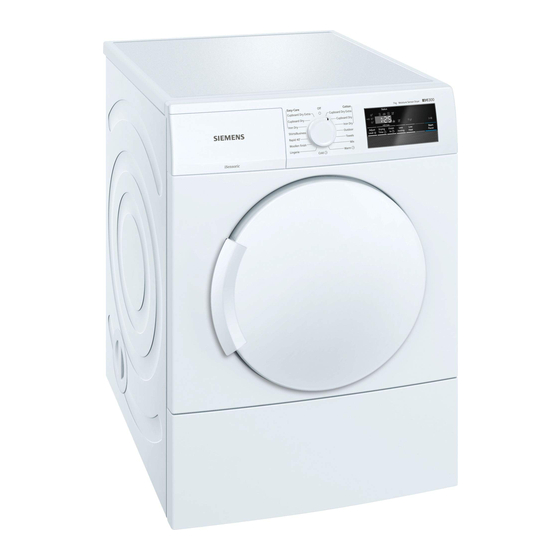
- Page 1 Tumble dryer WT34A202IN siemens-home.bsh-group.com/welcome Register your product online ens-home.com/welcome...
- Page 2 Your new tumble dryer Display rules : Warning! You have opted for a tumble dryer manufactured by Siemens. This combination of symbol and signal word indicates a possibly dangerous Please take a few minutes to read and situation. Not heeding the warning can become familiar with the advantages of cause death or injuries.
-
Page 3: Table Of Contents
Contents e n I n s t a l l a t i o n a n d o p e r a t i n g i n s t r u c t i o n s Program interruption ... . .29 Intended use. -
Page 4: Intended Use
Intended use Intended use Safety instructions The following safety information This appliance is intended for private ■ I n t e n d e d u s e S a f e t y i n s t r u c t i o n s and warnings are provided to domestic use only. - Page 5 Safety instructions Do not allow children to Warning ■ clean or maintain this Risk of suffocation! appliance unsupervised. If allowed to play with the Keep children under 3 years packaging/plastic film or ■ and pets away from this packing components, children appliance.
-
Page 6: Installation
Safety instructions Installation Warning Risk of electric shock/fire/ Warning material damage/damage to Risk of electric shock/fire/ the appliance! material damage/damage to If the appliance's mains cable is the appliance! altered or damaged, this may If the appliance is not installed result in electric shock, short properly, this may lead to a circuiting or fire due to... - Page 7 Safety instructions Incorrectly placing (stacking) Warning ■ this appliance on top of a Risk of fire/material damage/ washing machine may result damage to the appliance! in injury, material damage The use of extension cords or and/or damage to the power strips may result in fire appliance.
-
Page 8: Operation
Safety instructions Do not use the appliance if Warning ■ industrial chemicals have Risk of injury! been used to clean the The appliance is very heavy. ■ laundry. Lifting it may result in injury. Do not lift the appliance on Warning your own. - Page 9 Safety instructions During the last part of the Warning ■ drying cycle, the laundry in Risk of poisoning! the drum is not heated Poisonous fumes may be given (cooling cycle). This is to off by cleaning agents that ensure that it remains at a contain solvents, e.g.
-
Page 10: Cleaning/Maintenance
Safety instructions If you pour the wrong Caution! ■ quantity of detergent or Material damage/damage to cleaning agent into the the appliance appliance, this may result in If the amount of laundry in ■ material damage or damage the appliance exceeds its to the appliance. - Page 11 Safety instructions When removing the mains Warning ■ plug from the socket, always Risk of injury/material take hold of the plug itself damage/damage to the and never the mains cable, appliance! otherwise this may damage The use of spare parts and the mains cable.
-
Page 12: Environmental Protection
Environmental protection Don’t dispose of the discarded ■ Environmental Electronic Equipment in household bins or Municipal bins protection The product is not meant for re-sale ■ to any unauthorized agencies/scrap Packaging/used appliance dealers E n v i r o n m e n t a l p r o t e c t i o n Don't keep any replaced spare Dispose of packaging in an ■... -
Page 13: Installation And Connection
Installation and connection Warning Installation and Children may lock themselves in the connection dryer, putting their lives at risk! Do not set up the dryer behind a door Scope of delivery or sliding door, as this may obstruct the I n s t a l l a t i o n a n d c o n n e c t i o n dryer door or prevent it from opening. -
Page 14: Grounding Instructions
Installation and connection During installation, ensure that: Grounding Instructions The dryer is placed on a clean, level ■ Warning and firm surface, Danger of death! The mains plug can be accessed at ■ Improper connection of the ground may all times, result in electric shock. -
Page 15: Installation For The Exhaust Air Duct
Installation and connection Installation for the exhaust air Connections on the dryer duct Connections for an exhaust air duct are located: Caution! on the back panel Damage to the appliance ■ Inappropriate connecting of the exhaust air duct to the dryer may cause damages to the appliance. - Page 16 Installation and connection Seal the opening in the back panel exhaust air ducts with many bends ■ with the cover. and elbows. Pressure losses through friction Duct or pipe friction resistance, i.e. friction on the inside of the exhaust air duct, affects the air flow as follows: the smoother the internal wall ■...
- Page 17 Installation and connection Individual pressure loss values Pipe connection diameter > 100 mm Flat duct connection Internal wall Pipe, Flexible Flexible 110 x 54 220 x 54 smooth pipe, pipe, cor- smooth smooth grooved rugated Model variant straight piece per 1 m length Fixtures Bend R = 300 mm...
- Page 18 Installation and connection Example: pipe connection - inside Installation option diameter = 100 mm, flexible pipe, Notes corrugated Route the exhaust air duct in such a A = curved pipe (R = 300 mm) ■ way that the dryer cannot draw the B = straight piece (1.5 m) moist, warm exhaust air back again.
-
Page 19: Optional Accessories
Installation and connection In every case, have safe Note: operation confirmed by the responsible chimney sweep, boiler engineer, ventilation specialist, etc. Installing more than one dryer Up to 7 exhaust air dryers can be connected to an intercepting pipe with a smooth internal wall. -
Page 20: The Main Points In Brief
The main points in brief The main points in brief T h e m a i n p o i n t s i n b r i e f Load the laundry and close Switch on the dryer. Select a program and, if the door. -
Page 21: Getting To Know Your Appliance
Getting to know your appliance Getting to know your appliance Dryer G e t t i n g t o k n o w y o u r a p p l i a n c e ( Control and display panel 0 Fluff filter 8 Dryer door... -
Page 22: Control Panel
Getting to know your appliance Control panel ( Use the program selector to switch the dryer on and off and to select the program. 0 Programm ~ Page 25. 8 Start button for starting or interrupting the program ~ Page 27. @ Buttons ~ Page 27. -
Page 23: Display Panel
Getting to know your appliance Display panel Display panel Buttons in the display panel Fine adjustment of the dryness level. Anti-crease selected. ( Select the degree of dryness. Ý Childproof lock selected. 0 Select the drying time. Low-Heat Drying selected. 8 Select the Ready in time. -
Page 24: Laundry
Laundry Notes Laundry – When washing laundry to be tumble-dried, use the correct P reparing the laundry amount of detergent and care L a u n d r y products as specified in the Warning manufacturer's instructions. Risk of explosion or fire! –... -
Page 25: Programs And Buttons
Programs and buttons Programs and buttons Programs P r o g r a m s a n d b u t t o n s Program and fabrics Maximum load and program set- tings/info Name of the program The maximum load is based on the dry weight of the fabrics Which fabrics is the program suitable for? Possible program settings... - Page 26 Programs and buttons Warm û 3 kg All types of fabric; time programme. You can adjust the programme length using the button for Suitable for pre-dried or slightly damp laundry and for drying off the drying time. multi-layered, thick laundry. Notes Only dry wool, sports shoes and soft toys with the basket for ■...
-
Page 27: Buttons
Programs and buttons Buttons Buttons Explanations and notes Not all buttons and their functions can be selected in all programs. Note: Adjust Level Ô If the laundry is too damp after drying, you can finely adjust the dryness levels e.g. Cupboard Dry. The dryness level can be increased with the degree of dryness in three stages, from { to }. -
Page 28: Operating The Appliance
Operating the appliance Default program settings are Note: Operating the standard settings that are already defined when a program is selected. appliance After selecting a program, you can see the default program settings in Loading laundry and the display panel. O p e r a t i n g t h e a p p l i a n c e switching on the dryer If required, adjust the default... -
Page 29: Changing The Program Or Adding Laundry
Operating the appliance Changing the program or Removing laundry and adding laundry switching off the dryer You can remove or add laundry and Remove the laundry. change or alter the program at any time Turn the program selector to the "off" during drying. -
Page 30: Clean The Fluff Filter
Operating the appliance Clean the fluff filter Dry the fluff filter, close it and reinsert the fluff filter. During drying, fluff and hair from Note: the laundry is trapped by the fluff filter. If the fluff filter is blocked or dirty, this reduces the flow of air, which prevents the dryer from achieving its maximum performance. -
Page 31: Signal Setting
Signal setting The volume of the audible signal at Signal setting the end of the program is shown in the display. You can change the following settings: S i g n a l s e t t i n g The spin speed that is used for ■... -
Page 32: Cleaning
Cleaning Cleaning the moisture sensor Cleaning The dryer is equipped with a Note: C leaning the dryer and the stainless-steel moisture sensor. The C l e a n i n g control panel moisture sensor measures how damp the laundry is. After long periods of usage the moisture Warning sensor may become covered by a fine... -
Page 33: Faults And What To Do About Them
Faults and what to do about them Faults and what to do about them F a u l t s a n d w h a t t o d o a b o u t t h e m Faults Cause/remedy ¥... - Page 34 Faults and what to do about them Faults Cause/remedy Drying time too long? The fluff filter may be dirty and cause a longer drying time. Clean the fluff filter. ■ Unsuitable programme selected? ■ Dryer installed too closely to other objects? Provide adequate air circulation. ■...
-
Page 35: After-Sales Service
After-sales service After-sales service After-sales service A f t e r - s a l e s s e r v i c e If you cannot rectify the fault yourself (faults, what to do?), please contact our after-sales service. We will always find an appropriate solution to avoid unnecessary visits by engineers. -
Page 36: Consumption Values
Consumption values Consumption values C o n s u m p t i o n v a l u e s Program Spin speed which is used for Duration** Energy consump- spinning the laundry tion** Cotton 7 kg 7 kg Cupboard Dry* 1400 rpm 111 min... -
Page 37: Technical Data
Technical data Technical data Dimensions: T e c h n i c a l d a t a 85 x 60 x 60 cm Height x width x depth Weight: Approx. 37 kg Maximum load: 7 kg Connected voltage: 220 - 240 V Connected load: Max. - Page 40 Repair order and advice in the event of faults 0344 892 8999 (Calls charged at local or mobile rate.) 01450 2655 (0.03 € per minute at peak. Off peak 0.0088 € per minute.) You can find the contact information for all countries in the attached after-sales service directory.