Table of Contents
Advertisement
Available languages
Available languages
Installation
Instructions
See your Owner's Manual for details on how to contact us regarding installation questions
BEFORE YOU BEGIN
Read these instructions completely and carefully.
IMPORTANT
– Save these instructions for local electrical
inspector's use.
IMPORTANT
–
Observe all governing codes and
ordinances.
• Install the appliance according to the manufacturer's
instructions and local codes.
• Note to Installer – Be sure to leave these instructions
with the Consumer.
• Note to Consumer – Keep these instructions for future
reference.
• Appliance installation must be performed by a qualified
installer.
• This dryer must be exhausted to the outdoors.
• Before the old appliance is removed from service or
discarded, remove the washer and dryer doors.
• Do not allow children on or in the appliance. Close
supervision of children is necessary when the appliance
is used near children.
• Proper installation is the responsibility of the installer.
• Product failure due to improper installation is not
covered under the Warranty.
• Install the appliance where the temperature is above 50°F
for satisfactory operation of the appliance control system.
• Remove and discard existing plastic or metal foil duct
and replace with UL-listed duct.
• Service information and the wiring diagram are located
at the access panel.
PARTS SUPPLIED
1 Cable Tie
2 Washer Hoses
2 Strainer Screens/
Rubber Washers
NOTE: The Rubber
Washers may be in
the water hoses
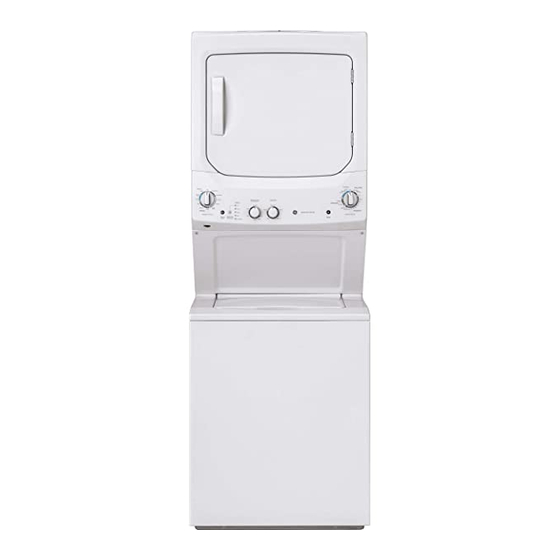
Unitized Washer/Dryer
WARNING
• Appliance installation must be performed by a qualified
installer.
• Install the appliance according to these instructions
and local codes.
• DO NOT install a clothes dryer with flexible plastic venting
materials. If flexible metal (semi-rigid or foil-type) duct is
installed, it must be UL-listed and installed in accordance
with the instructions found in "Connecting the Dryer
to House Vent" later in this manual. Flexible venting
materials are known to collapse, be easily crushed and
trap lint. These conditions will obstruct dryer airflow and
increase the risk of fire.
• DO NOT install or store this appliance in any location
where it could be exposed to water or weather.
• To reduce the risk of severe injury or death, follow all
installation instructions.
• Save these instructions. (Installers: Be sure to leave
these instructions with the customer.)
FOR GAS DRYERS ONLY
In the Commonwealth of Massachusetts,
the following installation instructions apply:
• Installation must be performed by a qualified or
licensed contractor, plumber, or gasfitter qualified
or licensed by the State.
• If using a ball valve, it shall be a T-handle type.
• A flexible gas connector, when used, must not
exceed 4 feet.
- Fire Hazard
234D2665P001
31-16781-3
08-18 GEA
01
Advertisement
Table of Contents

Related Manuals for GE GUD27GSSM2WW


Summary of Contents for GE GUD27GSSM2WW
- Page 1 Installation Unitized Washer/Dryer Instructions See your Owner’s Manual for details on how to contact us regarding installation questions BEFORE YOU BEGIN WARNING - Fire Hazard Read these instructions completely and carefully. IMPORTANT • Appliance installation must be performed by a qualified –...
-
Page 2: Unpacking Your Appliance
Installation Instructions UNPACKING YOUR APPLIANCE Remove the bag containing the washer Tilt the appliance sideways and remove the hoses and parts from tub. foam shipping pads by pulling at the sides and breaking them away from the appliance legs. Be sure to remove all of the foam pieces around the legs. - Page 3 Installation Instructions INSTALLATION REQUIREMENTS REQUIREMENTS FOR ALCOVE OR LOCATION CLOSET INSTALLATION This appliance must be installed on firm flooring to minimize WARNING vibration during spin cycle. Concrete flooring is best, but - Explosion Hazard wood base is sufficient, provided floor support meets FHA Keep flammable materials and vapors, such as standards.
-
Page 4: Materials You Will Need
Installation Instructions CONNECTING A GAS DRYER (skip for electric dryers) TOOLS YOU WILL NEED • Before beginning the installation, turn off the circuit breaker(s) or remove the dryer’s circuit fuse(s) at 10” Adjustable Flat-blade the electrical box. Be sure the dryer wrenches (2) screwdriver cord is unplugged from the wall. -
Page 5: Gas Requirements
Installation Instructions GAS REQUIREMENTS GAS SUPPLY • A 1/8” National Pipe Taper thread plugged WARNING - Explosion Hazard tapping, accessible for test gauge connection, must be installed immediately upstream of the • Use a new CSA International approved flexible gas supply connection to the dryer. Contact your gas supply line. - Page 6 Installation Instructions CONNECTING A GAS DRYER (cont.) CONNECTING THE DRYER TO THE GAS SUPPLY 24” 24” & 27” Back of Appliance Apply pipe compound to appliance inlet 24” 3/8” NPT inlet from appliance 27” only 45° Elbow Tighten the flexible gas line 27”...
-
Page 7: Test For Leaks
Installation Instructions ELECTRICAL CONNECTION TEST FOR LEAKS INFORMATION FOR GAS DRYERS Never use an open flame to test for gas leaks. (cont.) Check all connections for leaks with soapy solution or equivalent. • Appliance must be electrically grounded in accordance with local codes and ordinances, or in Apply a soap solution. -
Page 8: Tools You Will Need
Installation Instructions CONNECTING AN ELECTRIC DRYER (Skip for gas dryers and if your dryer already has a power cord attached) TOOLS YOU WILL NEED Before making the electrical connection, turn off the circuit breaker(s) or remove the dryer’s circuit Slip-joint pliers 1/4”... - Page 9 Installation Instructions ELECTRICAL CONNECTION ELECTRICAL CONNECTION INFORMATION FOR ELECTRIC INFORMATION FOR ELECTRIC DRYERS DRYERS For electrical connections using a For direct wire connections: power cord: WARNING - Fire Hazard WARNING - Fire Hazard Use 10 gauge solid copper wire. Use a new UL-listed 240V 30 amp dryer power Use a UL-listed strain relief.
- Page 10 Installation Instructions 24” MODELS - CONNECTING AN ELECTRIC DRYER CONNECTING DRYER USING 4-WIRE CONNECTING DRYER USING CONNECTION (MUST BE USED FOR 3-WIRE CONNECTION MOBILE HOME INSTALLATION) GROUND NOTE: Since January 1, 1996, the National Electrical STRAP GREEN GROUND Code requires that new constructions use a 4-wire SCREW STRAIN RELIEF WIRE...
- Page 11 Installation Instructions 27” MODELS - CONNECTING AN ELECTRIC DRYER CONNECTING DRYER USING 4-WIRE CONNECTING DRYER USING CONNECTION (MUST BE USED FOR 3-WIRE CONNECTION MOBILE HOME INSTALLATION) GREEN GROUND SCREW NEUTRAL 3 # 10 AWG MINIMUM AND GROUND STRAP (White) COPPER CONDUCTORS WIRE NOTE: Since January 1, 1996, the National Electrical OR 120/240V 30A POWER...
- Page 12 DO NOT exhaust into a chimney, kitchen • If rigid metal cannot be used, then UL-listed flexible exhaust, gas vent, wall, ceiling, attic, crawl metal clothes dryer transition duct (GE Appliances space, or concealed space of a building. part – PM08X10085) can be used.
- Page 13 Installation Instructions EXHAUSTING THE DRYER (cont.) • DO use elbows when turns are • DO cut duct as short as necessary. possible and install straight into wall. Elbows • DO NOT bend • DO NOT use • DO NOT • DO NOT or collapse excessive crush duct...
-
Page 14: Before You Begin
Installation Instructions EXHAUSTING THE DRYER (cont.) EXHAUST SYSTEM CHECKLIST STANDARD REAR EXHAUST HOOD OR WALL CAP This dryer comes ready for rear exhausting. If space is limited, use the instructions to exhaust • Terminate in a manner to prevent back drafts or entry of directly from the sides or bottom of the cabinet. - Page 15 Installation Instructions 24” MODELS ONLY 27” MODELS ONLY BOTTOM OR SIDE VENTING BOTTOM OR SIDE VENTING WARNING WARNING - Fire Hazard - Fire Hazard Disconnect dryer from electrical supply. Disconnect dryer from electrical supply. Wear gloves and arm guards. Wear gloves and arm guards. Failure to do so may result in fire, electrical Failure to do so may result in fire, electrical shock or lacerations.
-
Page 16: Plumbing Information
Installation Instructions CONNECTING THE WASHER PLUMBING INFORMATION CONNECTING TO PLUMBING FACILITIES WATER SUPPLY REQUIREMENTS • HOT AND COLD WATER FAUCETS – Must be within 42” of the appliance water inlet hose connections. The faucets must be 3/4” garden hose-type so inlet hoses can be connected. •... -
Page 17: Final Setup
Installation Instructions FINAL SETUP LEVELING AND STABILIZING APPLIANCE START-UP YOUR APPLIANCE The washer and dryer are now ready for use. See the Owner’s Manual for proper use and care. Level side-to-side REGISTER YOUR NEW APPLIANCE TO RECEIVE ANY IMPORTANT Level PRODUCT NOTIFICATIONS front-to-back See your Owner’s Manual for details on how to... - Page 18 Notes...
- Page 19 Notes...
- Page 20 Printed in Mexico...
- Page 21 Instrucciones Secadora Unificada a Lavadora de Instalación Consulte su Manual del Propietario para obtener detalles sobre cómo contactarnos con respecto a las preguntas de instalación ANTES DE COMENZAR ADVERTENCIA - Riesgo de incendio Lea estas instrucciones por completo y con •...
- Page 22 Instrucciones de instalación CÓMO DESEMPACAR EL APARATO Retire del recipiente la bolsa Incline el aparato de costado y saque los que contiene las mangueras y paños de espuma de embalaje tirando de los piezas de la Lavadora. costados y quitándolos de las patas del aparato. Asegúrese de quitar todas las piezas de espuma de las patas.
- Page 23 Instrucciones de instalación REQUISITOS DE INSTALACIÓN REQUERIMIENTOS - INSTALACIÓN UBICACIÓN EN NICHOS O ARMARIOS Este electrodoméstico se debe instalar en un piso firme a fin de minimizar la vibración durante el ciclo de ADVERTENCIA - Riesgo de explosión centrifugado. Se recomiendan los pisos de concreto, pero una base de madera es suficiente, siempre que Mantenga cualquier material y vapores inflamables, dicho piso cumpla con los estándares de FHA.
-
Page 24: Herramientas Necesarias
Instrucciones de instalación CÓMO CONECTAR UNA SECADORA A GAS (si se cuenta con una secadora eléctrica, saltear este paso) HERRAMIENTAS NECESARIAS • Antes de comenzar la instalación, apague el disyuntor o quite los fusibles de la secadora de la Llaves ajustables Destornillador caja eléctrica. - Page 25 Instrucciones de instalación REQUERIMIENTOS DE GAS SUMINISTRO DE GAS • Debe instalarse una toma a rosca de 1/8” NPT, ADVERTENCIA - Riesgo de explosión accesible para una conexión del manómetro de prueba, inmediatamente en sentido ascendente de • Use una línea nueva de suministro de gas la conexión de suministro de gas hacia la secadora.
- Page 26 Instrucciones de instalación CÓMO CONECTAR UNA SECADORA A GAS (cont.) CÓMO CONECTAR LA SECADORA 24” AL SUMINISTRO DE GAS 24” & 27” Parte Trasera del Electro- Aplique compuesto para doméstico tubería a la entrada del electrodoméstico. Entrada de 24” NPT de 3/8” del electrodoméstico SÓLO 27”...
-
Page 27: Prueba De Pérdidas
Instrucciones de instalación CONEXIÓN ELÉCTRICA INFORMACIÓN PRUEBA DE PÉRDIDAS SOBRE LAS SECADORAS A GAS (cont.) Nunca utilice una llama abierta para detectar pérdidas de gas. • Electrodoméstico debe estar conectada a tierra según los códigos y ordenanzas locales, o, en Controle todas las conexiones con una solución ausencia de tales códigos, según la última edición del jabonosa o un elemento equivalente. - Page 28 Instrucciones de instalación CÓMO CONECTAR UNA SECADORA ELECTRICA (Sáltese si se trata de las secadoras a gas o si su secadora ya tiene un cable de alimentación conectado) Antes de efectuar la conexión eléctrica, desactive los HERRAMIENTAS NECESARIAS disyuntores o quite los fusibles del circuito Pinzas Llave para de la secadora de la caja eléctrica.
- Page 29 Instrucciones de instalación CONEXIÓN ELÉCTRICA CONEXIÓN ELÉCTRICA INFORMACIÓN SOBRE LAS INFORMACIÓN SOBRE LAS SECADORAS ELÉCTRICAS SECADORAS ELÉCTRICAS Para realizar conexiones eléctricas Para conexiones directas de cables: con un cable de corriente: ADVERTENCIA - Riesgo de incendio ADVERTENCIA - Riesgo de incendio Use un cable de cobre con calibre de 10 Use un cable de suministro de corriente de la Use un amortiguador con refuerzo de la lista de UL.
- Page 30 Instrucciones de instalación MODELOS 24” - CÓMO CONECTAR SECADORA ELECTRICA CÓMO CONECTAR LA SECADORA CÓMO CONECTAR LA SECADORA UTILIZANDO UNA CONEXIÓN DE 3 USANDO UNA CONEXIÓN DE CABLES 4 CABLES (DEBE UTILIZARSE CINTA DE EN INSTALACIONES DE CASAS CONEXIÓN TORNILLO A TIERRA RODANTES) VERDE DE...
- Page 31 Instrucciones de instalación MODELOS 27” CÓMO CONECTAR SECADORA ELECTRICA CÓMO CONECTAR LA SECADORA CÓMO CONECTAR LA SECADORA UTILIZANDO UNA CONEXIÓN DE 3 USANDO UNA CONEXIÓN DE CABLES 4 CABLES (DEBE UTILIZARSE EL TORNILLO VERDE DE EN INSTALACIONES DE CASAS CABLES ELÉCTRICOS CONEXIÓN A TIERRA Y CONDUCTORES DE COBRE CABLE...
- Page 32 (tipo papel de aluminio). Un conducto universal flexible abrazaderas de tubería aprobado por UL (GE Appliances partes - PM8X73 Sierra para metales o WX8X73) puede ser utilizado UNICAMENTE en instalaciones donde un conductor de metal rígido o Conducto de metal de flexible no puede ser utilizado y donde un diámetro...
- Page 33 Instrucciones de instalación SALIDA AL EXTERIOR DE LA SECADORA (cont.) • UTILICE codos cuando hagan • CORTE el conducto lo más corto falta curvas. posible e instálelo derecho en la pared. Codos • NO doble o • NO utilice una •...
- Page 34 Instrucciones de instalación SALIDA AL EXTERIOR DE LA SECADORA (cont.) LISTA DE CONTROL DEL SISTEMA SALIDA TRASERA ESTÁNDAR DE SALIDA Esta secadora está equipada con escape trasero. Si el espacio es limitado, use las instrucciones CAMPANA O CUBIERTA DE PARED para que el escape funcione directamente desde •...
- Page 35 Instrucciones de instalación 24” MODELOS SOLAMENTE 27” MODELOS SOLAMENTE VENT LATERAL O PARTE INFERIOR VENT LATERAL O PARTE INFERIOR ADVERTENCIA ADVERTENCIA - Riesgo de incendio - Riesgo de incendio Desconecte la secadora del suministro eléctrico. Desconecte la secadora del suministro eléctrico. Use guantes y protectores para brazos.
- Page 36 Instrucciones de instalación CONEXIÓN DE LA LAVADORA INFORMACIÓN DE PLOMERÍA CONEXIÓN A INSTALACIONES DE REQUISITOS PLOMERÍA DE SUMINISTRO DE AGUA • GRIFOS DE AGUA CALIENTE Y DE AGUA FRÍA – Deben estar dentro de las 42” de las conexiones de la manguera de entrada de agua del electrodoméstico.
-
Page 37: Configuración Final
Instrucciones de instalación CONFIGURACIÓN FINAL CÓMO NIVELAR Y ESTABILIZAR INICIO DEL ELECTRODOMÉSTICO EL ELECTRODOMÉSTICO La lavadora y la secadora están listas para usar. Consulte el Manual del Propietario para un uso y cuidado adecuados. Nivelación de un lado a otro REGISTRE SU NUEVO Nivelación APARATO PARA RECIBIR LAS... - Page 38 Notas...
- Page 39 Notas...