Table of Contents
Advertisement
Quick Links
MINI COMPONENT SYSTEM
OPERATION MANUAL
Thank you for purchasing this SHARP product.
To obtain the best performance from this product,
please read this manual carefully.
It will guide you in operating your SHARP product.
The lightning flash with arrowhead
symbol, within an equilateral triangle,
is intended to alert the user to the
presence of uninsulated "dangerous
voltage" within the product's enclosure
that may be of sufficient magnitude to
constitute a risk of electric shock to
persons.
Caution - use of controls or adjustments or per-
formance of procedures other than those specified
herein may result in hazardous radiation exposure.
Note:
This equipment has been tested and found to comply with the limits for
a Class B digital device, pursuant to Part 15 of the FCC Rules.
These limits are designed to provide reasonable protection against harm-
ful interference in a residential installation.
This equipment generates, uses, and can radiate radio frequency energy
and, if not installed and used in accordance with the instructions, may
cause harmful interference to radio communications.
However, there is no guarantee that interference will not occur in a par-
ticular installation. If this equipment does cause harmful interference to
radio or television reception, which can be determined by turning the
equipment off and on, the user is encouraged to try to correct the inter-
ference by one or more of the following measures:
Reorient or relocate the receiving antenna.
Increase the separation between the equipment and receiver.
Connect the equipment into an outlet on a circuit different from that
to which the receiver is connected.
Consult the dealer or an experienced radio/TV technician for help.
WARNING
FCC Regulations state that any unauthorized changes or modifications
to this equipment not expressly approved by the manufacturer could void
the user's authority to operate this equipment.
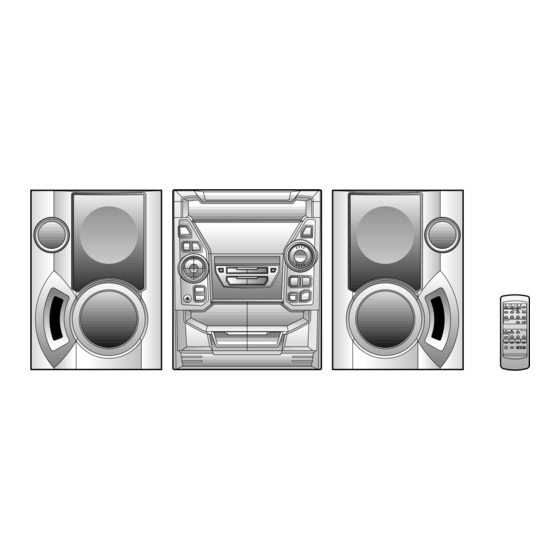
CD-BA1600 Mini Component System consisting of
CD-BA1600 (main unit) and CP-BA1600 (speaker sys-
tem).
C A U T I O N
R I S K O F E L E C T R I C S H O C K
D O N O T O P E N
CAUTI ON:
TO REDUCE THE
RISK OF ELECTRIC SHOCK, DO
NO T
REM OVE
COVER
BACK).
NO USER-SERVICEABLE PARTS
INSIDE. REFER SERVICING TO
QUALIFIED SERVICE PERSON-
NEL.
WARNING: TO REDUCE THE RISK OF
FIRE OR ELECTRIC SHOCK, DO NOT EX-
POSE THIS APPLIANCE TO RAIN OR
MOISTURE.
Note:
For your assistance in reporting this unit in case of loss
or theft, please record below the model number and serial
number which are located on the rear of the unit.
Please retain this information.
Model number _ _ _ _ _ _ _ _ _ _ _ _ _ _ _ _ _ _ _ _ _ _ _ _ _ _ _ _ _ _
Serial number _ _ _ _ _ _ _ _ _ _ _ _ _ _ _ _ _ _ _ _ _ _ _ _ _ _ _ _ _ _
Date of purchase _ _ _ _ _ _ _ _ _ _ _ _ _ _ _ _ _ _ _ _ _ _ _ _ _ _ _ _
Place of purchase _ _ _ _ _ _ _ _ _ _ _ _ _ _ _ _ _ _ _ _ _ _ _ _ _ _ _
CD-BA1600
The exclamation point within an equi-
lateral triangle is intended to alert the
user to the presence of important
(OR
operating and maintenance (servic-
ing) instructions in the literature ac-
companying the appliance.
It is the intent of Sharp that this product be used in
full compliance with the copyright laws of the United
States and that prior permission be obtained from co-
pyright owners whenever necessary.
FOR YOUR RECORDS
MODEL
Advertisement
Table of Contents

Related Manuals for Sharp CP-BA1600


Summary of Contents for Sharp CP-BA1600
- Page 1 Note: This equipment has been tested and found to comply with the limits for It is the intent of Sharp that this product be used in a Class B digital device, pursuant to Part 15 of the FCC Rules. full compliance with the copyright laws of the United...
-
Page 2: Table Of Contents
IMPORTANT SAFEGUARDS CAUTION Outdoor Antenna Grounding - If an outside antenna is connected All the safety and operating instructions should be read to the receiver, be sure the antenna system is grounded so as before the appliance is operated, and should be retained for to provide some protection against voltage surges and built-up static charges. -
Page 3: Precautions
(Metal or CrO tape is not recommended.) type of accident causing damage. SHARP will not be held For recording, use only normal tape. responsible for any damage resulting from use of this unit Do not use C-120 tapes, tapes with large diameter reels, with a voltage other than that which is specified. -
Page 4: Preparation For Use
PREPARATION FOR USE Unplug the AC power cord from the AC outlet before con- necting or disconnecting any component. Antenna connection Connect the antenna wire to the ANTENNA jack. FM antenna Position the FM antenna wire in the direction where the strongest signal can be received. - Page 5 (Continued) Placing the speaker system Left speaker Right speaker The left and right speakers have individual shapes. For best per- formance, place the speakers according to the diagram to the left. Connecting the AC power cord Connect the AC power cord to the AC INPUT jack, then connect the AC power cord plug to an AC outlet.
- Page 6 (Continued) Remote control When inserting or removing the batteries, push them toward ë battery terminals. Installing the batteries incorrectly may cause the unit to mal- function. Precautions for battery use: Insert the batteries according to the direction indicated in the battery compartment.
-
Page 7: Setting The Clock
SETTING THE CLOCK In this example, the clock is set for the 12-hour (AM 12:00) sys- tem. (Main unit operation) Press the ON/STAND-BY button to enter the stand-by mode. MEMORY/SET POWER Press the CLOCK button. STAND-BY Within 5 seconds, press the MEMORY/SET button. CLOCK Press the TUNING/TIME ( ) button to select the time... -
Page 8: Sound Control
SOUND CONTROL Volume (Main unit) (Remote control) Press the VOLUME button to increase the volume and the VOLUME button to decrease the volume..0 1 2 29 30 MAXIMUM Extra bass (X-BASS) (Remote control) (Main unit) When the power is first turned on, the unit will enter the extra bass mode which emphasizes the bass frequencies, and "X- BASS"... -
Page 9: Compact Disc Operation
COMPACT DISC OPERATION CD playback 5" (12 cm) Press the ON/STAND-BY button to turn the power on. Press the CD button. 3" (8 cm) Press the OPEN/CLOSE button to open the disc tray. Place the CD(s) on the disc tray, label side up. CDs can be placed on any open position on the disc tray. - Page 10 (Continued) Disc number selection When stopped, press the DISC SKIP button. Press the ) button. The next disc playback will begin, after which each following disc will be played sequentially. Notes: When the DISC SKIP button is pressed during playback, DISC SKIP playback will begin automatically from the next disc.
- Page 11 (Continued) APMS (Automatic Programmable Music Selector) Selected disc number You can playback the tracks on the CDs in the disc 1 - 3 positions in any order desired. By specifying the disc numbers from 1 to 3, and the track numbers from 1 to 99, you can choose up to 32 selections for playback in the order you like.
-
Page 12: Radio Operation
RADIO OPERATION Tuning (Main unit operation) Press the ON/STAND-BY button to turn the power on. Press the TUNER (BAND) button. Press the TUNER (BAND) button to select the desired fre- quency band. (FM ST, FM or AM) Press the TUNING/TIME ( ) button to tune into the 2,3,5,6 desired station. -
Page 13: Cassette Operation
(Continued) To recall a memorized station: Preset memory scan Press the PRESET ( ) button for less than 0.5 seconds to select the desired station. The stations saved in the preset memory can be scanned auto- The stations (preset channel number, frequency and matically. -
Page 14: Recording
RECORDING When recording important selections, be sure to Metal and CrO tapes should not be used for recording or make a preliminary test to ensure that the desired dubbing. material is being properly recorded. The VOLUME, X-BASS and EQUALIZER controls may be adjusted with no effect on the recorded sig- Recording from the built-in CD player nal (Variable Sound Monitor). -
Page 15: How To Use The Built-In Timer
HOW TO USE THE BUILT-IN TIMER Before setting the timer, make sure that the clock Timer recording setting is correct. (Page 6) (Main unit operation) Press the ON/STAND-BY button to turn the power on. Load a cassette for recording into the TAPE 2 cassette com- POWER TIMER/ partment. -
Page 16: Using External Units
USING EXTERNAL UNITS Video/Auxiliary (Audio signal) input To listen to or record signals from external sources through this unit: Use a separately available RCA cord to connect the desired external unit to the VIDEO/AUX jacks. (red → right channel, white → left channel) When using video equipment (Laser Disc player or VCR), be sure to connect the audio output to this unit and the video output to a television. -
Page 17: Maintenance
SPECIFICATIONS As part of our policy of continuous improvement, SHARP reserves the right to make design and specification changes for product improvement without prior notice. The performance specification figures indicated are nominal values of production units. There may be some deviations from these values in individual units. -
Page 18: Consumer Limited Warranty
Product, and shall constitute full satisfaction of all claims, whether based on contract, negligence, strict liability or otherwise. In no event shall Sharp be liable, or in any way responsible, for any damages or defects in the Product which were caused by repairs or attempted repairs performed by anyone other than an authorized servicer. Nor shall Sharp be liable or in any way responsible for any incidental or consequential economic or property damage.