
Related Manuals for Samsung FlexWash WV60M9900AW


Summary of Contents for Samsung FlexWash WV60M9900AW
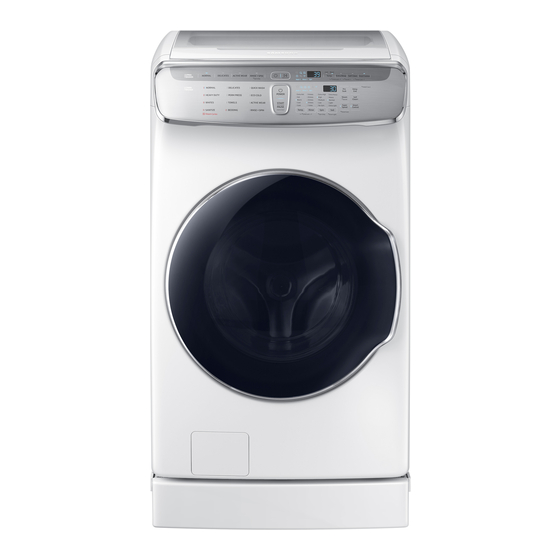
- Page 1 FlexWash™ User manual WV60M9900A* FlexWash_WV9900M_DC68-03768A-07_EN.indd 1 2019-05-23 PM 2:55:13...
-
Page 2: Table Of Contents
Contents Safety information What you need to know about the safety instructions Important safety symbols Important safety precautions California proposition 65 warning Critical installation warnings Installation cautions Critical usage warnings Usage cautions Critical cleaning warnings Regulatory notice FCC Notice IC Notice Open Source Announcement Installation Unpacking your washer... - Page 3 Maintenance General considerations Upper washer Lower washer Troubleshooting Checkpoints Information codes Specifications Fabric care chart Protecting the environment Declaration of conformity Specification sheet Cycle chart English 3 FlexWash_WV9900M_DC68-03768A-07_EN.indd 3 2019-05-23 PM 2:55:13...
-
Page 4: Safety Information
Safety information Congratulations on your new Samsung washer. This manual contains important information on the installation, use and care of your appliance. Please take some time to read this manual to take full advantage of your washer’s many benefits and features. -
Page 5: Important Safety Precautions
Important safety precautions WARNING To reduce the risk of fire, electric shock, or injury to persons when using your appliance, follow basic precautions, including the following: 1. Read all instructions before using the appliance. 2. Do not wash or dry articles that have been previously cleaned in, washed in, soaked in, or spotted with gasoline, dry-cleaning solvents, other flammable or explosive substances as they give off vapors that could ignite or explode. -
Page 6: California Proposition 65 Warning
Safety information CALIFORNIA PROPOSITION 65 WARNING WARNING Cancer and Reproductive Harm - www.P65Warnings.ca.gov. Critical installation warnings WARNING The installation of this appliance must be performed by a qualified technician or service company. • Failure to do so may result in electric shock, fire, an explosion, problems with the product, or injury. - Page 7 If the appliance, power plug, or power cord is damaged, contact your nearest Samsung service center for service. This appliance must be properly grounded. Do not ground the appliance to a gas pipe, plastic water pipe, or telephone line. • This may result in electric shock, fire, an explosion, or problems with the product.
-
Page 8: Installation Cautions
• Failure to do so may result in electric shock. If the appliance generates a strange noise, a burning smell, or smoke, unplug the power plug immediately and contact your nearest Samsung service center. • Failure to do so may result in electric shock or fire. - Page 9 Do not attempt to repair, disassemble, or modify the appliance yourself. • Do not use a fuse (such as copper, steel wire, etc.) other than a standard fuse. • If the appliance needs to be repaired or reinstalled, contact your nearest Samsung service center.
-
Page 10: Usage Cautions
• Failure to do so may result in electric shock or fire. If any foreign substance enters the appliance, unplug the power plug and contact your nearest Samsung service center. • This may result in electric shock or fire. Do not let children (or pets) play in or on your washer. The washer door does not open easily from the inside and children may be seriously injured if trapped inside. - Page 11 Using the product for business purposes qualifies as product misuse. If the product is used for business purposes, the product will not be covered by the standard warranty provided by Samsung and no responsibility can be attributed to Samsung for malfunctions or damages resulting from such misuse.
- Page 12 Safety information Do not wash, spin, or dry water-proof seats, mats, or clothing (*) unless your appliance has a special cycle for washing these items. (*): Woollen bedding, rain covers, fishing vests, ski pants, sleeping bags, diaper covers, sweat suits, and bicycle, motor cycle and car covers, etc. •...
- Page 13 Do not leave metal objects such as safety pins or hair pins in the drum for long periods of time. Do not leave bleach in the drum for long periods of time. • Doing either may cause the drum to rust. •...
-
Page 14: Critical Cleaning Warnings
Safety information Critical cleaning warnings WARNING Do not clean the appliance by spraying water directly onto it. Do not use a strong acidic cleaning agent. Do not use benzene, thinner, or alcohol to clean the appliance. • This may result in discoloration, deformation, damage, electric shock, or fire. Before cleaning the washer or performing maintenance, unplug it from the wall socket. -
Page 15: Regulatory Notice
Regulatory notice FCC Notice CAUTION Any changes or modifications not expressly approved by the party responsible for compliance could void the user’s authority to operate the equipment. This device complies with Part 15 of FCC Rules. Operation is Subject to following two conditions: 1. -
Page 16: Ic Notice
Unintentional emitter per FCC Part 15 Product type : Electric Clothes Washing Machines Model : WV60M9900A* Responsible Party – U.S. Contact Information Samsung Electronics America, Inc. QA Lab America 19 Chapin Rd. Building D Pine Brook NJ 07058 Tel: 1-973-808-6375 Fax: 1-973-808-63 IC Notice The term IC”... -
Page 17: Open Source Announcement
Directive 2014/53/EU. The full text of the EU declaration of conformity is available at the following internet address: The official Declaration of conformity may be found at http://www.samsung.com, go to Support > Search Product Support and enter the model name. -
Page 18: Installation
Unpack your washer and inspect it for shipping damage. Make sure you have received all the items shown below. If your washer was damaged during shipping, or you do not have all of the items, contact 1-800-SAMSUNG (1-800-726-7864). To prevent personal injury or strain, wear protective gloves whenever lifting or carrying the unit. -
Page 19: What's Included
What’s included Make sure all the parts are included in the product package. If you have a question about the washer or the parts, contact a local Samsung customer center or your retailer. 01 Lower detergent 02 Tub 03 Front door... - Page 20 • The number (7 to 9) of bolt caps provided depends on the model. • The appearance of the washer and provided accessories may differ by model. • To purchase an accessory or lost part, contact a local Samsung service center or your retailer.
-
Page 21: Installation Requirements
Tools required for installation (not supplied) Measuring tape Philips screwdriver Level Adjustable pliers Installation requirements Electrical supply and grounding • To prevent unnecessary risk of fire, • AC 120 V / 60 Hz / 15 AMP fuse or electrical shock, or personal injury, all circuit breaker is required. - Page 22 Drain belts, the pump, and other components of Samsung recommends a standpipe 18 in the washer. (46 cm) high. The drain hose must be connected through the hose clip to the standpipe, and the standpipe must fully cover the drain hose.
- Page 23 Alcove or closet installation Minimum clearance for stable operation: Sides 1 in. (25 mm) Rear 6 in. (152 mm) 21 in. (533 mm) Front 2 in. (51 mm) If both the washer and a dryer are installed in the same location, the front of the alcove or closet must have two unobstructed air openings for a combined minimum total area of 72 in²...
- Page 24 Installation Side by side installation 1 in. (25 mm) 34 in. (864 mm) 27 in. (686 mm) 2 in. (51 mm) 21 in. (533 mm) 6 in. (152 mm) *This clearance is not applicable to standalone washers. 61 in. (1550 mm) English FlexWash_WV9900M_DC68-03768A-07_EN.indd 24 2019-05-23 PM 2:55:17...
-
Page 25: Step-By-Step Installation
Step-by-step installation STEP 1 Select a location Location requirements: • A solid, level surface without carpeting or flooring that may obstruct ventilation • No direct sunlight • Adequate room for ventilation and wiring • Ambient temperature always higher than the freezing point (32 ˚F/0 ˚C) •... - Page 26 Installation STEP 3 Adjust the levelling legs 1. Gently slide the washer into position. Excessive force may damage the levelling legs. 2. Level the washer by manually adjusting the levelling legs. 3. When levelling is complete, tighten the nuts using the wrench. NOTE An adjustable wrench or 17 mm open- end wrench is required to loosen or...
- Page 27 A water hose without the gasket may leak. • If there is a water leak, stop using the washer and contact a local Samsung service center. A water leak may cause electric shock. • Do not stretch the water hose by force.
- Page 28 Installation To connect the water hoses to the taps: 1. Connect one end of each water hose to the Hot or Cold tap. 2. Turn the fittings by hand until they are tight, and then tighten them an additional two-thirds of a turn with a pliers.
- Page 29 5. Connect the other ends of the water hoses to the corresponding inlets on the rear of the machine as specified. Make sure the hot water hose is connected to the hot inlet, and the cold water hose to the cold inlet. 6.
- Page 30 Installation STEP 6 Position the drain system The pipe connector is attached on the product. NOTE A : Upper drain hose B : Lower drain hose C : Pipe Connector In a wall standpipe drain system The drain hose must be placed into a wall standpipe drain system.
- Page 31 The pipe connector can be positioned in the following ways: Over the edge of a wash basin The pipe connector (B) must be placed at a height of between 24 in. (60 cm) and 35 in. (90 cm) from the floor. To keep the spout of the drain hose bent, use the supplied plastic hose guide (A).
- Page 32 Installation To position without the pipe connector If you do not use the pipe connector, each drain hose can be positioned in the following ways: Over the edge of a wash basin The drain hose must be placed at a height of between 24 in.
- Page 33 CAUTION • Connect the hose guide (A) within 3–5 in. (7.6–12.7 cm)* from the end of the drain hose. If the drain hose is extended beyond the end of the hose guide, mold or microorganisms could spread inside the washer. •...
- Page 34 Installation NOTE To position using the pipe connector You washer comes with a pipe connector that is designed to join the upper drain hose and the lower drain hose. You can choose to use the connector to combine two drain hoses into a single outlet. 1.
-
Page 35: Before You Start
Before you start Initial settings Run Calibration (recommended) 4. When complete, the upper washer turns off automatically. Calibration ensures accurate weight detection by the washer. Make sure the To calibrate the lower washer tub or drum is empty before running 1. - Page 36 Before you start STEP 2 Empty pockets STEP 4 Determine the load capacity Empty all the pockets of your laundry Lower washer items Do not overload the washer. Overloading • Metal objects such as coins, pins, and may cause the washer to wash improperly. buckles on clothing may damage other NOTE laundry items as well as the drum or...
- Page 37 Upper washer • Do not use detergent that has hardened or solidified. This detergent may remain Laundry guidelines after the rinse cycle, blocking the drain Use the upper washer for small loads outlet. under 3.3 lbs (1.5 kg). Use HE detergent only Short- Blue Cotton...
-
Page 38: Guide To Cleaning Agents
Before you start Guide to cleaning agents Upper washer The upper washer provides two cleaning agent compartments: the left-side compartment for bleach, and the right side for fabric softener. You can apply detergent manually into the tub using the provided Aqua Pebble. •... - Page 39 2. Put a recommended amount of liquid or powdered detergent into the provided Aqua Pebble. The Aqua Pebble has a guide line (marked ‘20 ml’) near its top, which is the max line. Do not exceed the max line. CAUTION •...
- Page 40 Before you start 5. Add a recommended amount of liquid chlorine bleach bleach to the bleach compartment. Use caution not to overfill the compartment. 6. Close the protective cover, and then the top door. NOTE When the cycle is complete, take out the Aqua Pebble, turn it over, and put it on the softener compartment for later use (see the figure).
- Page 41 Lower washer The lower washer provides three cleaning agent compartments: the left-most compartment for the main wash, the right- first one for bleach, and the far right for fabric softener. • Main wash compartment (A): Add a recommended amount of liquid (or powdered) detergent to the main wash compartment.
- Page 42 Before you start 2. Add a recommended amount of liquid or powdered detergent to the detergent compartment. Do not exceed the max line (A). NOTE To apply powdered detergent, first remove the liquid detergent container. 3. Add a recommended amount of fabric softener to the softener compartment.
-
Page 43: Operations
Operations Your dual loading washer features upper and the lower washers for your convenience. The upper washer is an automatic tub loader that is designed to wash relatively small loads while the lower washer is a drum loader that takes care of normal or relatively heavy loads. - Page 44 Operations Cycle overview Cycle Description • For lightly soiled cotton, t-shirts, towels, and mixed loads. NORMAL • Use to wash lightly soiled normal items, except delicate fabrics such as silk or handwash-only fabrics. • For sheer fabrics, bras, lingerie, silks, and other handwash-only DELICATES fabrics.
-
Page 45: Lower Washer
Lower washer Control panel 01 Cycle area Press to select a cycle. 02 POWER Press to turn the lower washer on or off. 03 START/PAUSE Press and hold to start operation or press to stop operation (Hold to Start) temporarily. The status bar shows current cycle information and estimated time remaining or an information code if the lower washer needs to be 04 Status bar... - Page 46 Operations • Extra High: Extends the spinning process to effectively remove moisture from the load. Extra High uses a stronger spinning process to remove moisture, so it is not suitable for wrinklefree or non-iron fabrics, or overloads. • High: Underwear, t-shirts, jeans, and sturdy cottons. •...
- Page 47 With the Steam option selected, the washer senses the weight of the load and controls the steam effect according to the load size. This improves washing performance. Cycles available with the Steam option are: NORMAL, HEAVY DUTY, BEDDING, WHITES, and SANITIZE.
- Page 48 Operations After connecting the lower washer to your home network using the SmartThings app, you can control the washer remotely. When started, the Smart Control indicator blinks and the front door locks. 14 Smart Control The washer enters waiting mode and waits for remote commands. For more information, visit the SmartThings app page.
- Page 49 Cycle overview Standard cycles Cycle Description • For sheer fabrics, bras, lingerie, silks, and other handwash-only DELICATES fabrics. For best performance, use liquid detergent. • For wash-and-wear, synthetic fabrics, and lightly to normally PERM PRESS soiled items. TOWELS • For bath towels, washcloths (facecloths) and mats. QUICK WASH •...
-
Page 50: Simple Steps To Start
Operations Simple steps to start 1. Press POWER on the control panel of a desired washer (upper/lower) to turn the washer on. 2. Put laundry into the washer. 3. Select a cycle. 4. Change the cycle settings (temperature and/or soil level) as appropriate to the laundry. 5. - Page 51 To change the cycle during operation 1. Press START/PAUSE to stop operations temporarily. 2. Select a different cycle. 3. Press and hold START/PAUSE again to start the new cycle. WARNING • Do not put anything on top of your washer while it is running. •...
-
Page 52: Smartthings
• This appliance supports the Wi-Fi 2.4 GHz protocols. Download On an app market (Google Play Store, Apple App Store, Samsung Galaxy Apps), find the SmartThings app with a search term of “SmartThings”. Download and install the app on your device. -
Page 53: Special Features
Special features Child Lock To prevent children or infants from accidently starting or setting the washer, Child Lock locks all buttons except for the POWER button. Note that each washer operates independently and has its own Child Lock function. If you want to activate Child Lock for the upper or lower washer, you must press the appropriate buttons on the upper or lower washer’s control panel. - Page 54 3 seconds to enter the Smart Care mode. 2. Run the Samsung Smart Washer app on your mobile device, and then tap Smart Care. 3. Hold the mobile device so that the mobile device and the washer’s status bar face each other.
- Page 55 Sound Mute or unmute the sound (button beeps, indicator beeps, and chimes, etc.) Upper washer • To mute the alarm sound or beep on the upper washer, press and hold Extra Rinse and Self Clean for 3 seconds. To unmute, press and hold the buttons for 3 seconds again. Lower washer •...
- Page 56 Maintenance Keep the washer clean to prevent its performance from deteriorating and to preserve its life cycle. WARNING Certain internal parts are intentionally not grounded and may present a risk electric shock only during servicing. Service personnel – Do not contact the following parts while the appliance is energized: Control board, heat sink, motor, inlet valve and pump.
- Page 57 Mesh filter Clean the mesh filter of the water hose once or twice a year. 1. Turn off the washer, and then unplug the power cord. 2. Close the taps. 3. Loosen and disconnect the water hose from the back of the washer. Cover the hose with a cloth to prevent water from gushing out.
- Page 58 Maintenance Recovery from freezing The washer may freeze when the temperature in its location drops below 32 °F (0 °C). 1. Turn off the washer, and then unplug the power cord. 2. Pour warm water over the tap to loosen the water hose. 3.
- Page 59 • In the case where residue is present in the washer tub, add 1/3 cup (2.7 fl. oz., 80 ml) of liquid chlorine bleach directly to the empty tub before you start the Self Clean cycle. Do not use or mix any other detergent or chemicals during the Self Clean cycle. •...
- Page 60 Maintenance Lint filter We recommend cleaning the lint filter every 10 washes. 1. Remove the lint filter from the filter case on the tub of the upper washer. 2. Open the filter, and clean it with running water and a brush. 3.
- Page 61 Lower washer Self Clean+ Certain usage and environmental conditions may result in some residue build-up or odor in the washer drum. To prevent this build-up of residue or odor causing bacteria and keep your washer drum fresh and clean, perform the Self Clean+ cycle at least once a month or every 40 cycles.
- Page 62 Maintenance Main wash compartment The main wash compartment needs to be cleaned periodically to remove buildup of laundry additives. 1. Open the top-front cover. Grasp the main wash compartment, and then pull up to remove. 2. Remove all residue and traces of accumulated laundry agents from the compartment.
- Page 63 Fabric softener/bleach compartment Both the fabric softener compartment and the bleach compartment on the lower washer are not removable by design to facilitate visual feedback to users. To clean the softener compartment, follow these instructions. Cleaning the bleach compartment is basically the same.
- Page 64 Maintenance Emergency drain In case of a power failure, drain the water inside the drum before taking out the laundry. 1. Power off the washer, and then unplug it from the electrical outlet. 2. Gently press the top area of the filter cover to open.
- Page 65 Pump filter It is advisable to clean the pump filter 5 or 6 times a year to prevent it from clogging. A clogged pump filter may reduce the bubble effect. 1. Turn off the washer, and then unplug the power cord. 2.
- Page 66 Maintenance NOTE • Some pump filters feature a safety knob that is designed to prevent children from accidently opening the filter compartment. To open the safety knob of the pump filter, push in and turn it counterclockwise. The spring mechanism of the safety knob helps open the filter.
- Page 67 Troubleshooting Checkpoints If you encounter an issue to check with the washer, first check the table below and try the suggestions. Symptom Action • Make sure your home electrical system is providing electrical power that matches the requirements of the washer. See page Does not turn on.
- Page 68 Troubleshooting Symptom Action • Make sure the washer is installed on a level, solid floor that is not slippery. If the floor is not level, use the levelling feet to adjust the height of the washer. • Make sure the shipping bolts are removed. •...
- Page 69 Symptom Action • Make sure you use the recommended types of detergent. • Use high efficiency (HE) detergent to prevent oversudsing. Excessive suds. • Reduce the detergent amount for soft water, small loads, or lightly soiled loads. • Non-HE detergent is not recommended. Cannot add additional •...
- Page 70 Troubleshooting Symptom Action • Fully open both taps. • Make sure the temperature selection is correct. • Make sure the hoses are connected to the correct taps. Flush the water lines. • Make sure your water heater is set to supply hot water with a minimum temperature of 120 °F (49 °C) at the tap.
- Page 71 • Make sure the washer drains completely if it is turned off by force. If you operate the washer before it has drained completely, the washer may supply water and drain simultaneously. If an issue continues to occur, contact a local Samsung service center. English 71 FlexWash_WV9900M_DC68-03768A-07_EN.indd 71 2019-05-23 PM 2:55:28...
- Page 72 Troubleshooting Information codes If the washer fails to operate, you may see an information code on the screen. Check the table below and try the suggestions. Code Action Upper Lower washer washer Check the water level sensor. • Power off and then power the washer on after 2-3 minutes, and then try again.
- Page 73 • If the drain filter is clogged, clean the filter, and then restart the washer. Check the washing heater. 1 HC • Power off the washer, and then contact a Samsung customer service center. English 73 FlexWash_WV9900M_DC68-03768A-07_EN.indd 73 2019-05-23 PM 2:55:28...
- Page 74 • If the information code remains, contact a Samsung service 1 9C2 center. System failed. • Power off the washer, and then contact a Samsung service 1 SF center. Check communications between main and sub PBAs. • Try powering off and restarting the cycle.
- Page 75 PBA. • Try powering off and restarting the cycle. • If the information code remains, contact a customer service center. If any information code keeps appearing on the screen, contact a local Samsung service center. English 75 FlexWash_WV9900M_DC68-03768A-07_EN.indd 75...
- Page 76 Specifications Fabric care chart Bleach The following symbols provide garment care direction. The clothing care labels Any bleach (when needed) include symbols for drying, bleaching, drying and ironing, or dry cleaning when Only non-chlorine (color-safe) necessary. The use of symbols ensures bleach (when needed) consistency among garment manufacturers Tumble dry...
- Page 77 Iron dry or steam temperatures No steam (added to iron) High Do not iron Medium Dry-clean Dry-clean Warning symbols for laundering Do not dry-clean Do not wash Line dry / Hang to dry Do not wring Drip dry Do not bleach Dry flat Do not tumble dry Protecting the environment...
- Page 78 Specifications Specification sheet Type Dual loading washer A. Height - top door closed 46.9 in. (1192 mm) B. Height - top door opened 61 in. (1550 mm) Dimensions C. Width 27 in. (686 mm) (inches (mm)) D. Depth with door open 54.6 in.
- Page 79 Cycle chart Use this chart to set the best cycle and options for you laundry. Upper washer NOTE Setting Temp. : factory setting W : Warm : can be selected C : Cold Functions Options Cycle Temp. Extra Rinse NORMAL ...
- Page 80 Specifications Lower washer NOTE Setting Temp. Rinse Spin Soil Level : factory setting EH : Extra hot 5 : 5 times EH : Extra High EH : Extra Heavy : can be selected H : Hot 4 : 4 times H : High H : Heavy W : Warm...
- Page 81 Functions Options Cycle Soil Level Super Pre Soak Steam Delay End Speed NORMAL HEAVY DUTY BEDDING ...
- Page 82 If the product is located in an area where service by a SAMSUNG authorized servicer is not available, you may be responsible for a trip charge or required to bring the product to a SAMSUNG authorized service center for service.
- Page 83 Visits by a Service Engineer to explain functions, maintenance or installation is not covered by warranty. Please contact your Samsung call agent for help with any of these issues. EXCLUSION OF IMPLIED WARRANTIES...
- Page 84 PROFITS, FAILURE TO REALIZE SAVINGS OR OTHER BENEFITS REGARDLESS OF THE LEGAL THEORY ON WHICH THE CLAIM IS BASED, AND EVEN IF SAMSUNG HAS BEEN ADVISED OF THE POSSIBILITY OF SUCH DAMAGES. Some states do not allow exclusion or limitation of incidental or consequential damages, so the above limitations or exclusions may not apply to you.
- Page 85 SAMSUNG authorized service center. The original dated bill of sale must be presented upon request as proof of purchase to SAMSUNG or SAMSUNG’s authorized service center. SAMSUNG will provide in-home service during the warranty period at no charge, subject to availability within the Canada.
- Page 86 Warranty (CANADA) SAMSUNG will repair, replace, or refund this product at our option and at no charge as stipulated herein, with new or reconditioned parts or products if found to be defective during the limited warranty period specified above. All replaced parts and products become the property of SAMSUNG and must be returned to SAMSUNG.
- Page 87 BENEFITS, OR ANY OTHER SPECIAL, INCIDENTAL OR CONSEQUENTIAL DAMAGES CAUSED BY THE USE, MISUSE, OR INABILITY TO USE THIS PRODUCT, REGARDLESS OF THE LEGAL THEORY ON WHICH THE CLAIM IS BASED, AND EVEN IF SAMSUNG HAS BEEN ADVISED OF THE POSSIBILITY OF SUCH DAMAGES.
- Page 88 Scan this with your smartphone QUESTIONS OR COMMENTS? COUNTRY CALL OR VISIT US ONLINE AT U.S.A 1-800-SAMSUNG (726-7864) www.samsung.com/us/support www.samsung.com/ca/support (English) CANADA 1-800-SAMSUNG(726-7864) www.samsung.com/ca_fr/support (French) DC68-03768A-07 FlexWash_WV9900M_DC68-03768A-07_EN.indd 88 2019-05-23 PM 2:55:33...