Table of Contents
Advertisement
Available languages
Available languages
USER MANUAL
Portable Type
Room Air Conditioner
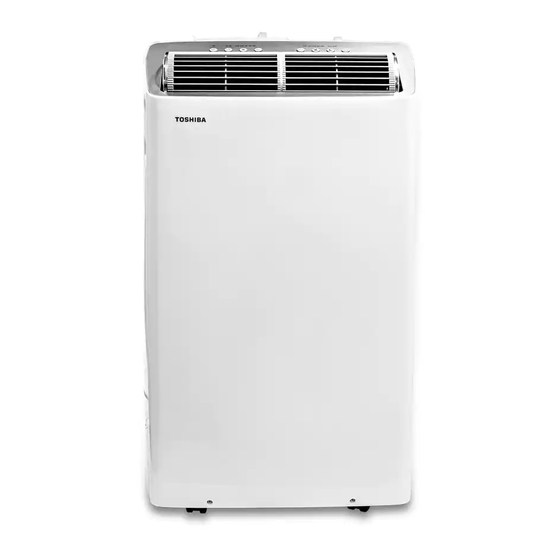
RAC-PT1412HVWRU
version B - 10 - 2020
version E - 03 - 2021
Safety Precautions
Operating Instructions
Installation Instructions
Care and Cleaning
Troubleshooting Tips
Remote Control and
App Instructions
WARNING
Warning notices: Before using this product,
please read this manual carefully and keep
it for future reference.
The design and specifications are subject to
change without prior notice for product
improvement. Consult with your dealer or
the manufacturer for details.
us.toshiba-lifestyle.com
Advertisement
Chapters
Table of Contents

Related Manuals for Toshiba RAC-PT1412HVWRU


Summary of Contents for Toshiba RAC-PT1412HVWRU
- Page 1 Troubleshooting Tips Remote Control and App Instructions USER MANUAL Portable Type Room Air Conditioner RAC-PT1412HVWRU WARNING Warning notices: Before using this product, please read this manual carefully and keep it for future reference. The design and specifications are subject to change without prior notice for product improvement.
-
Page 2: Table Of Contents
User Manual Safety Precautions ........................3 Operating Instructions ......................8 Installation Instructions ......................12 Care and Cleaning ........................19 Troubleshooting Tips ......................20 Heat Pump Hose Insulation Foam ................... 21 Remote Control and App Instructions ................22 Read This Manual Inside you’ll find many helpful hints on how to use and maintain your air conditioner properly. -
Page 3: Safety Precautions
SAFETY PRECAUTIONS To prevent injury to the user or other people and property damage, the instructions shown here must be followed. Incorrect operation due to ignoring of instructions may cause harm or damage. The level of risk is shown by the following indications. This symbol indicates a hazardous situation which, if not avoided, WARNING could result in death or serious injury. - Page 4 WARNING • Do not damage or use an alternate power cord. It may cause fi re and electric shock. If the power cord is damaged, it must be replaced by the manufacturer in order to avoid a hazard. • Do not direct airfl ow straight into persons to avoid possible health hazard. •...
- Page 5 CAUTION • Do not put a pet or house plant where it will be exposed to direct air fl ow. This could injure the pet or harm the plant. • Hold the plug by the head of the power plug when taking it out. Otherwise, it may cause electric shock and damage.
- Page 6 • Keep ventilation openings clear of obstruction. • Unit is only to be serviced by a Toshiba authorized servicer, please call Customer Service at 1-855-204-5313 for support. • Flammable refrigerant R32 is used within air conditioner. Please follow the instructions carefully to handle, install, clean, and service the air conditioner to avoid damage or hazard.
- Page 7 Operation of Current Device The power supply cord contains a current measuring device that detects damage to the Plug in & press RESET power cord. Test your power supply cord as follows: RESET 1. Plug in the air conditioner. 2. The power supply cord will have TWO TEST buttons on the plug head.
-
Page 8: Operating Instructions
OPERATING INSTRUCTIONS Preparation Control panel Outlet louver (automatic swing) Upper air filter (behind the grille) Handle (both sides) Inlet and outlet air hose Air inlet Panel Drain Outlet (dry mode) Drain Outlet (heating mode) Power plug storage Power cord storage Power cord outlet Caster Drain Outlet... - Page 9 Control Panel Features Swing (Connect) Wireless Indicator LED Display Power Button Button Timer Mode Up ( ) and Down ( ) Sleep Button Buttons Button Button Button Swing Button When the function is turned on, the constant fan light will illuminate, indicating the fan will Used to initiate the Auto Swing feature.
- Page 10 Shows Error codes and protection code: NOTICE E1 - Room temperature sensor error. When one of these error codes occurs, E2 - Evaporator temperature sensor error. turn o the unit and check for any E3 - Condenser temperature sensor error (select models). obstructions.
- Page 11 SLEEP operation NOTICE Pressing this button will increase (during cooling operation) or The SLEEP operation feature is decrease (during heating operation, applicable models) 2°F/1°C unavailable in FAN or DRY mode. after 30 minutes. The temperature will again increase (cooling) or decrease (heating) by another 2°F/1°C after an additional 30 minutes.
-
Page 12: Installation Instructions
• Service, maintenance or repair of this unit must be performed ed technician. • Product recycling must be done according to local regulations. Scan this QR code to watch an installation video for your Toshiba portable air conditioner: 25 cm 9.8 inch Page 12... - Page 13 Tools Needed • Phillips screwdriver • Saw (optional, to shorten window adaptor for narrow windows). • Tape measure or ruler • Knife or scissors Accessories ts windows 19.1’’-63.8’’ (48.4-160.2 cm). Please doublecheck all packaging materials to make sure accessories do not get accidentally thrown away. Part Description Quantity...
- Page 14 Window Installation Kit 1: For Hung Window types only Air Exhaust Insert the Air Exhaust Adapter into the exhaust Adapter of the hose (the circular opening) for optimal performance. Rotate the adapter clockwise until Exhaust the locking tabs click and it no longer rotates. Hose Skip this step if installing into a horizontal sliding window.
- Page 15 Type 1: Hung window installation Foam seal B (Adhesive type-shorter) Cut the adhesive foam seal A and B strips to the proper lengths, and attach them to the window sash and frame as shown. Foam seal A (Adhesive type) Insert the window slider assembly into the window track. If the hose opening is covered by the lip of the window frame, rotate Window the panel so the thicker side faces the window frame.
- Page 16 Type 2: Sliding window Installation (Optional) Foam seal B (Adhesive 1. Cut the adhesive foam seal A and B strips to the proper type-shorter) lengths, and attach them to the window sash and frame as shown. 2. Assembling the Sliding Window Adapter (Only needed Foam seal A for Sliding Window applications): Align both halves of the (Adhesive...
- Page 17 6. If desired, install the security bracket with 2 screws as Security shown. Bracket 2 Screws Attach the Sliding Window Adapter to the hose by lining up the circles on the adapter the hose. Insert the window slider adapter into the hole of the window slider. NOTICE To ensure proper function, DO NOT overextend or bend the hose.
- Page 18 Water Drainage (For Heating Mode) • While operating in heat pump mode, the unit will produce condensate that must be drained. You must install the drain hose when operating in heat mode. To install the drain hose, remove the plug from the drain port and attach the included hose. The universal drain adaptor can be attached to the end of the included hose.
-
Page 19: Care And Cleaning
CARE AND CLEANING Safety Precautions • Always unplug the unit before cleaning or servicing. • DO NOT use ammable liquids or chemicals to clean the unit. • DO NOT wash the unit under running water. Doing so causes electrical danger. •... -
Page 20: Troubleshooting Tips
TROUBLESHOOTING TIPS Before calling service, review this list. It may save you time and expense. This list includes common occurences that are not the result of defective workmanship or materials of this appliances. Problem Solution Unit does not turn on Displays P1 Error Code and means the water collection tray is full. -
Page 21: Heat Pump Hose Insulation Foam
HEAT PUMP HOSE INSULATION FOAM If you are experiencing condensation on the outer section of the hose during heating operation, apply the included heat pump insulation foam to the outside of the hose. Use the included zip ties to secure the foam around the hose. -
Page 22: Remote Control And App Instructions
REMOTE CONTROL AND APP INSTRUCTIONS Handling the Remote Control LOCATION OF THE REMOTE CONTROL Use the remote control within a distance of 26 ft. (8m) from the air conditioner, pointing it towards the unit. The unit will beep when it receives a signal. CAUTION •... - Page 23 BATTERY DISPOSAL Ensure used batteries are disposed of properly. TIPS FOR USING REMOTE CONTROL • In order to properly transmit a command, the ON/OFF indicator must be illuminated on the remote’s display. (See the Remote LED Screen Indicators section for more information.) Remote Control Specifi...
- Page 24 Remote Screen Indicators Information is displayed when the remote control is powered on. Fresh feature display (Not applicable) Sleep mode display Comfort sense feature display Wireless control feature display Low battery detection display (If flashes) MODE display Transmission Indicator Displays the current mode, Lights up when remote including: sends signal to indoor...
- Page 25 Setting the Timer TIMER ON/OFF - Set the amount of time after which the unit will automatically turn on/off. TIMER ON SETTING Press TIMER ON button Press up or down button for Point remote to unit and wait to initiate the ON time multiple times to set the desired 1sec, the TIMER ON will be sequence.
- Page 26 OS may or may not be supported until a new version is c mobile phone or problems in your network may prevent the system from working and Toshiba will not be responsible for any problems that could be caused by incompatibility or network issues.
- Page 27 Apple QR code Scan to download app. • You can also go to Google Play or App Store and search for Toshiba NA AC. For more information, please refer to Toshiba Lifestyle website: us.toshiba-lifestyle.com. NOTICE All the images in this manual are for reference only, your product and app may look slightly different.
- Page 28 CREATE YOUR ACCOUNT • Make sure your smartphone is connected to your wireless router and your wireless router has a working 2.4GHz internet connection. • It is recommended to activate your account immediately to be able to recover your password by email. 1.
- Page 29 ADDITIONAL APP AND SMART HOME FUNCTIONS For additional instructions regarding the features of the app and Smart Home skill capabilities, scan the QR code below. User Manual Page 29...
- Page 31 Instrucciones del Control Remoto y del App MANUAL DEL USUARIO Portatil Tipo Aire Acondicionado de Habitación RAC-PT1412HVWRU WARNING Warning notices: Antes de usar este producto, lea atentamente este manual y consérvelo para futuras referencias. El diseño y las especificaciones están sujetos a cambios sin previo aviso para la mejora del producto.
- Page 32 Manual del propietario Precauciones de Seguridad ....................33 Instrucciones de Operación ....................38 Instrucciones de Instalación ....................42 Mantenimiento y Limpieza ....................49 Soluciones de Problemas ....................50 Espuma Aislante para Manguera de Bomba de Calor ..........51 Instrucciones del Control Remoto y del App .............. 52 Lea este Manual En su interior encontrará...
-
Page 33: Precauciones De Seguridad
PRECAUCIONES DE SEGURIDAD Para evitar daños al usuario u otras personas y a la propiedad, las instrucciones que se muestran aquí deben ser seguidas. Las operaciones incorrectas por la ignora de las instrucciones podría causar perjuicios o lesiones. El nivel de riesgo está clasifi cado por las siguientes indicaciones. Este símbolo indica una situación peligrosa que, si no evitada, podría ADVERTENCIA causar la muerte o lesiones graves. - Page 34 ADVERTENCIA • No desmonte ni modifi que la unidad. Puede causar fallas y descarga eléctrica. • No dañe ni utilice un cable de alimentación alternativo. Puede causar incendio y descarga eléctrica. Si el cable de alimentación está dañado, debe ser reemplazado por el fabricante o un centro de servicio técnico autorizado o una persona igualmente califi cada para evitar un peligro.
- Page 35 PRECAUCIÓN • Tenga cuidado al desempacar e instalar. Los bordes afi lados podrían causar lesiones. • No limpie el acondicionador de aire con agua. El agua puede entrar en la unidad y degradar el aislamiento que podría conducir a una descarga eléctrica.
- Page 36 • Mantenga las aberturas de ventilación libres de obstrucciones. • La unidad solo debe ser atendida por un centro de asistencia autorizada Toshiba, llame al Servicio al Cliente al 1-855-204-5313 para obtener asistencia técnica. • El refrigerante infl amable R32 se usa dentro del acondicionador de aire. Siga las instrucciones cuidadosamente para manejar, instalar, limpiar y reparar el acondicionador de aire para evitar daños o peligros.
- Page 37 Operación del dispositivo de corriente El cable de energía contiene un dispositivo de medición que detecta daños en el proprio cable. Enchufe y pulse Pruebelo de la siguiente manera: el botón RESET 1. Enchufe el acondicionador de aire. RESET 2. El cable de energía tendrá DOS botones en el cabezal del enchufe.
-
Page 38: Instrucciones De Operación
INSTRUCCIONES DE OPERACIÓN Preparación Panel de control Deflector de aire Filtro de aire (oscilación automática) superior (detrás de la rejilla) Mango de traslado Manguera de aire (ambos os lados) salida y entrada Entrada de aire Panel Salida de drenaje (modo dry) Salida de drenaje (modo heating) Soporte del enchufe Soporte del cable... - Page 39 Característica del Panel de Control Botón del Swing Indicador del Wireless Visor de LEDs Botón Encendido/Apagado (ON/OFF) (Connect) Botón del Botón Botones Botón Botón del Timer del Mode Arriba y Abajo del Fan Sleep Botón Oscilación (Swing) NOTA: Aplicable a modelos con la función de ventilación constante.
- Page 40 Códigos de Error y códigos de protección: AVISO E1 - Error en el sensor de temperatura de la habitación. E2 - Error en el sensor de temperatura del evaporador. Cuando ocurre una de las fallas anteriores, apague la unidad y compruebe si hay E3 - Error del sensor de temperatura del condensador obstrucciones.
- Page 41 Funcionamiento del Modo Sueño (SLEEP) AVISO Al pulsar este botón se aumentará (durante la operación de La función de funcionamiento enfriamiento) o se disminuirá (durante operación de calefacción, SLEEP no está disponible en los en modelos aplicables) 1 °F/1 °C después de 30 minutos. La modos FAN o DRY.
-
Page 42: Instrucciones De Instalación
• El servicio técnico, mantenimiento o reparación de esta unidad cado. • El reciclaje del producto debe realizarse de acuerdo con las regulaciones locales. Escanee ese QR Code para ver un video de instalación de su aire acondicionado portátil Toshiba: 25 cm 9.8 inch Page 42 User Manual... - Page 43 Herramientas Necesarias • Destornillador Phillips • Sierra (opcional, para acortar el adaptador de ventana para ventanas estrechas). • Regla o cinta métrica • Tijera o cuchillo Accesorios El kit de instalación de ventanas es adaptable a ventanas de 19,1’’-63,8’’ (48,4-160,2 cm). Veri que dos veces todos los materiales de embalaje para asegurarse de que los accesorios no se desechen accidentalmente.
- Page 44 Kit de Instalación en Ventanas 1: Solamente para ventanas de colgar Adaptador de aire Inserte el adaptador de aire de escape en la manguera de escape (la abertura circular) para de escape un rendimiento óptimo. Gire el adaptador en el sentido de las agujas del reloj hasta que las Manguera pestañas de bloqueo hagan clic y ya no gire.
- Page 45 Tipo 1: Instalación en ventanas de colgar Sello de espuma B Foam seal B (Adhesive type-shorter) (Adhesivo más corto) 1. Corte las tiras A y B del sello de espuma adhesiva a las longitudes adecuadas y fíjelas al marco y al marco de la ventana como se muestra.
- Page 46 Tipo 2: Instalación en ventanas de deslizar (Opcional) Foam seal B Sello de espuma B (Adhesive (Adhesivo más corto) Corte las tiras A y B del sello de espuma adhesiva a las type-shorter) longitudes adecuadas y fíjelas al marco y al marco de la ventana como se muestra.
- Page 47 Si lo desea, instale el soporte de seguridad con 2 tornillos Soporte de Security como se muestra. seguridad Bracket 2 Screws 2 Tornillos Conecte el adaptador de ventana de colgar a la manguera alineando los círculos en el adaptador de la manguera. Inserte el adaptador del deslizador de la ventana en el orifi cio del deslizador de la ventana.
- Page 48 DRENAJE DEL AGUA (Para el modo de calefacción) • Mientras funciona en el modo calefacción, la unidad producirá condensado que debe ser drenado. Debe instalar la manguera de drenaje cuando opere en ese modo. Para instalar la manguera de drenaje, retire el tapón de drenaje y conecte la manguera incluida.
-
Page 49: Mantenimiento Y Limpieza
MANTENIMIENTO Y LIMPIEZA Precauciones de Seguridad • Desenchufe siempre la unidad antes de limpiarla o repararla. • NO use líquidos o productos químicos in amables para limpiar la unidad. • NO lavar la unidad con agua corriente. Hacerlo causa peligro eléctrico. •... -
Page 50: Soluciones De Problemas
SOLUCIONES DE PROBLEMAS Antes de llamar al servicio técnico, revise esta lista. Puede ahorrarle una gran cantidad de tiempo y dinero. Esta lista incluye ocurrencias comunes que no son consecuencia de un trabajo o materiales defectuosos en el equipo. Problema Solución El aire acondicionado no Muestra el código de error P1 y signifi ca que la bandeja de recolección de agua está... -
Page 51: Espuma Aislante Para Manguera De Bomba De Calor
ESPUMA AISLANTE PARA MANGUERA DE BOMBA DE CALOR Si hay condensación en la parte exterior de la manguera durante la operación de calefacción, aplique la espuma aislante de la bomba de calor incluida en la parte exterior de la manguera. Utilice las bridas incluidas para asegurar la espuma alrededor de la manguera. -
Page 52: Instrucciones Del Control Remoto Y Del App
INSTRUCCIONES DEL CONTROL REMOTO Y DEL APP Manejo del Control Remoto UBICACIÓN DEL CONTROL REMOTO Utilice el control remoto a distancia a una distancia de 26 piés (8 metros) del acondicionador de aire, apuntando hacia el receptor. rma con un pitido. PRECAUCIÓN •... - Page 53 ELIMINACIÓN DE BATERÍAS Asegúrese de que las baterías usadas sean desechadas correctamente. CONSEJOS PARA USAR EL CONTROL REMOTO • Para transmitir correctamente un mando, el indicador ON/OFF debe iluminarse en la pantalla del control remoto. (Consulte la sección Indicadores de la pantalla LED del Control Remoto para obtener más información).
- Page 54 Indicadores de la Pantalla del Control Remoto Las informaciones se muestran cuando se enciende el control remoto. Función de aire fresco (no aplica) Función Sleep activada Función Comfort Sense activada Modo Wireless activado Detección de batería baja (Si parpadea) Presenta MODE Indicador de Transmission Muestra el modo actual, Se enciende cuando el...
- Page 55 Confi guración del Timer (temporizador) TIMER ON/OFF - Establezca la cantidad de tiempo después del cual la unidad se encenderá / apagará automáticamente. CONFIGURACIÓN del TIMER ON Pulse TIMER ON para Pulse los botones arriba o abajo Apunte el control remoto a la iniciar la secuencia de varias veces para confi gurar el tiempo unidad y espere 1 segundo, el...
- Page 56 Toshiba no será responsable de ningún problema que pueda ser causado por incompatibilidad o problemas de red.
- Page 57 Código QR de Apple Escanear para descargar la aplicación. • También puede ir a Google Play o App Store y buscar Toshiba NA AC. Para obtener más información, consulte la página web de Toshiba Lifestyle: us.toshiba-lifestyle.com. AVISO Todas las imágenes de este manual son solo para referencia, su producto y aplicación pueden tener un aspecto ligeramente diferente.
- Page 58 CREA TU CUENTA • Asegúrese de que su Smartphone esté conectado a su router inalámbrico y que su router inalámbrico tenga una conexión a Internet de 2,4 GHz. • Se recomienda activar su cuenta inmediatamente para poder recuperar su contraseña por correo electrónico. 1.
- Page 59 FUNCIONES ADICIONALES DE LA APLICACIÓN Y SMART HOME Para obtener instrucciones adicionales sobre las características de la aplicación y las capacidades del sistema Smart Home, escanee el código QR a continuación User Manual Page 59...