Table of Contents
Advertisement
Quick Links
www.GEAppliances.com
. . . . . . . . . . 2, 3
Owner's Manual &
Installation Instructions
Operating Instructions
Control and Indicator Settings . . .5, 6
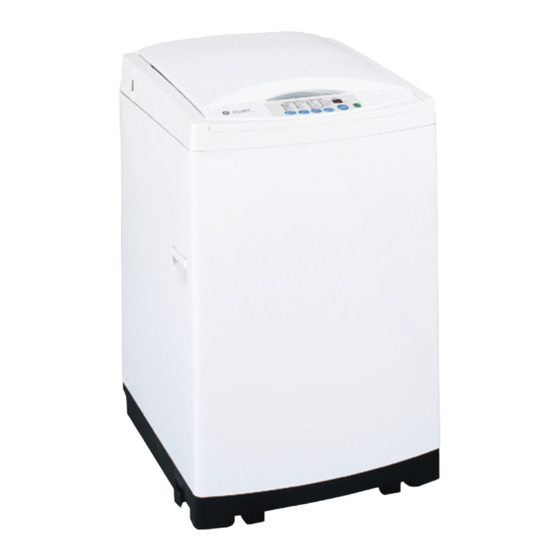
WSLS1100
Loading and Using the Washer . .7, 8
WSLP1100
Special Washer Features . . . . . . . . .4
WSLM1100
Alcove or Closet Installation . . . . 12
Electrical Requirements . . . . . . . . 10
Grounding Instructions . . . . . . . . 10
Installation Requirements . . . . . . . 9
Leveling the Washer . . . . . . . . . . . 10
Portable Model WSLP1100 . . . 13-16
Stationary Models WSLS1100
and WSLM1100 . . . . . . . . . . . 11, 12
Before You Call For Service . . 17-20
Status Indicators . . . . . . . . . . . . . . 17
Consumer Support
Consumer Support . . . . . Back Cover
Product Registration . . . . . . . . 21, 22
Warranty . . . . . . . . . . . . . . . . . . . . 23
Write the model and serial
numbers here:
#
#
You can find them on a label
on the back of the washer.
175D1807P328
49-90063-2 12-02 JR
Advertisement
Table of Contents

Related Manuals for GE WSLS11002


Summary of Contents for GE WSLS11002
-
Page 1: Table Of Contents
www.GEAppliances.com Safety Information ..2, 3 Owner’s Manual & Installation Instructions Operating Instructions Control and Indicator Settings . . .5, 6 WSLS1100 Loading and Using the Washer . .7, 8 WSLP1100 Special Washer Features . -
Page 2: Safety Information
IMPORTANT SAFETY INFORMATION. READ ALL INSTRUCTIONS BEFORE USING. WARNING! For your safety, the information in this manual must be followed to minimize the risk of fire or explosion, electric shock, or to prevent property damage, personal injury, or loss of life. WATER HEATER SAFETY Under certain conditions hydrogen gas may be produced in a water heater that has not been used for two weeks or more. - Page 3 www.GEAppliances.com WHEN NOT IN USE Turn off water faucets to relieve pressure on Do not attempt to repair or replace any part of ■ ■ hoses and valves and to minimize leakage if this appliance unless specifically recommended a break or rupture should occur. Check the in this Owner’s Manual, or in published user- condition of the fill hoses;...
-
Page 4: Special Washer Features
Special washer features. Before starting the washer: • Load the laundry in the washer. • Add the detergent and fabric softener to the dispenser drawer. • Add bleach (if needed) to the bleach dispenser. Detergent and Fabric Softener Dispenser Drawer The detergent and fabric softener To Use the Fabric Softener Dispenser: Maximum... -
Page 5: Control And Indicator Settings
About the control and indicator settings. www.GEAppliances.com CLOTHES CARE CYCLE SELECTION TIME REMAINING PRESOAK EXTRA LARGE COLORS HOT/COLD NORMAL LARGE WHITES WARM/WARM WASH MEDIUM DELICATES RINSE ONLY WARM/COLD COLD/COLD SPIN ONLY SMALL QUICK WASH LOAD SENSING POWER WASH START ON/OFF LOAD OPTIONS PAUSE... - Page 6 About the control and indicator settings. LOAD SIZE The water level should just cover the clothes. Adjust the load size accordingly. Loosely load clothes no higher than the top row of holes in the washer basket. WASH CYCLE These wash cycles control the length of the washing process. The chart below will help match the WASH CYCLE setting to your specific laundry needs.
- Page 7 Loading and using the washer. Always follow fabric manufacturer’s care label when laundering. www.GEAppliances.com Sorting Wash Loads Colors Soil Fabric Lint Whites Heavy Delicates Lint Producers Lights Normal Easy Care Lint Collectors Darks Light Sturdy Cottons Proper Use of Detergent Add clothes and detergent, then start the washer.
-
Page 8: Loading And Using The Washer
Loading and using the washer. Fabric Care Labels Below are fabric care label “symbols” that affect the clothing you will be laundering. WASH LABELS Machine wash cycle Normal Permanent Press/ Do not wash Do not wring Gentle/ Hand wash wrinkle resistant delicate Water temperature... -
Page 9: Installation Instructions
Installation Washer Instructions WSLS1100 WSLP1100 WSLM1100 If you have questions, call 800-GECARES or visit our Website at: www.GEAppliances.com BEFORE YOU BEGIN PLUMBING • WATER PRESSURE—Must be 10 p.s.i. minimum to Read these instructions completely and carefully. 150 p.s.i. maximum dynamic pressure measured at IMPORTANT –... -
Page 10: Electrical Requirements
Installation Instructions CAUTION: Before plugging in washer, read the following electrical requirements. LEVELING THE WASHER— ELECTRICAL REQUIREMENTS STATIONARY MODELS CAUTION: For personal safety, do Before connecting the hoses, the washer must be level. not use an extension cord or adapter plug with this Leveling locks are located at the bottom front of the appliance. -
Page 11: And Wslm1100
Installation Instructions WASHER CONNECTIONS FOR STATIONARY MODELS WSLS1100 AND WSLM1100 WARNING: Make sure the washer is unplugged. FLUSH WATER LINES CONNECT DRAIN HOSE Run some water from the hot and cold faucets to flush Form a U shape on the end of the drain hose with the the water lines and remove particles that might clog up hose pointed toward the drain. -
Page 12: Alcove Or Closet Installation
Installation Instructions WASHER CONNECTIONS FOR STATIONARY MODELS WSLS1100 AND WSLM1100 (CONT.) INSTALLATION CHECKLIST REMOVE THE PROTECTIVE FILM COVERING THE CONTROL PANEL Before starting the washer, check to make sure: ❏ Main power is turned on. ❏ The washer is plugged in. ❏... -
Page 13: Portable Model Wslp1100
Installation Instructions WASHER CONNECTIONS FOR PORTABLE MODEL WSLP1100—ONE-FAUCET CONNECTIONS Use the hose connector provided with the washer for a CONNECT TO VALVE INLET one-faucet connection. TO CONNECT THE WASHER: Attach the COLD water supply connector to the COLD water valve inlet (color BLUE). Make sure the washer is inside the connector before REMOVE THE UNI-COUPLE ®... - Page 14 Installation Instructions WASHER CONNECTIONS FOR PORTABLE MODEL WSLP1100—ONE-FAUCET CONNECTIONS (CONT.) MAKE SURE THE TEMPERATURE REMOVE THE PROTECTIVE FILM SELECTOR IS SET AT COLD/COLD COVERING THE CONTROL PANEL SLOWLY TURN ON THE WATER FAUCET ALL THE WAY TO THE DESIRED TEMPERATURE SETTING INSTALLATION CHECKLIST Before starting the washer, check to make sure:...
- Page 15 Installation Instructions TO DISCONNECT THE WASHER: TURN WATER FAUCET OFF DISCONNECT FROM WATER LINE Move the locking collar down and pull the hose connector down to disengage from the faucet adapter. Locking Collar Hose Connector UNPLUG POWER CORD AND RETURN IT TO THE STORAGE DRAIN WATER AREA Drain water from the hoses through the...
- Page 16 Installation Instructions WASHER CONNECTIONS FOR PORTABLE MODEL WSLP1100—TWO-FAUCET CONNECTIONS If you have two separate water connections, your washer can be connected to both the hot and cold water faucets. PLUG THE POWER CORD INTO A This kit can be purchased from your dealer or from Parts 3-PRONG GROUNDED OUTLET and Accessories.
-
Page 17: Troubleshooting Tips
Before you call for service… www.GEAppliances.com Troubleshooting Tips Save time and money! Review the charts on the following pages first and you may not need to call for service. Status Indicators ■ Press POWER ON/OFF to turn off the washer. ■... - Page 18 Before you call for service… Troubleshooting Tips WATER POSSIBLE CAUSES WHAT TO DO Too many suds • Switch to a lower sudsing detergent brand and follow Type of detergent instructions on package. • Try less detergent. Very soft water • Measure your detergent carefully. Use less soap if you Too much detergent have soft water, a smaller load, or a lightly soiled load.
- Page 19 www.GEAppliances.com OPERATION POSSIBLE CAUSES WHAT TO DO Washer pauses in cycle The washer normally pauses between washing steps Washer won’t operate • Make sure cord is plugged securely into a working outlet. Washer is unplugged • Turn both hot and cold faucets fully on. Water supply is turned off •...
- Page 20 Before you call for service… Troubleshooting Tips PERFORMANCE (cont’d) POSSIBLE CAUSES WHAT TO DO Snags, holes, tears, rips Pins, snaps, hooks, sharp • Fasten snaps, hooks, buttons and zippers. or excessive wear buttons, belt buckles, • Remove loose items like pins, objects in pockets zippers, and sharp objects and sharp buttons.
-
Page 21: Product Registration
You can rest easy, knowing that all your valuable household products are protected against expensive repairs. 800-626-2224 Place your confidence in GE and call us in the U.S. toll-free at for more information. *All brands covered, up to 20 years old, in the continental U.S. - Page 22 Our service number is safety modification. 800 GE CARES (800-432-2737). Model Number Serial Number Important: If you did not get a registration card with your product, detach and return the form below to ensure that your product is registered, or register online at www.GEAppliances.com.
- Page 23 Any part of the washer which fails due to a defect in materials or workmanship. During this From the date of the full one-year warranty, GE will also provide, free of charge, all labor and in-home service to replace original purchase the defective part.
-
Page 24: Consumer Support
Contact Us www.GEAppliances.com If you are not satisfied with the service you receive from GE, contact us on our Website with all the details including your phone number, or write to: General Manager, Customer Relations GE Appliances, Appliance Park...