Table of Contents
Advertisement
Quick Links
SEC.
甲
WORK
BRAND
76
<BACK>
210
148
1
REVISION DESCRIPTION
REV.No.
RER.NO.
PRINTING DEGREE
乙
丙
MODEL
P/NO.
EXTERIER INTERIER
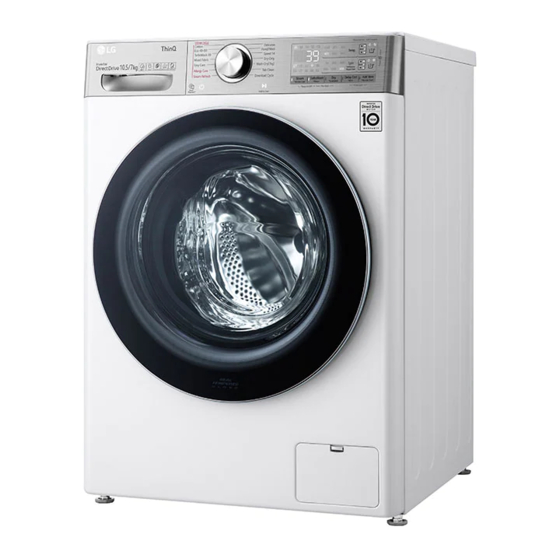
FWV1117WTSA
FWV1117BTSA
MFL71818826
1
Rev.00_052521
<FRONT>
甲
Global design
乙
P/No.
丙
148
PREPARED APPROVALED
DATE
MATERIAL AND PRINTING DESCRIPTION
LG MODEL NAME
F4V9RDP2WE.ABWQPUK
材质: 70g 双层纸
1
F4V9RDP2EE.ABLQPUK
<<备注 >>
1. 材质,印刷,尺寸参照作业表.
2. 印刷,文字大小和线条以LG设计基准.
3. 数字大小依据一般规格.
4. 批量生产前取的设计限度.
5.
LG电子产品有害物质管理基准 (LG(10)–A–9023)与协力社有害物质
guide基准禁止使用 Level A-I 与 A-II 有害物质。
<< NOTES >>
1. Material,printing and exterier size are refer to work tables.
2. Printing, tsxt size and line are based on LG desing film.
3. Exterier size on the drawing is cutting line.
4. Before product controlled by criteria sample.
5.
This part should comply with the criteria of Level A-I, A-II restricted
hazardous substances which refers to LGE standard LG(10)-A-9023 and
the hazardous substance management manual for the suppliers.
MODELING
DESIGNED
韩未黎
LGEPN
LG Electronics Inc.
LANGUAGE
SUFFIX
PAGE
ABWQPUK
ENGLISH
VC2 550
76
ABLQPUK
1
mm
SCALE
Unit
MANUAL,OWNER'S
1
T
I
REVIEWED
APPROVALED
CHECKED
T
L
DRUM-DOMESTIC
E
陈芳
朱宇杰
康正勋
MFL71818826
RELATED DRAWING
DWG.
No.
RELEASING THIS DRAWING
WITHOUT PERMISSIONG Electronics
SHOULD BEACCUSED ACCORDING
TO THE LAWS ADN COMPANY
RULES.
图纸为LGEPN资产,非法流通时,
根据相关法律和公司有关规定追究法律责任
REMARK
1/1
Advertisement
Table of Contents

Related Manuals for LG FWV1117WTSA


Summary of Contents for LG FWV1117WTSA
- Page 1 1. Material,printing and exterier size are refer to work tables. P/No. 丙 2. Printing, tsxt size and line are based on LG desing film. 3. Exterier size on the drawing is cutting line. 4. Before product controlled by criteria sample.
- Page 2 This will simplify installation and ensure that the product is installed correctly and safely. Leave these instructions near the product after installation for future reference. ENGLISH FWV1117WTSA FWV1117BTSA www.lg.com MFL71818826 Rev.00_052521 Copyright © 2021 LG Electronics Inc. All Rights Reserved.
-
Page 3: Table Of Contents
Adding Detergents and Softeners ..............31 Programme Table ....................35 Drying Programme ..................41 Extra Options and Functions ................44 SMART FUNCTIONS LG ThinQ Application ..................51 Smart Diagnosis ....................55 MAINTENANCE Cleaning After Every Wash................56 Cleaning the Appliance Periodically & Performing an Emergency Water Evacuation......................57 TROUBLESHOOTING Before Calling for Service................61... -
Page 4: Safety Instructions
global_main.book.book Page 3 Tuesday, May 25, 2021 11:26 AM SAFETY INSTRUCTIONS SAFETY INSTRUCTIONS CARING FOR THE ENVIRONMENT Environmental and Economical Tips Energy and water consumption • Water consumption and energy usage can be affected by the weight of the load. To make the best use of your appliance, load the maximum amount of dry clothes for the particular programme. - Page 5 global_main.book.book Page 4 Tuesday, May 25, 2021 11:26 AM SAFETY INSTRUCTIONS Selecting Extra Options and Functions • Select the water temperature suitable for the type of load you are washing. Follow the garment fabric care labels for best results. • The Pre Wash option is recommended for washing a heavily soiled load.
- Page 6 • You can take your appliance either to the shop where you purchased the product, or contact your local government waste office for details of your nearest authorised WEEE collection point. For the most up to date information for your country, please see www.lg.com/global/recycling.
-
Page 7: Read All Instructions Before Use
global_main.book.book Page 6 Tuesday, May 25, 2021 11:26 AM SAFETY INSTRUCTIONS READ ALL INSTRUCTIONS BEFORE USE The following safety guidelines are intended to prevent unforeseen risks or damage from unsafe or incorrect operation of the appliance. The guidelines are separated into ‘WARNING’ and ‘CAUTION’ as described below. - Page 8 global_main.book.book Page 7 Tuesday, May 25, 2021 11:26 AM SAFETY INSTRUCTIONS • If the power cord is damaged, it must be replaced by the manufacturer, its service agent or similarly qualified persons in order to avoid a hazard. • Ventilation openings must not be obstructed by a carpet. •...
- Page 9 global_main.book.book Page 8 Tuesday, May 25, 2021 11:26 AM SAFETY INSTRUCTIONS Installation • Never attempt to operate the appliance if it is damaged, malfunctioning, partially disassembled, or has missing or broken parts, including a damaged cord or plug. • This appliance should only be transported by two or more people holding the appliance securely.
- Page 10 • Do not touch the door during a high temperature programme. • In case of a water leak from the appliance or flood, disconnect the power plug and contact the LG Electronics customer information centre. • Turn off water taps to relieve pressure on hoses and valves and to minimize leakage if a break or rupture should occur.
- Page 11 • Only qualified service personnel from LG Electronics service centre should disassemble, repair, or modify the appliance. Contact an LG Electronics customer information centre if you move and install the appliance in a different location.
- Page 12 global_main.book.book Page 11 Tuesday, May 25, 2021 11:26 AM SAFETY INSTRUCTIONS • Remove the door before disposing of or discarding this appliance to avoid the danger of children or small animals getting trapped inside.
-
Page 13: Installation Parts And Specifications
global_main.book.book Page 12 Tuesday, May 25, 2021 11:26 AM INSTALLATION INSTALLATION Parts and Specifications NOTE • Appearance and specifications may change without notice to improve the quality of the appliance. Front View Index Part Name Index Part Name Detergent Dispenser Cover Cap Drawer Door... - Page 14 global_main.book.book Page 13 Tuesday, May 25, 2021 11:26 AM INSTALLATION Rear View Index Part Name Index Part Name Power Plug Drain Hose Transit Bolts...
- Page 15 Page 14 Tuesday, May 25, 2021 11:26 AM INSTALLATION Specifications Description Value Model Name FWV1117WTSA FWV1117BTSA Power Supply 220‒240 V~, 50 Hz Product Weight 73 kg Dimension(mm) D’’ D’ Index Dimension (mm) D" 1100...
- Page 16 global_main.book.book Page 15 Tuesday, May 25, 2021 11:26 AM INSTALLATION Accessories *1 The included accessories vary depending on the model you purchased. Cold Supply Hose Anti–slip Sheets*1 Spanner Elbow Bracket for Securing Drain Hose Caps for Covering Transit Bolt Holes Tie Strap*1...
-
Page 17: Installation Place Requirements
global_main.book.book Page 16 Tuesday, May 25, 2021 11:26 AM INSTALLATION Installation Place Requirements Before installing the appliance, check the following information to make sure that the appliance should be installed in a correct place. Installation Location Index Clearance (mm) • This appliance must be installed on firm flooring to minimize vibration during the spin cycle. - Page 18 NOTE persons may cause injury or serious • You can purchase rubber cups (part malfunctioning. Contact your local No. 4620ER4002B) from the LG service authorised LG repairer. centre. • The power plug must be plugged into an appropriate outlet socket that is...
-
Page 19: Unpacking The Appliance
global_main.book.book Page 18 Tuesday, May 25, 2021 11:26 AM INSTALLATION Unpacking the Appliance Lifting the Appliance Off the fully loosen all transit bolts by turning them counterclockwise. Foam Base * This feature may vary depending on the model purchased. After removing the carton and shipping material, lift the appliance off the foam base. -
Page 20: Levelling The Appliance
• Do not install the washing machine on to be considered to stop or reduce a plinth, stand or elevated surface excessive noise and vibration. unless it is manufactured by LG Electronics for use with this model. Adjusting and Levelling the Feet... - Page 21 NOTE This feature may vary depending on the • Additional anti-slip sheets are available model purchased. at LG Electronics service centre. If you install the appliance on a slippery surface, it may move because of excessive vibration. Incorrect levelling may cause malfunction through noise and vibration.
-
Page 22: Connecting The Water Supply Hose
global_main.book.book Page 21 Tuesday, May 25, 2021 11:26 AM INSTALLATION Connecting the Water Supply Hose Note for Connection Connecting the Hose to the Water Tap • Water pressure must be between 50 kPa and 800 kPa (0.5‒8.0 kgf/cm²). If Connecting Screw-Type Hose to Tap the water pressure is more than 800 with Thread kPa, a decompression device should... - Page 23 global_main.book.book Page 22 Tuesday, May 25, 2021 11:26 AM INSTALLATION Connecting the Hose to the Appliance Screw the supply hose to the water inlet valve on the back of the appliance. • Do not connect the hose to the hot water supply for models with one water inlet.
-
Page 24: Installing The Drain Hose
global_main.book.book Page 23 Tuesday, May 25, 2021 11:26 AM INSTALLATION Installing the Drain Hose Installing the Drain Hose with the Elbow Bracket The drain hose should not be placed higher than 100 cm above the floor. Water in the appliance may not drain or may drain slowly. -
Page 25: Operation Operation Overview
global_main.book.book Page 24 Tuesday, May 25, 2021 11:26 AM OPERATION OPERATION Operation Overview Using the Appliance CAUTION Before the first wash, select the Cotton • Remove items from the flexible door wash programme and add a half amount seal gasket to prevent clothing and of the detergent. - Page 26 global_main.book.book Page 25 Tuesday, May 25, 2021 11:26 AM OPERATION Choose the desired cycle. • Press the cycle button repeatedly or turn the cycle selector knob until the desired cycle is selected. • Now select a wash temperature and spin speed. Pay attention to the fabric care label of your clothes.
-
Page 27: Control Panel
Programme Knob • Programmes are available according Remote Start to the clothes type. With the LG ThinQ app, you can use a • The lamp will light up to indicate the smartphone to control your appliance selected programme. remotely. - Page 28 global_main.book.book Page 27 Tuesday, May 25, 2021 11:26 AM OPERATION • The current settings are shown in the display. • Press the button for that option to select other settings. ezDispense Buttons • Press the Dispenser 1 or Dispenser 2 to select ezDispense function.
- Page 29 global_main.book.book Page 28 Tuesday, May 25, 2021 11:26 AM OPERATION Time and Status Display • The time shown is only an estimate. Programme Status Indicators This time is based on normal operating • When a washing programme is conditions. Several external factors running, LED for the active stage will (load weight, room temperature, blink, and the LEDs for the remaining...
-
Page 30: Preparing The Wash Load
global_main.book.book Page 29 Tuesday, May 25, 2021 11:26 AM OPERATION Preparing the Wash Load Sort the wash load for best washing results, and then prepare the clothes according to the symbols on their care labels. Sorting the Clothes Symbol Wash / Fabric type •... - Page 31 global_main.book.book Page 30 Tuesday, May 25, 2021 11:26 AM OPERATION keys can damage both your appliance and clothes. • Wash delicates (stockings, underwired bras) in a wash net. • Close zippers, hooks and strings to make sure that these items do not snag on other clothes.
-
Page 32: Adding Detergents And Softeners
global_main.book.book Page 31 Tuesday, May 25, 2021 11:26 AM OPERATION Adding Detergents and Softeners Detergent Dosage - Liquid detergent is often designed for special applications, e.g. for • Detergent should be used according to coloured fabric, wool, delicate or the instruction of the detergent dark clothes. - Page 33 global_main.book.book Page 32 Tuesday, May 25, 2021 11:26 AM OPERATION Slowly slide the detergent dispenser • Do not try to fill the compartments too quickly. Add detergent and drawer out as far as it will go. softener slowly to avoid overflows. Liquid detergent compartment Liquid fabric softener or Liquid detergent compartment...
- Page 34 global_main.book.book Page 33 Tuesday, May 25, 2021 11:26 AM OPERATION safety. Failure to do so can damage the Open the detergent dispenser washer or cause the detergent or drawer. softener to leak out of the ventilation holes. • Detergent or fabric softener left in the ezDispense compartments for an extended period may harden and fail to dispense properly.
- Page 35 global_main.book.book Page 34 Tuesday, May 25, 2021 11:26 AM OPERATION • Slamming the detergent dispenser Open the door and put detergent drawer may result in the detergent tablets into the drum before loading overflowing into another the clothes. compartment or pouring into the tub earlier than programmed.
-
Page 36: Programme Table
global_main.book.book Page 35 Tuesday, May 25, 2021 11:26 AM OPERATION Programme Table Washing Programme Cotton 40 ℃ (Cold to 95 ℃) Max. Load: Rating Description Washes normally soiled clothes by combining various drum motions. Eco 40-60 40 ℃ (40 ℃ to 60 ℃) Max. - Page 37 global_main.book.book Page 36 Tuesday, May 25, 2021 11:26 AM OPERATION Delicates 20 ℃ (Cold to 40 ℃) Max. Load 3 kg Description Washes machine-washable lingerie, sheer and lacy clothes. Hand/Wool 30 ℃ (Cold to 40 ℃) Max. Load 2 kg Description Washes hand-washable and machine-washable delicate clothes such as washable wool, lingerie, dresses etc.
- Page 38 global_main.book.book Page 37 Tuesday, May 25, 2021 11:26 AM OPERATION • Neutral detergent is recommended. Extra Options *1 This option is automatically inserted in the programme and can not be deselected. NOTE • Rinse+ option can be selected for every washing programme in this table except the Dry Only and Steam Refresh programmes.
- Page 39 global_main.book.book Page 38 Tuesday, May 25, 2021 11:26 AM OPERATION Program Wrinkle TurboWa EcoHybri Steam Care Wash Wash+Dr Selectable Maximum Spin Speed Spin Speed Programme Default Available Cotton 1400 rpm Eco 40-60 1400 rpm TurboWash 39 1200 rpm 400 to 1400 rpm Mixed Fabric 1000 rpm Easy Care...
- Page 40 global_main.book.book Page 39 Tuesday, May 25, 2021 11:26 AM OPERATION Consumption Data Unit Description kg: Laundry load h:mm: Programme duration kWh: Energy consumption ℃: Maximum temperature inside the treated textile Litres: Water consumption rpm: Maximum spin speed %: Remaining moisture at the end of spinning phase. The higher is the spin speed, the higher is the noise and the lower is the remaining moisture.
- Page 41 global_main.book.book Page 40 Tuesday, May 25, 2021 11:26 AM OPERATION *3 It is able to clean normally soiled cotton laundry declared to be washable at 40 ℃ or 60 ℃, together in the same cycle, and to dry it in such a way that it can be immediately stored in a cupboard, and that this programme is used to assess the compliance with the EU ecodesign legislation (EU 2019/2023).
-
Page 42: Drying Programme
global_main.book.book Page 41 Tuesday, May 25, 2021 11:26 AM OPERATION Drying Programme General Tips for Drying Always stretch these materials out immediately after drying. Use the automatic programmes to dry most loads. Electronic sensors measure Permanent Press and Synthetics the temperature of the exhaust to Do not overload your appliance. - Page 43 global_main.book.book Page 42 Tuesday, May 25, 2021 11:26 AM OPERATION • Fabric Type: For delicate fabrics NOTE • Max. Load: 3.5 kg • The estimated drying time varies from the actual drying time during the Normal Eco ( Automatic cycle. The type of fabric, size Suitable for energy dry programme.
- Page 44 global_main.book.book Page 43 Tuesday, May 25, 2021 11:26 AM OPERATION • Normal ( ) - For general drying NOTE • Time 30/60/120 minutes - For timed • If you select the programme, you will drying be unable to select a dry programme. •...
-
Page 45: Extra Options And Functions
global_main.book.book Page 44 Tuesday, May 25, 2021 11:26 AM OPERATION Extra Options and Functions You can use the extra options and functions to customize the programmes. Customizing a Washing Follow the next steps to customize a washing programme: Programme Each programme has default settings Prepare the clothes and load the that are selected automatically. - Page 46 global_main.book.book Page 45 Tuesday, May 25, 2021 11:26 AM OPERATION twice to cycle the machine off and back Optional 1: Press Steam or TurboWash button. Optional 2: Press and hold Steam button for 3 seconds to select the Wrinkle Care option. Using Special Options Press the Start/Pause button.
- Page 47 global_main.book.book Page 46 Tuesday, May 25, 2021 11:26 AM OPERATION Open the door after it unlocks itself • Avoid using liquid detergent for this function. and add or remove necessary clothing items. Close the door and press the Start/ Using the ezDispense Pause button.
- Page 48 global_main.book.book Page 47 Tuesday, May 25, 2021 11:26 AM OPERATION Changing Dispense Level for a Single the ezDispense amounts for a standard 4-6 kg load. Load • Most cycles will automatically use the Press the Power button. default amounts you have set, indicated by the Normal LED light on the Dispenser 1 and Dispenser 2 Turn the knob to select the desired...
- Page 49 global_main.book.book Page 48 Tuesday, May 25, 2021 11:26 AM OPERATION Save the default changes. • The Liquid detergent indicator is always light on. • Dispenser 1: Press and hold the Dispenser 1 button for 3 seconds. • When the Link indicator is selected, the Dispenser 2 button •...
- Page 50 global_main.book.book Page 49 Tuesday, May 25, 2021 11:26 AM OPERATION Press the Dispenser 1 or Dispenser 2 (when changing the type of detergent or softener). button to select the compartment to be cleaned up. • Both compartments can be cleaned at the same time.
- Page 51 global_main.book.book Page 50 Tuesday, May 25, 2021 11:26 AM OPERATION Unlocking the Control Panel Turn on the power. Press and hold the Delay End and Add Item buttons at the same time for 3 seconds to deactivate this function. Beep On/Off This appliance plays a melody when it starts and stops.
-
Page 52: Smart Functions
Page 51 Tuesday, May 25, 2021 11:26 AM SMART FUNCTIONS SMART FUNCTIONS LG ThinQ Application The LG ThinQ application allows you to communicate with the appliance using a smartphone. LG ThinQ Application Features Smart Diagnosis This function provides useful... - Page 53 Before Using LG ThinQ service provider or refer to your wireless router manual. Application • LG ThinQ is not responsible for any Check the distance between the network connection problems or any faults, malfunctions, or errors caused appliance and the wireless router (Wi- by network connection.
- Page 54 NOTE • Once this function is enabled, you can Activating Network Connection only start a cycle from the LG ThinQ smartphone application. If the cycle is Run the LG ThinQ application. not started, the appliance will wait to start the cycle until it is turned off...
- Page 55 In addition to the source code, all referred license terms, warranty disclaimers and copyright notices are available for download. LG Electronics will also provide open source code to you on CD-ROM for a charge covering the cost of performing such distribution (such as the cost of media, shipping, and handling) upon email request to opensource@lge.com.
-
Page 56: Smart Diagnosis
Wi-Fi equipped appliance, it can transmit troubleshooting data to a smartphone using the LG ThinQ application. • Launch the LG ThinQ application and select the Smart Diagnosis feature in the menu. Follow the instructions provided in the LG ThinQ application. -
Page 57: Maintenance
global_main.book.book Page 56 Tuesday, May 25, 2021 11:26 AM MAINTENANCE MAINTENANCE WARNING • Unplug the appliance before cleaning to avoid the risk of electric shock. Failure to follow this warning may result in serious injury, fire, electric shock, or death. •... -
Page 58: Cleaning The Appliance Periodically & Performing An Emergency Water Evacuation
global_main.book.book Page 57 Tuesday, May 25, 2021 11:26 AM MAINTENANCE Cleaning the Appliance Periodically & Performing an Emergency Water Evacuation Tub Clean Leave the door open to dry the inside of the appliance completely. This is a special function to help clean the •... - Page 59 global_main.book.book Page 58 Tuesday, May 25, 2021 11:26 AM MAINTENANCE Remove the water inlet filter with Remove the drain plug from the drain small pliers and then clean the filter tube first , and then drain the using a medium bristle tooth brush. water.
- Page 60 global_main.book.book Page 59 Tuesday, May 25, 2021 11:26 AM MAINTENANCE Cleaning the ezDispense Open the lids. Drawer Clean the ezDispense compartments every time you refill the detergent/ softener or change to a new type of detergent/softener. Remove and clean the detergent dispenser drawer once or twice a month.
- Page 61 global_main.book.book Page 60 Tuesday, May 25, 2021 11:26 AM MAINTENANCE • Do not use soap when cleaning the drawer and inserts. Securely close the covers on the ezDispense compartments. Wipe off any moisture with a dry towel or cloth after cleaning. Reinsert the detergent dispenser drawer.
-
Page 62: Troubleshooting
Your appliance is equipped with an automatic error-monitoring system to detect and diagnose problems at an early stage. If the appliance does not function properly or does not function at all, check the following tables before calling to LG Electronics service centre. - Page 63 • Check and clean the drain filter. Door sensor malfunctions. dE dE1 dEz dE4 • Please call LG service centre. You can find your local LG DOOR ERROR service centre phone number in the warranty card. This is a control error.
- Page 64 global_main.book.book Page 63 Tuesday, May 25, 2021 11:26 AM TROUBLESHOOTING Symptoms Possible Cause & Solution Is supply/drain hose or drain pump frozen? • Supply warm water into the drum in order to unfreeze the FROZEN FAILURE drain hose and the drain pump. Cover the supply hose with wet and warm towel.
- Page 65 global_main.book.book Page 64 Tuesday, May 25, 2021 11:26 AM TROUBLESHOOTING Symptoms Possible Cause & Solution The amount of liquid fabric softener in the liquid fabric E d4 softener or liquid detergent compartment did not ezDispense ERROR decrease. • Call for service. The amount of liquid detergent or fabric softener in the E ds liquid fabric softener or liquid detergent compartment...
- Page 66 global_main.book.book Page 65 Tuesday, May 25, 2021 11:26 AM TROUBLESHOOTING Symptoms Possible Cause & Solution Vibrating noise Package materials are not removed. • Remove package materials. The clothes may be unevenly distributed in the drum. • Pause the programme and redistribute the clothes after the door unlocks.
- Page 67 global_main.book.book Page 66 Tuesday, May 25, 2021 11:26 AM TROUBLESHOOTING Symptoms Possible Cause & Solution Appliance does Control panel has powered off due to inactivity. not operate. • This is normal. Press the Power button to turn the appliance on. Appliance is unplugged.
- Page 68 global_main.book.book Page 67 Tuesday, May 25, 2021 11:26 AM TROUBLESHOOTING Symptoms Possible Cause & Solution Door does not The door cannot be opened for safety reasons once the open. appliance starts. • This is normal. You can safely open the door after turns off.
- Page 69 global_main.book.book Page 68 Tuesday, May 25, 2021 11:26 AM TROUBLESHOOTING Symptoms Possible Cause & Solution Cycle end is Unbalance is detected or suds removing programme is delayed • This is normal. The time remaining shown on the display is only an estimated duration. Actual time may vary. Performance Symptoms Possible Cause &...
- Page 70 global_main.book.book Page 69 Tuesday, May 25, 2021 11:26 AM TROUBLESHOOTING Symptoms Possible Cause & Solution Wrinkling Appliance is not unloaded promptly. • Always remove items from the appliance as soon as the programme is complete. Appliance is overloaded. • The appliance can be fully loaded, but the drum should not be tightly packed with items.
- Page 71 global_main.book.book Page 70 Tuesday, May 25, 2021 11:26 AM TROUBLESHOOTING ezDispense Symptoms Possible Cause & Solution Refill Alarm Detergent/softener has built up on the fluid level sensor. continues to • Open the compartment covers and clean the insides of the display when ezDispense compartments with warm water.
- Page 72 global_main.book.book Page 71 Tuesday, May 25, 2021 11:26 AM TROUBLESHOOTING Symptoms Possible Cause & Solution Detergent, You need the ezDispense compartment's horizontal softener leaks maintenance. from the lid of the • Leakage occurs when the ezDispense compartment is ezDispense tilted. Slide the ezDispense compartment out or in slowly compartments.
- Page 73 Customer Care and Service Contact an LG Electronics customer information centre. • To find an LG Electronics authorised service personnel, visit our website at www.lg.com and follow the instructions found there. • Self-repair is not recommended as it could further damage the device and void the guarantee.
- Page 74 global_main.book.book Page 73 Tuesday, May 25, 2021 11:26 AM Memo...
- Page 75 global_main.book.book Page 74 Tuesday, May 25, 2021 11:26 AM Memo...
- Page 76 global_main.book.book Page 75 Tuesday, May 25, 2021 11:26 AM Memo...
- Page 77 global_main.book.book Page 73 Tuesday, May 25, 2021 11:26 AM...