Table of Contents
Advertisement
Available languages
Available languages
Quick Links
Advertisement
Chapters
Table of Contents

Related Manuals for LG 108C


Summary of Contents for LG 108C
- Page 1 User GUide LG 108C www.lg.com MFL69382201 (1.0)
- Page 3 This handset is not suitable for people who have a visual impairment due to the • touch screen keyboard. © Copyright 2015 LG Electronics, Inc. All rights reserved. LG and the LG logo are • registered trademarks of LG Group and its related entities. All other trademarks are the property of their respective owners.
-
Page 4: Table Of Contents
Contents Phone Overview ........4 Contacts in Your Phone’s Memory ..18 Storing Basics ........18 Menus Overview ........6 Customizing Individual Entries ..18 Menu Access ........6 Speed Dial ........19 Storing a Number with Pauses ..19 Getting Started with Your Phone .. - Page 5 Erasing messages......33 5. Turn off all sounds .......52 Recent call ........34 6. Hearing aid .........53 1. Missed calls .......34 Settings ..........53 2. Received calls ......34 1. Sounds settings ......53 3. Dialed calls .........35 2. Display settings ......58 4. All calls ........35 3.
-
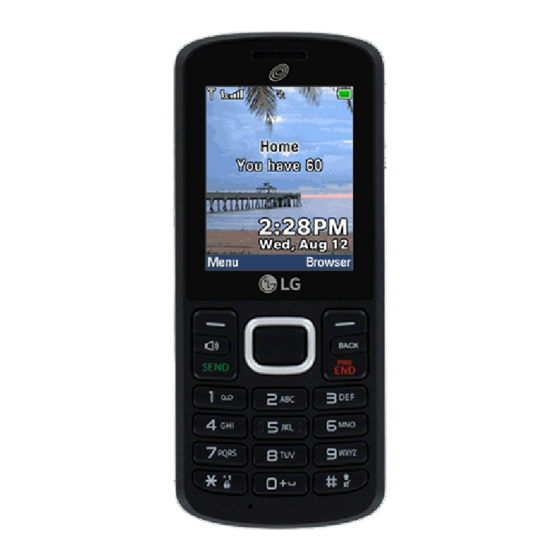
Page 6: Phone Overview
Phone Overview Earpiece Clear/Voice Commands Deletes single spaces or characters with a quick LCD Screen press. Press and hold to delete entire words while Selection keys entering text. Press once Each of these keys to back out of menus, performs the functions one level at a time. - Page 7 Charger/Accessory Port Connects the phone to the charger or other compatible accessories. Charging with PC & USB cable: You can use your computer to charge your phone. Connect one end of a USB cable to the Charger/ Accessory Port on your phone and the other end to a high-power USB port on your PC (commonly located on the front panel of the computer).
-
Page 8: Menus Overview
Menus Overview Menu Access While in standby mode, press the Left Selection Key [Menu] to access your phone’s menus. There are two methods of accessing menus and submenus: Use the Directional Keys to highlight a menu/option and press to select it. •... - Page 9 5. Contacts <Name> 1. Readout 1. TXT message 6. Redial 1. Full Readout 2. Voicemail 7. Help 2. Menu Readout 3. Emergency tone 2. Ez tip calculator 3. Digit dial Readout 4. Missed call 3. Eco-calculator 4. Caller ID Readout 4.
- Page 10 8. Name match for dialing 4. Voice privacy 3. Phone settings 5. DTMF tones 1. Airplane mode 5. Memory 2. Set directional keys 1. Memory usage 3. Voice commands 2. My pictures 1. Confi rm choices 3. My sounds 2. Sensitivity 4.
-
Page 11: Getting Started With Your Phone
Getting Started with Your Phone The Battery Installing the Battery Use the fingernail cutout at the bottom left of the back cover to lift and remove the cover. Align the battery contacts with the terminals near the top of the battery compartment and insert the battery into the compartment. - Page 12 Removing the Battery Turn the phone off. Use the notch at the bottom left of the back cover to lift and remove the cover. Use the fingertip opening near the bottom of the battery compartment to lift the battery out. Getting Started with Your Phone...
-
Page 13: Charging The Battery
Charging the Battery Use the charger provided with your phone. WARNING: Use only the charger provided with the phone. Using any charger other than the one included with the phone may damage your phone or battery. NOTICE: Please make sure that the 'B' side faces up before inserting a charger or USB cable into the Charger/Accessory Port of your phone. -
Page 14: Battery Temperature Protection
NOTE: Low-power USB ports are not supported, such as the USB ports on your keyboard or bus-powered USB hub. Battery Temperature Protection If the battery gets overheated, the phone will automatically turn off. When you turn the phone back on, a message pops up alerting you that the phone was powered off for your safety. -
Page 15: Making Calls
Press the Power/End Key until the LCD screen lights up. Turning the Phone Off Press and hold the Power/End Key until the LCD screen turns off. Making Calls Make sure the phone is turned on. Enter the phone number. Press the Send Key to dial the call. -
Page 16: Quick Access To Convenient Features
Quick Access to Convenient Features Sounds Off Quickly deactivate your phone's sounds when you're in a place where phone sounds would be disruptive. From standby mode press and hold the for 3 seconds. To return to normal sounds mode, press and hold the Mute Function The Mute Function prevents the transmission of your voice to the caller. -
Page 17: 3-Way Call
3-way call You can talk with two people at the same time with a three-way conversation on your wireless phone. Airtime and other charges, which may include toll or long distance charges, will apply for all simultaneous calls until you end one call. While on the first call, dial the 10-digit number of the second person. -
Page 18: Voice Commands
Voice commands Voice commands allow you to do things by verbal command (e.g., make calls, check Voicemail, etc.). Press the Voice Commands Key on the keypad. Call Say "Call" and then call someone simply by saying the name or phone number. -
Page 19: Entering And Editing Information
Entering and Editing Information Text Input The following key functions are available to help with text entry: Left Selection Key: Press to change the text input mode. Shift: Press to change capitalization (initial cap, caps lock, lowercase). Right Selection Key: Press to display other matching words in the database in T9 word mode. -
Page 20: Contacts In Your Phone's Memory
Contacts in Your Phone’s Memory Storing Basics Enter a number (max. 48 digits), then press the Left Selection Key [Save]. Use the Directional Key to highlight Add new contact/ Update existing, then press Use the Directional Key to highlight Mobile 1/ Home/ Business/ Mobile 2/ Fax, then press Enter a name (max. -
Page 21: Speed Dial
Speed Dial Allows you to set up your Speed dials. Press Left Selection Key [Menu]. Press Contacts. Press Contact list. Use the Directional Key to highlight a Contact entry, then press the Left Selection Key [Edit]. Use the Directional Key to highlight a phone number, then press the Right Selection Key [Options]. - Page 22 Enter the additional number(s) (e.g., pin number, credit card number, etc.). Press the Left Selection Key [Save]. Choose Add new contact/ Update existing. Choose Mobile 1/ Home/ Business/ Mobile 2/ Fax. Continue entering information for the Contact entry as necessary. NOTE: If you selected Update existing after you select the number type, the contact information is automatically updated.
-
Page 23: Adding Another Phone Number
Adding Another Phone Number From standby mode Enter a phone number, then press the Left Selection Key [Save]. Use the Directional Key to highlight Update existing, then press Use the Directional Key to highlight an existing entry then press update your contact entry. Use the Directional Key to highlight Mobile 1/ Home/ Business/ Mobile 2/ Fax, then press... -
Page 24: Changing The Default Number
Changing the Default Number The Default Number is the phone number you first entered when you created the Contact. However, another number can be saved as the Default number. Press Left Selection Key [Menu]. Press Contacts. Press Contact list. Use the Directional Key to highlight an entry. -
Page 25: Speed Dialing
Press Contacts. Press Contact list. Use the Directional Key to highlight a Contact entry to edit and press [View]. Highlight the phone number with the speed dial, then press the Right Selection [Options]. Press Remove speed dial. Press [Yes] to confirm. Speed Dialing Allows you to make phone calls quickly and easily to numbers stored in Contacts. -
Page 26: Using The Phone Menus
Using the Phone Menus Contacts The Contacts menu allows you to store names, phone numbers and other information in your phone’s memory. 1. New contact Allows you to add a new contact to your Contact list. NOTE: Using this submenu, the number is saved as a new Contact, not into an existing Contact. -
Page 27: Favorites
Use the Directional Key to scroll through your Contacts alphabetically. Press the Right Selection Key [Options] to select one of the following: • New contact/ Erase/ New TXT message/ Call/ Manage contacts/ Set as favorite/ Search entry mode Press the Left Selection Key [Edit] to edit the contact. -
Page 28: Groups
Press the Left Selection Key [Done]. Once you have added Contacts to the Favorites list, the following options will become available in the Favorites menu: Left Selection Key : View OK Key : New TXT message Right Selection Key : Options Move position/ Remove/ Remove all 4. -
Page 29: Speed Dials
5. Speed dials Allows you to view your list of Speed dials or designate Speed dials for numbers entered in your Contacts. Press Left Selection Key [Menu]. Press Contacts. Press Speed dials. Use the Directional Key to highlight the Speed dial position, or enter the Speed dial digit and press [Set]. -
Page 30: New Txt Message
The message icon ( ) is displayed on the screen. In the case of a high priority message, the icon ( ) will flash. 1. New TXT message This menu allows you to send messages. The Basics of Sending a Text Message Press Left Selection Key [Menu]. -
Page 31: Inbox
Use the keypad to enter your message. Press [Send]. 2. Inbox The phone alerts you in up to 3 ways when you receive a new message: By displaying a notification message on the screen. • By sounding a tone or vibration, if set. •... -
Page 32: Sent
Sort by sender/time Allows you to sort messages alphabetically by sender's name or by time received. Message Icon Reference New text message Read text message Massage failed Message sent Multiple messages delivered Multiple messages failed Multiple messages delivery Multiple messages sent incomplete Text message draft Message delivered... -
Page 33: Drafts
While viewing a message, choose for the following options: Forward/ Lock/ Save as template/ Add to contacts/ Message info 4. Drafts Saved message drafts are stored here. Press Left Selection Key [Menu]. Press Messages. Press Drafts. Highlight a message. The following options are available. Press [Edit] to continue editing the message. -
Page 34: Templates
Press Voicemail. The following options are available. Press the Left Selection Key [Clear] to clear the Voicemail counter. Then • press [Yes]. Press the Send Key [Call] to listen to the message(s). • Press and hold from your phone, as a speed dial to your voicemail. 6. -
Page 35: Erasing Messages
Messages font size Allows you to select Small, Normal or Large for the size of the text characters. TXT instant reply Select On to text a reply instantly. Or, select Off. TXT auto scroll Select On to automatically scroll text down while viewing messages. Or, select Off. -
Page 36: Recent Call
Recent call The Recent call menu has lists of phone numbers and/or Contacts entries for calls you placed, accepted, or missed. It is continually updated as new numbers are added to the beginning of the list and the oldest entries are removed from the bottom of the list. -
Page 37: Dialed Calls
Press the Send Key to place a call to the number. • Press the Right Selection Key [Options] to select: • Save to contacts(Contact info)/ Erase/ Lock(Unlock)/ Erase all/ Call timer Press the Left Selection Key [Message] to send a message to the number. •... -
Page 38: Call Timer
Press the Send Key to place a call to the number. • Press the Right Selection Key [Options] to select: • Save to contacts(Contact info)/ Erase/ Lock/ Erase all/Call timer Press the Left Selection Key [Message] to send a message to the number. •... -
Page 39: Notepad
Press Left Selection Key [Menu]. Press Browser. Notepad Allows you to add, read, edit, and erase notes to yourself. Press Left Selection Key [Menu]. Press Notepad. Press Notepad. Press the Left Selection Key [Add] to write a new note. Press the Left Selection Key to change the entry mode. -
Page 40: Pictures
2. Pictures This menu allows you to view all of your pictures and buy graphics. Access and Options Press Left Selection Key [Menu]. Press Multimedia. Press Pictures. Browse the submenus. 2.1 My pictures Allows you to view and manage photos stored in the phone. Press Left Selection Key [Menu]. - Page 41 Editing a Picture Access My pictures, then use the Directional Key to highlight a picture. Press [View] and then press the Right Selection Key [Options] and select Edit to zoom, rotate and crop the photo. 2.2 Default pictures Allows you to view and manage default photos stored in the phone. Press Left Selection Key [Menu].
-
Page 42: Ringtones
3. Ringtones Personalize your phone with ringtones. A wide variety of choices are available, such as current hits, pop, hip-hop, and more. 3.1 My sounds Allows you to record a new sound or select a desired sound. How to record a new sound Press Left Selection Key [Menu]. -
Page 43: Tools
3.2 Default ringtones Allows you to manage your preloaded sounds. Press Left Selection Key [Menu]. Press Multimedia. Press Ringtones. Press Default ringtones. Use the Directional Key to highlight a ringtone and press [Play] to play the ringtone or the Left Selection Key [Set as] to set the ringtone as: Ringtone: Sets the ringtone for your incoming calls. -
Page 44: Voice Commands
1. Voice commands This feature provides you with the following options equipped with AVR (Advanced Voice Recognition) technology. Each option has its detailed information on the phone and you can check it out by pressing the Left Selection Key [Info]. Press Left Selection Key [Menu]. - Page 45 1.1 Start command Press Left Selection Key [Menu]. Press Tools. Press Voice commands. NOTE: You can also press the Voice Commands Key from standby mode to quickly access the Voice commands feature. 1.1.1 Call <Name or Number> Say "Call" and then call someone simply by saying the name or phone number. Please speak clearly and say the name or number exactly as it is entered in your Contact List.
-
Page 46: Ez Tip Calculator
1.1.4 Check <Item> The ‘Check’ command allows you to check out a wide range of items such as Phone status, Voicemail, Messages, Missed calls, Time, Signal strength, Battery level, Volume and My number. 1.1.5 Contacts <Name> You can look up names in your Contacts (for example, 'Contacts John') as well as manage your Contact List including creating, erasing or modifying. -
Page 47: Eco-Calculator
3. Eco-calculator Allows you to keep track of your walking and cycling distances. The amount of CO that is decreased by walking and cycling is displayed for you to see. Press Left Selection Key [Menu]. Press Tools. Press Eco-calculator. Select the Walking or Cycling fields to edit the hours and miles. NOTE: The decreasing CO amount is automatically updated when you enter the hour or mile amounts. -
Page 48: Info Search
4. Info search Allows you to search items stored on the phone. Press Left Selection Key [Menu]. Press Tools. Press Info search. Enter two or more characters in the search field and press [Search]. By default, the phone will search all the categories. To specify the categories, highlight All and press the Left Selection Key [Set]. -
Page 49: Unit Converter
6. Unit converter Allows you to converts units to desired units. Press Left Selection Key [Menu]. Press Tools. Press Unit converter. Choose from Area/ Length/ Mass/ Temperature/ Volume/ Velocity. Select the known unit type and enter the quantity you would like to convert. The conversion will occur upon entering the desired quantity. -
Page 50: Alarm Clock
Highlight a Calendar setting field, then press the Left Selection Key [Set]. For each Calendar event you can set: • Start date • Start time • End date • End time • Repeat • Until • Alerts • Tones • Vibrate Use the Directional Key to highlight the setting you want, then press Press... -
Page 51: Calculator
Press [Save] after setting all of the Alarm fields as necessary. How to delete alarms From the Alarm clock list, press the Right Selection Key [Options] to view the available options. Press Erase to delete an alarm or Erase all to delete all alarm entries. Press [Yes]. -
Page 52: Readout
1. Readout Allows you to set the Readout settings. Press Left Selection Key [Menu]. Press Accessibility. Press Readout. 1.1 Full Readout Allows your phone to read the screens out loud for blind and low-vision users or when your eyes are busy. Press Left Selection Key [Menu]. - Page 53 Press Digit dial Readout. Use the Directional Key to highlight a setting, then press [Set]. 1.4 Caller ID Readout Allows you to set how you want the Caller ID to be read out. Press Left Selection Key [Menu]. Press Accessibility. Press Readout.
-
Page 54: Invert Color
2. Invert color Allows you to invert the color theme. Press Left Selection Key [Menu]. Press Accessibility. Press Invert color. Use the Directional Key to highlight a setting, then press [Set]. 3. Large text Allows you to use larger font for menus. Press Left Selection Key [Menu]. -
Page 55: Hearing Aid
Press Turn off all sounds. Use the Directional Key to highlight a setting, then press [Set]. 6. Hearing aid Allows you to activate or deactivate Hearing Aid Compatibility for this device. Press Left Selection Key [Menu]. Press Accessibility. Press Hearing aid. Use the Directional Key to highlight a setting, then press [Set]. - Page 56 1.1.1 Master volume Allows you to set the Master volume. Press Left Selection Key [Menu]. Press Settings. Press Sounds settings. Press Volumes. Press Master volume. 1.1.2 Readout volume Allows you to set the Readout volume. Press Left Selection Key [Menu]. Press Settings.
- Page 57 1.2 Call sounds Allows you to set how the phone alerts you for types of incoming calls. Press Left Selection Key [Menu]. Press Settings. Press Sounds settings. Press Call sounds. 1.2.1 Call ringtone Allows you to set the ringtones for incoming calls. Press Left Selection Key [Menu].
- Page 58 Use the Directional Key to highlight a setting, then press [Set]. 1.2.3 Caller ID Readout Allows you to set how you want the Caller ID to be read out. Press Left Selection Key [Menu]. Press Settings. Press Sounds settings. Press Call sounds.
- Page 59 Select an alert option. Call connect Alerts you when the call is connected. Call disconnect Alerts you when the call is disconnected. Charge complete Alerts you when the battery is completely charged. Use the Directional Key to highlight a setting, then press [Set].
-
Page 60: Display Settings
2. Display settings Provides options to customize the phone’s display screen. Press Left Selection Key [Menu]. Press Settings. Press Display settings. 2.1 Backlight timer Allows you to set the duration for illuminating the backlight for the main display, front display, and keypad. Each is set separately. Press Left Selection Key [Menu]. - Page 61 2.3 Wallpaper Allows you to choose the kind of background to be displayed on the phone's LCD in standby mode. Press Left Selection Key [Menu]. Press Settings. Press Display settings. Press Wallpaper. Highlight a Wallpaper submenu and press Highlight a picture and press [Set] to set it as the wallpaper.
- Page 62 Use the Directional Key to highlight a setting, then press [Set]. NOTE: Press the Left Selection Key [Preview] to preview the selected font type. 2.6 Font size Allows you to set the font size for Dial digits, Menu & List and Message. This setting is helpful for those who need the text to display a little bit larger.
-
Page 63: Phone Settings
Press Clock format. Use the Directional Key to highlight a setting, then press [Set]. NOTE: Press the Left Selection Key [Preview] to preview the selected clock format. 2.8 Name match for dialing Allows you to display names when entering matching phone numbers to dial. Press Left Selection Key [Menu]. - Page 64 3.2 Set directional keys NOTE: To access these shortcuts press the Directional Key in the direction (up,down,left,right) set from standby mode for the Shortcut you want to access. Press Left Selection Key [Menu]. Press Settings. Press Phone settings. Press Set directional keys. Use the Directional Key to highlight a shortcut key you want to set.
- Page 65 3.5 Location Allows you to set GPS (Global Positioning System: Satellite assisted location information system) mode. Press Left Selection Key [Menu]. Press Settings. Press Phone settings. Press Location. Use the Directional Key to highlight a setting, then press [Set]. NOTES: GPS satellite signals are not always received by the phone, especially •...
- Page 66 Press Security. Enter the four-digit lock code. The lock code is the last 4 digits of your mobile phone number if it is set. The lock code is the last 4 digits of your MEID if your mobile phone number is not set. 3.7.1 Edit codes Allows you to enter a new four-digit lock code.
- Page 67 Use the Directional Key to highlight the restriction then press Calls: Incoming calls Allow all/ Contacts only/ Block all Calls: Outgoing calls Allow all/ Contacts only/ Block all Text msgs: Incoming messages Allow all/ Contacts only/ Block all Text msgs: Outgoing messages Allow all/ Contacts only/ Block all Data Allow all/ Block all...
- Page 68 Enter the four-digit lock code. Press Lock phone now. NOTE: To unlock the phone from standby mode, press the Right Selection Key [Unlock] and enter the four-digit lock code. 3.7.5 Reset default Allows you to reset your phone to the factory default settings. Press Left Selection Key [Menu].
-
Page 69: Call Settings
4. Call settings The Call settings menu allows you to set various configurations for calling features. 4.1 Answer options Allows you to determine how the phone will answer an incoming call. Press Left Selection Key [Menu]. Press Settings. Press Call settings. Press Answer options. - Page 70 TTY + talk: Users who can talk but cannot hear receive a text message and send voice through TTY equipment. TTY + hear: Users who can hear but cannot talk send a text message and receive voice through TTY equipment. off: Users send and receive without TTY equipment.
- Page 71 4.3 One touch dial Allows you to initiate a speed dial call by pressing and holding the speed dial digit. If set to Off, Speed dial numbers designated in your Contacts will not function. Press Left Selection Key [Menu]. Press Settings.
-
Page 72: Memory
5. Memory Allows you to check your phone’s internal memory. Shows the memory information saved in your phone. Press Left Selection Key [Menu]. Press Settings. Press Memory. Use the Directional Key to select a submenu, then press to view the memory used. - Page 73 Press ESN/MEID. 6.3 Icon glossary Allows you to view all the icons and their meanings. Press Left Selection Key [Menu]. Press Settings. Press Phone info. Press Icon glossary. Select a submenu and browse through the icons. 6.4 SW/HW version Allows you to view the versions of various applications such as SW, PRL, Browser, AVR, MMS, hardware version.
-
Page 74: For Your Safety
For your safety The highest SAR value for this model phone when tested for use at the ear is 1.27 W/kg and when worn on the body, as described in this user guide, is 1.18 W/kg (body-worn measurements differ among phone models, depending upon available accessories and FCC requirements). -
Page 75: Fcc Hearing-Aid Compatibility (Hac) Regulations For Wireless Devices
Please only use an approved charging accessory to charge your LG phone. Improper handling of the Accessory/Charger Port, as well as the use of an incompatible charger, may cause damage to your phone and void the warranty. - Page 76 M-Ratings: Phones rated M3 or M4 meet FCC requirements and are likely to generate less interference to hearing devices than phones that are not labeled. M4 is the better/ higher of the two ratings. T-Ratings: Phones rated T3 or T4 meet FCC requirements and are likely to generate less interference to hearing devices than phones that are not labeled.
- Page 77 For information about hearing aids and digital wireless phones Wireless Phones and Hearing Aid Accessibility http://www.accesswireless.org/ Gallaudet University, RERC http://tap.gallaudet.edu/Voice/ FCC Hearing Aid Compatibility and Volume Control http://www.fcc.gov/cgb/dro/hearing.html The Hearing Aid Compatibility FCC Order http://hraunfoss.fcc.gov/edocs_public/attachmatch/FCC-03-168A1.pdf Hearing Loss Association of America [HLAA] http://hearingloss.org/content/telephones-and-mobile-devices Warranty Laws The following laws govern warranties that arise in retail sales of consumer goods:...
- Page 78 over provisions of the Commercial Code when they conflict. [CC §1790.3.] For purposes of small claims actions, this course will focus on rights and duties under the state laws. For your safety...
- Page 79 © Copyright 2015 LG Electronics, Inc. Todos los derechos reservados. LG y el • logotipo de LG son marcas registradas de LG Group y sus entidades relacionadas. Todas las demás marcas son propiedad de sus respectivos titulares.
- Page 80 Contenido Descripción general del teléfono ..4 Introducir y editar información ..18 Entrada de texto ....... 18 Descripción general de menús ... 6 Contactos en la memoria de su Acceso al menú ........6 teléfono ..........19 Introducción a su teléfono ....9 Principios básicos de almacenamiento 19 Batería..........
- Page 81 5. Buzón de voz ......34 2. Invertir color .......57 6. Plantillas ........35 3. Texto grande .......57 Ajustes de mensajes .......35 4. Audio mono ........57 Borrar mensajes ......36 5. Desactivar todos los sonidos ..58 Llamadas recientes ......36 6. Prótesis auditiva ......58 1.
-
Page 82: Descripción General Del Teléfono
Descripción general del teléfono Auricular Tecla Borrar/Comandos de voz Elimina espacios o caracteres individuales con solo Pantalla LCD presionar rápidamente. Manténgala presionada para Teclas de Selección eliminar palabras completas Cada una de estas teclas en pantallas de entrada de realiza las funciones texto. - Page 83 Puerto para cargador/accesorios Conecta el teléfono al cargador u otros accesorios admitidos. Cargar con el cable USB y PC: Puede usar su computadora para cargar el teléfono. Conecte uno de los extremos del cable USB al puerto para cargador/accesorios del teléfono y el otro extremo a un puerto USB con alta potencia de la PC (por lo general, ubicado en el panel frontal de la computadora).
-
Page 84: Descripción General De Menús
Descripción general de menús Acceso al menú En el modo de espera, presione la Tecla de selección izquierda [Menú] para acceder a los menús del teléfono. Existen dos métodos para acceder a los menús y submenús: Use las Teclas Direccionales para resaltar un menú... - Page 85 1. Llamar <Nombre o 1. Volumen maestro Número> 2. Volumen de lectura Calculadora 2. Enviar msj a <Nombre o 3. Volumen del teclado Número o Grupo> 2. Sonidos de llamada 3. Ir a <Menú> Accesibilidad 1. Timbre de llamada 4. Verifi car <Elemento> 1.
- Page 86 2. Brillo 6. Bloqueo automático del teclado 3. Fondo de pantalla 7. Seguridad 1. Mis fotos 8. Selección de sistema 2. Presentación de diapositivas 4. Programación de llamada 4. Estilo de menú 1. Opciones de contestar 1. Cuadrícula 2. Modo TTY (Predeterminado) 3.
-
Page 87: Introducción A Su Teléfono
Introducción a su teléfono Batería Instalar la batería Utiliza la ranura en la parte inferior izquierda de la tapa posterior para levantar y retirar la tapa. Alinee los contactos de la batería con los terminales cerca de la parte superior del compartimiento de la batería e inserte la batería dentro del compartimiento. - Page 88 Extraer la batería Apague el teléfono. Utiliza la ranura en la parte inferior izquierda de la tapa posterior para levantar y retirar la tapa. Use la abertura para dedo que se encuentra cerca de la parte inferior del compartimiento de la batería para levantarla. Introducción a su teléfono...
-
Page 89: Cargar La Batería
Cargar la batería Use el cargador incluido con su teléfono. ADVERTENCIA: Use únicamente el cargador que viene incluido con el teléfono. El uso de cualquier cargador distinto del que viene incluido con el teléfono puede dañar el teléfono o la batería. AVISO: Por favor asegúrese de que el lado 'B' esté... -
Page 90: Protección De La Temperatura De La Batería
NOTA: No se admiten puertos USB con poca potencia, como los puertos USB del teclado o el nodo USB alimentado desde el bus. Protección de la temperatura de la batería Si la batería se sobrecalienta, el teléfono se apagará en forma automática. Cuando vuelve a encender el teléfono, aparece un mensaje de alerta avisando que el teléfono se apagó... -
Page 91: Encender Y Apagar El Teléfono
Encender y apagar el teléfono Encender el teléfono Si el nivel de carga de la batería es bajo, inserte la batería y conecte el teléfono a un tomacorriente externo. Presione la Tecla Encender/Finalizar hasta que se encienda la pantalla LCD. Apagar el teléfono Mantenga presionada la Tecla Encender/Finalizar hasta que se apague la... -
Page 92: Remarcar Llamadas
Remarcar llamadas Cuando está en la pantalla principal, presione la Tecla Enviar una vez para acceder a todas las llamadas. Resalta el número que desea marcar y luego presione la Tecla Enviar otra vez. Iconos de la pantalla Cuando el teléfono está encendido, la línea superior de la pantalla LCD muestra los iconos de estado del teléfono. -
Page 93: Acceso Rápido A Características Convenientes
Acceso rápido a características convenientes Sonidos desactivados Desactive rápidamente los sonidos del teléfono cuando usted se encuentre en un lugar en el que los sonidos perturbarían el ambiente. Desde el modo de espera toque y mantenga presionada por 3 segundos. Para regresar al modo de sonidos normales, presione y mantenga presionada la tecla Función Silencio La función Silencio evita la transmisión de su voz a quien llama. -
Page 94: Llamada De Conferencia
Llamada de conferencia Puede conversar con dos personas al mismo tiempo mediante una llamada de conferencia en su teléfono inalámbrico. Se pueden aplicar cargos por tiempo de difusión y otros cargos, que pueden incluir tasas o cargos por llamadas de larga distancia, entre otros, por todas la llamadas simultáneas hasta que finalice una llamada. - Page 95 Enviar msj a: Diga "Enviar mensaje" y el comando le preguntará por el tipo de mensaje. Ir a: Esta opción le permite acceder a un menú en el teléfono. Verificar: Le permite verificar varios elementos, como el estado del teléfono, buzón de voz, mensajes, llamadas perdidas, hora, fuerza de señal, nivel de batería, volumen y el número del teléfono.
-
Page 96: Introducir Y Editar Información
Introducir y editar información Entrada de texto Las siguientes funciones de teclas están disponibles para ayudarle a ingresar texto: Tecla de selección izquierda: Presiónela para cambiar el modo de entrada de texto. Mayúscula: Presiónela para cambiar el uso de mayúsculas (mayúscula inicial, todas mayúsculas, minúsculas). -
Page 97: Contactos En La Memoria De Su Teléfono
Contactos en la memoria de su teléfono Principios básicos de almacenamiento Introduzca un número (máx. 48 dígitos), luego presione la Tecla de selección izquierda [Grdr]. Use la Tecla Direccional para resaltar Nuevo contacto/ Actualizar existente y luego presione Use la Tecla Direccional para resaltar Móvil 1/ Casa/ Negocio/ Móvil 2/ Fax y luego presione Ingrese un nombre (32 caracteres máximo) y cualquier información adicional y... -
Page 98: Marcación Rápida
Marcación rápida Le permite configurar sus Marcación rápida. Presione la Tecla de selección izquierda [Menú]. Presione Contactos. Presione Lista de contactos. Use la Tecla Direccional para resaltar una entrada de contacto y luego presione la Tecla de selección izquierda [Corregir]. Use la Tecla Direccional para resaltar un número de teléfono y luego presione la Tecla de selección derecha... - Page 99 Introduzca el número telefónico, luego presione la Tecla de selección derecha [Opciones]. Use la Tecla Direccional para resaltar Añadir 2-seg pausa o Añadir espera y luego presione Ingrese los números adicionales (por ejemplo, número de PIN, número de tarjeta de crédito, etc.). Presione la Tecla de selección izquierda [Grdr].
-
Page 100: Agregar Otro Número De Teléfono
Agregar otro número de teléfono Desde el modo de espera Introduzca el número telefónico y luego presione la Tecla de selección izquierda [Grdr]. Use la Tecla Direccional para resaltar Actualizar existente y luego presione Use la Tecla Direccional para resaltar una entrada existente y luego presione para actualizar la entrada del contacto. -
Page 101: Cambiar El Número Predeterminado
Use la Tecla Direccional para resaltar una entrada de contacto y luego presione la Tecla de selección izquierda [Corregir]. Use la Tecla Direccional para resaltar el campo que desea modificar. Realice los cambios y presione [Grdr] para actualizar la entrada de contacto. Cambiar el número predeterminado El número predeterminado es el número de teléfono que ingresó... -
Page 102: Marcación Rápida
Use la Tecla Direccional para resaltar una entrada. Presione la Tecla de selección derecha [Opciones]. Presione Borrar. Presione [Sí] para confirmar. Eliminar un número de marcación rápida Presione la Tecla de selección izquierda [Menú]. Presione Contactos. Presione Lista de contactos. Use la Tecla Direccional para resaltar una entrada de contacto que desee editar y presione... - Page 103 Marcación rápida de varios dígitos Cuando mantiene presionada una tecla numérica, esta le indica al teléfono que llame a un número de marcación rápida. Para llamar a un número de marcación rápida de más de un dígito, presione los primeros dígitos y luego mantenga presionado el último dígito.
-
Page 104: Uso De Menús Del Teléfono
Uso de menús del teléfono Contactos El menú Contactos le permite almacenar nombres, números de teléfono y otra información en la memoria del teléfono. 1. Nuevo contacto Le permite agregar un nuevo contacto a la lista de contactos. NOTA: Usando este submenú, el número se guarda como un nuevo contacto, no en un contacto existente. -
Page 105: Favoritos
Use la Tecla Direccional para desplazarse por sus contactos en orden alfabético. Presione la Tecla de selección derecha [Opciones] para seleccionar una • de las siguientes opciones: Nuevo contacto/ Borrar/ Nuevo mensaje de TXT/ Llamada/ Administrar contactos/ Fijar como favorito/ Modo de ingreso de la búsqueda Presione la Tecla de selección izquierda [Corregir] para editar el contacto. -
Page 106: Grupos
Presione la Tecla de selección izquierda [Hecho]. Después de agregar los contactos a la lista de favoritos, tendrá las siguientes opciones disponibles en el menú Favoritos: Tecla de selección izquierda : Ver Tecla OK : Nuevo mensaje de TXT Tecla de selección derecha : Opciones Mover posición/ Quitar/ Quitar todo 4. -
Page 107: Marcación Rápida
Agregar contactos a un grupo En el submenú Grupos, presione [Ver] y luego [Añadir]. Resalte el contacto deseado y presione [Subry]. Presione la Tecla de selección izquierda [Hecho] para agregar el contacto al grupo. 5. Marcación rápida Le permite ver su lista de números de Marcación rápida o designar Marcación rápida para números ingresados en sus Contactos. -
Page 108: Nuevo Mensaje De Txt
su proveedor de servicio las funciones y capacidades del sistema. Cuando vea un mensaje recibido, puede llamar al remitente presionando la Tecla • Enviar Alerta de nuevo mensaje de texto El teléfono puede alertarle cuando recibe nuevos mensajes. Las opciones incluyen: El teléfono muestra un mensaje en la pantalla. -
Page 109: Entrada
Seleccione el campo Para, presione la Tecla de selección derecha Añadir. Seleccione una opción y presione De contactos Para seleccionar un destinatario de su lista de contactos. De llamadas rctes Para seleccionar un destinatario de llamadas recientes. Favoritos Para seleccionar un destinatario de Favoritos. Grupos Para seleccionar un destinatario de sus grupos. - Page 110 Presione la Tecla de selección derecha [Opciones] para acceder a las • siguientes opciones: Contestar Responde a la dirección del remitente del mensaje recibido. Responder con copia Responde a la dirección del remitente con una copia del texto del mensaje original incluida. Adelantar Reenvía el mensaje a otras direcciones de destino.
-
Page 111: Enviado
Borrador de mensaje de texto Mensaje entregado Bloquear Alta prioridad 3. Enviado El menú Enviado almacena todos los mensajes enviados. Presione la Tecla de selección izquierda [Menú]. Presione Mensajes. Presione Enviado. Resalte un mensaje. Las siguientes opciones están disponibles. Presione [Abrir] para ver el mensaje. -
Page 112: Buzón De Voz
Presione la Tecla de selección izquierda [Borrar] para eliminar el mensaje. • Presione la Tecla de selección derecha [Opciones] para acceder a las • siguientes opciones: Enviar Envía el mensaje seleccionado. Añadir a contactos Guarda el número, la dirección de correo electrónico y los números de la dirección incluida en el mensaje en sus Contactos. -
Page 113: Plantillas
6. Plantillas Permite administrar las plantillas de texto. Presione la Tecla de selección izquierda [Menú]. Presione Mensajes. Presione Plantillas. Seleccione un mensaje para ver su contenido y editarlo. Presione [Grdr] para guardarlo. Ajustes de mensajes Le permite configurar los ajustes de sus mensajes. Presione la Tecla de selección izquierda [Menú]. -
Page 114: Borrar Mensajes
Auto-dsplz TXT Seleccione Encendido para desplazarse automáticamente hacia abajo por el texto mientras ve los mensajes o seleccione Apagado. Alerta CMAS Ajuste su configuración para recibir alertas de emergencia. Este menú le ofrece tres opciones: Recibir alertas/ Recordatorio de alerta/ Alerta tono/ Alerta vibración Firma Seleccione Personalizada para crear/editar una firma para enviar en forma automática con los mensajes. -
Page 115: Perdidas
1. Perdidas Le permite ver la lista de llamadas perdidas; hasta 90 entradas. Presione la Tecla de selección izquierda [Menú]. Presione Llamadas reciente. Presione Perdidas. Use la Tecla Direccional para resaltar una entrada y luego Presione [Abrir] para abrir la entrada. •... -
Page 116: Marcadas
Presione la Tecla de selección izquierda [Mensaje] para enviar un • mensaje al número. 3. Marcadas Le permite ver la lista de llamadas salientes; hasta 90 entradas. Presione la Tecla de selección izquierda [Menú]. Presione Llamadas reciente. Presione Marcadas. Use la Tecla Direccional para resaltar una entrada y luego Presione [Abrir] para abrir la entrada. -
Page 117: Tiempo De Llamadas
Presione la Tecla de selección derecha [Opciones] para seleccionar: • Guardar en contactos (Info de contacto)/ Borrar/ Asegurar (Abrir)/ Borrar todo/ Tiempo de llamadas Presione la Tecla de selección izquierda [Mensaje] para enviar un • mensaje al número. ACCESO DIRECTO: Para ver una lista rápida de todas sus llamadas recientes, presione la Tecla Enviar desde el modo de espera. -
Page 118: Acceso Web
Acceso web Le permite acceder a noticias, deportes, información del clima y correo electrónico desde su dispositivo. El acceso y las selecciones dentro de esta función dependen de su proveedor de servicios. Para obtener información específica sobre el acceso a Internet desde el teléfono, comuníquese con su proveedor de servicios. -
Page 119: Fotos
Presione Grabar voz. Presione para comenzar a grabar y luego presione [Alto] para detener la grabación. 2. Fotos Este menú le permite ver todas las fotos y comprar gráficos. Acceso y opciones Presione la Tecla de selección izquierda [Menú]. Presione Multimedia. - Page 120 Presentación de diapositivas Reproduce todas las imágenes como una presentación de diapositivas. Administrar fotos Le permite marcar varias imágenes para borrarlas, enviarlas o bloquearlas/desbloquearlas. Renombrar Le permite cambiar el nombre del archivo. Aseg Le permite bloquear o desbloquear. Los archivos bloqueados no pueden borrarse accidentalmente.
-
Page 121: Timbres
2.3 Comprar gráficos Este menú le permite comprar imágenes. Presione la Tecla de selección izquierda [Menú]. Presione Multimedia. Presione Fotos. Presione Comprar gráficos. 3. Timbres Personalice su teléfono con tonos de timbre. Está disponible una amplia variedad de opciones, como hits, hip-hop, y más. 3.1 Mis sonidos Le permite grabar un nuevo sonido o seleccionar el sonido que desee. - Page 122 Opciones con un archivo de sonido resaltado: Presione la Tecla de selección izquierda [Fij como] para establecer como • Timbre, Contacto ID o Sonidos de alerta. Presione [Escu] para escuchar el sonido. • Presione la Tecla de selección derecha [Opciones] para seleccionar: •...
-
Page 123: Herramientas
3.3 Comprar timbres Este menú le permite comprar timbres. Presione la Tecla de selección izquierda [Menú]. Presione Multimedia. Presione Timbres. Presione Comprar timbres. Herramientas Las herramientas de su teléfono incluyen comandos de voz, calculadora de propinas EZ, calculadora ecológica, buscador de información, cronómetro y conversor de unidades. - Page 124 Confirmar selecciones Permite elegir si desea que el sistema de comandos le solicite con una lista de coincidencias potenciales. Elija entre Automático/ Siempre confirmar/ Nunca confirmar. Sensibilidad Permite controlar cómo el sistema filtra las coincidencias. Elija entre Más sensible/ Automático/ Menos sensible. Entrenar de voz Esta opción le permite entrenar el teléfono para que reconozca los patrones de voz.
- Page 125 1.1.2 Enviar msj a <Nombre o Número o Grupo> Diga "Enviar mensaje" y el comando le pedirá que defina el tipo de mensaje. Una vez elegido el tipo de mensaje, se le solicitará el nombre, número o grupo del contacto. El mensaje se iniciará automáticamente. Si dice un comando de oración completa, como "Enviar mensaje a Roberto", el sistema iniciará...
-
Page 126: Ez Propina
2. Ez propina Le permite calcular las cantidades de una cuenta fácilmente y rápidamente utilizando el total de la cuenta, el % de propina y el número de personas como variables. Presione la Tecla de selección izquierda [Menú]. Presione Herramientas. Presione Ez propina. -
Page 127: Búsqueda De Info
Presione la Tecla de selección izquierda [Prog] para ajustar los siguientes ajustes. Modo Le permite cambiar la animación de la pantalla principal de la • ecocalculadora a Persona o Arbol. Dependiendo de la información que ingresó por última vez (Caminata o Ciclismo), aparecerá una animación. El número de árboles en la animación se calcula según la cantidad de CO que se redujo. -
Page 128: Cronómetro
Para ver un resultado de búsqueda, resalte los resultados deseados y presione [Ver]. Si desea reintentar la búsqueda, presione la Tecla de selección derecha [Reintentar]. Si desea iniciar una nueva búsqueda, presione la Tecla de selección izquierda [Búsqueda], ingrese la palabra clave y presione Si no se encuentran resultados, se le solicitará... -
Page 129: Convertidor De Unidades
6. Convertidor de unidades Permite convertir unidades a las unidades deseadas. Presione la Tecla de selección izquierda [Menú]. Presione Herramientas. Presione Convertidor de unidades. Elija entre Área/ Longitud/ Masa/ Temperatura/ Volumen/ Velocidad. Seleccione el tipo de unidad conocida e introduzca la cantidad que desea convertir. - Page 130 Introduzca el asunto y desplácese hacia abajo para configurar los ajustes restantes. Resalte un campo de ajuste en el Calendario y presione la Tecla de selección izquierda [Ajustar]. Para cada evento del Calendario, puede ajustar lo siguiente: • Fecha de inicio •...
-
Page 131: Reloj Despertador
2. Reloj despertador Le permite configurar hasta 10 alarmas. A la hora de la alarma, su alarma aparecerá en la pantalla LCD y sonará la alarma. Presione la Tecla de selección izquierda [Menú]. Presione Mi agenda. Presione Reloj despertador. Presione la Tecla de selección izquierda [Añadir]. -
Page 132: Calculadora
Calculadora Permite realizar cálculos matemáticos simples. Presione la Tecla de selección izquierda [Menú]. Presione Calculadora. Presione Calculadora. Introduzca los números para obtener el valor que desea. Para borrar los elementos ingresados, presione la Tecla de selección izquierda [Despejar]. Utilice la Tecla de selección derecha [Operadores] para agregar otros operadores. - Page 133 1.1 Lectura completa Permite que el teléfono lea las pantallas en voz alta para personas ciegas y con poca visión o para cuando sus ojos estén ocupados. Presione la Tecla de selección izquierda [Menú]. Presione Accesibilidad. Presione Lectura. Presione Lectura completa. Use la Tecla Direccional para resaltar un ajuste y luego presione [Fijado].
- Page 134 1.4 Lectura de ID de llamador Permite establecer cómo desea que el teléfono lea la identificación de llamada en voz alta. Presione la Tecla de selección izquierda [Menú]. Presione Accesibilidad. Presione Lectura. Presione Lectura de ID de llamador. Use la Tecla Direccional para resaltar un ajuste y luego presione [Fijado].
-
Page 135: Invertir Color
2. Invertir color Permite invertir el tema de color. Presione la Tecla de selección izquierda [Menú]. Presione Accesibilidad. Presione Invertir color. Use la Tecla Direccional para resaltar un ajuste y luego presione [Fijado]. 3. Texto grande Permite utilizar fuente más grande para los menús. Presione la Tecla de selección izquierda [Menú]. -
Page 136: Desactivar Todos Los Sonidos
5. Desactivar todos los sonidos Este menú desactiva todos los sonidos del teléfono. Presione la Tecla de selección izquierda [Menú]. Presione Accesibilidad. Presione Desactivar todos los sonidos. Use la Tecla Direccional para resaltar un ajuste y luego presione [Fijado]. 6. Prótesis auditiva Le permite activar o desactivar la compatibilidad de audífonos para este dispositivo. - Page 137 1.1 Volúmens Le permite ajustar rápidamente la configuración de sonidos principales para llamadas entrantes y mensajes (texto y correo de voz). Presione la Tecla de selección izquierda [Menú]. Presione Configuración. Presione Programación de sonidos. Presione Volúmens. Ajuste el volumen con la Tecla Direccional and presione [Fijado] para guardar la configuración.
- Page 138 1.1.3 Volumen del teclado Le permite ajustar el volumen del teclado. Presione la Tecla de selección izquierda [Menú]. Presione Configuración. Presione Programación de sonidos. Presione Volúmens. Presione Volumen de teclado. 1.2 Sonidos de llamada Le permite ajustar la manera en que el teléfono le avisa sobre los tipos de llamada entrantes.
- Page 139 SUGERENCIA: para escuchar un tono de timbre antes de establecerlo, presione la Tecla de selección izquierda [Escu]. 1.2.2 Vibrar de llamada Permite establecer que el teléfono vibre cuando recibe una llamada entrante. Presione la Tecla de selección izquierda [Menú]. Presione Configuración.
- Page 140 Presione Sonidos de alerta. Seleccione Mensaje de TXT/ Buzón de voz/ Timbre de emergencia/ Llamadas perdidas. El menú Sonidos de alerta ofrece las siguientes opciones: Tono/ Vibrar/ Recordatorio La excepción es el menú Tono de emergencia. Este menú incluye las siguientes opciones: Alerta/ Vibrar/ Apagado.
-
Page 141: Programación De Pantalla
Presione Encendido o Apagado. Use la Tecla Direccional para resaltar un ajuste y luego presione [Fijado]. 1.6 Modo senior Le permite ajustar el teléfono para que se adapte en forma automática a entornos ruidosos al ajustar el nivel de sonido y mejorar la inteligibilidad de la voz. NOTA: La función del Modo senior está... - Page 142 Presione Programación de pantalla. Presione Temporizador de luz de fondo. Use la tecla Direccional para resaltar una configuración, luego presione [Fijado] 5 Segundos/ 10 Segundos/ 20 Segundos/ 30 Segundos/ 60 Segundos • 2.2 Brillo Le permite establecer los niveles de la luz de fondo. Presione la Tecla de selección izquierda [Menú].
- Page 143 2.4 Estilo de menú Le permite elegir entre distintos temas para los menús del teléfono. Presione la Tecla de selección izquierda [Menú]. Presione Configuración. Presione Programación de pantalla. Presione Estilo de menú Resalte una foto y presione [Fijado] para para establecerla como fondo de pantalla.
- Page 144 2.6 Tamaño de fuente Permite establecer el tamaño de la fuente para Dígitos de marcación, Menú & lista y Mensaje. Esta configuración es útil para quienes necesitan mostrar el texto un poco más grande. Presione la Tecla de selección izquierda [Menú].
-
Page 145: Programación De Teléfono
Use la Tecla Direccional para resaltar un ajuste y luego presione [Fijado]. NOTA: Presione la Tecla de selección izquierda [Avance] para previsualizar el formato de reloj seleccionado. 2.8 Coincidencia de nombre para marcación Le permite mostrar nombres al ingresar números de teléfono que coincidan para marcarlos. - Page 146 3.2 Establecer teclas direccionales NOTA: Para acceder a estos accesos directos presione la tecla Direccional en la dirección (arriba, abajo, izquierda, derecha) ajustada desde el modo en espera para el acceso directo que desea acceder. Presione la Tecla de selección izquierda [Menú].
- Page 147 3.5 Ubicación Permite ajustar el modo de GPS (Sistema de posicionamiento global: sistema de información de ubicación asistido por satélite). Presione la Tecla de selección izquierda [Menú]. Presione Configuración. Presione Programación de teléfono. Presione Ubicación. Use la Tecla Direccional para resaltar un ajuste y luego presione [Fijado].
- Page 148 Presione Configuración. Presione Programación de teléfono. Presione Seguridad. Ingrese el código de bloqueo de cuatro dígitos. Si está configurado, el código de bloqueo consta de los 4 últimos dígitos de su número de teléfono móvil. El código de bloqueo consiste en los últimos 4 dígitos de su MEID, si no configura su número de teléfono móvil.
- Page 149 Ingrese el código de bloqueo de cuatro dígitos. Seleccione un menú de Restricciones, y presione Use la Tecla Direccional para resaltar la restricción y luego presione Llamadas: Llamadas entrantes Permitir todas/ Solo de contactos/ Bloquear todas Llamadas: Llamadas salientes Permitir todas/ Solo de contactos/ Bloquear todas Texto msjs: Mensajes entrantes Permitir todas/ Solo de contactos/ Bloquear...
- Page 150 3.7.4 Bloquear teléfono ahora Le permite establecer el ajuste de Bloquear teléfono ahora del teléfono. Presione la Tecla de selección izquierda [Menú]. Presione Configuración. Presione Programación de teléfono. Presione Seguridad. Introduzca el código de bloqueo de cuatro cifras. Presione Bloquear teléfono ahora. NOTA: Para desbloquear el teléfono desde el modo de espera, presione la Tecla de selección derecha [Abrir] e ingrese el código de bloqueo...
-
Page 151: Programación De Llamada
3.8 Selección de sistema Permite configurar el entorno de administración del teléfono. Deje este ajuste como predeterminado a menos que desee alterar la selección del sistema según las instrucciones de su proveedor de servicios. Presione la Tecla de selección izquierda [Menú]. - Page 152 4.2 Modo TTY Le permite conectar un dispositivo TTY para comunicarse con otras personas que también estén usando uno de ellos. Un teléfono con compatibilidad TTY puede traducir los caracteres escritos en voz. También se puede traducir la voz a caracteres y después mostrarse en el TTY.
- Page 153 Realice una conexión telefónica con el número que desee. Una vez establecida la conexión, use el equipo TTY para escribir y enviar un mensaje de texto o de voz. El mensaje de texto o de voz que reciba se verá en la pantalla del equipo TTY. Modo TTY (Teletypewriter) Cuando se establece Modo de transmisión/...
-
Page 154: Memoria
4.4 Privacidad de voz Le permite ajustar la función de privacidad de voz para llamadas CDMA. CDMA ofrece en forma inherente privacidad de voz. Si necesita más información, consulte a su proveedor de servicios. Presione la Tecla de selección izquierda [Menú]. -
Page 155: Información De Teléfono
Use la Tecla Direccional para seleccionar un ajuste y luego presione [OK]. 6. Información de teléfono Le permite ver información específica de su teléfono y del software. Presione la Tecla de selección izquierda [Menú]. Presione Configuración. Presione Información de teléfono. 6.1 Mi número Le permite ver su número de teléfono. - Page 156 Presione Glosario de iconos. Seleccione un submenú y navegue por los iconos. 6.4 Versión SW/HW Le permite ver las versiones de distintas aplicaciones como software, PRL, Acceso Web, AVR, MMS, Bluetooth y hardware. Presione la Tecla de selección izquierda [Menú]. Presione Configuración.
-
Page 157: Por Su Seguridad
Por su seguridad El valor más elevado de la SAR para este modelo de teléfono cuando se lo probó para usarse en el oído es de 1,27 W/kg y cuando se lo usa sobre el cuerpo, según lo descrito en esta guía del usuario, es de 1,18 W/kg (las mediciones del uso en el cuerpo varían en función de los modelos de los teléfonos y dependen de los accesorios disponibles y los requisitos de la FCC). -
Page 158: Reglamentaciones De Compatibilidad Con Audífonos (Hac) Para Dispositivos Inalámbricos
Use solo accesorios originales aprobados por el fabricante o accesorios que no • contengan metales. Utilice solamente accesorios de carga aprobados para cargar el teléfono LG. La manipulación inadecuada del puerto de carga/accesorio y el uso de un cargador no compatible pueden ocasionarle daños al teléfono y anular la garantía. - Page 159 dispositivos auditivos. No se han clasificado todos los teléfonos. Los teléfonos clasificados incluyen la clasificación en su caja o llevan una etiqueta en la caja. Las clasificaciones no son garantías. Los resultados variarán en función del dispositivo auditivo del usuario y su pérdida de audición. Si su dispositivo auditivo resultara ser vulnerable a la interferencia, es posible que no pueda usar satisfactoriamente un teléfono clasificado.
- Page 160 En el ejemplo de la izquierda, si un audífono cumple con la clasificación de nivel M2 y el teléfono inalámbrico cumple con la clasificación de nivel M3, la suma de los dos valores es igual a M5. Esto debería proporcionarle al usuario del audífono un “uso normal” mientras usa su audífono con ese teléfono inalámbrico en particular.
- Page 161 Legislación sobre la garantía Las leyes siguientes rigen las garantías que surgen en virtud de las ventas minorista de productos para el consumidor: Ley Song-Beverly de Garantía del Consumidor de California [CC, Sección 1790 y • siguientes] El Código Uniforme de Comercio de California, División Dos [Cód. de Comercio, •...