Table of Contents
Advertisement
Advertisement
Table of Contents

Related Manuals for HP DF1010P1


Summary of Contents for HP DF1010P1
- Page 1 Digital Photo Frame User Guide 7” df730p1 9” df940p1 10.1” df1010p1...
- Page 2 Note: Your frame style and features may differ from those documented in this User Guide. UG-E_DF730P1-DF940P1-DF1010P1_v1.0_02-11...
-
Page 3: Table Of Contents
Table of Contents Introduction ... 5 DPF Key Features ... 5 What’s in the Box ... 5 Compatible Memory Cards ... 5 Overview of the DPF ... 5 Remote Control ... 6 Control Buttons on DPF ... 6 Getting Started ... 7 The HOME Screen ... - Page 4 Frequently Asked Questions ... 17 Important Safety Precautions ... 18 Cleaning the DPF... 18 Product Specifications ... 18 Limited Warranty ... 19 FCC Statement ... 20 Declaration of Conformity... 20...
-
Page 5: Introduction
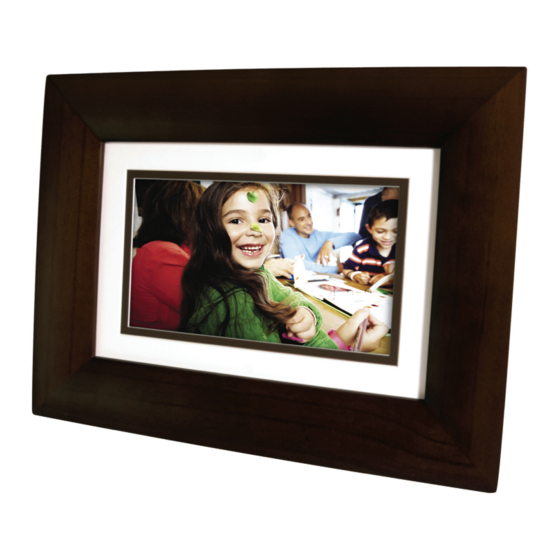
Introduction Welcome to the Hewlett Packard (HP) Multimedia Digital Photo Frame (DPF). Now you can display your digital photos directly from your memory card, no computer is necessary. DPF Key Features Simple Plug & Play Displays digital photo files (JPEG up to 16 mega pixels) ... -
Page 6: Remote Control
Remote Control You can access all of the DPF’s features, and perform all of the functions by using the remote control. You will be able to perform several functions with the remote control that are not possible with the top-back panel control buttons. Note: Before first time use, pull the plastic tab sticking out of the remote control. -
Page 7: Getting Started
Getting Started 1. Plug the AC Power Adapter into the DPF’s DC power jack and an electrical wall outlet. 2. Slide the power button on the left side of the DPF up to the ON position. 3. If prompted, select the desired language for the user interface display (varies by model). 4. -
Page 8: About Selecting Options
Photo Import Method Set Sleep Mode Reset to Factory Defaults Set Language Greeting Card About Selecting Options Throughout this User Guide, when you are instructed to ‘select’ a function option or button, unless otherwise instructed, to highlight [the referenced option] Select Media Source If you have inserted one or more external media sources (i.e., memory card), you can use the function to switch between the internal memory and your external media source for viewing your photos. -
Page 9: Enter Greeting
= Select the background image appropriate for your greeting (can also be your personal photo) STYLE 1 2 3 4 = Clears the entry field = View your greeting with selected background image = Toggle between the Title and Message entries TITLE MSG = Toggles between upper and lower case letters, and the following symbols: ... -
Page 10: Photos
4. Your greeting will now display your personal photo as the background. 5. Select to view your greeting, and then press VIEW 6. When satisfied with your greeting, select PHOTOS PHOTOS feature includes many functions for optimizing and customizing your viewing preferences. You can view your photos individually or as slideshows. -
Page 11: Optimal Image Display
3. Use to scroll through the LCD options, and use achieved. 4. Use to select Done TIP: You can also adjust the brightness with the dial on the left side of the DPF. Optimal Image Display You can choose the desired display mode for displaying your photos on the DPF as follows: HOME 1. -
Page 12: Delete Photos From Internal Memory
2. To import all photos, select To import individual photos, select 3. Use (‘ ‘ will deselect). 4. Press , and then select Delete Photos from Internal Memory You can delete photo files from the DPF’s internal memory, but not from an external media source (i.e., memory card). -
Page 13: Set Slideshow Interval
3. To assign an individual photo: With the desired photo displayed, press To assign multiple photos: Press ‘ 4. Select Assign to Folder Play Slideshow from Slideshow Folder HOME 1. On the screen, press 2. Select Select Media Source Slideshow Folders 3. -
Page 14: Set Slideshow Shuffle
Set Slideshow Shuffle You can set the slideshow to display your photos in a random ‘shuffle’ order, or display them in the order as stored on the selected media source. HOME 1. On the screen, press 2. Select Slideshow Setup 3. -
Page 15: Run The Schedule
Run the Schedule After the schedule times have been set (per above instructions), you will use the you want the schedule to take effect. There are two methods for running the schedule, either from a slideshow or from the CAUTION: After you select the pressing remote or control button, powering off) and the schedule will not take effect until you select this function again to re-activate. -
Page 16: Set Sleep Mode
6. Similarly, to copy files from your computer to the internal memory, first locate the files on your computer, select the files you want to copy, and then drag and drop them into the DPF’s internal memory drive. TIP: Most cameras and graphic programs store photos in the Windows XP ‘My Pictures’ or Vista ‘Pictures’ folder. -
Page 17: Set Language
Q: How do I set up my DPF? A: It is very simple to get your Digital Photo Frame setup. Just plug the power adapter into the DPF and into a standard wall outlet, and then power it on. A slideshow will begin displaying the images pre-loaded in the internal memory. To view your own photos, insert a memory card into the card slot on the side of the DPF. -
Page 18: Important Safety Precautions
Important Safety Preca utions Always follow these basic safety precautions when using your Multimedia Digital Photo Frame (DPF). This will reduce the risk of fire, electric shock, and injury. WARNING: Do not expose this product to rain or moisture. Do not remove the cover. There are no user-serviceable parts inside. Refer all servicing to qualified personnel. -
Page 19: Limited Warranty
Replacement products and parts are warranted to be free from defects in materials or workmanship for 90 days, or for the remainder of the warranty period for the HP Product which they are replacing or in which they are installed, whichever is longer. -
Page 20: Fcc Statement
Supplier's Address: Product Name and Model: Hewlett Packard Digital Picture Frame Regulatory Model Number: (1) df730p1 (2) df750p1 (3) df840p1 (4) df940p1 (5) df1010p1 (6) df1200p1 Conforms to the following product specifications: EMC: EN 55022: 2006 + A1: 2007 EN 61000-3-2: 2006...