Table of Contents
Advertisement
Advertisement
Table of Contents

Related Manuals for HP Photosmart 120


Summary of Contents for HP Photosmart 120
- Page 1 photosmart 120 series digital camera user's manual...
- Page 3 Microsoft Corporation. Apple, Macintosh, and Mac are registered trademarks of Apple Computer, Inc. Materials disposal This HP product contains the following materials that might require special handling at end-of-life: Alkaline manganese dioxide-zinc or lithium-iron disulfide AA batteries. Lead in the solder and some component leads.
-
Page 5: Table Of Contents
1-Getting Started Camera Parts ......8 Setup ........12 Attaching the wrist strap . - Page 6 Finding help on the web....48 Contacting HP Customer Support ... .48 Hardware Repair Services ....49 Obtaining support in the United States .
-
Page 7: 1-Getting Started
Getting Started Congratulations on the purchase of your new HP photosmart 120 series digital camera. This easy-to-use digital camera takes high-quality photos, records video clips, and makes it easy for you to share your photos with family and friends. You can select images that you want to print by using the HP Photo Imaging software for Microsoft®... -
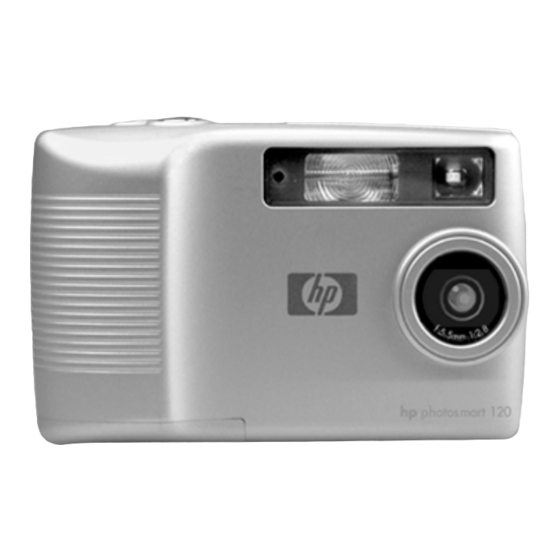
Page 8: Camera Parts
Blinking red—indicates that the 10 second self-timer is in use; blinks with increasing frequency until picture or video is taken Off—indicates that the self-timer is not in use and video is not being recorded hp photosmart 120 user’s manual... - Page 9 1-Getting Started Description Allows you to connect the camera to a computer by using a USB cable Allows you to connect an optional HP AC power adapter to the camera to operate the camera without batteries Allows access to the batteries...
- Page 10 Increases image quality from Good Better button Zoom in on your subject or set the 10 second self-timer Selects the Turns the camera power on and the memory card Wrist strap attachment hp photosmart 120 user’s manual Best Flash setting...
- Page 11 Name Display button Tripod mount Arrow buttons button Display Viewfinder light 1-Getting Started Description Switch from Preview mode to Playback mode Allows tripod mounting Move to menu options and navigate through images Switch to Playback mode and select menu options Provides menu information to operate the camera;...
-
Page 12: Setup
Installing the batteries Open the Battery door Insert the batteries (supplied) as indicated. NOTE For more information about batteries, refer to Appendix A: Accessories and Battery Management. on the bottom of the camera. hp photosmart 120 user’s manual... -
Page 13: Installing A Memory Card (Optional)
Installing a memory card (optional) Your digital camera comes with 4 megabytes (MB) of internal memory so that you can store images and video in your camera. However, you can use an optional CF memory card to expand the camera’s memory so that you can store more images and video. -
Page 14: Turning On Power
The first time you turn the camera on, the following screen appears and prompts you to choose a language. Scroll to the language that you want by using the Arrow buttons. Press to select the highlighted language. button to turn on the camera. hp photosmart 120 user’s manual... -
Page 15: Setting The Date And Time
Setting the date and time The camera has a real-time clock that records the date and time at which you take each picture. The screen appears with the date format setting highlighted (M = Month, D = Day, and Y = Year). Press the date format that you want, and then press the right Arrow button to highlight the date setting. -
Page 16: Installing The Software
Windows Insert the HP Photo Imaging CD into the CD-ROM drive of your computer. The installation window automatically appears. - Page 17 USB Configuration Select Disk Drive, and then press OK. Insert the HP Photo Imaging CD into the CD-ROM drive of your computer. Double-click the CD icon on the desktop. Double-click the appropriate language folder, and then double-click the installer icon.
- Page 18 120 user’s manual...
-
Page 19: 2-Taking Pictures
Taking Pictures Taking a picture You can take a picture almost any time the camera is on, no matter what is showing on the Display. To take a picture: Frame your subject in the viewfinder, and then press the Shutter button. -
Page 20: Recording Video Clips
NOTE Your camera supports a memory card up to 128 MB. Display shows the last frame Display backlight Video button to start recording. You Video hp photosmart 120 user’s manual button again. -
Page 21: Using The Self-Timer
When recording a video clip, you can view the time remaining for recording on the Display. The camera automatically stops recording when the timer reaches zero. You can use the digital zoom feature to zoom in on your subject, although you cannot change the zoom setting while you are recording. -
Page 22: Using Digital Zoom
The Display screen, and then press the button once to turn on digital zoom. The button twice activates the self- to frame your subject, and then take the hp photosmart 120 user’s manual Display Display button... -
Page 23: Using The Flash
Using the flash When the camera is on, the flash is automatically set to Auto Flash. If you change the flash setting, the camera will remain in that setting until you change it again or turn off the camera. By using the the flash settings in the following order. - Page 24 8 MB CF memory card—up to 25 images To change the image quality: Press the button until the setting you want appears on the Display. The settings change incrementally from Better, and then to Best. hp photosmart 120 user’s manual Best mode. Good...
-
Page 25: 3-Reviewing Your Images
Reviewing Your Images Playback mode After you have taken some pictures and they are stored in the camera, you can view them in Playback mode. You can also view your video clips, delete or magnify images, and more. To review your images: Press the button to activate Playback mode. - Page 26 NOTE To preserve battery life, you can connect to an optional HP AC adapter while reviewing your images. HP supports only HP AC adapters and other accessories expressly approved by HP. For more information about accessories for your camera, refer to Appendix A: Accessories and Battery Management.
-
Page 27: Playback Menu
Playback menu You can use the Playback menu to print, delete, or magnify images. You can also view thumbnails of your images, or use Setup option to change the settings on your camera. To view the Playback menu, press the the menu options by using the Icon Description... -
Page 28: Printing Your Images
For more information about printing your images, refer to Chapter 4, Connecting and Printing. NOTE If you are viewing a video clip, the inactive because you cannot print video clips. hp photosmart 120 user’s manual Print option is... -
Page 29: Deleting Your Images
Deleting your images You can delete the current image, or all images, by using the Delete option. You can scroll to the selection you want by using the buttons. Highlight your selection, and then press OK. By using the Delete menu, you can select: This Image - Deletes the current image. -
Page 30: Viewing Thumbnail Images
Thumbnail option. You can scroll through your thumbnail images by using the buttons. To view an enlarged image, select it, and then press OK. To move to the next page of images, use the buttons. hp photosmart 120 user’s manual... -
Page 31: Magnifying Your Images
Magnifying your images You can enlarge your images on the Display by using the Magnify option. Select an image that you want to magnify, and then press OK. A progress bar is visible on the Display as the image is magnified. -
Page 32: Using The Setup Menu
- causes the computer to recognize the camera as a disk drive (Mass Storage Device Class (MSDC) standard). menu to configure preferences on the Setup menu by using the to make your selection. - causes the computer to recognize the hp photosmart 120 user’s manual... - Page 33 NOTE If you are connecting to a computer running Windows, you can use either setting. If you are connecting to a Macintosh computer, you must change this setting to information, refer to Chapter 1, Getting Started. Move to CF Card This menu option allows you to move images from the camera’s internal memory to a CF memory card.
-
Page 34: Language Menu
Display. For information about how to select a language for your camera, refer to Chapter 1, Getting Started. Exit This menu option exits the Playback menu and returns to Playback mode. hp photosmart 120 user’s manual... -
Page 35: 4-Connecting And Printing
Connecting and Printing You can share your pictures with family and friends by printing them, or storing them on your computer to send by e-mail. To transfer images to your computer, connect the camera to the computer by using the USB cable provided. Connecting to a computer Turn the camera on, and then connect the camera directly to a computer by using the USB cable as shown in the illustration. -
Page 36: Printing Your Images
When you transfer images from the camera to your computer, the print order is copied along with them. The HP Photo Imaging software reads the print order and prints the images that you selected. For more information, refer to the software’s Help. -
Page 37: Printing With A Cf Memory Card
Printing with a CF memory card If your images are stored on a CF memory card, you can insert the memory card directly into most HP photosmart printers. When you insert the memory card into the printer, the printer reads the print order and prints the specified images. For more information, see the instructions available with your printer’s... - Page 38 120 user’s manual...
-
Page 39: 4-Troubleshooting And Support
The charge in the batteries can be low or completely drained. Try installing new or recharged batteries. Ensure that the HP AC adapter is not damaged or defective and is plugged into an electrical outlet with power. If you want to use battery power, disconnect the HP AC adapter from the camera. - Page 40 The camera buttons other than respond when the camera is connected to a computer. Replace the batteries. Remove and reinsert the batteries. Replace the batteries if necessary. Press the Shutter way down. button hp photosmart 120 user’s manual button do not button all the...
- Page 41 The Ni-MH batteries you are using were recharged incorrectly. 5-Troubleshooting and Support Use an HP AC adapter to power the camera when you are using the extended period of time and when you are unloading several images to your computer.
- Page 42 Turn the self-timer off. Do not try to get closer than the camera’s minimum focus range. Hold the camera steady as you press the Shutter a tripod. Turn on flash or use a tripod. hp photosmart 120 user’s manual button or use...
- Page 43 Problem Possible cause Solution My image is There was not too dark. enough light. The flash was on, but the subject was too far away. A light shone behind the subject. Your finger blocked the flash. My image is The flash too bright.
- Page 44 Turn on the camera. Make sure that the cable is firmly connected at both ends. Connect the camera directly to a USB port on the computer. Change the setting to Disk hp photosmart 120 user’s manual USB Configuration Disk Drive.
-
Page 45: Error Messages
Error Messages You may receive error messages on the camera’s Display, or on your computer screen. Error Messages on the Display Message Unsupported card Battery low No images in camera Card full Card is unformatted 5-Troubleshooting and Support Possible cause Solution The card in the Check and ensure that... - Page 46 Make sure you are connected to a connected to a supported USB device that computer. it does not recognize. hp photosmart 120 user’s manual...
-
Page 47: Error Messages On The Computer
USB the hub. hub. You have not If you want to have the chosen to have images removed, choose the images this option from the removed from HP Photo Imaging the camera software. when you unload them to a computer. -
Page 48: Getting Assistance
Contacting HP Customer Support In addition to the Web, you can contact HP by telephone or mail for support and service for your camera. Prices, availability, and hours of support are subject to change without notice. -
Page 49: Hardware Repair Services
Support Center, which can help determine if service is required and direct you to a service site. Otherwise, contact the store where you purchased the product. Or, visit www.hp.com/cpso-support/guide/psd/repairhelp.html the nearest sales and service office. Service is free of charge during the warranty period. Beyond the warranty period, service will be charged. -
Page 50: Upgraded Warranty Options
180 days of product purchase. HP will determine the hardware service offering based upon the outcome of system self-test programs run by the customer through the initial call to the HP Customer Care Center. If during your technical support call it is determined that your product needs replacement, HP will ship you this replacement product next business day free of charge. -
Page 51: Obtaining Support Worldwide
Please check for the details and conditions of phone support in your country or region by consulting website www.hp.com/cposupport/loc/regional.html. Alternatively, you can ask your dealer or call HP at the phone number indicated in this manual. For English support in Europe, contact +44 (0) 207 512 52 02. - Page 52 Russian Federation Saudi Arabia 800 897 14440 Singapore +65 6272 5300 +82 (2) 3270 0700 (Seoul) 0-80-999-0700 (outside Seoul) +44 (0) 207 512 52 02 +7 095 797 3520 (Moscow) +7 812 346 7997 (St. Petersburg) hp photosmart 120 user’s manual...
- Page 53 Slovakia +421-2-68208080 South Africa 086 000 1030 (RSA) +27-11 258 9301 (outside RSA) Spain +34 902 321 123 Sweden +46 (0)8 619 2170 Switzerland +41 (0)848 80 11 11 Taiwan 0 800 01 0055 Thailand +66 (2) 661 4000 Turkey +90 216 579 71 71 Ukraine +7 (380-44) 490-3520...
- Page 54 120 user’s manual...
-
Page 55: Appendix A: Accessories And Battery Management Accessories
Management Accessories You can purchase additional accessories for your camera from your local retailer or online at www.hpshopping.com. Some accessories for your HP photosmart 120 series digital camera include: HP AC power adapter (C8875A) Rechargeable batteries and battery charger CompactFlash (CF) memory card... -
Page 56: Extending Battery Life
NiCd, and NiMH. For the best results with your camera, use photo-lithium or NiMH batteries. Extending battery life Use an optional HP AC adapter when unloading pictures to your computer. Turn the camera off during a pause in picture taking. -
Page 57: Power Conservation
Power Conservation To conserve battery power, the camera’s shuts off automatically when there is no button activity for 60 seconds. If the camera is in Preview mode, it switches to Playback mode. To turn on the the camera, press any button. If no buttons are pressed for 5 minutes, the camera turns off (unless it is connected to a computer). - Page 58 120 user’s manual...
-
Page 59: Appendix B: Reference
Appendix B: Reference Camera Specifications Feature Sensor Color depth Resolution Memory type Memory capacity Lens Zoom Capture modes Exposure control Aperture 7-Appendix B: Reference Description 1.0 MP 1/2” 24 bits (8 bits x 3 colors) Good 0.25 MP (576 x 432) Better 1.0 MP (1152 x 864) Best... - Page 60 10 second delay Virtual image viewfinder 1.4” STN Motion JPEG AVI for video clip 4 AA batteries (included) or optional HP AC adapter (6V, 2A type 2 plug) For power consumption data, please see the regulatory supplement included on the CD that came with your camera.
- Page 61 Feature Standards Case Material Tripod mount Dimensions Weight 7-Appendix B: Reference Description MSDC JPEG Motion JPEG AVI DPOF EXIF Plastic External Body Dimensions: 111mm (L) x 44.5mm (W) x 69mm (H) 151 grams (without batteries)
- Page 62 120 user’s manual...
- Page 63 Index Numerics 2x/self-timer button 10 AA batteries 56 AC power adapter connector 9 not working correctly 39 purchase 55 accessibility assistance 48 accessories 55 accidental damage protection alkaline batteries 41, 56 aperture 59 attach wrist strap 12 audio specifications 60 Auto flash 23 backlight on display 20, 57 bag for camera 55...
- Page 64 47 connectors power adapter 9 USB 9 conserve battery life 41, 56 battery power 20, 36 contact HP Customer Support 48 customer support 48 damage protection 50 dark images, troubleshoot 43 date effect when batteries removed 15, 55...
- Page 65 create 36 description 36 print from 36 standards used 61 digital zoom specifications 59 use 10, 22 view effect on subjects 22 dimensions of camera 61 disk drive icon not present on Macintosh computer 44 set camera to be recognized as 32 display button 11 doors...
- Page 66 24 memory capacity 59 resolution 59 hardware repair services 49 help for problems 48 hotline for support 48 HP Customer Support 48 HP support hotline 48 HP SupportPack 50 image quality effect of settings on memory increase 10 recommendations 24...
- Page 67 image capacity per quality level 24 increase 20 move images to CF memory card 33 move images to computer 36 ISO (sensitivity) 60 JPEG compression format for files standards used 61 language choose 14 menu 34 LCD specifications 60 LEDs. lights lens specifications 59 life of batteries...
- Page 68 mount camera on tripod 11 MSDC (Mass Storage Device Class) setting for camera 32, 61 navigate through menus 11 NiCd batteries recharge 56 use 56 NiMH batteries recharge 56 use 56 no images in memory 26 on/off button 10 optical viewfinder blinking light 11, 14, 19, 36 frame pictures 19 location 10...
- Page 69 purchase accessories 55 CF memory card 13, 55 quality button 10 quality levels for images change 23 description 23 image capacity for each 24 image capacity in CF memory card for each 59 increase or decrease 10 recommendations 24 resolution 59 view settings 23 range flash 43...
- Page 70 take pictures 19 video clips 20 technical support 48 telephone support U.S. 49 worldwide 51 thumbnails of images 30 time amount provided by self-timer effect when batteries removed 15, 55 review remaining for video clips 21 set 15 view formats 15 wrong one displayed 42 transfer images from internal memory to computer 36...
- Page 71 50 websites accessibility 48 disposal and recycling 3 HP photosmart 48 HP products 48 purchasing 55 sales and service offices 49 warranty upgrades 50 weight of camera 61 white balance 60 Windows operating systems install bonus software 16...
- Page 72 Index...
- Page 76 Printed in Singapore 2002 *Q2154−90010* Q2154-90010...