Chapters
Table of Contents

Related Manuals for Haier WS137GDAI


Summary of Contents for Haier WS137GDAI
- Page 1 WS137GDAI WS137GDNFI Wine Cellar User Guide Weinkühler Bedienungsanleitung Cave à vin Manuel d'Utilisation Cantinetta per vini Manuale utente Bodega de vinos Manual del Usuario ka na víno Wijnkelder Handleiding...
- Page 2 Safety information WARNING:Risk of r since ammable materials are used. Take care material. WARNUNG: Br Das Symbol weist auf Brandge- fahr hin, da brennbare Materialien verwen- det werden. Verhindern Sie die Entstehung von Bränden, die durch ent ammbare Materialien verursacht werden. ATTENTION: Risque ères Le symbole montre qu’il y’a le risque de maté...
- Page 3 Safety information FIGYELEM: T z / gyúlékony anyag veszélye. A szimbólum azt jelzi, hogy zveszély áll fenn, mivel gyúlékony anyagokat használnak. Ügyel jen arra, hogy ne tegyen rá zveszélyes gyú lékony anyagot.
- Page 5 User Manual Wine Cellar WS137GDAI WS137GDNFI...
- Page 6 Thank You Thank you for purchasing a Haier Product. Please read these instructions carefully before using this appliance. The instructions con- tain important information which will help you get the best out of the appliance and ensure safe and proper installation, use and maintenance.
-
Page 7: Table Of Contents
Content 1- Safety information ........................4 2- Safety tips............................7 3- Maintenance ..........................11 4-Accessories..........................15 5- Product description .........................16 6- Installation ..........................17 7- Use ..............................19 8- Energy saving tips ........................21 9 - Equipment ..........................22 10- Care and cleaning ........................23 11- Troubleshooting ........................24 12- Technical data .........................27 13- Customer service ........................28 14- Wine bottle stacking.......................29... -
Page 8: 1- Safety Information
Safety information This appliance is intended to be used exclusively for the storage of wine.Before switching on the appliance for the rst time read the following safety hints: WARNING! Before rst use Make sure there is no transport damage. Remove all packaging and keep out of children´s reach and dis- pose them in an environmentally friendly manner. - Page 9 WARNING! WARNING: WARNING: WARNING:...
- Page 10 WARNING! WARNING:...
-
Page 11: 2- Safety Tips
Safety tips WARNING! Maintenance / cleaning Make sure children are supervised if they carry out cleaning and maintenance. Disconnect the appliance from the electrical supply before un- dertaking any routine maintenance. Allow at least 7 minutes be- fore restarting the appliance, as frequent starting may damage the compressor. - Page 12 Safety tips Do not use water spray or steam to clean the appliance. Do not clean the cold glass door with hot water. Sudden temper- ature change may cause the glass to break. If you leave your appliance out of use for an extended period, leave it open to prevent odour and unpleasant smells building up inside.
- Page 13 Safety tips Intended use This appliance is intended to be used in household and similar ap- plications such as ments; - farm houses and by clients in hotels, motels and other residen- tial type environments; - bed and breakfast type environments; - catering and similar non-retail applications.
- Page 14 Safety tips Disposal symbol on the product or on its packaging indicates that this product may not be treated as household waste. Instead it shall be handed over to the applicable collection point for the recycling of electrical and electronic equipment. By ensuring this product is disposed of correctly, you will help prevent potential negative con- sequences for the environment and human health, which could otherwise be caused by inappropriate waste handling of this prod-...
- Page 15 WARNING: Clean the door gasket:...
- Page 16 Maintenance Installation door gasket after cleaning: Before installation, make sure that there is no water on the door gasket. Insert the door gasket into the groove , and press the door gasket tightly from the top to the bottom by hand until the whole door gasket is inserted into the groove.
-
Page 19: 4-Accessories
Accessories Check the accessories and literature in accordance with this list: without isolation. Name Quantity User Slide runner Wooden Guide Wooden shelf Shelf Product Model WS137GDAI WS137GDNFI... -
Page 20: 5- Product Description
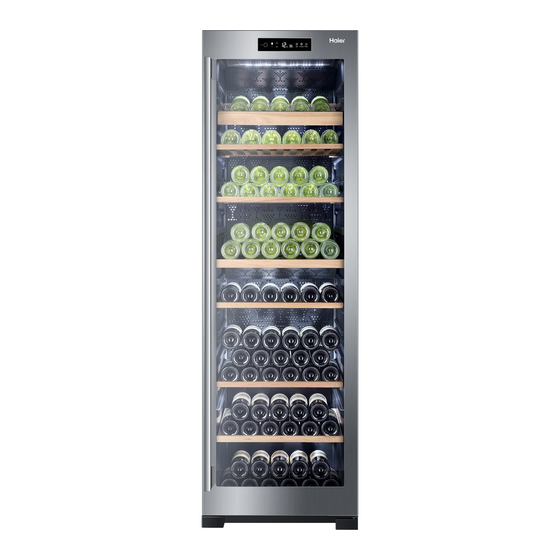
Product description Notice Picture of appliance Master control panel Wooden shelf Telescopic rails Glass door Middle partition Door handle Wooden shelf Adjustable foot screw... -
Page 21: 6- Installation
Installation 1. Unpacking Take the appliance out of the packaging. Remove all packaging materials including the foam base and all adhesive tape hold- ing the accessories. 2. Environmental conditions the temperature inside the appliance and its energy consumption. Do not install the appli- ance near other heat-emitting appliances (ovens, refrigerators) without isolation. - Page 22 Installation 6. Fine tuning of the door The appliance closes more easily if the levelling feet on the front are used: Rotate the adjustable feet (Fig. 6) to turn them up or down: Turning the feet clockwise raises the appliance. Turning the feet counterclockwise lower the appli- ance.
- Page 23 Control Panel Screen Temperature Tem- Power perature Lock/Unlock Up/Down Interior Light Cycle of °F/°C Humidity Temperature Zone Conversion the air Automatic Locking and Unlocking The appliance has an automatic locking function in order to prevent improper operation of the set operating conditions and temperature due to accidental triggering.
- Page 24 Humidity Display Humidity display zone will display the humidity inside your wine cellar in real time. Interior Light To complement the look of your wine collection, a soft light has been built into the wine cella Simply push the "Light" button and the light comes on, push again for o When door is open the light will go on.
-
Page 25: 8- Energy Saving Tips
Engergy saving tips Energy saving tips Make sure the appliance is properly ventilated (see INSTALLATION). Do not install the appliance in direct sunlight or in the near of heat sources (e.g. stoves, heaters). Avoid unnecessarily low temperature in the appliance. The energy consumption in- creases the lower the temperature in the appliance is set. -
Page 26: Equipment
Equipment 1. Shelf 1. The shelves are designed for easy storage and easy removal of the wine.They can be cleaned with a soft towel. 2. Regualr bottles with diameter of 76mm can be stacked. 3. Magnum bottles can be stacked on the bottom. 4. -
Page 27: 10- Care And Cleaning
Care and cleaning 1. Defrosting The defrosting of the wine cellar is done automatically; no manual operation is needed. 2.Replacing the LED lamp The lamp uses LED as its light source,featuring low energy consumption and long service life. If there is any abnormality,please contact the customer service.See CUSTOMER SERVICE. - Page 28 Troubleshooting of a problem please check all shown possibilities and follow below instructions before you contact an after sales service. See CUSTOMER SERVICE. WARNING! Before maintenance, deactivate the appliance and disconnect the mains plug from the mains socket. improper repairs can cause considerable consequential damages. A damaged supply should only be replaced by the manufacturer, its service agent or Error Code Cause...
- Page 30 The door is blocked. Check for blockages like bottles or shelves. To contact the technical assistance, visit our website: https://corporate.haier-europe.com/en/ Under the section “website”, choose the brand of your product and your country. You will to contact the technical assistance.
-
Page 31: 12- Technical Data
Technical data Brand Haier Haier WS137GDAI WS137GDNFI Wine Cellar Wine Cellar Category Household refrigeration category Annual energy consumption (kWh/year) Storage volume (L) Climate class: This appliance is intended to be SN-ST SN-ST used at an ambient temperatur between 10 °C and 38 °C... -
Page 32: 13- Customer Service
Customer Service We recommend our Haier Customer Service and the use of original spare parts. your local dealer or and FAQs and where you can activate the service claim. To contact our Service, ensure that you have the following data available. -
Page 33: 14- Wine Bottle Stacking
Wine bottle stacking 750ml Pull-out shelf 76.1mm Pull-out shelf WS137GDAI WS137GDNFI (137 bottle capacity) - Page 35 Bedienungsanleitung Weinkühler WS137GDAI WS137GDNFI...
- Page 36 Vielen Dank, dass Sie ein Haier-Gerät gekauft haben. Legende Umweltinformationen Entsorgung WARNUNG! Gefahr von Verletzung oder Erstickung!
- Page 37 Inhalt 1- Sicherheitsinformationen ......................4 2- Sicherheitshinweise ........................9 3- Wartung ............................13 4- Zubehör ............................19 5- Produktbeschreibung ......................20 6- Aufstellung und Montage .......................21 7- Verwendung ..........................23 8- Tipps zum Strom sparen ......................25 9- Ausstattung ..........................26 ......................27 11- Fehlerbehebung ........................28 12- Technische Daten ........................31 13- Kundendienst ..........................32 .......................33...
-
Page 38: 1- Sicherheitsinformationen
Sicherheitsinformationen WARNUNG! Aufstellung und Montage WARNUNG... - Page 39 Sicherheitsinformationen WARNUNG! Aufstellung und Montage WARNUNG: Stellen Sie keine Steckdosenleisten oder tragbare WARNUNG: Nur für DE: WARNUNG:...
- Page 40 Sicherheitsinformationen...
- Page 41 Sicherheitsinformationen WARNUNG! Lagern Sie keine Medikamente, Bakterien oder chemische Mit WARNUNG:...
- Page 42 Sicherheitsinformationen...
- Page 43 Sicherheitshinweise WARNUNG! Reinigen und Warten WARNUNG:...
-
Page 44: 2- Sicherheitshinweise
Sicherheitshinweise WARNUNG! nicht WARNUNG:... - Page 45 Sicherheitshinweise...
- Page 46 Sicherheitshinweise Entsorgung Das Symbol WARNUNG!
- Page 47 WARNUNG:...
- Page 48 Reinigung der Regale: WARNUNG:...
-
Page 53: 4- Zubehör
Zubehör Überprüfen Sie das Zubehör und die Dokumentation gemäß dieser Liste: ohne Isolierung. Bedie- nungs- Schlüssel anlei- tung WS137GDAI WS137GDNFI... -
Page 54: 5- Produktbeschreibung
Produktbeschreibung Anmerkung Wegen der technischen Änderungen und verschiedenen Modellen, können einige der Abbildungen von Ihrem Modell abweichen. Geräte Abbildung Teleskopschienen... -
Page 55: 6- Aufstellung Und Montage
Aufstellung und Montage 1. Auspacken Nehmen Sie das Gerät aus der Verpackung. bänder, mit denen das Zubehör befestigt ist. 2. Umgebungsbedingungen Die Raumtemperatur muss immer zwischen 10 °C und 38 °C betragen, da sie die Tempe- Sie das Gerät nicht ohne Isolation in der Nähe von anderen Geräten (Herde, Kühlschränke) auf, die Hitze abgeben. - Page 56 Aufstellung und Montage 6. Feinjustierung der Tür rungsfüße an der Vorderseite verwendet wird: Drehen Sie den einstellbaren Fuß (Abb. 6), um den Fuß nach oben oder unten zu drehen: Durch Drehen der Füße im Uhrzeigersinn wird das Gerät angehoben. Durch das Drehen der Füße gegen den Uhrzeiger- sinn wird das Gerät angehoben.
-
Page 57: 7- Verwendung
Verwendung Bedienfeld Bedienfeld Temperatur Ein-/Aus- Licht sperren/ höher/ Tempera- ein/aus Taste entsperren niedriger turanzeige °F/°C Temperaturbereich Luftfeuch- Lüfter Umschaltung tigkeit ein/aus Automatische Sperr- und Entsperrvorrichtung Das Gerät verfügt über eine automatische Sperrfunktion, durch die eine unbeabsichtigte Änderung der Betriebseinstellungen und Temperatur vermieden werden soll. Das Schlosssymbol wird angezeigt, und das Bedienfeld wird gesperrt, wenn Sie den Tastenbetrieb 30 Sekunden lang einstellen. - Page 58 Verwendung Luftfeuchtigkeitsanzeige Die Luftfeuchtigkeitsanzeige zeigt in Echtzeit die Luftfeuchtigkeit in Ihrem Weinkühlschrank an. Innenbeleuchtung rer Weinsammlung gerecht zu werden, wird der Weinkühlschrank mit einem gedämpften Licht beleuchtet. Drücken Sie einfach die „Light“-Taste, um die Beleuchtung einzuschalten, und drücken Sie sie erneut, um sie wieder auszuschalten. Für höchste Energiee zienz sollten Sie die Beleuchtung nicht ständig eingeschaltet lassen, sondern nur bei Bedarf einschalten.
-
Page 59: 8- Tipps Zum Strom Sparen
Tipps zum Strom sparen Tipps zum Strom sparen Stellen Sie sicher, dass das Gerät sachgemäß belüftet wird (siehe AUFSTELLUNG). Stellen Sie das Gerät nicht in direktem Sonnenlicht oder in der Nähe von Wärmequel- len (z. B. Öfen, Heizungen) auf. Vermeiden Sie unnötigerweise niedrige Temperaturen im Gerät. Der Stromver- brauch steigt, je niedriger die Temperatur im Gerät eingestellt ist. -
Page 60: 9- Ausstattung
Ausstattung 1. Regal 1. Die Regale sollen eine einfache Lagerung und Entnahme des Weins ermöglichen.– Sie lassen sich mit einem weichen Tuch reinigen. 3. Flaschen in Übergröße können auf dem untersten Regal gestapelt werden. 4. Die Menge kann von der gezeigten Anzahl abweichen und möglicherweise können die Flaschen anders gestapelt werden. - Page 61 1. Abtauen Das Abtauen des Weinkühler tomatisch statt, manuelles Abtauen ist nicht notwendig. 2. Die LED-Leuchte e rsetzen wendet LED als Lichtquelle, was einen niedrigen Str rauch und eine lange Lebensdauer zum Resultat hat. Wenn eine Abw kontaktieren Sie bitte den Kundendienst.Siehe KUNDENDIENST. WARNUNG! Ersetzen Sie die LED-Leuchte nicht selbst.
- Page 62 Fehlerbehebung Viele auftretende Probleme können Sie selbst ohne spezielles Fachwissen lösen. Falls einmal ein Problem auftreten sollte, prüfen Sie sämtliche erwähnten Ursachen und pro- bieren die nachstehenden Abhilfemaßnahmen, bevor Sie sich an den Kundendienst wen- den. Siehe KUNDENDIENST. WARNUNG! Schalten Sie das Gerät aus und ziehen Sie den Netzstecker aus der Steckdose, bevor Sie das Gerät warten.
- Page 63 Fehlerbehebung Problem Mögliche Ursache Mögliche Lösung Der Kompressor Netzstecker ist nicht mit der Steck- Verbinden Sie den Netzstecker. funktioniert nicht. dose verbunden. Das Gerät läuft häu- Die Außentemperatur zu hoch. In diesem Fall ist es normal, dass Das Gerät war für einen Zeitraum das Gerät länger läuft.
- Page 64 Fehlerbehebung Problem Mögliche Ursache Mögliche Lösung Auf der Das Klima ist zu warm und zu Bei f tem Klima ist das nor- mal und es wenn die Weinkühleraußenseite Luftf keit sinkt. Die Tür A ten Sie darauf dass die Tür keit.
-
Page 65: 12- Technische Daten
Technische Daten Produktbeschreibung gemäßEU-Verordnung Nr.2019/2016 Marke Haier Haier Modellname / Kennzeichnung WS137GDAI WS137GDNFI Kategorie Weinkühler Weinkühler Haushaltskühlkategorie Jährlicher Energieverbrauch (in kWh/Jahr) Lagervolumen (l) Klimaklasse: Dieses Gerät sollte bei einer Umgebungstemperatur zwischen SN-ST SN-ST 10°C und 38°C eingesetzt werden Luftschallemissionen C(39) - Page 66 Kundendienst WIR empfehlen unseren Haier Kundendienst und den Gebrauch von originalen Ersatzteilen. Wenn Sie ein Problem mit Ihrem Gerät haben sollten, sehen Sie bitte zuerst im Abschnitt FEHLERBEHEBUNG nach. Wenn Sie hierfür keine L kontaktieren Sie bitte ren Händler vor Ort. Alternativ Kundendienst auf www.haier.com, wo Sie die Telef...
- Page 67 750ml 76.1mm WS137GDAI WS137GDNFI...
- Page 69 Manuel d'Utilisation Cave à vin WS137GDAI WS137GDNFI...
- Page 70 Nous vous remercions Avertissement- Consignes importantes de Informations générales et conseils Informations sur l'environnement Mise au rebut...
- Page 71 Sommaire Consignes de sécurité ........................4 Conseils de sécurité ........................7 Entretien ............................11 Accessoires .............................15 Description du produit ........................16 Installation ............................17 Utilisation ............................19 Conseils pour économiser de l‘énergie ..................21 Équipement .............................22 Entretien et nettoyage ........................23 Dépannage ............................24 Informations techniques .......................27 Service Clients ..........................28 Empilage de bouteilles de vin ......................29...
-
Page 72: Consignes De Sécurité
Consignes de sécurité Installation AVERTISSEMENT... - Page 73 Consignes de sécurité Utilisation quotidienne et connaissances, si elles sont encadrées ou formées à l'utilisa-...
- Page 74 Consignes de sécurité...
-
Page 75: Conseils De Sécurité
Conseils de sécurité Assurez-vous que les enfants sont sous surveillance lors du net- de l'eau tiède et une solution de bicarbonate de soude - environ... - Page 76 Conseils de sécurité évitez de brancher et Le système de réfrigération est sous haute...
- Page 77 Conseils de sécurité doivent être stockés,...
- Page 78 Conseils de sécurité Mise au rebut...
- Page 79 d'acétone et toute autre solution organique, acide ou alcaline Nettoyez l’intérieur et l’extérieur de bonne étanchéité comme indiqué l’alcool de qualité alimentaire, nettoyez...
-
Page 80: Entretien
Entretien Monter le joint de porte après le nettoyage : n’est pas mouillé. Insérez le joint de porte dans la rainure et ap- puyez-le fermement du haut vers le bas à l’aide de vos mains jusqu’à ce qu’il soit entièrement inséré dans la rainure. Nettoyage des clayet Les clayettes peuvent être retirées pour être nettoyées. - Page 81 Entretien...
- Page 82 Entretien...
-
Page 83: Accessoires
Accessoires ez les accessoires et la documentation conformément à cette list Clayette Clayette Touche supérieur WS137GDAI WS137GDNFI... -
Page 84: Description Du Produit
Description du produit Photo de l'appareil Panneau central de commande Clayette à bouteilles supérieure Glissières télescopiques Porte en verre Séparation centrale Poignée de porte Clayette en bois Vis réglable Filtre à charbon actif du pied... - Page 85 Installation 1. Déballage Sortez l'appar Retirez tout le tériel et le adhésif tenant les accessoires. 2. Conditions environnementales La t rature de la pièce doit toujours être c entre 10 °C et 38 °C, car elle peut tallez pas l’appareil près d’autres appareils qui produisent de la chaleur (cuisinières, réfri- gérateurs) sans isolation.
-
Page 86: Installation
Installation 6. Ajustement des portes L’appareil se ferme plus facilement lorsque les pieds de mise à niveau situés à l’avant sont r Tournez les pieds réglables (Fig. 6) pour les faire tour- ner vers le haut ou ver L’appareil se soulève lorsque vous tournez les pieds dans le sens horaire. -
Page 87: Utilisation
Utilisation Panneau de commande Verrouillage/ Augmentation/ déverrouillage baisse de la Température Témoin Puissance de l'écran température Zone de Conversion Humidité Cycle d’air température SDgrF/SDgrC Verrouillage et déverrouillage automatiques L'appareil est doté d'une fonction de verrouillage automatique qui permet d accidentelle des conditions de fonctionnement et de la températ errouille en l'absence de toute intervention pendant 30 secondes. - Page 88 Utilisation...
-
Page 89: Conseils Pour Économiser De L'énergie
Conseils pour économiser de l'énergie Conseils pour économiser de l'énergie N’exposez pas l’appareil à la lumière directe du soleil ou à proximité des sources de Évitez de faire fonctionner l'appareil à une température inutilement basse. La consommation énergétique augmente lorsque l'appareil fonctionne à des tempéra- tures basses. -
Page 90: Équipement
Équipement 1. Cl ayette 1. Les clayettes sont conçues pour le stockage et le retrait faciles du vin. Elles peuvent être nettoyées à l’aide d’une serviette douce. 2. Les bouteilles ordinaires d'un diamètre de 76 mm peuvent être empilées. 3. Les bouteilles Magnum peuvent être empilées sur la clayette inférieure. rer du nombre de bouteilles représentées si elles sont remment. -
Page 91: Entretien Et Nettoyage
Entretien et nettoyage 1. Dégivrage La cave à vin se dégivre aut ration manuelle n'est nécessaire. 2. Remplacement des lampes LED comme source d’éclair consomment moins d'énergie et ont une longue durée de vie. En cas d'anomalie, veuillez contacter le service clientèle. -
Page 92: Dépannage
Dépannage Vous pouvez résoudre la plupart des problèmes qui pourraient survenir sans expertise instructions ci-dessous avant de contacter un service après-vente. Voir la section SER- VICE CLIENT. AVERTIS secteur de la prise de courant. des réparations incorrectes peuvent causer des dommages consécutifs considé- rables. - Page 93 Problème Causes probables Solutions possibles Dans ce cas, il est normal que continuellement ou Assurez ven- matiquement une fois la tem- L'intérieur de la cave L’intérieur de la cave à vin a besoin Nettoyez l’intérieur de la cave à est sale s u f f i s a m m e n t Des bouteilles ont été...
- Page 94 La porte est bloquée. clayettes peuvent en être la cause. Pour contacter l'assistance technique, visitez notre site Internet: https://corporate.haier-europe.com/en/ . Dans la section «websites», choisissez la où vous pouvez trouver le numéro de téléphone et le formulaire pour contacter l'assistance technique...
-
Page 95: Informations Techniques
Informations techniques Fiche produit conforme à la r Marque Haier Haier Catégorie Cave à vin Cave à vin Catégorie de réfrigération domes- tique Consommation énergétique annuelle Volume de stock Cet appareil doit être utilisé à SN-ST SN-ST une température ambiante variant entre Émissions de bruits aériens acous-... -
Page 96: Service Clients
Service Clients Nous vous recommandons notre service clients Haier et l’utilisation de pièces de re- change d’origine. Si vous avez un problème avec l’appareil, veuillez-vous référer à la section DÉPANNAGE. Si vous ne trouvez pas de solution, veuillez contacter t support, vous trou- verez des numéros de téléphone et une FAQ. -
Page 97: Empilage De Bouteilles De Vin
Empilage de bouteilles de vin 750ml Clayette-tiroir Clayette-tiroir 76.1mm WS137GDAI WS137GDNFI... - Page 99 Manuale utente Cantinetta per vini WS137GDAI WS137GDNFI...
- Page 100 Grazie Legenda Avvertenza - Informazioni importanti per la Informazioni e suggerimenti generali Informazioni ambientali Smaltimento ATTENZIONE!
- Page 101 Indice Informazioni di sicurezza ........................ 4 Consigli di sicurezza ......................... 7 Manutenzione ..........................11 Accessori ............................15 Descrizione del prodotto ......................16 Installazione .............................17 Uso ..............................19 Suggerimenti per risparmiare energia ..................21 Strumentazione ..........................22 Cura e pulizia............................23 Guida alla risoluzione dei problemi ....................24 Dati tecnici ............................27 Servizio di assistenza ........................28 Impilaggio bottiglie vino ........................29...
-
Page 102: Informazioni Di Sicurezza
Informazioni di sicurezza ATTENZIONE! Prima di iniziare a usare il dispositivo Installazione AVVERTENZA more anomalo durante il funzionamento, nel qual caso occorre... - Page 103 Informazioni di sicurezza ATTENZIONE! AVVERTENZA: AVVERTENZA: Il cavo di alimentazione del AVVERTENZA: Uso quotidiano...
- Page 104 Informazioni di sicurezza ATTENZIONE! causate da caduta o scosse elettriche causate dal contatto con da di non conservarvi all’interno materiali che richiedono tem- AVVERTENZA: terno dell’elettrodomestico, a eccezione di quelli consigliati dal...
-
Page 105: Consigli Di Sicurezza
Consigli di sicurezza ATTENZIONE! Manutenzione / pulizia lizzare acqua calda e soluzione di bicarbonato di sodio; circa un AVVERTENZA: Se il cavo di alimentazione è danneggiato, deve essere sostituito... - Page 106 Consigli di sicurezza Informazioni sul gas refrigerante ATTENZIONE! ventilare bene la stanza, non collegare o scollegare i cavi di alimen- Qualora gli occhi entrino in contatto col refrigerante, risciacquare AVVERTENZA: rosamente le istruzioni e contattare un addetto o il nostro servizio...
- Page 107 Consigli di sicurezza Uso previsto - fattorie e clienti di hotel, motel e altri ambienti residenziali;...
- Page 108 Consigli di sicurezza Smaltimento Il simbolo ATTENZIONE!
-
Page 109: Manutenzione
Manutenzione AVVERTENZA: neutro Pulire la guarnizione della porta: estrarla... - Page 110 Manutenzione Installazione della guarnizione dello sportello, dopo la pulizia: Prima dell'installazione, assicurarsi che non vi sia acqua sulla guar- nizione. Inserire la guarnizione nella scanalatura e premerla fondo scanalatura. Pulizia dei ripiani: Sarà possibile estrarre tutti i ripiani per eseguire le operazioni di pulizia.
- Page 111 Manutenzione...
- Page 112 Manutenzione...
-
Page 113: Accessori
Accessori Controllare gli accessori e la documentazione conformemente al presente elenco: senza isolazione. WS137GDAI WS137GDNFI... -
Page 114: Descrizione Del Prodotto
Descrizione del prodotto Nota Immagine dell’apparecchio Rannello di controllo principale Ripiano superiore per i vini Rotaie telescopiche Sportello in vetro Scomparto intermedio Maniglia dello sportello Ripiano in legno Vite del piede Filtro ai carboni attivi regolabile... -
Page 115: Installazione
Installazione 1. Disimballaggio Estrarre il dispositivo dall'imballaggio. Togliere tutti i materiali dell’imballaggio, compresa la base in schiuma, e tutto il na- stro adesivo che tiene gli accessori in posizione. 2. Condizioni ambientali La temperatura della stanza dovrebbe sempre collocarsi in un intervallo compreso fra i nonché... - Page 116 Installazione 6. Regolazione di precisione delle porte L’apparecchiatura si chiude con più facilità se vengono usati i piedini di livellamento sulla parte anteriore. Ruotare i piedini regolabili (Fig. 6) per alzarli o abbassar- La rotazione dei piedini in senso orario alza il di- spositivo.
-
Page 117: Uso
Pannello di controllo Blocco/sblocco Aumenta/riduci dello schermo temperatura Spia Temperatura Alimentazione Zona di temperatura Conversione da Umidità Ciclo dell’ari SDgrF a SDgrC Blocco e sblocco automatico L'apparecchio è dotato di una funzione di blocco automatico per impedire eventuali malfunzionamenti relativi a condizioni e temperatura di esercizio, dovuti a un'attivazione indesiderata. Se il funzionamento viene interrotto per un periodo di 30 secondi, verrà... - Page 118 Display umidità Il display umidità di zona consente di visualizzare l'umidità presente nella cantina in tempo reale. Luce interna per 3 secondi. alimentazione saranno attive parzialmente. Memoria temperatura in caso di interruzioni di corrente...
-
Page 119: Suggerimenti Per Risparmiare Energia
Suggerimenti per risparmiare energia Suggerimenti per risparmiare energia ZIONE). Non installare il dispositivo direttamente esposto alla luce del sole o vicino a sorgenti di alimentazione (ad esempio: stufe, riscaldatori). Evitare di impostare temperature inutilmente basse all'interno dello scomparto frigo- rifero. Il consumo di energia aumenta mano a mano che si scende con la temperatura impostata nel dispositivo. -
Page 120: Strumentazione
Strumentazione 1. Ripiano 1. I ripiani sono stati progettati per una facile conservazione ed estrazione del vino. Essi possono essere puliti con un panno morbido. 2. Sarà possibile impilare le bottiglie di dimensioni normali con un diametro di 76 mm. 3. -
Page 121: Cura E Pulizia
Cura e pulizia 1. Sbrinamento Lo sbrinamento della cantinetta per vini avviene in automatico, non è necessario intervenire manualmente. 2. Sostituzione della lampada LED La lampada si serve della tecnologia LED come sorgente luminosa. Ciò comporta un basso consumo energetico è una lunga durata di vita. In caso di anomalie, si prega di contattare il servizio clienti, cfr. -
Page 122: Guida Alla Risoluzione Dei Problemi
Guida alla risoluzione dei problemi caso di problemi controllare tutte le possibilità indicate e attenersi alle seguenti istruzioni prima di contattare il servizio post vendita. Cfr. ASSISTENZA CLIENTI. ATTENZIONE! Prima di eseguire qualunque intervento di manutenzione, spegnere l'apparecchio ed estrarre la spina dalla presa. Gli interventi di manutenzione sulla strumentazione elettrica vanno eseguiti unica- mente da elettricisti esperti, dato che l'esecuzione di riparazioni in modo non ade- guato può... - Page 123 In questo caso, è normale che il frequentemen- Di norma, è necessario siano alimenti o contenitori che Non è garantito il livello adeguato di Garantire un livello di ventilazio- L’interno della Le bottiglie sono state aggiunte di aggiunte di recente raggiunga-...
- Page 124 Controllare la presenza di bloc- chi quali ad esempio bottiglie o ripiani. Per contattare l'assistenza tecnica, visitare il nostro sito Web: https://corporate.haier-europe.com/en/ . Nella sezione "websites", scegli la marca del numero di telefono e il modulo per contattare l'assistenza tecnica...
-
Page 125: Dati Tecnici
Dati tecnici IT IT Scheda del prodotto conformemente alla normativa UE Numero 2019/2016 Marca Haier Haier WS137GDAI WS137GDNFI Categoria Cantinetta per vini Cantinetta per vini casa Consumo energetico annuo (kWh/anno) Volume di conservazione (L) Classe climatica: Questo dispositivo è stato pensato... -
Page 126: Servizio Di Assistenza
Servizio di assistenza Consigliamo di fare riferimento alla nostra Assistenza Clienti Haier; consigliamo inoltre di servirsi di componenti originali. In caso di problemi col dispositivo, controllare come prima cosa la sezione GUIDA ALLA RISOLUZIONE DEI PROBLEMI. Qualora non fosse possibile trovare una soluzione, contattare Modello________________________ N. -
Page 127: Impilaggio Bottiglie Vino
Impilaggio bottiglie vino Ripiano estraibile 750ml Ripiano estraibile 76.1mm WS137GDAI WS137GDNFI... - Page 129 Manual del Usuario Bodega de vinos WS137GDAI WS137GDNFI...
- Page 130 Gracias tante ADVERTENCIA!!
- Page 131 Índice Información de seguridad ......................4 Consejos de seguridad ........................7 Mantenimiento ..........................Accesorios ............................15 Descripción del producto ......................16 Instalación ............................17 Uso ..............................19 Sugerencias para el ahorro energético..................21 Equipo ...............................22 Limpieza y Cuidados ........................23 Solución de problemas .........................24 Datos técnicos ..........................
- Page 132 ADVERTENCIA!! Antes del primer uso ADVERTENCIA...
- Page 133 ¡ADVERTENCIA! ADVERTENCIA : ADVERTENCIA : Solo para el Reino Unido: ADVERTENCIA : Uso diario...
- Page 134 ADVERTENCIA!! ADVERTENCIA :...
- Page 135 ¡ADVERTENCIA! Mantenimiento/Limpieza ADVERTENCIA:...
- Page 136 ¡ADVERTENCIA! no enchufe ADVERTENCIA:...
- Page 137 Uso previsto res, como...
- Page 138 ¡ADVERTENCIA! ¡Riesgo de lesiones o asfixia!
-
Page 139: Mantenimiento
Mantenimiento ADVERTENCIA : Limpie la junta de la puerta:... - Page 140 Mantenimiento Instalación de la puerta después de limpieza: Asegúrese de que no haya agua en la junta de la puerta antes de la instalación. Inserte la junta de la puerta en la ranura, y presiónela con la mano desde arriba hacia abajo hasta que toda la junta de la puerta se inserte en la ranura.
-
Page 143: Accesorios
Accesorios Compruebe los accesorios y su documentación de acuerdo con esta lista:sin aislamiento. Estante Estante WS137GDAI WS137GDNFI... -
Page 144: Descripción Del Producto
Descripción del producto Aviso Debido a los cambios técnicos y diferentes modelos, algunas de las ilustraciones de este manual pueden diferir de su modelo. Imagen del aparato Panel de control principal Estante superior para el vino Guía telescópica Puerta de cristal Separador central Tirador de la puerta... -
Page 145: Instalación
Instalación 1. Desembalaje Saque el aparato del embalaje. Retire todos los materiales de embalaje, incluida la base de espuma y toda la cinta adhesiva que contiene los accesorios. 2. Condiciones ambientales La temperatura ambiente siempre debe estar entre los 10 °C y los 38 °C, ya que puede afectar a la temperatura dentro del aparato y su consumo de energía. - Page 146 Instalación 6. Puesta a punto de la puerta El aparato se cierra más fácilmente si se usan los pies de nivelación en el frente: Gire las patas ajustables (Imag. 6) para subir o bajarlas: Girando los pies en el sentido de las agujas del reloj aumenta el aparato.
-
Page 147: Uso
Bloqueo/desbloqueo Zona de Humedad °F/ °C Bloqueo y desbloqueo automático tomátic to de las condiciones de funcionamiento y t ccidental. Se most a á el icono "L cont ol se bloquea á si se detiene el funcionamiento du ante las teclas Desbloqueado Bloqueado tecla du ant... - Page 148 Indicador de humedad La zona de indicador de humedad mostrará la humedad del interior de la bodega en tiempo real. Iluminación interior Circulación interior de la bodega todos los iconos de la tecla de encendido estarán encendidos. Tras mantener pulsada la tecla de encendido Compensación de baja temperatura...
-
Page 149: Sugerencias Para El Ahorro Energético
Sugerencias para el ahorro energético Consejos para ahorrar energía Asegúrese de que el aparato tenga la ventilación adecuada (consulte la sección VEN- TILACIÓN). No instale el aparato en un lugar donde reciba luz solar de forma directa o cerca de una fuente de calor (por ejemplo, estufas, calentadores). -
Page 150: Equipo
Equipo Estante 1. Los estantes están diseñados para un fácil almacenamiento y una fácil extracción de los vinos. limpiar con una toalla suave. 2. Se pueden apilar botellas regulares con un diámetr 3. Las botellas Magnum se pueden apilar en el estante inferior. 4. -
Page 151: Limpieza Y Cuidados
Limpieza y Cuidados 1. Descongelación La descongelación de la bodega de vinos se realiza automáticamente, no se necesita ninguna operación manual. 2 Reemplazo de la lámpara de LED La lámpara utiliza LED como fuente de luz, con bajo consumo de energía y larga vida útil. En caso de alguna anormalidad, comuníquese con el servicio al cliente. -
Page 152: Solución De Problemas
Solución de problemas Puede solucionar muchos problemas usted mismo sin necesidad de conocimientos es- las instrucciones a continuación antes de contactar a un proveedor de servicios postven- ta. Ver sección ATENCIÓN AL CLIENTE. ¡ADVERTENCIA! Antes de realizar cualquier tarea de mantenimiento, apague el aparato y desconecte el cable de corriente. - Page 153 Problema Causa posible Solución posible con demasiada fre El interior de la bodega El interior de la bodega de vinos Se han agregado botellas recien botellas recientemente agre medad en el interior...
- Page 154 Revise si hay bloqueos como botellas o estanterías. Para ponerse en contacto con la asistencia técnica, visite nuestro sitio web: https://corporate.haier-europe.com/en/. En la sección "websites", elija la marca de el número de teléfono y el formulario para contactar con la asistencia técnica.
-
Page 155: Datos Técnicos
Datos técnicos Ficha del producto conforme al Reglamento EU Nro. 2019/2016 Marca Haier Haier WS137GDAI WS137GDNFI Bodega de vinos Bodega de vinos Categoría Categoría de refrigeración doméstica Consumo anual de energía (kWh/año) Capacidad de almacenamiento (Litros) Clase climática: Este aparato ha sido diseñado para... -
Page 156: Atención Al Cliente
Atención al cliente Recomendamos recurrir al centro de atención al cliente de Haier y utilizar repuestos originales.Si tiene un problema con su aparato, consulte primero la sección SOLUCIÓN DE PROBLEMAS. Si no puede encontrar una solución en esta sección, contacte con disponibles. -
Page 157: Apilación De Botellas De Vino
Apilación de botellas de vino 750ml Estante extraíble Estante extraíble 76.1mm WS137GDAI WS137GDNFI... - Page 159 Podr cznik u ytkownika dziarka do win WS137GDAI WS137GDNFI...
- Page 160 Legenda...
- Page 161 Zawart Informacje dotycz ce bezpiecz twa ..................4 ..................7 wacja ............................11 ............................15 tu ..........................16 ............................17 U yt owanie ............................19 ..........................................22 wacja i czy zczenie ......................23 Rozwi zywanie pr w ......................24 Dane techniczne ...................................................28 .........................29...
- Page 170 Konserwacja Instalacja uszczelki drzwi po czyszczeniu: Przed upewnij e na uszczelce drzwi nie ma wody. ó uszczelk drzwi do rowka i uszczelk drzwi r cznie od szczelka drzwi z o ona w rowek Czyszcz Wszy czyszczenia. Wyjmij wszystkie butelki. Wyczy reczk o eniem poczek...
- Page 171 Konserwacja...
- Page 172 Konserwacja...
- Page 173 Akcesoria Spraw terat e iz Przycisk WS137GDAI WS137GDNFI...
- Page 174 Opis produktu Uwaga Z powodu zmian technicznych i różnych modeli, niektóre ilustracje w tej instrukcji mogą się różnić od Twojego modelu. rz dz Główny panel sterowania Górna półka na wino prowadnice teleskopowe Drzwiczki szklane Ścianka środkowa Uchwyt drzwiczek Półka drewniana Regulowana ęglowy śruba...
- Page 175 Instalacja 1. Rozpakowywanie Wyjmij urz dzenie z opakowania. wszystkie cz opakowania, piankow podstaw i przytrzymu- kcesoria. 2. W rodowiskowe Temperatura w pomieszczeniu powinna by zawsze dzy 10 °C a 38 °C, poniewa mo e to wp yw na temperatur we rz urz dzenia oraz zu ycie energii.
- Page 176 Instalacja 6. Regulacja drzwi Urz dzenie zamyka lepiej, u yto stopek pozio- ych z przodu: topk Przekr cenie stopki w prawo podnosi urz dzenie. Przekr cenie stopki w lewo obni a urz dzenie. 7. Czas oczekiwania ce spr arki znajduje olej do bez wej konserwacji.
- Page 177 U ytkowanie Panel sterowania Blokada/ odblokowanie Temperatura Temperatura ekranu Lampka Zasilanie Strefa temperatury SDgrF/SDgr- Cykl konwersja powietrza Automatyczne zamykanie i otwieranie zatrzymana na 30 sekund. Zatrzymanie przez 30 s Zablokowany Odblokowany 3 sekundy. Panel sterowania zostanie blokady i przytrzymaj przez 3 s Zablokowany Odblokowany Regulacja temperatury...
- Page 178 U ytkowanie...
- Page 179 Porady dotycz szcz dz rgii rz dz tylow rz: INSTALACJA). rz dz ra o ym cz y ców rz ków). otrz w rz dz za t rat ra. z do lodó róc prz racz doprowad rza. Utrz czy t zaw z zamyka...
- Page 180 Wyposa enie zapr twego przechowyw twego wy wina. czyszcz rednicy 76mm. rzedsta Dioda we r dzenia z otworz gdy dr przycis ownie przycis rgetyc owinn gdy nie z 3. Z zam a: ewo; Otwórz dr rawo;...
- Page 181 Konserwacja i czyszczenie 1. Rozmr Rozmrażanie chłodziarki do win wykonywane jest automatycznie; nie trzeba nic robić. Lampa wykorzystuje LED jako źródło światła i cha rakteryzuje się niskim zużyciem energii i długą żywotnością. W przypadku jakichko wiek nieprawidłowości skontaktuj się z obsługą rz: OBSŁUGA KLIENTA.
- Page 182 Rozwi zywanie problemów Wiele problemów mo rozwi z samodzielnie, bez specjalistycznej wiedzy. W przy- padku problemów prosimy sprawd wszystkie pokazane mo iw i post ow zgod- nie z poni zymi instrukcjami przed skontaktowaniem posprzeda Patrz: OBS UGA KLIENTA. OSTR Przed przy do konserwacji, cz urz dzenie i wyjmij wtyczk z gniazdka sieciowego.
- Page 184 Rozwi zywanie problemów Problem Mo iwa przyczyna Mo iwe ro y i zby o normalne zjawisko w wilgo nym klimacie i zmieni gromad wilgo ny gdy wilgo na ze rznej Upewnij e drzwi szczel- Drzwi nie szczelnie z powierzchni nie zamykane, a uszczelki Skrapla zimne po rze we-...
- Page 185 Dane techniczne Karta produktu, zgodnie z Zarz dzeniem UE Nr 2019/2016 Marka Haier Haier WS137GDAI WS137GDNFI Kategoria dzenia domowego Klasa efekt rgetycznej Roczne zu ycie energii (kWh/rok) komory (l) Klasa klimatyczna: SN-ST SN-ST stosowania przy temperaturze otoczenia od 10°C do 38 °C...
- Page 186 Europejskie adresy Haier Kraj * Adres pocztowy Kraj Adres pocztowy Francja Belgium-FR Hiszpania Belgium-NL Portugalia Netherlands Luxembourg Polska Niemcy Czechy Austria Grecja Rumunia Wielka Rosja Brytania...
- Page 187 750ml wysuwana szuflada wysuwana szuflada 76.1mm WS137GDAI WS137GDNFI...
- Page 189 Návod k Pou WS137GDAI WS137GDNFI...
- Page 190 Popis VAROVÁNÍ!
- Page 191 Obsah ce........................ 4 ......................7 ...............................11 ............................15 e..........................16 ce ............................17 ...............................19 .......................21 ............................22 Pé ...........................23 ..........................24 ..........................2 7 Zá a ..........................28 ........................29...
- Page 192 VAROVÁNÍ! VAROVÁNÍ...
- Page 193 VAROVÁNÍ! VAROVÁNÍ: VAROVÁNÍ: VAROVÁNÍ:...
- Page 194 VAROVÁNÍ! VAROVÁNÍ:...
- Page 195 VAROVÁNÍ! VAROVÁNÍ:...
- Page 196 VAROVÁNÍ! VAROVÁNÍ:...
- Page 198 VAROVÁNÍ!
- Page 199 VAROVÁNÍ:...
- Page 200 Údr P ed se ujist te, e o te t s- do drá ky te rukou t shor rá e ze pr te k kejte...
- Page 203 WS137GDAI WS137GDNFI...
- Page 204 Popis spotřebiče Poznámka teré ilustrace v tomto manuálu se mohou v důsled u technic ých a rozdílnosti modelů lišit od Vašeho sp otřebiče. Obrázek spot Hlavní ovládací panel Horní police na víno ře Střední přepáž Madlo dvíř Dř police Nastavitelný í...
- Page 205 Instalace 1. Vybalení te spot dstr te materiály v pá- sek, kter 2. Podmínky okolního prost edí Teplota v místnosti v rozmezí 16 °C a °C, proto e m e vat teplot spot e a spot ener te spot do ízkosti spo- ráky 3.
- Page 206 Instalace Z ízení se zavírá, pokud se pou vyrovnáva- cí no ky na p ední str Ot te telné no ky (obr. 6), abyste Oto ení no ek ve ých spot Oto ení no ek pro ých spot kompresoru umíst ný bezúdr spot tento p epravy...
- Page 207 o 1 SDgrC o 1 SDgrC...
- Page 209 Tipy na ušet ení energie Tipy na ušet ení energie Zkontrolujte, zda spot rá (viz INSTALACE). Neinstalujte spot nebo do blízkosti tepelných zdr rák, radiátory). Nenastavujte na spot zbyt nízk teploty. ni ší teplota je na spot yšší je spot eba energie. Dve e spot ebi e otvírejte c co nejkratší...
- Page 210 ko. Pok...
- Page 211 Péče a čiš t 1. Odmrazování čk otřeba ž Odmraz otřebiči je jak rotož otřebovává ž živo y ky VAROVÁNÍ! ť ř š Vyč otřebič ř ž ů ř te otevř y te z otřebič 4. S šk te vš otřebič...
- Page 212 ešení pr jaký problém, ne se obrátíte na prodejce, zkontrolujte postupujte podle ní ný z ZÁKAZNICK VAROVÁNÍ! P ed pr te a odpojt ké sít zása Poškozený sí kabel musí robce, autor z ný nebo Kód chyby Teplota dolní teplotní Kontaktujte prosím náš...
- Page 214 át. Dve e se nezaví- Spot áze. te spot s vyrov- návací no kou. kována. Zkontr te blokování, Chcete-li kontaktovat technickou pomoc, navštivte naše webové stránky: https://corporate.haier-europe.com/en/ pomoci...
- Page 215 Technické údaje List výrobk íz Haier Haier Kategorie Chladící kategorie pro domácnost rgetick ot eba ener rok) Klimatick Vzduchem ší ené emise hluku (db(A) r Typ spot ebi e tojící tojící Tento spot Tento výrobek vyhovuje po adavk všech odpovídajících...
- Page 216 Service & S ránk Ješ e n e uvede- né inf e na výk ké Z o ázk e naše n e uvedené evropské adresy: Evropské adresy Haier Poštovní adresa Krajina Poštovní adresa Europe Tr rance SAS De Cris oforis raviers Itálie...
- Page 217 Stohování lahví vína 750ml výsuvné police výsuvné police 76.1mm WS137GDAI WS137GDNFI...
- Page 219 Gebruikershandleiding Wijnkelder WS137GDAI WS137GDNFI...
- Page 220 Legende WAARSCHUWING! Risico op letsels of verstikking!
- Page 221 Inhoud Veiligheidsinformatie ........................4 Veiligheidstips ........................... 7 Onderhoud ............................11 Accessoires .............................15 Productbeschrijving ........................16 Installatie ............................17 Gebruik..............................19 Energiebesparing tips ........................21 Apparatuur ............................22 Zorg en reiniging ..........................23 Probleemoplossen ........................24 Technische gegevens........................27 Klantendienst ..........................28 ..........................29...
-
Page 222: Veiligheidsinformatie
Veiligheidsinformatie ligheidstips lezen en naleven: WAARSCHUWING! Voor de eerste ingebruikname Installatie WAARSCHUWING... - Page 223 Veiligheidsinformatie WAARSCHUWING! WAARSCHUWING: WAARSCHUWING: Enkel voor het VK: WAARSCHUWING: Dagelijks gebruik en mentaal vermogen of een gebrek aan ervaring en kennis als Als er een koelgaslek of ander ontvlambaar gaslek ontstaat in de...
- Page 224 Veiligheidsinformatie WAARSCHUWING! WAARSCHUWING:...
- Page 225 WAARSCHUWING! Onderhoud & reinigen WAARSCHUWING: Als het netsnoer beschadigd is, moet het worden vervangen door...
- Page 226 Koelgasinformatie WAARSCHUWING! grondig ventileren, de netsnoeren niet WAARSCHUWING:...
- Page 227 Beoogd gebruik. omgevingen, bed and breakfast omgevingen;...
- Page 228 Het symbool WAARSCHUWING!
- Page 229 WAARSCHUWING: Reinig de deurpakking. maanden worden gereinigd om een...
-
Page 230: Onderhoud
Onderhoud Installatie van de deurpakking na de reiniging: Voor de installatie, zorg ervoor dat er geen water aanwezig is op de deurpakking. Voer de deurpakking in de groef en druk de deur- pakking stevig van boven naar onder met de hand tot de volledige deurpakking is ingevoerd in de groef. -
Page 233: Accessoires
Accessoires Controleer de accessoires en literatuur op basis van de onderstaande lijst. Toets schap WS137GDAI WS137GDNFI... -
Page 234: Productbeschrijving
Productbeschrijving Opgelet Omwille van technische wijzigingen en uiteenlopende modellen kunnen de illustraties in deze handleiding verschillen van uw model. Afbeelding van het apparaat Hoofdbedieningspaneel Bovenste wijnschap Telescopische rails Glazen deur Scheidings- wand Deurgreep Houten schap Verstelbare Filter met actieve koolstof pootschroef... -
Page 235: Installatie
Installatie 1. Uit de verpakking verwijderen Verwijder het apparaat uit de verpakking. Verwijder al het verpakkingsmateriaal, inclusief de schuimbasis en de plakband van de accessoires. 2. Milieuomstandigheden De kamertemperatuur moet altijd tussen 10 °C en 38 °C zijn aangezien het de tempera- tuur in het apparaat en het energieverbruik kan beïnvloeden. - Page 236 Installatie 6. De deuren jnafstemmen Het apparaat sluit gemakkelijker als de voetjes vooraan worden gebruikt: Draai aan de instelbare voet (afb. 6) om de voet om- hoog of omlaag te draaien: Als u de voet rechtsom draait, verhoogt u het ap- paraat.
-
Page 237: Gebruik
Gebruik Bedieningspaneel Scherm vergrendelen/ Temperatuur ontgrendelen hoger/lager Temperatuur Verlichting Aan-/uitknop Temperatuurzone SDgr F/ SDgr C Vochtigheid Luchtcyclus omwisselen Automatische vergrendeling en ontgrendeling Het apparaat heeft een functie voor automatische vergrendeling om een onjuiste werking van de ingestelde gebruikscondities en temperatuur als gevolg van onopzettelijke activering te voorkomen. Het hangslotpictogram wordt weergegeven en het bedieningspaneel wordt vergrendeld zodra het paneel gedurende 30 seconden niet meer is gebruikt. - Page 238 Gebruik Luchtvochtigheidsweergave De luchtvochtigheidsweergavezone toont steeds de actuele vochtigheidsgraad in uw wijnkast. Koelkastverlichting uitschakelen als u het niet nodig hebt. 6. Wisselen tussen Celsius en Fahrenheit tussen Celsius en Fahrenheit. weer uitgeschakeld. standaardinstellingen.
-
Page 239: Energiebesparing Tips
Energiebesparing tips Energiebesparing tips Zorg ervoor dat het apparaat correct geventileerd is (zie INSTALLATIE). U mag het apparaat niet installeren in direct zonlicht of in de buurt van warmtebron- nen (bijv. fornuizen, verwarming). Vermijd onnodig lage temperaturen in het apparaat. Het energieverbruik verhoogt hoe lager de temperatuur van het apparaat wordt ingesteld. -
Page 240: Apparatuur
Apparatuur 1. De rekken zijn ontworpen voor een eenvoudige opberging en gemakkelijke verwijdering van de wijn. Ze kunnen worden gereinigd met een zachte doek. ter van 76mm kunnen wor kunnen op de onder te lade wor 4. Het aantal kan variëren van het weer ze op een andere Voorzorgsmaatregelen voor gebruik van wijnkast glazen deur raken wanneer u de deur... -
Page 241: Zorg En Reiniging
Zorg en reiniging 1. Ontdooien De wijnkelder ontdooit automatisch; er is geen handmatige bewerking nodig. 2. De LED lamp vervangen De lamp gebruikt de LED als haar lichtbron, met een laag energieverbruik en een lange levensduur. In het geval van een afwijking moet u contact opnemen met de klantendienst. -
Page 242: Probleemoplossen
Probleemoplossen het geval van een probleem moet u alle weergegeven mogelijkheden controleren en de onderstaande instructies volgen voor u contact opneemt met de dienst na verkoop. Zie KLANTENDIENST. WAARSCHUWING! Voor ieder onderhoud moet u het apparaat uitschakelen en de stekker verwijderen uit het stopcontact. - Page 243 Probleem Mogelijke oorzaak Mogelijke oplossing De stekker is niet ingevoerd in het In dat geval is het normaal dat rende een te lange geen etenswaren of container versleten, gebarsten of stemmen lossen wanneer de gewenste Het is onvoldoende versleten, gebarsten of stemmen Het klimaat is te warm en te voch...
- Page 244 Controleer op blokkeringen zo- Ga naar onze website om contact op te nemen met de technische ondersteuning: https://corporate.haier-europe.com/en/ .Kies onder de sectie "website" het merk van uw telefoonnummer en formulier kunt vinden om contact op te nemen met de technische...
-
Page 245: Technische Gegevens
Technische gegevens 2019/2016 Merk Haier Haier WS137GDAI WS137GDNFI Categorie Wijnkelder Wijnkelder Huishoudelijke koeling categorie Jaarlijks energieverbruik (kWu/jaar) Opslagvolume (L) Klimaatklasse: Dit apparaat is bedoeld voor gebruik bij een omgevingstemperatuur SN-ST SN-ST tussen 10°C en 38 °C. Lucht gedragen akoestische geluid-... -
Page 246: Klantendienst
Klantendienst We raden onze Haier klantendienst aan en het gebruik van originele reserveonderdelen. Als u een probleem ondervindt met uw apparaat moet u eerst de sectie PROBLEEMOP- LOSSEN controleren. Als u daar geen oplossing vindt, kunt u contact opnemen met uw lokale verkoper of de Onderhoud &... - Page 247 750ml Uittrekbare plank Uittrekbare plank 76.1mm WS137GDAI WS137GDNFI...