Table of Contents
Advertisement
Quick Links
Advertisement
Table of Contents

Related Manuals for Electrolux EW7W368S


Summary of Contents for Electrolux EW7W368S
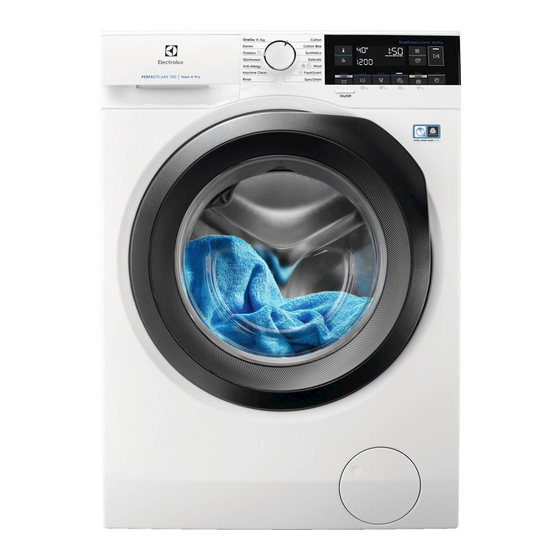
- Page 1 EW7W368S Washer Dryer User Manual...
-
Page 2: Table Of Contents
19. ACCESSORIES....................44 WE’RE THINKING OF YOU Thank you for purchasing an Electrolux appliance. You’ve chosen a product that brings with it decades of professional experience and innovation. Ingenious and stylish, it has been designed with you in mind. So whenever you use it, you can be safe in the knowledge that you’ll get great results every time. -
Page 3: Safety Information
ENGLISH Subject to change without notice. SAFETY INFORMATION Before the installation and use of the appliance, carefully read the supplied instructions. The manufacturer is not responsible for any injuries or damages that are the result of incorrect installation or usage. Always keep the instructions in a safe and accessible location for future reference. - Page 4 1.2 General Safety Do not change the specification of this appliance. • This appliance is intended to be used in household • and similar applications such as: staff kitchen areas in shops, offices and other – working environments; by clients in hotels, motels, bed & breakfast and –...
- Page 5 ENGLISH Do not exceed the maximum load of 8 kg (refer to the • "Programme chart" chapter). The appliance must be connected to the water mains • using the new supplied hose sets, or other new hose sets supplied by the Authorised Service Centre. Old hose sets must not be reused.
-
Page 6: Safety Instructions
Do not use high pressure water sprays and/or steam • to clean the appliance. Clean the appliance with a moist cloth. Use only • neutral detergents. Do not use abrasive products, abrasive cleaning pads, solvents or metal objects. Before any maintenance operation, deactivate the •... -
Page 7: Installation
ENGLISH 2.4 Use WARNING! Risk of injury or damage to WARNING! the appliance. Risk of injury, electric shock, fire, burns or damage to the • Do not sit or stand on the open door. appliance. • Do not dry dripping wet clothes in the appliance. - Page 8 3. Open the door. Remove all the items from 4. Put the front polystyrene packaging the drum . element on the floor under the appliance. Carefully put down the appliance onto its rear side. 5. Remove the polystyrene protection from 6.
- Page 9 ENGLISH there is air circulation below the 1. Connect the water inlet hose to the appliance. back of the appliance. 2. Loosen or tighten the feet to adjust the level. All feet must rest firmly on the floor. 2. Position it toward left or right depending on the positon of the water tap.
- Page 10 2. On the edge of a sink - Fasten the The end of the drain hose guide to the water tap or to the wall. must always be ventilated , i.e. the inner diameter of the drain pipe (min. 38 mm - min.
-
Page 11: Product Description
Use the delicate without consuming more time, energy fragrance exclusively developed by and water than necessary. ELECTROLUX to add a pleasant feeling of "just-washed" garment to... - Page 12 5.2 Control panel description Machine Clean Rinse Mode - Dry touch button The permanent options are set by holding pressed the permanent Anti-crease option relative button for at least 3 Time Manager touch button seconds. permanent Child Lock option...
- Page 13 ENGLISH 5.3 Display The Temperature area: Temperature indicator . Cold water indicator. Door locked indicator. Child safety lock indicator. The digital indicator can show: • Programme duration (e. g. , washing and/or drying phase). • Delay time (e. g. • Cycle end ( •...
-
Page 14: Dial And Buttons
Drum clean indicator. This is a recommendation to perform the drum cleaning. Anti-crease phase indicator. Drying phase indicator. The spin area: Spin speed indicator No Spin indicator. Spin phase is off. Rinse Hold indicator. Maximum load indicator (refer to "The SensiCare System load detection "... - Page 15 ENGLISH washing programme. Set this option To activate/deactivate this option, hold for very delicate fabrics. The rinses the Prewash button pressed for 3 phase uses more water for some seconds until the indicator comes on/ washing programmes goes off on the display. •...
- Page 16 When you set a washing programme, the When setting a steam programme, this display shows the default duration and button allows to chose three steam levels and the programme duration is reduced dashes. accordingly: Touch Time Manager button to •...
-
Page 17: Programmes
ENGLISH 6.14 Time Dry You can not set all automatic levels for each Touch this button to set the time that type of fabrics. suits the fabrics you have to dry (refer to "Timed drying" table). The display shows 6.16 Delay Start the set value. - Page 18 • Items that are not suitable for tumble drying. • All items with plastic, metal, wooden parts or alike. ELECTROLUX fragrance. If you use this special gentle fragrance, your laundry will scent as just washed: pour a single dose bottle in the compartment and simply start a steam programme.
- Page 19 ENGLISH Programme Reference Maxi‐ Programme description Default tem‐ spin (Type of load and soil level) perature speed load Temperature Spin range speed range 1 kg Cottons, Synthetics, Delicates. Short and gentle steam programme to refresh even your FreshScent very delicate garments, including very delicate garments with sequins, lace etc.
- Page 20 Programme Reference Maxi‐ Programme description Default tem‐ spin (Type of load and soil level) perature speed load Temperature Spin range speed range 1600 rpm 8 kg White cotton items. This programme re‐ (1600 - moves micro-organisms thanks to a washing...
- Page 21 ENGLISH Programme Reference Maxi‐ Programme description Default tem‐ spin (Type of load and soil level) perature speed load Temperature Spin range speed range Reset position. The display shows dashes only. 1) Cottons energy saving programme. This programme at 60ºC with a load of 8 kg is the reference programme for data entered in the energy label, in compliance with 96/60/EC Di‐...
- Page 22 Programme Machine Clean ■ ■ ■ Machine Clean ■ ■ ■ ■ ■ ■ ■ ■ ■ Anti-Allergy ■ ■ ■ ■ ■ ■ ■ Sportswear ■ ■ ■ ■ ■ ■ Outdoor ■ ■ ■ ■ ■ ■...
- Page 23 ENGLISH 7.3 Automatic drying Dryness Level Type of fabric Load Cottons and Linen up to 4 kg (bathrobes, bath towels, Extra Dry etc) For towelling materials Denim garments up to 3 kg Cottons and Linen up to 4 kg (bathrobes, bath towels, Cupboard Dry etc) For items to be stored...
-
Page 24: Settings
7.4 Timed drying Dryness Level Type of fabric Load Spin Suggested (kg) spee duration (mins) (rpm) Extra Dry Cottons and Linen 1600 180 - 200 For towelling (bathrobes, bath towels, etc) 1600 90 - 110 materials 1600 60 - 70... -
Page 25: Before First Use
ENGLISH buttons simultaneously for about 2 If you deactivate the seconds. The display shows On or Off. acoustic signals, they continue to operate when the appliance has a malfunction. 9. BEFORE FIRST USE 1. Make sure that the electrical power is 4. - Page 26 10.3 Filling the detergent and 10.4 Check the position of the additives detergent flap 1. Pull out the detergent dispenser until it stops. 2. Press the lever down to remove the - Compartment for prewash dispenser. phase, soak programme or stain re‐...
- Page 27 ENGLISH The drain pump can operate shortly before the appliance fills water. 10.7 Starting a programme with the delay start 1. Touch the Delay Start button repeatedly until the display shows the desired delay time. On the display the indicator shows Make sure that the flap does not cause a 2.
- Page 28 10.8 The SensiCare System 10.9 Interrupting a programme load detection and changing the options When the programme is running, you The programme duration in can change only some options: the display is referred to a medium/high load. 1. Touch the Start/Pause button.
- Page 29 ENGLISH 10.11 Opening the door - 10.13 Draining water out after Adding garments end of cycle If you have chosen a programme or an If the temperature and level option that does not empty out the water of the water in the drum are of the last rinse, the programme is too high and/or the drum is completed, but:...
-
Page 30: Daily Use - Washing & Drying
If the dial is rotated to the "Reset" If you set a programme or an position , the appliance automatically option that ends with water turns off in 30 seconds. in the drum, the Stand-by function doesn't deactivate the appliance to remind you to drain the water. -
Page 31: Daily Use - Drying Only
ENGLISH Each time you tap on this button the time The anti-crease phase reduces value increases by 5 minutes. The creasing. display shows the set new time value. You can remove the laundry before the anti-crease phase is completed. 2. Touch the Start/Pause button to We recommend, for better results, start the programme. -
Page 32: Fluff In The Fabrics
• The indicator of button Start/Pause In the display the door locked indicator comes on. goes off. The door locked goes The display also shows the remaining off. programme time. The appliance continues to operate with the anti-crease phase for 12.3 Timed Drying... -
Page 33: Hints And Tips
ENGLISH 14. HINTS AND TIPS Special stain removers are available. WARNING! Use the special stain remover that is Refer to Safety chapters. applicable to the type of stain and fabric. 14.1 The laundry load 14.3 Detergents and other treatments • Divide the laundry into: white, coloured, synthetics, delicates and •... -
Page 34: Care And Cleaning
14.5 Water hardness • = The item can be tumble dried • = The drying cycle is at high If the water hardness in your area is high temperature or moderate, we recommend that you use a water softener for washing •... - Page 35 ENGLISH 15.1 External cleaning 15.4 Door seal Clean the appliance with mild soap and warm water only. Fully dry all the surfaces. CAUTION! Do not use alcohol, solvents or chemical products. CAUTION! Regularly examine the seal and remove Do not clean the metal all objects from the inner part.
- Page 36 2. Remove the top part of the additive 15.7 Cleaning the drain pump compartment to aid cleaning and flush it out under running warm WARNING! water, to remove any traces of Disconnect the mains plug accumulated detergent. After from the mains socket.
- Page 37 ENGLISH 6. Repeat the steps 4 and 5 until the water stops to flow out. 7. Turn the filter anti-clockwise to remove it. 2. Place a suitable bowl below the drain pump access to collect the water that flows out. 3.
- Page 38 When you drain the water with the emergency drain procedure, you must activate the drain system again: a. Put 2 litres of water in the main wash compartment of the detergent dispenser. b. Start the programme to drain the water.
-
Page 39: Troubleshooting
ENGLISH 15.9 Emergency drain remaining water from the inlet hose and the drain pump. If the appliance cannot drain the water, 1. Disconnect the mains plug from the carry out the same procedure, described mains socket. in 'Cleaning the drain pump' paragraph. If 2. - Page 40 If the appliance is overloaded, remove some items from the drum and/or hold the door shut while touching the Start/Pause button until the indicator stops flashing (see the picture below). 16.2 Possible failures Problem Possible solution • Make sure that the mains plug is connected to the mains socket.
- Page 41 ENGLISH Problem Possible solution • Make sure that the sink spigot is not clogged. • Make sure that the drain hose has no kinks or bends. • Make sure that the drain filter is not clogged. Clean the filter, if necessary. Refer to "Care and cleaning". The appliance does not •...
- Page 42 Problem Possible solution • Increase the detergent quantity or use a different deter‐ gent. The washing results are • Use special products to remove the stubborn stains be‐ not satisfactory. fore you wash the laundry. • Make sure that you set the correct temperature.
-
Page 43: Consumption Values
ENGLISH Make sure that the water level inside the drum is not too high. If necessary, proceed with an emergency drain (refer to «Emergency drain» in «Care and cleaning» chapter). To open the door, proceed as follows: 1. Press the On/Off button to switch the appliance off. -
Page 44: Technical Data
1) Connect the water inlet hose to a water tap with a 3/4'' thread. 19. ACCESSORIES 19.1 Available in www.electrolux.com/shop or from authorised dealer Only appropriate accessories approved by ELECTROLUX ensure the safety standards of the appliance. If unapproved parts are used, any claims will be invalidated. 19.2 Fixing plate kit Read carefully the instructions supplied with the accessory. - Page 45 ENGLISH 20. ENVIRONMENTAL CONCERNS appliances marked with the symbol Recycle materials with the symbol with the household waste. Return the Put the packaging in relevant containers product to your local recycling facility or to recycle it. Help protect the contact your municipal office. environment and human health by recycling waste of electrical and electronic appliances.
- Page 46 www.electrolux.com...
- Page 47 ENGLISH...
- Page 48 www.electrolux.com/shop...