Table of Contents
Advertisement
Quick Links
L o s k a r n
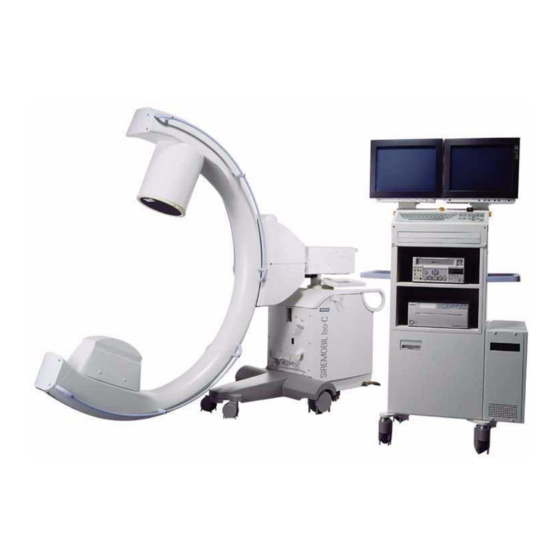
SIREMOBIL Iso-C 3D
Installation and Startup
System
3D Navigation
Print No.:
SPR2-230.814.03.02.02
Replaces: SPR2-230.814.03.01.02
SP
2002
© Siemens AG
The reproduction, transmission or use
of this document or its contents is not
permitted
without
express
authority. Offenders will be liable for
damages. All rights, including rights
created by patent grant or registration
of a utility model or design, are
reserved.
English
Doc. Gen. Date: 11.05
written
Advertisement
Table of Contents

Related Manuals for Siemens SIREMOBIL Iso-C 3D


Summary of Contents for Siemens SIREMOBIL Iso-C 3D
- Page 1 L o s k a r n SIREMOBIL Iso-C 3D Installation and Startup System 3D Navigation 2002 © Siemens AG The reproduction, transmission or use of this document or its contents is not permitted without express written authority. Offenders will be liable for damages.
- Page 2 Assemblers and other persons who are not employed by or otherwise directly affiliated with or authorized by Siemens or one of its affiliates are directed to contact one of the local offices of Siemens or one of its affiliates before attempting installation or service pro- cedures.
-
Page 3: Table Of Contents
3D Navigation with the SIREMOBIL Iso-C 3D ....... . . - Page 4 Concluding steps............49 8 _______ Fax Form______________________________________________________ 50 9 _______ Changes to Previous Version _____________________________________ 51 SIREMOBIL Iso-C 3D SPR2-230.814.03.02.02 Siemens AG Page 4 of 52 11.05...
-
Page 5: Safety Information
When performing the work steps and tests described herein, observe the product-specific safety information contained in the documents, as well as the general safety information TD00-000.860.01..Siemens AG SPR2-230.814.03.02.02 SIREMOBIL Iso-C 3D Page 5 of 52 Medical Solutions 11.05 CS SD 24... -
Page 6: Notes And Symbols
Results and events are indented and preceded by an arrow. NOTE Depending on the progress of the configuration, the "Next” button might also be displayed as the "Finish” button. SIREMOBIL Iso-C 3D SPR2-230.814.03.02.02 Siemens AG Page 6 of 52 11.05... - Page 7 If any problems arise when making changes in the Service UI, at- tempt to resolve them first by powering the system completely off and then powering it on again. Siemens AG SPR2-230.814.03.02.02 SIREMOBIL Iso-C 3D Page 7 of 52 Medical Solutions 11.05 CS SD 24...
-
Page 8: 3D Navigation With The Siremobil Iso-C 3D
The 3D navigation kit is a universal HW and SW interface which controls navigation sys- tems provided by different navigation systems vendors. The navigation system itself is not provided by Siemens, but always by a navigation sys- tems vendor. Fig. 2:... -
Page 9: Procedure In Collaboration With The Navigation Systems Vendor Brainlab
The navigation systems vendor schedules its own service call. The presence of a SIEMENS technician is no longer necessary. This will prevent waiting periods for the SIEMENS technician as well as for the navigation systems vendor's technician. For this reason, the procedure described below should be followed. -
Page 10: Procedure In Collaboration With All Other Navigation Systems Vendors
Schedule the service call with the customer. Siemens technician (1st service call) The following tasks must be performed by the SIEMENS technician at the 1st service call: • Check all required system updates and perform any that are still necessary •... -
Page 11: Overview - Flow Chart
General information Joint tasks, performed by Siemens and the navigation systems vendor The following tasks are performed jointly, with a technician from the navigation systems vendor: • If necessary, adapt the DICOM network node configuration to the navigation system •... -
Page 12: Tools And Materials Required
Tool kit Allen wrench set Insulating tape Service PC Several blank CD-ROMs Several floppy disks SIREMOBIL Iso-C 3D SPR2-230.814.03.02.02 Siemens AG Page 12 of 52 11.05 CS SD 24 Medical Solutions... -
Page 13: References
General information References Software description SPR2-230.815.01 Image Quality quick test SPR2-230.037.01 Siemens AG SPR2-230.814.03.02.02 SIREMOBIL Iso-C 3D Page 13 of 52 Medical Solutions 11.05 CS SD 24... -
Page 14: Updates
Checks Prior to Installation Updates 2Checks Prior to Installation • Check to see whether all necessary system updates have been performed. • Perform any necessary updates. SIREMOBIL Iso-C 3D SPR2-230.814.03.02.02 Siemens AG Page 14 of 52 11.05 CS SD 24 Medical Solutions... -
Page 15: Testing The 3D Software
If the 3D software “VC00B” is not installed, install it according to the instructions found in the document “Software Description SPR2-230.815.01.xx.xx”. • Close the window Siemens AG SPR2-230.814.03.02.02 SIREMOBIL Iso-C 3D Page 15 of 52 Medical Solutions 11.05 CS SD 24... -
Page 16: Function Check
Check that the system functions properly. • Perform a visual inspection of the 3D navigation kit and of the calibration phantom with the navigation interface to make sure they are in the correct condition. SIREMOBIL Iso-C 3D SPR2-230.814.03.02.02 Siemens AG Page 16 of 52 11.05... -
Page 17: Replacing Grid Holder On Image Intensifier
Mechanical system Replacing grid holder on image intensifier 3Mechanical system Fig. 4: I.I._1 • Remove the screws of the grid holder. Siemens AG SPR2-230.814.03.02.02 SIREMOBIL Iso-C 3D Page 17 of 52 Medical Solutions 11.05 CS SD 24... - Page 18 Mechanical system Fig. 5: I.I._2 • Remove the microswitch. • Cut cable and insulate with insulating tape. SIREMOBIL Iso-C 3D SPR2-230.814.03.02.02 Siemens AG Page 18 of 52 11.05 CS SD 24 Medical Solutions...
- Page 19 Apply some silicon (20 48 981) to the fitting surface of the new metal grid holder (75 51 703), all the way around, orient the grid correctly, and press it onto the grid holder. Siemens AG SPR2-230.814.03.02.02 SIREMOBIL Iso-C 3D Page 19 of 52 Medical Solutions 11.05...
- Page 20 Wait for the silicone to harden (approx. 30 min). • Attach the grid holder to the I.I. and secure it with screws (11 22 571) and contact wash- ers (34 16 66)6. SIREMOBIL Iso-C 3D SPR2-230.814.03.02.02 Siemens AG Page 20 of 52 11.05...
-
Page 21: Attach Label To Unit
Attach label to unit Fig. 8: ID label • Attach the included label (75 51 828) to the unit as shown in the illustration. Siemens AG SPR2-230.814.03.02.02 SIREMOBIL Iso-C 3D Page 21 of 52 Medical Solutions 11.05 CS SD 24... -
Page 22: Licensing
3D operation. syngo screen appears on right-hand monitor • Open syngo service software Fig. 9: Service Software Home Menu • Click "Configuration". • Click "Next". SIREMOBIL Iso-C 3D SPR2-230.814.03.02.02 Siemens AG Page 22 of 52 11.05 CS SD 24 Medical Solutions... - Page 23 "Are you sure you want to overwrite the existing license file?" • Click "OK". The following is displayed: “license data successfully saved” • Remove CD or floppy disk. Siemens AG SPR2-230.814.03.02.02 SIREMOBIL Iso-C 3D Page 23 of 52 Medical Solutions 11.05 CS SD 24...
-
Page 24: Dicom Configuration
Select "TCP/IP LAN” under "Local host” Check IP address • Click the selection window under "IP address". • If the IP address 192.168.1.1 appears, delete it. SIREMOBIL Iso-C 3D SPR2-230.814.03.02.02 Siemens AG Page 24 of 52 11.05 CS SD 24... - Page 25 Close the service software. • Switch the system completely off and then back on. - This ensures that the configuration is completely saved within syngo. Siemens AG SPR2-230.814.03.02.02 SIREMOBIL Iso-C 3D Page 25 of 52 Medical Solutions 11.05 CS SD 24...
-
Page 26: Navigation Dicom Nodes
Under "Host name" enter "Navi". • Under TCP/IP address enter "192.17.3.111". • Click "Save". The following is displayed: "Host properties successfully saved". • Click "OK". • Select ">". SIREMOBIL Iso-C 3D SPR2-230.814.03.02.02 Siemens AG Page 26 of 52 11.05 CS SD 24 Medical Solutions... - Page 27 Do not make any changes under "Storage". • Click "Add". • Click "Save". The following is displayed: "DICOM node properties successfully saved". • Click "OK". Siemens AG SPR2-230.814.03.02.02 SIREMOBIL Iso-C 3D Page 27 of 52 Medical Solutions 11.05 CS SD 24...
- Page 28 • Wait until the application SW has restarted. • Switch the system completely off and then back on. - All configuration data is thus saved within syngo. SIREMOBIL Iso-C 3D SPR2-230.814.03.02.02 Siemens AG Page 28 of 52 11.05 CS SD 24...
-
Page 29: Positioning
Using the light laser localizer, align the C-arm correctly with respect to the markings on the calibration phantom, first in the vertical and then in the horizontal C-arm position. Siemens AG SPR2-230.814.03.02.02 SIREMOBIL Iso-C 3D Page 29 of 52 Medical Solutions 11.05... -
Page 30: Systems Not Equipped With A Laser Light Localizer
C-arm position. To this end, release a brief exposure and check the position of the C-arm with respect to the calibration phantom. SIREMOBIL Iso-C 3D SPR2-230.814.03.02.02 Siemens AG Page 30 of 52 11.05... -
Page 31: Checking The Positioning
When the calibration phantom is positioned correctly, the points of the ball pat- tern will not be visible at the upper and lower image edges. See illustration below. Fig. 17: adjustment Siemens AG SPR2-230.814.03.02.02 SIREMOBIL Iso-C 3D Page 31 of 52 Medical Solutions 11.05 CS SD 24... -
Page 32: Calibration
• Under "Reset calibration data", click "Reset". The following is displayed: “Reset all Calibration Data! Are you sure?" • Click "OK". SIREMOBIL Iso-C 3D SPR2-230.814.03.02.02 Siemens AG Page 32 of 52 11.05 CS SD 24 Medical Solutions... - Page 33 BrainLAB navigation system Fig. 19: Calibration_1 • Select “Without Navigation shield”. Fig. 20: Calibration_2 Siemens AG SPR2-230.814.03.02.02 SIREMOBIL Iso-C 3D Page 33 of 52 Medical Solutions 11.05 CS SD 24...
- Page 34 Orbital = -95 degrees No. 7 Angulation = 180 degrees Orbital = +95 degrees No. 8 Angulation = 180 degrees Orbital = -95 degrees SIREMOBIL Iso-C 3D SPR2-230.814.03.02.02 Siemens AG Page 34 of 52 11.05 CS SD 24 Medical Solutions...
- Page 35 BrainLAB navigation system Fig. 21: Calibration_finish • Click "Home". • Close the service software. NOTE This completes the calibration procedure. Siemens AG SPR2-230.814.03.02.02 SIREMOBIL Iso-C 3D Page 35 of 52 Medical Solutions 11.05 CS SD 24...
-
Page 36: Image Quality Test
C-arm. • Use the laser light localizer (if one is installed) to aid in locating the isocenter. Fig. 22: Test_set-up_side_view Fig. 23: Test_set-up_top_view SIREMOBIL Iso-C 3D SPR2-230.814.03.02.02 Siemens AG Page 36 of 52 11.05 CS SD 24... -
Page 37: Testing Procedure
Click “Acquisition ISO-C 3D”. - This is the button with the two C-arms and the figure in the middle, in the upper right button block. Siemens AG SPR2-230.814.03.02.02 SIREMOBIL Iso-C 3D Page 37 of 52 Medical Solutions 11.05 CS SD 24... - Page 38 BrainLAB navigation system Fig. 25: scan_1 • Click on a leg. • Under “Scan protocol”, click “Slow”. • Under “Navigation marker ring”, select “not mounted”. SIREMOBIL Iso-C 3D SPR2-230.814.03.02.02 Siemens AG Page 38 of 52 11.05 CS SD 24 Medical Solutions...
- Page 39 Fig. 26: scan_2 • For orientation, click the right-hand button. - This is the button with the C-arm. Doing so activates the “Start 3D scan” button. Siemens AG SPR2-230.814.03.02.02 SIREMOBIL Iso-C 3D Page 39 of 52 Medical Solutions 11.05 CS SD 24...
- Page 40 BrainLAB navigation system Fig. 27: scan_3 • Click “Start 3D scan”. SIREMOBIL Iso-C 3D SPR2-230.814.03.02.02 Siemens AG Page 40 of 52 11.05 CS SD 24 Medical Solutions...
- Page 41 Fig. 29: START2 • Manually move the C-arm to the start position (into the limit switch). - Image intensifier tube located on main unit. Siemens AG SPR2-230.814.03.02.02 SIREMOBIL Iso-C 3D Page 41 of 52 Medical Solutions 11.05 CS SD 24...
- Page 42 BrainLAB navigation system The following window appears following a successful manual test run. Fig. 30: EXECUTE SIREMOBIL Iso-C 3D SPR2-230.814.03.02.02 Siemens AG Page 42 of 52 11.05 CS SD 24 Medical Solutions...
-
Page 43: Measurement Run
During the scan, the following window is displayed: Fig. 31: MEASURE2 The following window appears following a successful measurement: Siemens AG SPR2-230.814.03.02.02 SIREMOBIL Iso-C 3D Page 43 of 52 Medical Solutions 11.05 CS SD 24... - Page 44 BrainLAB navigation system Fig. 32: DONE • Remove foot from the footswitch. At the end of the measurement, the reconstructed volume automatically appears in the 3D card. SIREMOBIL Iso-C 3D SPR2-230.814.03.02.02 Siemens AG Page 44 of 52 11.05 CS SD 24...
- Page 45 BrainLAB navigation system Fig. 33: syngo_screen_after_successful_data_input Siemens AG SPR2-230.814.03.02.02 SIREMOBIL Iso-C 3D Page 45 of 52 Medical Solutions 11.05 CS SD 24...
-
Page 46: Checking 3D High Resolution
Fig. 34: Slice_plane_setting_in_upper_left_window • If the lead strip test pattern is slanted in relation to the floor plane, correct this by rotat- ing the slice plane in Free Mode. SIREMOBIL Iso-C 3D SPR2-230.814.03.02.02 Siemens AG Page 46 of 52 11.05... - Page 47 A syngo image should display a plane parallel to the lead strip test pattern. Fig. 36: slice_parallel_to_lead_strip_test_pattern_in_upper_right_window • Double-click this image. A full-field image is displayed. Siemens AG SPR2-230.814.03.02.02 SIREMOBIL Iso-C 3D Page 47 of 52 Medical Solutions 11.05 CS SD 24...
-
Page 48: Notify Brainlab
Fax it to the appropriate organizational unit at BrainLAB. - This notifies BrainLAB that the navigation system is ready to be installed. NOTE From Siemens' perspective, this concludes the process of install- ing the BrainLAB navigation system. SIREMOBIL Iso-C 3D SPR2-230.814.03.02.02... - Page 49 File the new CDs and disk in the logbook. • Remove the old 3D reconstruction license disk, since this is included in the 3D naviga- tion license. Siemens AG SPR2-230.814.03.02.02 SIREMOBIL Iso-C 3D Page 49 of 52 Medical Solutions 11.05 CS SD 24...
- Page 50 Fax Form 8Fax Form Fig. 37: FAX SIREMOBIL Iso-C 3D SPR2-230.814.03.02.02 Siemens AG Page 50 of 52 11.05 CS SD 24 Medical Solutions...
- Page 51 Changes to Previous Version 9Changes to Previous Version Added items: -Configuration -Calibration -Image quality test Added differentiation between navigation systems vendor BrainLAB and other navigation systems vendors. Siemens AG SPR2-230.814.03.02.02 SIREMOBIL Iso-C 3D Page 51 of 52 Medical Solutions 11.05 CS SD 24...
- Page 52 Changes to Previous Version SIREMOBIL Iso-C 3D SPR2-230.814.03.02.02 Siemens AG Page 52 of 52 11.05 CS SD 24 Medical Solutions...