
Related Manuals for Motorola 8700


Summary of Contents for Motorola 8700
- Page 1 APPLICANT: MOTOROLA FCC ID: IHDT5ZN1 A preliminary draft copy of the user manual follows. EXHIBIT 8...
- Page 2 Prohibition of illegal modification of Each handset manufactured by Motorola has its own ESN(Electronics Serial Number). If this ESN is removed or changed, or an attempt is made to reproduce and enter another ESN, the software built in the handset starts to operate to abort the attempt.
- Page 3 Compliments Thanks in deed for and congratulations to purchasing the cellular phone of Motorola which enjoys the best radio communication technology in the world. All of the Motorola cellular communication equipment are designed and manufactured in compliance with the in-house strict standard and international standards.
-
Page 4: Table Of Contents
Content Information about Components and Battery Confirmation of Components Information about Battery Battery Use Time Information about Charge Configuration of MC-8700 Basic Use Turning Power On/Off Turning Handset On/Off Receiving a Call Viewing Feature Menu How to Use Major Features... - Page 5 Selecting Keytone Volume Selecting Voice Volume Selecting Length of Keytone Selecting Call Connection Tone/End Tone Volume Alert Tones Call Connection Tone One Minute Alert Tone Area Change Alert Tone Signal Low Alert Tone Call Closing Tone Lock Mode Lock Setting Setting Originating Call Restrict New Password Setting Emergency Number...
- Page 6 Additional Service Registering/Clearing Transit Connection Feature Software Version Features Available During Calls Sending User's Own Telephone Number Receiving Tone Volume Silencing Sending Tone (Mute Mode) Note Mode User's Own Telephone Number Electronic Dialing How to Use Message Service Basic Use Receiving A Message Confirming Received Voice Message Confirming Received Text Message...
-
Page 7: Information About Components And Battery
Information about Components and Battery Confirmation of Components Standard type battery, Medium capacity battery, User's manual Separate items(battery, battery charger, etc.) vary according to clients' requirements. -
Page 8: Information About Battery
Information about Battery Battery Status Display Battery charging status can be confirmed from the illustration on the LCD display of the handset showing battery charge level. Shows that battery charge level is high. Shows that battery charge level is low. Shows that the battery has been almost discharged, so it is necessary to recharge it promptly. - Page 9 Storage and Disposal of Battery To extend the battery life, do NOT leave off the battery under -10? or beyond 45? . Do not leave the battery inside your car but carry it with yourself. A battery with its life over must be thrown to a designated place; do not throw it near open flame. Caution: Use care not to allow the battery terminals(metal plates touching the charger) to short other metals.
- Page 10 Installing Battery Pack 1. Fit the upper side of the battery pack into the groove provided on the rear side of the handset. 2. Slide it all the way in the arrow direction until 'click' is heard. Removing Battery Pack Push down the battery pack with the removal button pressed.
-
Page 11: Battery Use Time
Battery Use Time l Battery use time is decreased if you stay in a no service area over an extended period of time. l Electric current is used more in standby time than during calls, so the longer call time is, the shorter the standby time remains. l The use time of digital cellular phone varies depending upon mobile telecommunications system and base station system setups. -
Page 12: Information About Charge
Information about Charge Using Desktop Charger The battery can be charged with the handset attached to the front side of the charger. For the rear side of the charger, the battery is charged as illustrated in the diagram. - Page 13 Battery Charging Time Charging time depending upon battery and charger is as follows: l Standard type battery : 3 hours l Medium capacity battery : 4 hours Temperature It is recommended that the battery is charged at room temperature. To protect the battery life, do not leave off the battery under 10? or beyond 45? .
-
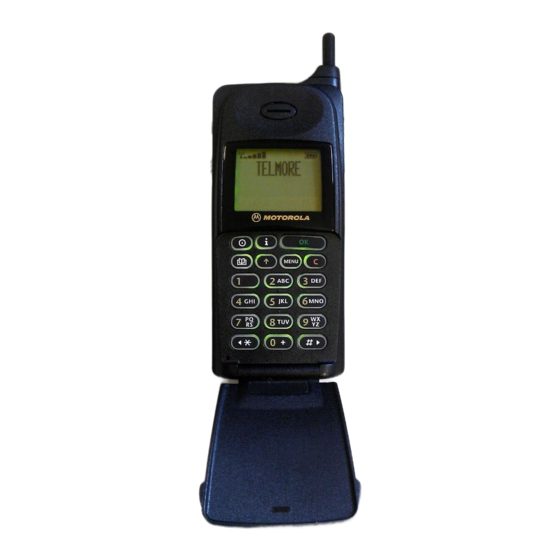
Page 15: Configuration Of Mc-8700
Configuration of MC-8700... - Page 16 Feature Keys Used to end a call or to turn on/off the power. Used to delete characters/numbers shown on LCD or use message service. Used to display feature setup MENU or convert Korean to English, vice versa. Used store telephone number/name/changed feature.
- Page 17 Display Window(LCD) Displays receiving signal strength level. Displays no service area. Displays vibration feature setup. Displays alarm feature setup. Displays roaming area other than home service area. Displays in English. Displays the reception of a message. Displays battery charging level.
-
Page 18: Basic Use
Basic Use Turning Power On/Off Open the flip, and press and hold key. The lamp lights up. Opening the flip and pressing/holding key displays "Call is ended" message and then the power is turned Off. l The current time is displayed automatically in an area where radio wave can be received. -
Page 19: Turning Handset On/Off
Turning Handset On/Off 1. Open the flip and enter an area code and telephone number. 2. Press key. 3. When call is finished, either close the flip or press key. • If entering a wrong telephone number, pressing key deletes each number from the rear. -
Page 20: Viewing Feature Menu
Viewing Feature Menu 1. In standby mode, pressing Displays the feature menus. 2. Press (# 4) , (3R) or Key to confirm the number of a desired menu. 3. Press the number of the desired menu. -
Page 21: How To Use Major Features
How to Use Major Features Telephone Directory Searching by Name Using this feature searches a telephone number stored into the handset. Ô ¶ Ô ¶ key in sequence. 1. Press 2. Entering one or more characters among desired names and pressing key approaches the name group containing the desired name. - Page 22 ? Deleting Stored Numbers 1. If a desired name is displayed, press key. 2. Select 'YES" by pressing (# 4) , (3R) or key, and then press...
- Page 23 ? Entering English text Enter A by pressing once. Enter B by pressing twice. Enter C by pressing three times. Enter 2 by pressing four times. Enter a by pressing five times. Enter b by pressing six times. Enter c by pressing seven times. ? Entering special symbols Press ¶...
-
Page 24: Searching By Memory Address
Searching by Memory Address Using this feature searches a telephone number stored on the handset. Ô ¶ Ô · key in sequence. 1. Press 2. Confirm the address name you want by entering a desired storage address. 3. Pressing key places a call to the displayed number. * Quick Dialing + 3V key searches telephone numbers stored in the order of Pressing... -
Page 25: Entering A New Telephone Number
Entering A New Telephone Number Using this feature enters a new telephone number on the handset. Ô ¶ Ô ¸ key in sequence. 1. Press 2. Enter a telephone number and press key. 3. Enter a name and press key. The telephone number will be entered in the first empty address. - Page 26 5. Press (# 4) , (3R) key to select a ringer type. When a call is received from the person whose telephone number is stored, the handset alerts you with the stored name and selected type of ringer *. * This feature is available only when calling party's telephone number confirming service is supported, so it may not be provided according to the situation of the service provider.
-
Page 27: Confirming User's Own Telephone Number
Confirming User's Own Telephone Number Using this feature confirms your own telephone number on the handset. Ô ¶ Ô ¹ key in sequence. 1. Press Quick Dialing +(# 4) key in sequence confirms the user's own telephone Pressing number. ? Confirmation of Date on Lunar Base Ô... -
Page 28: Timer
Timer Last Call Time Using this feature confirms last call time in 000 minutes and 00 seconds. è · è ¶ key in sequence. 1. Press Total Call Time Using this feature confirms the total call time in 0000 calls/00000 minutes and 00 seconds. -
Page 29: Deleting Call Time Information
Deleting Call Time Information Using this feature erases all the call time information. è · è ¸ key in sequence 1. Press 2. Select 'YES" by pressing (# 4) , (3R) or key, and then press key. -
Page 30: Selecting Tone Type
Selecting Tone Type Selecting Ringer/Vibration/Lamp The handset alerts you that a call is received in one of the 4 methods: Ringer, Vibration, Ringer after Vibration, and Lamp. Using this feature allows you to select one among Ringer, Vibration, Ringer after Vibration, and Lamp. è... -
Page 31: Selecting Ringer Type
Selecting Ringer Type Using this feature selects a ringer type among 5 Ringers and 15 melodies. è ¸ è · key in sequence 1. Press 2. Press (# 4) , (3R) or key to select a desired mode. 3. Press key. -
Page 32: Selecting Ringer Volume
Selecting Ringer Volume Using this feature selects ringer volume among the four levels of low, medium, high, and maximum. è ¸ è ¸ key in sequence 1. Press 2. Press (# 4) , (3R) or key to select a desired level of volume. 3. - Page 33 Selecting Keytone Volume Using this feature selects a desired level of keytone volume among the five levels of Mute, low, medium, high, and maximum. è ¸ è ¹ key in sequence 1. Press 2. Press (# 4) , (3R) or key to select a desired level of volume.
- Page 34 Selecting Voice Volume Using this feature selects a desired level of voice volume among the 4 levels of low, medium, high, and maximum. • Voice volume can be adjusted easily using key with a hand during a call. è ¸ è º...
- Page 35 Selecting Length of Keytone Using this feature selects a desired length of keytone among the 2 levels of Short and Long. è ¸ è » key in sequence 1. Press 2. Press (# 4) , (3R) or key to select a desired length of keytone. 3.
- Page 36 Selecting Call Connection Tone/End Tone Volume Using this feature selects volume of call connection tone and end tone among the four levels of low, medium, high, and maximum. è ¸ è ¼ key in sequence 1. Press 2. Press (# 4) , (3R) or key to select a desired level of volume.
- Page 37 Alert Tones Using this feature sets or resets various alert tones. Call Connection Tone Using this feature sets or resets call connection tone. è ¸ è ½ è ¶ key in sequence 1. Press 2. Press (# 4) , (3R) or key to select a desired mode.
- Page 38 One Minute Alert Tone Using this feature sets or resets one minute alert tone. • One Minute Alert Tone: An alert tone tone sounded at intervals of 1 minute during calls. è ¸ è ½ è · key in sequence 1.
- Page 39 Area Change Alert Tone Using this feature sets or resets area change alert tone. è ¸ è ½ è ¸ key in sequence 1. Press 2. Press (# 4) , (3R) or key to select a desired mode. 3. Press key.
- Page 40 Signal Low Alert Tone Using this feature sets or resets alert tone sounded when signal strength level is so low that the call may be discontinued soon. è ¸ è ½ è ¹ key in sequence 1. Press 2. Press (# 4) , (3R) or key to select a desired mode.
- Page 41 Call Closing Tone Use this feature sets or resets "Call End Tone" è ¸ è ½ è º key in sequence 1. Press 2. Press (# 4) , (3R) or key to select a desired mode. 3. Press key. (The phone is set to the selected mode.)
- Page 42 Lock Mode Lock Setting Using this feature sets Lock state of the handset to No, When Power On, or Always. è ¹ è Password of 4 ciphers è ¶ key in sequence. 1. Press (Default password: 4 ciphers on the last number of user's own telephone number 017- ? ? ? - ? ? ? ? ) 2.
- Page 43 Setting Originating Call Restrict Using this feature sets a call restrict among Origination Restrict, International Call Restrict, and 'Code 700' Restrict. è ¹ è Password of 4 ciphers è · key in sequence. 1. Press 2. Select a desired call restrict feature by pressing the number. 3.
- Page 44 ? Origination Restrict Using this feature, you can set the handset to a selection among 'YES', 'NO', and '1? 9 Addresses'. If 'YES' is selected, all the originating calls including international calls and code 700 are restricted. ? International Call Restrict Using this feature, you can set international call restrict to 'YES' or 'NO'.
- Page 45 New Password Using this feature enters a new password on the handset. è ¹ è Password of 4 ciphers è ¸ key in sequence. 1. Press 2. Enter a new password and press key. 3. Enter it again and press key.
- Page 46 Setting Emergency Number Using this feature enters 3 emergency telephone numbers on the handset. • Emergency telephone can be used even with the handset set to LOCK mode. è ¹ è Password of 4 ciphers è ¹ key in sequence. 1.
- Page 47 Clearing Emergency Call Number To clear an emergency telephone call number, press key on the display screen for emergency call number stored on the phone, and then erase a desired telephone number by using key and press key. ? How to place an emergency call •...
- Page 48 Erasing Called List Using this feature erases the called list on the handset. • 10 telephone numbers can be erased from the recently called list. è ¹ è Password of 4 ciphers è º key in sequence. 1. Press 2. Press (# 4), (3R) or key to select either 'YES' or 'NO'.
- Page 49 Confidential Telephone Number If this feature is set, a telephone number which has been set to 'Confidential' when entering telephone numbers is marked with "Confidential" and so it is not displayed on the phone display. See p30. • To place a call to a telephone number entered into the memory as 'Confidential', the password must be entered.
- Page 50 Returning to Defaults Using this feature can return all the settings set, changed, or registered on the phone to the factory default status. è ¹ è Password of 4 ciphers è ¼ key in sequence. 1. Press 2. Press (# 4), (3R) or key to select either ‘...
- Page 51 Call Related Features Auto Answer You can use this feature to set ringer mode so that the ringer sounds as many times as specified (No/Once/twice/Thee times) and then the connection is made. è º è ¶ key in sequence 1. Press 2.
- Page 52 Auto Redialing You can use this feature to set the phone so that it re-attempts call placing at specified intervals(No/Every 5 sec./Every 10 sec./Every 20sec.) up to 5 times. è º è · key in sequence 1. Press 2. Press (# 4) , (3R) or key to select a desired mode.
- Page 53 Auto Area Code Using this feature sets frequently used area codes on the handset so that an area code is displayed automatically when entering a telephone number. è º è ¸ key in sequence 1. Press 2. Enter an area code. 3.
- Page 54 Setting Alarm Using this feature sets time on the phone so that the ringer sounds at the specified time. è º è ¹ key in sequence 1. Press 2. Select 'YES' and press key. 3. Enter a desired time, and then press key.
- Page 55 Call Reservation Using this feature sets a telephone number and calling time on the phone so that you can place a call at a specified time. è º è º key in sequence 1. Press 2. Select 'YES' and press key.
- Page 56 active in order to alert you that it is the reserved time, and it displays as illustrated in the right diagram. If is pressed with "Reserved Telephone Number" displayed, the call is connected directly to the called party. Schedule Management This feature allows you to set the time for an important schedule and the schedule name on the phone.
- Page 57 ? Example of Schedule Entering and Storing • Storage of schedule by date • Storage of schedule by date monthly • Storage of schedule by date daily • Storage of schedule by week • Storage of schedule by week monthly...
- Page 58 • To enter "monthly" or "daily", press key from month, week, or display. World Time Using this feature displays the current time of 21 major cities in the world. • The local time is displayed for approximately 20 seconds. è º è ¼...
- Page 60 User Time You can display the current on the phone display as early or late(up to 24 hours) as desired. è º è ½ key in sequence. 1. Press 2. Press (# 4) , (3R) or key to select 'YES'. 3.
- Page 61 Selecting Background Illumination You can select any of 7 background illumination modes from "On when opening the flip/Auto adjustment(Off in 5 sec.)/Always Off/Off in 5 sec./Off in 10 sec./Off in 15 sec./Off in 20 sec. è º è ¾ key in sequence. 1.
- Page 62 Changing Initial Display Screen You can change the initial display message in up to 8 Hangul characters/16 alphabetic letters. è º è 1. Press (0) key in sequence. 2. Enter a desired message. (See "How to Enter Characters" on p27. 3.
- Page 63 Additional Service If you use additional service provided by service providers, the following features will be used conveniently. The appropriate additional service should have been registered on the service provider. Some services are provided for pay, and so you are required to contact the providers. Registering/Clearing Transit Connection Feature You can register for transit connection service provided by Power Digital 017.
- Page 64 Software Version You can confirm the software version of the phone using this feature. è (# 4) è (# 4) key in sequence. 1. Press 2. The phone displays the current software version. • Quick Dialing Setting/Clearing Vibration Mode - Pressing and holding (3R) key sets the handset to vibration mode. •...
- Page 65 Features Available During Calls Sending User's Own Telephone Number When using cellular phone service or beeper service, you can use this features to send your own telephone number during a call. è ¶ key in sequence. 1. Press Receiving Tone Volume Using this features adjusts receiving tone volume in 4 levels during a call.
- Page 66 Silencing Sending Tone (Mute Mode) Using this feature, you can silence sending tone during a call or clear mute mode. è ¸ key in sequence. 1. Press 2. With sending tone silenced, pressing key clears mute mode. Note Mode You can enter called number during a call using this feature. (The noted telephone number is stored on the called list.) è...
- Page 67 • Pressing during a call enables you to use the note feature. User's Own Telephone Number You can confirm your own telephone number during a call using this feature. è º key in sequence. 1. Press • In standby mode, press (# 4) key to confirm your own telephone number.
- Page 68 2. Press key. 3. Select a desired dial delay mode. 4. After the call is connected, enter the dial number to be sent. • If you have to send the dial number several times, repeat the steps 2? 4. 5. Press key.
- Page 69 How to Use Message Service Basic Use Pressing message icon allows you to enter message menu easily. The message menu is divided into 5 types: 1. Voice mail, 2. Text message, Message sending, 4. Clearing All Messages, and 5. Set. When a message is received, the phone sets ringer, vibration, or lamp active to alert you that the message is received and to display the appropriate icon on [ ] window.
- Page 70 Receiving A Message Confirming Received Voice Message You can confirm a received voice message using this feature. è ¶ key in sequence. 1. Press 2. Press to confirm voice message. 3. Pressing places a call to the displayed number.
- Page 71 Confirming Received Text Message You can confirm a received text message using this feature. è · key in sequence. 1. Press 2. Press to confirm text message. 3. Pressing connects you to the telephone number left by the calling party. Mark ? indicates that the same message has been received repeatedly.
- Page 72 Sending A Message You can send a text message using this feature. è ¸ key in sequence. 1. Press 2. Enter the calling party's telephone number and press , and then enter a telephone number to receive and 3. Enter a message to send. (See "How to Enter Hangul/English Characters" on p27. Up to 40 Hangul characters and 80 alphabetic letters can be sent at one time.) 4.
- Page 73 Erasing All Messages All the messages can be erased by using this feature. è ¹ key in sequence. 1. Press 2. Press ¶ key to delete all the messages. For 'NO", press · key.
- Page 74 Setting You can set message reception display screen/reception alert using this feature. ? Setting Reception Display è º è ¶ 1. Press key in sequence. 2. Press key to select a desired mode. 3. Press key. • Viewing Contents: Two lines of contents from the message are displayed on the handset display.
- Page 75 ? Setting Alarm for Reception of Message è º è · 1. Press key in sequence. 2. Press key to select a desired mode. 3. Press key. • 2-minute alarm: Ringer or vibration mode alerts you every 2 minutes that a message has been received. •...
- Page 76 Appendix Menu Status Table Main Menus Sub-menus 1. Telephone directory ? Searching by Name ? Searching by Memory Address ? Entering A New Telephone Number ? Confirming User's Own Telephone Number 2. Timer ? Last Call Time ? Total Call Time ? Erasing Call Information 3.
- Page 77 Main Menus Sub-menus ? Setting Emergency Number ? Erasing Called List ? Confidential Telephone Number ? Returning to Defaults 5. Call Related Features ? Auto Answer ? Auto Redialing ? Auto Area Code ? Setting Alarm ? Call Reservation ? Schedule Management ? World Time ? User Time ? Selecting Background Illumination...