Panasonic PV-DV101 Manual
Hide thumbs
Also See for PV-DV101:
- Operating instructions manual (64 pages) ,
- Operating manual (65 pages) ,
- Operating instructions manual (64 pages)

Related Manuals for Panasonic PV-DV101


Summary of Contents for Panasonic PV-DV101
- Page 1 ORDER NO. VMD0102006C3 Digital Video Camcorder PV-DV101 / PV-DV401 SPECIFICATIONS...
- Page 2 2001 Matsushita Electric Industrial Co., Ltd. All rights reserved. Unauthorized copying and distribution is a violation of law. 1. SAFETY PRECAUTIONS GENERAL GUIDELINES 1. IMPORTANT SAFETY NOTICE There are special components used in this equipment which are important for safety. These parts are marked by in the Schematic Diagrams, Circuit Board Layout, Exploded Views and...
- Page 3 Replacement Parts List. It is essential that these criticalparts should be replaced with manufacturer’s specified parts to prevent X-RADIATION, shock, fire, or other hazards. Do not modify the original design without permission of manufacturer. 2. An Isolation Transformer should always be used during the servicing of AC Adaptor whose chassis is not isolated from the AC power line.
- Page 4 3. Use an AC voltmeter, with 1 k /V or more sensitivity, to measure the potential across the resistor. 4. Check each exposed metallic part, and measure the voltage at each point. 5. Reverse the AC plug in the AC outlet and repeat each of the above measurements.
- Page 5 foil, to prevent electrostatic charge buildup or exposure of the assembly. 3. Use only a grounded-tip soldering iron to solder or unsolder ES devices. 4. Use only an antistatic solder removal device. Some solder removal devices not classified as "antistatic (ESD protected)" can generate electrical charge sufficient to damage ES devices.
- Page 6 It is important to use an accurate periodically calibrated high voltage meter. 3. Measure the High Voltage. The meter (electrostatic type) reading should indicate 2.2 kV±0.1 kV. If the meter indication is out of tolerance, immediate service and correction is required to prevent the possibility of premature componentfailure.
- Page 7 5.1.2. INTERCONNECTION OF EXTENSION CABLES Fig. 1-2...
- Page 8 5.1.3. SIMPLIFIED FAULT FINDING DATA (SELF-DIAGNOSTIC SYSTEM) When following conditions occur, the Power LED will flash according to the condition. Fig. 2-1...
- Page 9 If any of the following numbers appear on-screen, the palmcorder may need service. Do not remove the battery (if attached) and write down the displayed number. Fig. 2-2 Note: While battery remains, the Error No. will be displayed again when the power is switched off and on again.
- Page 10 removed or dead, Error No. will not remain in the memory.) 5.1.4. SHORT JIG C.B.A. (For early products) Purpose of the Short JIG C.B.A. In order to prevent the breaking of the Flash ROM due to ESD (Electro Static Discharge), the Short JIG C.B.A. is installed to the connector B3 on the Main C.B.A.
- Page 11 used to install the F.P.C. to the Non ZIF Connector. Fig. 4 5.1.6. METHOD FOR LOADING/UNLOADING OF MECHANISM CAUTION: If loading does not start after DC Power Supply is applied, DO NOT continue to applying DC Power Supply. Apply+3 VDC Power Supply to the Loading Motor terminals. Loading: DC - to Portion "a,"...
- Page 12 ADJUSTMENT (LSUP0007) A signal check can be performed using the Interface Board.
- Page 15 5.1.8. HOW TO REMOVE A JAMMED TAPE 5.1.8.1. Electrical Method CAUTION: If loading does not start after DC Power Supply is applied, DO NOT continue to applying DC Power Supply. In this case, perform in Manual Method. Remove a jammed tape as follows: 1.
- Page 16 4. Rewind the tape into the DV Cassette Tape by turning the Capstan Rotor clockwise. Fig. 6-2 5. Eject the DV Cassette Tape by applying+3 VDC Power Supply again. 6. Take out the DV Cassette Tape from the Garage Unit. 5.1.8.2.
- Page 17 3. Rewind the tape into the DV Cassette Tape by turning the Capstan Rotor clockwise. 4. Eject the DV Cassette Tape by sliding the Lock Lever. Fig. 6-4 5. Take out the DV Cassette Tape from the Garage Unit. 5.1.9. EEPROM DATA CAUTION: Be sure to save the EEPROM data using PC-EVR Adjustment Program before service and adjustment in order to make sure to...
- Page 18 EEPROM data menu, and then press "Enter" key. 4. Input the file name, and then press the "Enter" key. The data of EEPROM IC will be stored to your PC. 2.How to write the EEPROM data which was stored in your PC to EEPROM IC 1.
- Page 19 2. Input the saved file name, and then press "Enter" key. ID Number will be written automatically. b When the original ID information can not be read because of destruction of EEPROM etc.: 1. Select "3. Read (Save)/Write All EEPROM data." in Main menu, and then press "Enter"...
- Page 20 5.1.12. REPLACEMENT PROCEDURES FOR CSP (CHIP SIZE PACKAGE) IC 5.1.12.1. EQUIPMENT 1. Pre-Heater 2. Spot Heater 3. Vacuum Pick-up 4. P.C.B. Holder Fig. 9-1...
- Page 21 Fig. 9-2 5.1.12.2. REMOVAL OF CSP IC Fig. 9-3...
- Page 22 5.1.12.3. INSTALLATION OF CSP IC Fig. 9-4...
- Page 23 Fig. 9-5...
- Page 24 5.1.12.4. CSP IC LOCATION Fig. 9-6...
- Page 25 5.1.13. SPECIAL NOTE All integrated circuits and many other semiconductor devices are electrostatically sensitive and therefore require the special handlings techniques described under the "ELECTROSTATICALLY SENSITIVE (ES) DEVICES" section of this service manual. 5.1.14. REPLACEMENT PROCEDURE FOR LEADLESS (CHIP) COMPONENT The following procedures are recommended for the replacement of the leadless components used in this Unit.
- Page 26 Note: A. Leadless component must not be reused after removal. B. Excessive mechanical stress and rubbing of the component electrode must be avoided. 2. Removing the leadless component Grasp the leadless component body with tweezers and alternately apply heat to both electrodes. When the solder on both electrodes is melted, remove leadless component with a twisting motion.
- Page 27 Note: Do not glue the replacement leadless component to the circuit board. 5.1.15. IC6001 REPLACEMENT NOTE Three types of IC6001 (M32121FCAWG, M32121MCA100, or M32121MCA101) are used on a running change basis. When replacing IC6001, as in cases like the following, it is necessary to replace the resistor at the same time.
- Page 28 Two types of IC401 (MN1030F01K or MN103001GDA) are used on a running change basis. When replacing IC401, as in cases like the following, it is necessary to replace the resistor at the same time. Otherwise, IC401 may have a short life. Be sure to confirm the part numbers of both the original IC401 and the new one supplied as shown: - When replacing IC401 (MN1030F01K) with IC401 (MN103001GDA),...
- Page 29 6. DISASSEMBLY/ASSEMBLY PROCEDURES 6.1. CABINET SECTION 6.1.1. Disassembly Flowchart This flow chart indicates the disassembly steps of the cabinet parts and the P.C.Boards in order to gain access to item (s) to be serviced. When reassembling, perform the step (s) in the reverse...
- Page 30 order. Bend, route and dress the wires as they wereoriginally. Fig. D1 Note : 1. When removing the cabinet, work with care so as not to break the Locking Tabs. 2. Place a cloth or some other soft material under the P.C. Boards or Unit to prevent damage.
- Page 31 How to read chart shown above: A: Order of steps in Procedure When reassembling, perform the step(s) in the reverse order. These numbers are also used as the identification (location) No. of parts in Figures. B: Part to be removed or installed. C: Fig.
- Page 32 6.1.2.2. Left Cover Fig. D3...
- Page 33 6.1.2.3. Side Case R Unit Fig. D4...
- Page 34 6.1.2.4. Main C.B.A., Power C.B.A. Fig. D5 6.1.2.5. Lens Unit Fig. D6...
- Page 35 6.1.2.6. Cassette Cover Unit, Mechanism Chassis Ass’y Fig. D7...
- Page 36 6.1.2.7. Top Case Ass’y Fig. D8 6.1.3. FRONT CASE UNIT PORTION 6.1.3.1. Front C.B.A. Fig. D9...
- Page 37 6.1.3.2. Lens Ring Unit Fig. D10 6.1.4. SIDE CASE R UNIT PORTION 6.1.4.1. Right Cover Unit Fig. D11...
- Page 38 6.1.4.2. LCD Case Unit Fig. D12 6.1.4.3. Speaker Unit, Toripod Frame Fig. D13 6.1.5. LCD PORTION...
- Page 39 6.1.5.1. LCD Case A Unit Fig. D14 6.1.5.2. LCD Shaft Unit, LCD Case B Fig. D15...
- Page 40 6.1.5.3. LCD C.B.A., LCD Panel Unit Fig. D16...
- Page 41 6.1.5.4. LCD Lamp Unit Fig. D17...
- Page 42 6.1.6. LENS PORTION A 6.1.6.1. CCD C.B.A., Filter Rubber, Optical Filter, Optical Filter Stopper, IR Cut Filter Fig. D18-1...
- Page 43 Fig. D18-2...
- Page 44 6.1.7. LENS PORTION B 6.1.7.1. Lens Piece...
- Page 45 Fig. D19 6.1.7.2. Focus Motor Unit, Zoom Motor Unit Fig. D20 6.1.8. SIDE CASE L UNIT PORTION...
- Page 46 6.1.8.1. Jack Ass’y Fig. D21 6.1.8.2. Jack F.P.C., S-Jack C.B.A., Jack C.B.A., Jack Angle Fig. D22...
- Page 47 6.1.9. TOP CASE UNIT PORTION 6.1.9.1. Top Case Unit, EVF Unit/Color EVF Unit Fig. D23 6.1.9.2. Top Angle, Top Operation Unit Fig. D24...
- Page 48 6.1.10. EVF UNIT PORTION (For Model with Monochrome EVF) Note: When disassembling or reassembling, make sure that no dust gets...
- Page 49 in EVF Unit. 6.1.10.1. Eye Cap Unit Fig. D25 6.1.10.2. EVF Base Holder Fig. D26 6.1.10.3. EVF Case A Unit, Dust Cover, EVF Case B Unit Fig. D27...
- Page 50 6.1.10.4. EVF F.P.C., CRT, Deflection Yoke, EVF C.B.A. Fig. D28 6.1.11. COLOR EVF UNIT PORTION (For Model with Color EVF)
- Page 51 Note: When disassembling or reassembling, make sure that no dust gets in Color EVF Unit. 6.1.11.1. Eye Cap Unit Fig. D29...
- Page 52 6.1.11.2. LCD EVF Case A, EVF Panel Unit Fig. D30 6.1.11.3. EVF F.P.C. Holder, EVF Fixing Angle, LCD EVF Case, EVF F.P.C., LCD EVF Angle Unit Fig. D31...
- Page 53 6.1.11.4. Color EVF C.B.A., EVF Protect A, Protect Plate, LED Diffusion Plate, LED Lens, EVF LCD Holder, LCD Panel, EVF Protect B Fig. D32...
- Page 54 6.2. SCREWS FOR DISASSEMBLY/ASSEMBLY OF CABINET 6.3. MECHANISM SECTION...
- Page 55 6.3.1. Inner Parts Location 6.3.1.1. TOP VIEW Fig. DM1-1...
- Page 56 6.3.1.2. BOTTOM VIEW Fig. DM1-2 6.3.2. STOP Position Confirmation Check the following points to confirm that the Mechanism is in STOP Position from the top side.
- Page 57 Fig. DM2 6.3.3. Guide Piece L, Guide Piece R, Garage Unit Fig. DM4...
- Page 58 6.3.4. Cylinder Unit Fig. DM5...
- Page 59 6.3.5. Dumper Unit Fig. DM6...
- Page 60 6.3.6. DEW Sensor Fig. DM7...
- Page 61 6.3.7. Mechanism F.P.C. Unit Fig. DM8...
- Page 62 6.3.8. Reduction Gear B Fig. DM9...
- Page 63 6.3.9. Mechanism Cover Unit Fig. DM10...
- Page 64 6.3.10. Idler Arm Unit, Center Gear Fig. DM11...
- Page 65 6.3.11. Tension Arm Unit Fig. DM12...
- Page 66 6.3.12. S Reel Table, T Reel Table Fig. DM13...
- Page 67 6.3.13. T Break Unit Fig. DM15...
- Page 68 6.3.14. T4 Height Plate, Pinch Arm Unit Fig. DM16...
- Page 69 6.3.15. Rail Fig. DM17...
- Page 70 6.3.16. Cylinder Base Unit Fig. DM18...
- Page 71 6.3.17. S& T Arm Unit, S& T Post Unit Fig. DM19...
- Page 72 6.3.18. Loading Motor Unit Fig. DM20...
- Page 73 6.3.19. Sensor F.P.C. Fig. DM21...
- Page 74 6.3.20. Tension Drive Arm, S Brake Drive Lever Fig. DM22...
- Page 75 6.3.21. Cam Gear Fig. DM23...
- Page 76 6.3.22. Pinch Drive Arm, Intermediate Gear Fig. DM24...
- Page 77 6.3.23. Mode Switch Fig. DM25...
- Page 78 6.3.24. MIC Switch Fig. DM26...
- Page 79 6.3.25. Main Plate Unit Fig. DM27...
- Page 80 6.3.26. T4 Drive Arm Fig. DM28...
- Page 81 6.3.27. Drive Pulley Fig. DM29...
- Page 82 6.3.28. Capstan Unit, Timing Belt, Capstan Adjust Spring Fig. DM30...
- Page 83 6.3.29. Lock Lever Unit, Lock Pick Lever Fig. DM31...
- Page 84 6.4. SCREWS FOR DISASSEMBLY/ASSEMBLY OF MECHANISM 7. ADJUSTMENT PROCEDURES 7.1. SERVICE FIXTURES& TOOLS...
- Page 86 7.2. MECHANICAL ADJUSTMENT 7.2.1. Comparison between adjustment items and replacement parts 7.2.2. TENSION POST ADJUSTMENT Purpose: To maintain a constant tape tension so that the tape runs with stability.
- Page 87 Symptom of Misadjustment: 1. If the adjusted value is below the specification, the tape tension is not sufficient, thus causing a tape slack. 2. If the adjusted value is above the specification, the tape tension is too high, thus causing tape damage. Equipment Required: Flat Headed (-) Screwdriver (Purchase Locally) 1.
- Page 88 1. Set the Capstan Tilt Adjustment Tool between Capstan Unit and Chassis. Fig. T2-1 2. Tighten the Capstan Adjust Screw so that the plate of Capstan Unit just touches to the Capstan Tilt Adjustment Tool. Fig. T2-2 7.2.4. T4 POST HEIGHT CONFIRMATION Purpose: To confirm so that the height of the T4 Post is proper.
- Page 89 2. Slide the Tape Eject Switch. Then open the Cassette Cover Unit. Fig. T3-2 3. Remove the Cassette Cover Unit. 4. Confirm that the tape travels without curing at T4 post in both PLAY and REVIEW modes. If curing is apparent, replace the Pinch Arm Unit.
- Page 90 7.2.5. ENVELOPE OUTPUT ADJUSTMENT 1. Connect the Camcorder and the Interface Board with Camera Connecting Cable. 2. Connect the oscilloscope to "Envelope TP" on the Interface Board. 3. Playback the Tape Path Alignment Tape (LSVQ0041). 4. Adjust the S1 post by turning the top of post with Post Height Adjustment Fixture (LSVQ0021) so that the left half of envelope signal becomes flat as possible.
- Page 91 7.3. ELECTRICAL ADJUSTMENT 7.3.1. INITIAL GUIDELINE The table below shows which adjustments are necessary according to the unit parts and individual parts to be replaced. Make sure to perform these adjustments shown below as necessary. 7.3.2. TEST EQUIPMENT 1. Dual-Trace Oscilloscope Voltage Range: 0.001 to 50 V/Div.
- Page 92 Probes: 10:1, 1:1 2. Frequency Counter 3. Vectorscope 4. Plastic Tip Driver 5. Personal Computer PC: IBM PC/AT or compatible OS: MS-DOS or MS-Windows CPU: 486 or higher Drive: 3.5 inch 1.44 MB floppy disk drive Port: D-Sub-9-pin Serial or D-Sub-25-pin Serial Monitor: VGA Color 6.
- Page 93 Fig. E1-1 2. Remove Screws (A) and open the Right Cover Unit from the unit. Fig. E1-2 3. Connect the Camera Connecting Cable to P101 and P102 on the Interface Board. Fig. E1-3 Note: Install Camera Connecting Cable so that the Connector is upward as shown.
- Page 94 5. Connect the AC Adaptor to the unit. 6. Connect the P108 on the Interface Board to RS232C of the PC with Inter Link Cable. 7. Set the SW115 (M103 EXMOD1) on the Interface Board to "GND." 8. Set the SW110 (RS232C SEL) on the Interface Board to "DSUB." 9.
- Page 95 7.3.4. SET UP OF PC-EVR ADJUSTMENT PROGRAM 1. Turn on the Personal Computer. 2. Restart it in MS-DOS mode. 3. Change the current directory to the one including the PC-EVR Adjustment Program and start up the PC-EVR Adjustment Program as follows. A.
- Page 96 C. Input "kdv2001," and then press "ENTER" key to start up the PC -EVR Adjustment Program. Fig. E2-2 "Select Model Number Menu" will be displayed. 4. Select the model number which you are servicing, and then press "Enter" key. The starting display will be displayed. 5.
- Page 97 With using key, you can also see sub menu in order. Fig. E3-2 Note: The adjusted data is stored to EEPROM IC after each adjustment. 7.3.6. VR ADJUSTMENT 7.3.6.1. MONOCHROME EVF SECTION Note: Camcorder need NOT to be powered off and on after each adjustment procedure.
- Page 98 Equipment : ---------- Adjustment Procedure: 1. Playback the Color Bar Standard Tape. 2. Adjust the VERTICAL SIZE CONTROL (VR901) so that the vertical picture size becomes correct. Fig. E4-1 7.3.6.3. Centering Adjustment Purpose: To set the optimum picture position on the EVF picture. Symptom of Misadjustment: The EVF picture will be shifted.
- Page 99 7.3.6.4. Brightness Adjustment Purpose: To set the optimum EVF brightness level. Symptom of Misadjustment: The EVF picture will be too white or black. Test Point : ---------- Adjustment : VR903 (EVF C.B.A.) Specification : Natural Gradation Input : Color Bar Standard Tape (VFM3010EDS) Mode : Equipment : ----------...
- Page 100 Test Point : ---------- Adjustment : VR902 (EVF C.B.A.) Specification : Optimum focus Input : Color Bar Standard Tape (VFM3010EDS) Mode : Equipment : ---------- Adjustment Procedure: 1. Playback the Color Bar Standard Tape. 2. Adjust the FOCUS CONTROL (VR902) to optimum focus in the Viewfinder.
- Page 101 8.6. EVF SCHEMATIC DIAGRAM ( Model: PV-DV101 ) 8.7. COLOR EVF SCHEMATIC DIAGRAM ( Model: PV-DV401 ) 8.8. JACK/ S-JACK SCHEMATIC DIAGRAMS 8.9. INTERCONNECTION SCHEMATIC DIAGRAM 8.10. VOLTAGE CHART 9. CIRCUIT BOARD LAYOUT 9.1. MAIN C.B.A. 9.2. POWER C.B.A. 9.3. MICROPHONE UNIT/FRONT C.B.A.
- Page 102 10.10. EVF BLOCK DIAGRAM ( Model: PV-DV101 ) 10.11. COLOR EVF BLOCK DIAGRAM ( Model: PV-DV401 ) 10.12. POWER SUPPLY BLOCK DIAGRAM 11. EXPLODED VIEWS 11.1. MAIN PARTS SECTION...
- Page 103 11.2. TOP CASE AND EVF SECTION ( Model: PV-DV101)
- Page 104 11.3. TOP CASE AND COLOR EVF SECTION (MODEL: PV-DV401)
- Page 105 11.4. LENS SECTION...
- Page 106 11.5. SIDE CASE R AND LCD SECTION...
- Page 107 11.6. FRONT CASE SECTION...
- Page 108 11.7. MECHANISM SECTION...
- Page 109 11.8. PACKING PARTS AND ACCESSORIES SECTION...
- Page 110 12. REPLACEMENT PARTS LISTS BEFORE REPLACING PARTS, READ THE FOLLOWING: 12.1. REPLACEMENT NOTES 12.1.1. General Notes 1. Use only original replacement parts:...
- Page 111 To maintain original function and reliability of repaired units, use only original replacement parts which are listed with their part numbers in the parts list. 2. IMPORTANT SAFETY NOTICE Components identified by the sign have special characteristics important for safety. When replacing any of these components, use only the specified parts.
- Page 112 RTL: Retention Time Limited This indicates that the retention time is limited for this item. After the discontinuation of this item in production, it will no longer be available. 3. Cut Washers (Ref No. 473, 475, and 477) are not reusable. If removed, install a new one.
- Page 113 ashort life. Be sure to confirm the part numbers of both the original IC6001 and the new one supplied as shown: Case1: When replacing IC6001 (M32121FCAWG) with IC6001 (M32121MCA101), be sure to remove resistor (Ref No. R6027). Then, install it to R6076. Case2: When replacing IC6001 (M32121MCA100) with IC6001 (M32121FCAWG), be sure to remove resistor (Ref No.
- Page 114 Be sure to confirm the part numbers of both the original IC401 and the new one supplied as shown: - When replacing IC401 (MN1030F01K) with IC401 (MN103001GDA), be sure to remove resistor (Ref No. R427). Then, install it to R426. 12.2.
- Page 115 Ref. No. Part No. Part Name& Description Remarks LSXY0254 MECHANISM CHASSIS ASS'Y LSXY0231 MECHANISM CHASSIS ASS'Y LSYK0590 CASSETTE COVER UNIT LSKM0240 LEFT COVER LSMA0521 GROUNDING PLATE,STEEL LSYK0604 SIDE CASE L UNIT,ABS RESIN ( A ) LSYK0605 SIDE CASE L UNIT,ABS RESIN ( B ) LSEK0403 LIGHT TERMINAL UNIT LSFL0076...
- Page 116 Ref. No. Part No. Part Name& Description Remarks LSYK0709 RIGHT COVER UNIT ( B ) LSYK0565 FRONT CASE UNIT,ABS RESIN ( A ) LSYK0566 FRONT CASE UNIT,ABS RESIN ( B ) LSYK0564 LENS RING UNIT LSKN0001 MICROPHONE NET LSGQ0016 MICROPONE SHEET,NYLON-RAYON VMFW0100 SHEET,NYLON-RAYON LSYK0572...
- Page 117 Ref. No. Part No. Part Name& Description Remarks LSML0099 TENSION DRIVE ARM LSML0100 S BRAKE DRIVE LEVER VXLS1122 LOCK LEVER UNIT LSML0102 LOCK PICK LEVER LSMD0186 GUIDE PIECE R LSMD0187 GUIDE PIECE L LSXP0018 DAMPER UNIT LSSH0001 MEMORY IN CASSETTE SWITCH LSMA0365 PINCH DRIVE ARM LSMB0181...
- Page 118 Ref. No. Part No. Part Name& Description Remarks LSMT0057 MICROPHONE CUSHION ( B ) LSJW0013 FLEXIBLE FLAT CABLE W/OUT PLUG,22P0.5MMP,50MM 5 LSEK0372 CRT SOCKET UNIT ELY05V578G DEFLECTION YOKE M01LSX07WB01 LSJB8107 FLEXIBLE PRINTED CABLE W/PLUG,DC 5V VMZW0660 INSULATION SHEET,PLASTIC VMTS0035M CUSHION,RUBBER VMFS0138 SHEET,NYLON-RAYON LSSB0004...
- Page 119 12.3. ELECTRICAL REPLACEMENT PARTS LIST PRINTED CIRCUIT BOARD ASSEMBLY Ref. No. Part No. Part Name& Description Remarks LSEP8085A1 MAIN C.B.A. ( A ) E.S.D. LSEP8085C1 MAIN C.B.A. ( B ) E.S.D. LSEP8086A1 POWER C.B.A. ( A ) E.S.D. RTL LSEP8086B1 POWER C.B.A.
- Page 120 Ref. No. Part No. Part Name& Description Remarks IC301 AD9843AJST IC, LINEAR IC302 XC62FP2902MR IC, CMOS STANDARD LOGIC E.S.D. IC303 XC74UHU04WM IC, CMOS STANDARD LOGIC E.S.D. IC304 MN52A2 IC, LOGIC E.S.D. IC305 MN31121SA-E1 IC, LOGIC E.S.D. IC401 MN103001GDA IC, 32BIT MICROCONTROLLER ( B )*See Replacement Note E.S.D. IC402 PDIUSBD12 IC, LOGIC ( B )
- Page 121 Ref. No. Part No. Part Name& Description Remarks Q1204 2SB1218A TRANSISTOR SI PNP CHIP Q1204 2SA1576A106R TRANSISTOR SI PNP CHIP Q1205 UN9213J TRANSISTOR SI NPN CHIP Q1205 DTC144EE-TL TRANSISTOR SI NPN CHIP Q1206 2SD2216J TRANSISTOR SI NPN CHIP Q1206 2SC4617(R) TRANSISTOR SI NPN CHIP Q1207 2SB1462J...
- Page 122 Ref. No. Part No. Part Name& Description Remarks D301 MA2S728 DIODE SI CHIP D301 RB520S30TE61 DIODE SI CHIP D1101 RD12S-T1B DIODE ZENER CHIP 12V D1102 MA111 DIODE SI CHIP D1102 1SS355TE-17 DIODE SI CHIP D1201 MA8100 DIODE ZENER CHIP 10V D1202 MA8062-HTX DIODE ZENER CHIP 6.8V...
- Page 123 Ref. No. Part No. Part Name& Description Remarks R330 ERJ2GEJ105X MGF CHIP 1/16W 1M R331 ERJ3GEY0R00V MGF CHIP 1/16W 0 R332 ERJ2GE0R00X MGF CHIP 1/16W 0 R401 ERJ2GEJ102X MGF CHIP 1/16W 1K ( B ) R402 ERJ2GEJ101X MGF CHIP 1/16W 100 ( B ) R403 ERJ2GEJ102X MGF CHIP 1/16W 1K ( B )
- Page 124 Ref. No. Part No. Part Name& Description Remarks R718 ERJ2GEJ332X MGF CHIP 1/16W 3.3K R719 ERJ2GEJ332X MGF CHIP 1/16W 3.3K R720 ERJ2GEJ114X MGF CHIP 1/16W 110K R721 ERJ2GEJ183X MGF CHIP 1/16W 18K R722 ERJ2GEJ183X MGF CHIP 1/16W 18K R723 ERJ2GEJ114X MGF CHIP 1/16W 110K R724 ERJ2GEJ363X...
- Page 125 Ref. No. Part No. Part Name& Description Remarks R1112 ERJ2GEJ223X MGF CHIP 1/16W 22K R1113 ERJ2GEJ473X MGF CHIP 1/16W 47K R1114 ERJ2GEJ473X MGF CHIP 1/16W 47K R1201 ERJ2GEJ472X MGF CHIP 1/16W 4.7K R1202 ERJ2GEJ103X MGF CHIP 1/16W 10K R1203 ERJ2GEJ472X MGF CHIP 1/16W 4.7K R1204 ERJ2GEJ473X...
- Page 126 Ref. No. Part No. Part Name& Description Remarks R3030 ERJ2GE0R00X MGF CHIP 1/16W 0 R3032 ERJ2GE0R00X MGF CHIP 1/16W 0 R3033 ERJ2GEJ105X MGF CHIP 1/16W 1M R3034 ERJ2GEJ473X MGF CHIP 1/16W 47K R3035 ERJ2GEJ473X MGF CHIP 1/16W 47K R3101 ERJ2GEJ750X MGF CHIP 1/16W 75 R3102 ERJ2GEJ680X...
- Page 127 Ref. No. Part No. Part Name& Description Remarks R5004 ERJ2GE0R00X MGF CHIP 1/16W 0 R5005 ERJ2GEJ103X MGF CHIP 1/16W 10K R5006 ERJ2GEJ103X MGF CHIP 1/16W 10K R5008 ERJ2GEJ103X MGF CHIP 1/16W 10K R5009 ERJ2GEJ103X MGF CHIP 1/16W 10K R5011 ERJ2GEJ182X MGF CHIP 1/16W 1.8K R5012 ERJ2GEJ682X...
- Page 128 Ref. No. Part No. Part Name& Description Remarks R6056 ERJ2GEJ473X MGF CHIP 1/16W 47K R6057 ERJ2GEJ473X MGF CHIP 1/16W 47K R6058 ERJ2GEJ562X MGF CHIP 1/16W 5.6K R6059 ERJ2GEJ562X MGF CHIP 1/16W 5.6K R6060 ERJ2GEJ473X MGF CHIP 1/16W 47K R6061 ERJ2GEJ473X MGF CHIP 1/16W 47K R6062 ERJ2GEJ473X...
- Page 129 Ref. No. Part No. Part Name& Description Remarks R6113 ERJ2GEJ102X MGF CHIP 1/16W 1K R6114 ERJ2GE0R00X MGF CHIP 1/16W 0 R6115 ERJ2GEJ473X MGF CHIP 1/16W 47K R6116 ERJ2GEJ473X MGF CHIP 1/16W 47K R6117 ERJ2GE0R00X MGF CHIP 1/16W 0 R6118 ERJ2GEJ332X MGF CHIP 1/16W 3.3K R6119 ERJ2GEJ473X...
- Page 130 Ref. No. Part No. Part Name& Description Remarks R6170 ERJ2GEJ102X MGF CHIP 1/16W 1K R6171 ERJ2GEJ102X MGF CHIP 1/16W 1K R6172 ERJ2GEJ102X MGF CHIP 1/16W 1K R6173 ERJ2GEJ153X MGF CHIP 1/16W 15K R6174 ERJ2GEJ562X MGF CHIP 1/16W 5.6K R6175 ERJ2GEJ153X MGF CHIP 1/16W 15K R6176 ERJ2GEJ562X...
- Page 131 Ref. No. Part No. Part Name& Description Remarks C404 ECST0JY106 TANTALUM CHIP 6.3V 10UF ( B ) C405 ECUV1C104ZFV C CHIP 16V 0.1UF ( B ) C406 ECUV1C104ZFV C CHIP 16V 0.1UF ( B ) C407 ECUV1C104ZFV C CHIP 16V 0.1UF ( B ) C410 ECUV1C104ZFV C CHIP 16V 0.1UF ( B ) C701...
- Page 132 Ref. No. Part No. Part Name& Description Remarks C3008 ECST0JY106 TANTALUM CHIP 6.3V 10UF C3009 ECUE1C104ZFQ C CHIP 16V 0.1UF C3010 ECUE1C104ZFQ C CHIP 16V 0.1UF C3011 ECUE1C103KBQ C CHIP 16V 0.01UF C3012 ECST0JY106 TANTALUM CHIP 6.3V 10UF C3013 ECUE1C103KBQ C CHIP 16V 0.01UF C3014 ECUE1C104ZFQ C CHIP 16V 0.1UF C3015...
- Page 133 Ref. No. Part No. Part Name& Description Remarks C3124 ECUE1C103KBQ C CHIP 16V 0.01UF C3125 ECST0JY106 TANTALUM CHIP 6.3V 10UF C3126 ECUE1C103KBQ C CHIP 16V 0.01UF C3127 ECUE1C103KBQ C CHIP 16V 0.01UF C3128 ECST0JY335 TANTALUM CHIP 6.3V 3.3UF C3129 ECUV1A105KBN C CHIP 10V 1UF C3130 ECUE1C104ZFQ C CHIP 16V 0.1UF C3131...
- Page 134 Ref. No. Part No. Part Name& Description Remarks C4310 ECST0GX476 TANTALUM CHIP 4V 47UF C4312 ECUV1C104ZFV C CHIP 16V 0.1UF C5001 ECST0JY106 TANTALUM CHIP 6.3V 10UF C5002 ECST0JX476ZR TANTALUM CHIP 6.3V 47UF C5003 ECUE1H330JCQ C CHIP 50V 33PF C5004 ECUE1H681KBQ C CHIP 50V 680PF C5005 ECUE1C103KBQ C CHIP 16V 0.01UF C5007...
- Page 135 Ref. No. Part No. Part Name& Description Remarks L301 LSLJDJA100KF COIL CHIP 10UH L302 LSLJDJA100KF COIL CHIP 10UH L303 ERJ3GEY0R00V MGF CHIP 1/16W 0 L304 ERJ3GEY0R00V MGF CHIP 1/16W 0 L305 LSLJDJA100KF COIL CHIP 10UH L306 LSLJDJA220KF COIL CHIP 22UH L401 LSLJDJA220KF COIL CHIP 22UH ( B ) L402...
- Page 136 Ref. No. Part No. Part Name& Description Remarks LSJP01AF080B CONNECTOR 80P LSJS01AG030 CONNECTOR 30P LSJS01AG020 CONNECTOR 20P LSJS01KA003 CONNECTOR 3P FPC CONNECTOR Ref. No. Part No. Part Name& Description Remarks LSJS05AA008 CONNECTOR 8P LSJS05AA020 CONNECTOR 20P LSJS05AA010 CONNECTOR 10P LSJS05AA018 CONNECTOR 18P LSJS10AD012 CONNECTOR 12P...
- Page 137 Ref. No. Part No. Part Name& Description Remarks Q1001 UN9111J TRANSISTOR SI PNP CHIP Q1001 DTA114EE-TL TRANSISTOR SI PNP CHIP Q1003 UN9115J TRANSISTOR SI PNP CHIP Q1003 DTA114TE-TL TRANSISTOR SI PNP CHIP Q1004 MPL1-TL TRANSISTOR SI PNP CHIP Q1005 MPL1-TL TRANSISTOR SI PNP CHIP Q1006 MPL1-TL...
- Page 138 Ref. No. Part No. Part Name& Description Remarks R1001 ERJ2GEJ104X MGF CHIP 1/16W 100K R1002 ERJ2GEJ103X MGF CHIP 1/16W 10K R1003 ERJ2GE0R00X MGF CHIP 1/16W 0 R1005 ERJ2GEJ223X MGF CHIP 1/16W 22K R1006 ERJ2GEJ154X MGF CHIP 1/16W 150K R1007 VRJSD3D2702 MGF CHIP 1/16W 27K R1008 ERJ2GEJ273X...
- Page 139 Ref. No. Part No. Part Name& Description Remarks R1073 ERJ2GEJ222X MGF CHIP 1/16W 2.2K R1074 ERJ2GEJ221X MGF CHIP 1/16W 220 R1075 ERJ2GEJ101X MGF CHIP 1/16W 100 R1078 ERJ2GEJ221X MGF CHIP 1/16W 220 R1079 ERJ2GEJ222X MGF CHIP 1/16W 2.2K R1080 ERJ2GEJ822X MGF CHIP 1/16W 8.2K R1081 ERJ2GEJ222X...
- Page 140 Ref. No. Part No. Part Name& Description Remarks C1041 VCUSQBC105KB C CHIP 16V 1UF C1042 VCUSQBC105KB C CHIP 16V 1UF C1043 ECUE1H681KBQ C CHIP 50V 680PF C1046 ECUE1H152KBQ C CHIP 50V 1500PF C1048 ECUE1H222KBQ C CHIP 50V 2200PF C1050 ECUE1H102KBQ C CHIP 50V 1000PF C1051 ECUV0J105KBV C CHIP 6.3V 1UF C1053...
- Page 141 Ref. No. Part No. Part Name& Description Remarks L1001 LSLQJ05S100M CHOKE COIL 10UH L1002 LSLQJ05S100M CHOKE COIL 10UH L1003 LSLQJ05S220M COIL CHIP 22UH L1004 LSLQJ05S220M COIL CHIP 22UH L1005 LSLQJ05S330M COIL CHIP 33UH L1006 LSLQJ05S470M COIL CHIP 47UH L1007 VLJW3TC4R7MT CHIP 4.7UH L1008 LSLJDJA100KF COIL CHIP 10UH L1009...
- Page 142 Ref. No. Part No. Part Name& Description Remarks JK1001 LSJH0032 BATTERY TERMINAL JK6501 LSJJ0137 MINI JACK SOCKET ( A ) JK6502 LSJJ0179 USB MINI JACK SOCKET ( B ) 12.3.3. MICROPHONE UNIT/FRONT C.B.A. TRANSISTORS Ref. No. Part No. Part Name& Description Remarks Q4801 2SD1819A...
- Page 143 Ref. No. Part No. Part Name& Description Remarks R4801 VRJSD3D3901 MGF CHIP 1/16W 3.9K R4802 VRJSD3D3901 MGF CHIP 1/16W 3.9K R4803 ERJ3GEYJ104V MGF CHIP 1/16W 100K R4804 ERJ3GEYJ393V MGF CHIP 1/16W 39K R4805 ERJ3GEYJ472V MGF CHIP 1/16W 4.7K R4806 ERJ3GEYJ104V MGF CHIP 1/16W 100K R4807 ERJ3GEYJ393V MGF CHIP 1/16W 39K R4808...
- Page 144 Ref. No. Part No. Part Name& Description Remarks C4801 ECUV1H102KBV C CHIP 50V 1000PF C4802 ECUV1H102KBV C CHIP 50V 1000PF C4803 ECUV1H123KBV C CHIP 50V 0.012UF C4804 ECUV1H123KBV C CHIP 50V 0.012UF C4805 VCUSQBA105KB C CHIP 10V 1UF C4806 ECUV1H102KBV C CHIP 50V 1000PF C4807 ECST0JX226 TANTALUM CHIP 6.3V 22UH...
- Page 145 INTEGRATED CIRCUITS Ref. No. Part No. Part Name& Description Remarks IC901 AN2515NS-E1 IC, LINEAR TRANSISTORS Ref. No. Part No. Part Name& Description Remarks Q902 2SD968A(S) TRANSISTOR SI NPN CHIP Q903 2SB1218A TRANSISTOR SI PNP CHIP Q903 2SA1576A106R TRANSISTOR SI PNP CHIP DIODES Ref.
- Page 146 Ref. No. Part No. Part Name& Description Remarks VR902 LSRV0002 VARIABLE CHIP 5M VR903 EVM7ESX30B26 VARIABLE CHIP 2M CAPACITORS Ref. No. Part No. Part Name& Description Remarks C902 ECUV1H123KBV C CHIP 50V 0.012UF C903 VCUSQBA105KB C CHIP 10V 1UF C904 EEAFC0J101H ELECTROLYTIC 6.3V 100UF C905...
- Page 147 Ref. No. Part No. Part Name& Description Remarks LSEK0372 CRT SOCKET UNIT ELY05V578G DEFLECTION YOKE M01LSX07WB01 LSJB8107 FLEXIBLE PRINTED CABLE W/PLUG,DC 5V 12.3.5. COLOR ELECTRONIC VIEWFINDER C.B.A. (Model: B) INTEGRATED CIRCUITS Ref. No. Part No. Part Name& Description Remarks IC901 AN2540FHQ IC, LINEAR TRANSISTORS...
- Page 148 Ref. No. Part No. Part Name& Description Remarks R901 ERJ3GEY0R00V MGF CHIP 1/16W 0 R902 ERJ3GEYJ102V MGF CHIP 1/16W 1K R903 ERJ3GEYJ102V MGF CHIP 1/16W 1K R904 ERJ3GEYJ102V MGF CHIP 1/16W 1K R905 ERJ3GEYJ102V MGF CHIP 1/16W 1K R906 ERJ3GEYJ102V MGF CHIP 1/16W 1K R907 ERJ3GEYJ102V MGF CHIP 1/16W 1K R908...
- Page 149 Ref. No. Part No. Part Name& Description Remarks FP901 LSJS05AA022 CONNECTOR 22P FP902 LSJS05AA016 CONNECTOR 16P 12.3.6. LIQUID CRYSTAL DISPLAY C.B.A. INTEGRATED CIRCUITS Ref. No. Part No. Part Name& Description Remarks IC8001 AN2540FHQ IC, LINEAR TRANSISTORS...
- Page 150 Ref. No. Part No. Part Name& Description Remarks Q8001 UN5212 TRANSISTOR SI NPN CHIP Q8001 DTC124EUA106 TRANSISTOR SI NPN CHIP Q8002 2SB1462J TRANSISTOR SI PNP CHIP Q8002 2SA1774(R) TRANSISTOR SI PNP CHIP Q8003 UN5212 TRANSISTOR SI NPN CHIP Q8003 DTC124EUA106 TRANSISTOR SI NPN CHIP Q8004 2SB1462J...
- Page 151 Ref. No. Part No. Part Name& Description Remarks R8001 ERJ3GEYJ223V MGF CHIP 1/16W 22K R8003 ERJ3GEYJ223V MGF CHIP 1/16W 22K R8004 ERJ3GEYJ102V MGF CHIP 1/16W 1K R8005 ERJ3GEYJ102V MGF CHIP 1/16W 1K R8006 ERJ3GEYJ102V MGF CHIP 1/16W 1K R8007 ERJ3GEY0R00V MGF CHIP 1/16W 0 R8008 ERJ3GEYJ102V MGF CHIP 1/16W 1K R8009...
- Page 152 Ref. No. Part No. Part Name& Description Remarks C8001 ECUV1C474KBN C CHIP 16V 0.47UF ( A ) C8001 ECUV1E104KBN C CHIP 25V 0.1UF ( B ) C8002 ECUV1C104KBV C CHIP 16V 0.1UF C8003 ECUV1C104KBV C CHIP 16V 0.1UF C8004 ECUV1C104KBV C CHIP 16V 0.1UF C8005 NMA0J226MTR ELECTROLYTIC CHIP 6.3V 22UF...
- Page 153 MISCELLANEOUS Ref. No. Part No. Part Name& Description Remarks VMZW0660 INSULATION SHEET,PLASTIC 12.3.7. JACK C.B.A. DIODES Ref. No. Part No. Part Name& Description Remarks D3701 MA147 DIODE SI CHIP D3702 MA147 DIODE SI CHIP D3706 MAZT068H0L DIODE ZENER CHIP 6.8V D3706 DF3A6.8FE DIODE ZENER CHIP 6.8V...
- Page 154 Ref. No. Part No. Part Name& Description Remarks R3751 ERJ3GEYJ561V MGF CHIP 1/16W 560 R3752 ERJ3GEYJ331V MGF CHIP 1/16W 330 COILS Ref. No. Part No. Part Name& Description Remarks L3751 BK1608HM102 FERRITE CORE L3752 BK1608HM102 FERRITE CORE FPC CONNECTOR Ref. No. Part No.
- Page 155 SYSTEM CONTROL BLOCK DIAGRAM MAIN C.B.A. SIDE OPERATION UNIT SIDE CASE L UNIT IC6009 (DAC) IC6001 (SYSTEM MICROCONTROLLER) POWER C GAIN CONTROL TO VIDEO I/F 22,23 MENU BLOCK DIAGRAM YGAIN CONTROL MENU SW REC/PAUSE POWER PWM BIAS CONTROL DAC CS (H) OSD-R OSD-R REC/PAUSE SW...
- Page 156 SERVO BLOCK DIAGRAM CYLINDER UNIT MAIN C.B.A. IC2001 (CYLINDER/CAPSTAN MOTOR DRIVE) IC3201 (FORMATTING/EQUALIZER) 5, 6 CYLINDER CYLINDER CYLINDER SOFT MOTOR TIMING START MOTOR MOTOR SWITCHING CYL DRIVE CLOCK DRIVE 3, 4 CONTROL CONTROL DRIVE DRIVE CONTROL 7, 8 CYL PG CYL FG CYLINDER CYLINDER...
- Page 157 AF BLOCK DIAGRAM LENS UNIT MAIN C.B.A. IC6001 (SYSTEM MICROCONTROLLER) FP701 ZOOM ENCODER (FROM IC6009 (18)) FP701 HALL AMP GAIN CONTROL FROM (FROM IC6009 (2)) SYSTEM CONTROL FOCUS ZOOM PWM BIAS CONTROL BLOCK DIAGRAM ENCODER ENCODER (FROM IC6009 (19)) FP701 HALL BIAS CONTROL FOCUS ENCODER Q6008...
- Page 158 LCD BLOCK DIAGRAM VIDEO SIGNAL (REC & PB) MAIN C.B.A. LCD SHAFT UNIT LCD C.B.A. Q8002 L8004 (WITH 3INCH LCD) +12V (WITH 2.5INCH LCD) LCD PANEL UNIT FP8002 FP8003 Q8001 IC8001 (LCD RGB SIGNAL PROCESS) Q8005 FP8002 FP8003 +7.5V Q8004 FP8002 FP8003 D8001...
- Page 159 EVF BLOCK DIAGRAM VIDEO SIGNAL (REC & PB) EVF C.B.A. L902 C913 P902 P902 IC901 (EVF DRIVE) Q903 FROM VIDEO SIGNAL FP11 FP901 PROCESS I BLOCK LUMA MIX AMP H.DEFLECTION DIAGRAM COIL T901 SYNC V-SYNC V-OSC SEPARATION SEPARATION VR903 Q901, BRIGHTNESS Q902 H PLUSE...
- Page 160 COLOR EVF BLOCK DIAGRAM VIDEO SIGNAL (REC & PB) MAIN C.B.A. COLOR EVF C.B.A. EVF LCD PANEL UNIT L901 IC901 (EVF RGB SIGNAL PROCESS) VCC (+3V) NOT USED VCC (+3V) FP902 L902 VCC (+3V) HCK2 FP902 L903 +12V 10 VCC (+12V) FP902 HCK1 FP902...
- Page 161 POWER SUPPLY BLOCK DIAGRAM POWER C.B.A. Q1023 LCD +3.2V D1005 Q1021 CAM +3.2V L1012 IC1003 SHUNT REGULATOR F1003 1A/32V UNREG (TO IC6002(3)) BATTERY (T) JK1001 (TO IC6002(4)) BATTERY (D) SW UNREG L1010 AF +5V BATTERY L1009 LCD-BL +5V TERMINAL L1007 REG +5V (A) L1011 HA +5V...
- Page 162 MARK NOTE: NOTE: NOTE: MULTILAYER C.B.A. PV-DV101 FOR SCHEMATIC DIAGRAM AND CIRCUIT BOARD LAYOUT NOTES, CIRCUIT BOARD LAYOUT SHOWS COMPONENTS INSTALLED FOR VARIOUS MODELS. THIS C.B.A. IS Multi-Layer C.B.A. THIS CIRCUIT BOARD SHOWS COMPONENT LAYOUT-PATTERN REFER TO BEGINNING OF SCHEMATIC SECTION.
- Page 163 COMPARISON CHART OF MODELS & MARKS MODEL MARK NOTE: PV-DV101 FOR SCHEMATIC DIAGRAM AND CIRCUIT BOARD LAYOUT NOTES, REFER TO BEGINNING OF SCHEMATIC SECTION. PV-DV401 (COMPONENT SIDE) LEADLESS COMPONENT PARTS LOCATION GUIDE MAIN C.B.A. C1101 J-3 C3032 D-3 C3227 B-3...
- Page 164 Three types of IC6001 (M32121FCAWG, M32121MCA100, or M32121MCA101) are used on arunning change basis. Then, install it to R426. FOR PROPER PARTS CONTENT FOR THE MODEL YOU ARE SERVICING, PV-DV101 Part When replacing IC6001, as in cases like the following, it is necessary to replace the resistor at the same time.
- Page 165 COMPARISON CHART OF MODELS & MARKS NOTE: MODEL MARK FOR SCHEMATIC DIAGRAM AND CIRCUIT BOARD LAYOUT NOTES, REFER TO BEGINNING OF SCHEMATIC SECTION. PV-DV101 PV-DV401 (FOIL SIDE) LEADLESS COMPONENT PARTS LOCATION GUIDE MAIN C.B.A. C1203 D-5 C3122 H-3 C4307 I-2...
- Page 166 PLEASE REFER TO THE SCHEMATIC DIAGRAM AND PARTS LIST. THIS C.B.A. IS Multi-Layer C.B.A. THIS CIRCUIT BOARD SHOWS COMPONENT LAYOUT-PATTERN FOR SCHEMATIC DIAGRAM AND CIRCUIT BOARD LAYOUT NOTES, PV-DV101 FOR COMPONENT SIDE AND FOIL SIDE. LAYOUT PATETRNS ARE SINGLE PATTERN FOR EACH NOTE: REFER TO BEGINNING OF SCHEMATIC SECTION.
- Page 167 NOTE: FOR SCHEMATIC DIAGRAM AND CIRCUIT BOARD LAYOUT NOTES, REFER TO BEGINNING OF SCHEMATIC SECTION. LEADLESS COMPONENT PARTS LOCATION GUIDE POWER POWER C.B.A. C1001 C1048 C6503 L6502 R1036 R6501 C1002 C1049 C6504 L6503 R1037 R6502 IC1001 C1003 C1050 C6505 L6504 R1038 R6503 IC1002...
- Page 168 MICROPHONE UNIT/FRONT C.B.A. LSXM0013 (A) / LSXM0014 (B) COMPARISON CHART OF MODELS & MARKS MODEL MARK PV-DV101 NOTE: PV-DV401 FOR SCHEMATIC DIAGRAM AND CIRCUIT BOARD LAYOUT NOTES, REFER TO BEGINNING OF SCHEMATIC SECTION. (FOIL SIDE) (COMPONENT SIDE) NOTE: CIRCUIT BOARD LAYOUT SHOWS COMPONENTS INSTALLED FOR VARIOUS MODELS.
- Page 169 MODEL MARK FOR SCHEMATIC DIAGRAM AND CIRCUIT BOARD LAYOUT NOTES, CIRCUIT BOARD LAYOUT SHOWS COMPONENTS INSTALLED FOR VARIOUS MODELS. PV-DV101 REFER TO BEGINNING OF SCHEMATIC SECTION. FOR PROPER PARTS CONTENT FOR THE MODEL YOU ARE SERVICING, PV-DV401 PLEASE REFER TO THE SCHEMATIC DIAGRAM AND PARTS LIST.
- Page 170 NOTE: NOTE: CIRCUIT BOARD LAYOUT INCLUDES COMPONENTS WHICH ARE NOT USED. FOR SCHEMATIC DIAGRAM AND CIRCUIT BOARD LAYOUT NOTES, PV-DV101 PLEASE REFER TO THE SCHEMATIC DIAGRAM AND PARTS LIST FOR PROPER PARTS CONTENT. REFER TO BEGINNING OF SCHEMATIC SECTION. PV-DV401...
- Page 171 NOTE: NOTE: FOR SCHEMATIC DIAGRAM AND CIRCUIT BOARD LAYOUT NOTES, CIRCUIT BOARD LAYOUT SHOWS COMPONENTS INSTALLED FOR VARIOUS MODELS. PV-DV101 REFER TO BEGINNING OF SCHEMATIC SECTION. FOR PROPER PARTS CONTENT FOR THE MODEL YOU ARE SERVICING, PV-DV401 PLEASE REFER TO THE SCHEMATIC DIAGRAM AND PARTS LIST.
- Page 172 JACK C.B.A. LSEP8005B1 S-JACK C.B.A. LSEP8057C1 COMPARISON CHART OF MODELS & MARKS MODEL MARK PV-DV101 NOTE: NOTE: PV-DV201 CIRCUIT BOARD LAYOUT INCLUDES COMPONENTS WHICH ARE NOT USED. CIRCUIT BOARD LAYOUT INCLUDES COMPONENTS WHICH ARE NOT USED. PV-DV401 PLEASE REFER TO THE SCHEMATIC DIAGRAM AND PARTS LIST FOR PROPER PARTS CONTENT.
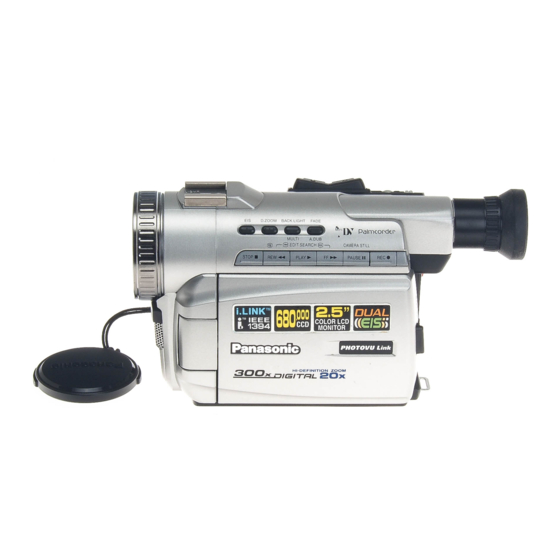
- Page 173 Digital Video Camcorder Operating Instructions PV-DV401 Model No. Mini Before attempting to connect, operate or adjust this product, please read these instructions thoroughly. LSQT0451A...
-
Page 174: Things You Should Know
Also, any unauthorized changes or modifications to this equipment could void the user’s authority to operate. For assistance, please call : 1-800-211-PANA(7262) or send e -mail to : consumerproducts@panasonic.com... -
Page 175: Important Safeguards
Important Safeguards Important Safeguards 1. Read Instructions — All the safety and operating 11. Grounding or Polarization — This video unit may be instructions should be read before the unit is equipped with either a polarized 2-wire AC operated. (Alternating Current) line plug (a plug having one blade wider than the other) or 3-wire grounding type 2. -
Page 176: Precautions
• TO PROTECT THE FINISH OF YOUR PALMCORDER ... Before handling your Palmcorder, make sure your hands and face are free from any chemical products, such as suntan lotion, as it may damage the finish. For assistance, please call : 1-800-211-PANA(7262) or send e -mail to : consumerproducts@panasonic.com... -
Page 177: Table Of Contents
Table of Contents Table of Contents Getting Started Things You Should Know ....................2 Important Safeguards ....................... 3 Precautions ........................4 Before Using ........................6 Quick Guide ........................9 Supplying Power ......................11 Setting the Clock ......................13 Using the Palmcorder Menu ................... 14 MENU OSD ........................ -
Page 178: Before Using
Before Using Before Using Unpack your Palmcorder 1 pc. Battery Pack 1 pc. 8 MB 1 pc. A/V Cable 1 pc. AC Adaptor (PV-DBP8A) MultiMediaCard (LSJA0280) (PV-DAC11) with AC Cable (LSFT0198A) and DC Cable 1 pc. IR Remote Control (LSSQ0294) 1 pc. - Page 179 Before Using Before Using Before you begin Cassette Insertion/Removal • Connect the Palmcorder to a power • If the Palmcorder is connected to a power source. (See pages 11, 12.) source, the cassette can be inserted and ejected without turning the Palmcorder Slide TAPE EJECT to open the TAPE EJECT Cassette Compartment Cover.
- Page 180 Before Using Before Using Attaching the Shoulder Strap Thread the strap ends through the Strap Attachment Rings. Undo the two strap ends from their buckles. Remove the buckle from one end of the strap. Reinsert the strap ends through their buckles.
-
Page 181: Quick Guide
Quick Guide Quick Guide Before you begin Insert the Battery Pack • Charge the Battery. (See page 11.) Slide the Viewfinder backward to its fully expanded position and then tilt it upward. Insert the Battery Pack and slide it down until it locks with a click. - Page 182 Quick Guide Quick Guide Before you begin Insert Memory Card* • Charge the Battery. (See page 11.) *Memory Card: MultiMediaCard or SD Memory Card (See page 64.) • Be sure to insert the Memory Card before using the Card PhotoShot. (See page 32.) Below is a list of memory cards which can be used in this Palmcorder.
-
Page 183: Supplying Power
Supplying Power Supplying Power Charge the Battery Pack on the AC Adaptor Connect and plug in the Power Cord as shown. • POWER Lamp will light. • Remove the DC Cable, if attached, from the adaptor. Attach the Battery as shown to charge. - Page 184 Supplying Power Supplying Power Battery Care Caution: To avoid damage to the Battery: • Charge only with specified charger. • Do not drop or jar the Battery. • Charge the Battery within an ambient • Use the Battery with specified models temperature range of 32°...
-
Page 185: Setting The Clock
Setting the Clock Setting the Clock Before you begin Set the Date and Time • Connect the Palmcorder to a power The date and time is calculated, including source. (See pages 11, 12). leap year, up to DEC 31 2089. •... -
Page 186: Using The Palmcorder Menu
Using the Palmcorder Menu Using the Palmcorder Menu The Palmcorder features two menu Displaying the MENU displays: one for CAMERA mode (recording) and the other for VCR mode (Playback). (See pages 15~18.) Press MENU to display the CAMERA • While the Menu screen is displayed, you or VCR menu (according to the cannot record on or play a tape. -
Page 187: Menu Osd
MENU OSD MENU OSD Camera Mode Menu Screen DIGITAL FUNCTION (See page 44.) To select one of the 10 digital functions. Setting to OFF cancels the previously selected digital function. PROG. AE (See page 43.) To select one of the 5 Program AE modes. - Page 188 MENU OSD MENU OSD REMOTE (See page 26.) VCR1: To receive signals from the Remote Control, set to VCR1. VCR2: To receive signals from the Remote Control, set to VCR2. OFF: To prevent reception of signals from the Remote Control. BEEP Set to ON to hear beep when starting and stopping camera recording or...
- Page 189 MENU OSD MENU OSD VCR Mode Menu Screen DIGITAL FUNCTION (See page 44.) To select one of the 6 digital functions. Setting to OFF cancels the previously selected digital function. D. EFFECT (See page 44.) To select one of the 2 digital picture effects for playback.
- Page 190 MENU OSD MENU OSD SPEED (See page 46.) In Strobe Multi mode, used to select the interval at which a succession of still screens are captured from the playback picture. FAST : Every 0.3 seconds NORM : Every 0.6 seconds SLOW : Every 1.0 seconds DISPLAY (See page 19.) To select the desired type of display...
-
Page 191: Electronic Viewfinder/Lcd Monitor Indications
Electronic Viewfinder/LCD Monitor Indications Electronic Viewfinder/LCD Monitor Indications Here are some of the basic indications which will appear on the Palmcorder EVF and LCD Monitor. Only Date and Time indications will be recorded onto the tape. Battery Remaining Display ON/OFF and Counter/Time Code The indication switches as shown FULL below when the desired “DISPLAY”... - Page 192 Electronic Viewfinder/LCD Monitor Indications Electronic Viewfinder/LCD Monitor Indications p q r Volume Display (See page 27.) Tape Mode Indications The volume bar appears when the Recording. volume of the built-in speaker is being PHOTO PhotoShot recording. adjusted. PAUSE Paused during recording. PLAY Playback.
- Page 193 Electronic Viewfinder/LCD Monitor Indications Electronic Viewfinder/LCD Monitor Indications The following warning displays appear in the EVF and the LCD monitor. Indications Condition If the Palmcorder is in CAMERA mode without a cassette inserted, “ ” will flash and “TAPE NOT INSERTED” will appear for 5 seconds.
-
Page 194: Camera Recording
Camera Recording Camera Recording Simple Recording Before you begin • Connect the Palmcorder to a power Remove the lens cap and clip it to the hand source. (See pages 11, 12.) strap. • Insert a cassette with record tab closed. (See page 6.) Set POWER to CAMERA. - Page 195 Camera Recording Camera Recording Before you begin Using the LCD Monitor • Connect the Palmcorder to a power The LCD (Liquid Crystal Display) monitor source. (See pages 11, 12.) can be used while recording. • Insert a cassette with record tab closed. (See page 6.) Press LCD-OPEN to unlock the LCD monitor.
- Page 196 Camera Recording Camera Recording Recording Check To playback the final few seconds of the Press EDIT SEARCH briefly in the last recorded scene in the REC/PAUSE REC/PAUSE mode. mode. The [CHK] indication appears. After checking, the Palmcorder returns to the REC/PAUSE mode. EDIT SEARCH •...
- Page 197 Camera Recording Camera Recording Blank Search You can go directly to a blank portion of Set the POWER to VCR. tape and start recording exactly where you • The POWER Lamp lights red. left off. • Be sure POWER is fully turned to VCR position.
-
Page 198: Remote Control
Do not reverse the polarity. Insert the Battery Tray. Replace battery with Panasonic PART NO. VSBW0004 (CR2025) only. Use of another battery may present a risk of fire or explosion. Caution: battery may explode if mistreated. Dispose of used battery properly. -
Page 199: Playback Your Recordings
Playback your Recordings Playback your Recordings Playback using the LCD Monitor Before you begin You can also use the LCD monitor to playback your recording. • Connect the Palmcorder to a power source. (See pages 11, 12.) • Insert a recorded cassette. VOLUME KEY •... -
Page 200: Special Features
Playback Your Recordings Playback Your Recordings Special Effect Features Rapid Visual Search During Playback During playback, hold down FAST Note FORWARD/SEARCH or REWIND/ • Sound is muted during all special effects. SEARCH. The search will continue for as long PAUSE Button as the button is held down. - Page 201 Playback Your Recordings Playback Your Recordings Special Effect Features Variable Speed Search During Playback (Continued) Note Press PLAY to start playback. • Sound is muted during all special effects. Press PLAY again. PAUSE Button Rotate JOG KEY to adjust the playback speed.
- Page 202 Playback Your Recordings Playback Your Recordings Special Effect Features Index Forward/Reverse Search During Playback (Continued) (Remote Control Only) Note Search for a particular scene by using the • Sound is muted during all special effects. electronic index marks placed at the beginning of each recording.
- Page 203 Playback Your Recordings Playback Your Recordings View Recording/Playback on your TV [ TV with AUDIO/VIDEO IN Jacks ] Set POWER to CAMERA or VCR. To view what the Palmcorder is recording or to playback a tape on your A/V OUT Turn your TV ON and set it to LINE INPUT or S-VIDEO.
-
Page 204: Card Features
Card Features Card Features Before you begin Card PhotoShot • Connect the Palmcorder to a power You can record still images to a Memory source. (See pages 11, 12.) Card. • Set POWER to OFF before inserting a Warning Memory Card. (See page 10.) •... - Page 205 Card Features Card Features Before you begin Recording images From a • Connect the Palmcorder to a power Tape source. (See pages 11, 12.) • Set POWER to OFF before inserting a You can record still images from a Memory Card. (See page 10.) cassette tape to a Memory Card.
- Page 206 Card Features Card Features Press M-PLAY to display the Multi 3, 4 JOG KEY playback screen. • “PLEASE WAIT” appears on-screen. • Rotate JOG KEY to scroll through Multi image screen pages (6 images per page) and select an MENU image.
- Page 207 Card Features Card Features Before you begin Delete Specific Images • Connect the Palmcorder to a power You can delete unwanted images and source. (See pages 11, 12.) increase the remaining image memory. • Set POWER to OFF before inserting a Warning: recorded Memory Card.
- Page 208 Card Features Card Features Delete All Image Pages Before you begin • Connect the Palmcorder to a power You can delete all images from the Memory source. (See pages 11, 12.) Card easily with this operation. • Set POWER to OFF before inserting a Warning: recorded Memory Card.
- Page 209 Card Features Card Features Format the Memory Card Before you begin You can easily format your Memory Card • Connect the Palmcorder to a power using this operation. source. (See pages 11, 12.) Warning: • Set POWER to OFF before inserting a Formatting permanently removes all image recorded Memory Card.
- Page 210 Card Features Card Features Before you begin Photo Title • Connect the Palmcorder to a power You can record PhotoShot images from a source. (See pages 11, 12.) • Set POWER to OFF before inserting a Memory Card to a cassette to be used as recorded Memory Card.
-
Page 211: Dual Digital Electronic Image Stabilization System (D.eis)
Special Features Special Features Dual Digital Electronic Image CAMERA mode Stabilization System (D.EIS) Set POWER to CAMERA. This feature helps compensate for any • The POWER lamp lights red. unintentional hand or body movement. It • Be sure POWER is fully turned to can be used in both the Recording and CAMERA position. -
Page 212: Digital Zoom
Special Features Special Features Digital Zoom CAMERA mode POWER ZOOM Set POWER to CAMERA. Switch • The POWER lamp lights red. • Be sure POWER is fully turned to CAMERA position. 1, A POWER Press D. ZOOM to select D.ZOOM1 or Switch D.ZOOM2. -
Page 213: Digital Photoshot
Special Features Special Features Digital PhotoShot Use this feature to record a seven second Set POWER to CAMERA. (approx.) still image from the current camera • The POWER lamp lights red. picture. Audio is also recorded for on-the- • Be sure POWER is fully turned to spot narration. -
Page 214: White Balance
Special Features Special Features White Balance Set POWER to CAMERA. • The POWER lamp lights red. Auto White Balance automatically maintains • Be sure POWER is fully turned to optimum color balance in most lighting CAMERA position. conditions. However, when using Digital Functions, etc., you may get better results Press MENU to display the menu using the manual adjustment. -
Page 215: Program Ae
Special Features Special Features Program AE Set POWER to CAMERA. • The POWER lamp lights red. The Auto Exposure feature can be used to • Be sure POWER is fully turned to make quality recordings in a variety of CAMERA position. scene situations. -
Page 216: Other Digital Functions
Special Features Special Features Other Digital Functions Set POWER to CAMERA or VCR. • The POWER lamp lights red. Use the following features to add interest • Be sure POWER is fully turned to and professionalism to your recordings or CAMERA or VCR position. -
Page 217: Picture In Picture (Pinp)
Special Features Special Features Picture in Picture (PinP) Before you begin • Connect the Palmcorder to a power You can display a PinP (still image) screen source. (See pages 11, 12.) on the Main Picture. Note • PinP position is fixed at the bottom right Set POWER to CAMERA. -
Page 218: Strobe Multi Mode
Special Features Special Features Strobe Multi Mode Before you begin • Connect the Palmcorder to a power In Strobe Multi Mode, you can select the source. (See pages 11, 12.) rate at which a succession of still screens are captured from the playback picture. Set POWER to VCR. -
Page 219: Focus
Special Features Special Features Auto Focus The Palmcorder automatically adjusts the focus over the entire zoom range. Manual Focus Set POWER to CAMERA. Use Manual Focus (MF) when recording ... • The POWER lamp lights red. • a subject through glass. •... -
Page 220: Audio/Video Fade In/Out
Special Features Special Features High Speed Shutter Before you begin • Connect the Palmcorder to a power To record high speed motion (e.g. tennis source. (See pages 11, 12.) stroke) for improved STILL or SLOW • Set POWER Switch to CAMERA. MOTION playback when watching the tape •... -
Page 221: Audio Dubbing Using The External Or Built-In Microphone
Special Features Special Features Before you begin Audio Dubbing using the • Connect the external Microphone External or Built-in Microphone (if used). • Turn on the Palmcorder. The original sound can be replaced with • Insert a pre-recorded tape to be new sound using the built-in Palmcorder dubbed. -
Page 222: Memory-Stop Editing
Special Features Special Features Press PAUSE to start Audio Dubbing. 4, 5 PAUSE • Connect the Palmcorder to the TV in Button order to monitor the sound. (See page 31.) To listen to the desired audio sound, set the AUDIO setting of the VCR mode MENU (see page 17) as follows: AUDIO:The following selections are available for 12 bit AUDIO dubbed... -
Page 223: Copying Your Tapes To S-Vhs Or Vhs Cassette
Special Features Special Features Before you begin Copying your Tapes to • Connect both Palmcorder and VCR to S-VHS or VHS Cassette their power sources. • Connect the Palmcorder to a VCR as illustrated left. Source (Playing) • Turn ON both units. Palmcorder •... -
Page 224: Copying From Digital Equipment (Dubbing)
Special Features Special Features Before you begin Copying from Digital • Connect both Palmcorders to their Equipment (dubbing) power sources. • Connect the two Palmcorders using the High quality digital-to-digital copying can DV interface cable (i.LINK) be accomplished if both Palmcorders (4-pin to 4-pin). -
Page 225: Transferring Your Images
: support@arcsoft.com Note • The Windows 2000 driver is currently not available, but will be available in the future on our website at www.panasonic.com/video. Software Installation (Windows 98/Me) Caution • Please install Palmcorder USB Device Driver first before connecting the Palmcorder and your PC using USB Cable. - Page 226 Transferring Your Images Transferring Your Images Notes on PHOTOVU LINK/Movie Messenger and CARD LINK operation • For PHOTOVU LINK/Movie Messenger, do not connect the i.LINK and USB terminals to the Palmcorder at the same time. • Make sure Palmcorder power is not shut off during use, your PC system may become unstable, therefore it is recommended that the AC Adaptor be used as the power source.
- Page 227 (supplied). (See page 54.) • “CONNECT WITH PC” is displayed on the LCD monitor. Click on “Start,” “Programs,” “Panasonic,” “Palmcorder,” then “CARD LINK (for USB).” • “CARD LINK (for USB) is opened. Press TRANSFER. TRANSFER Button • CARD LINK (for USB) application is...
- Page 228 Transferring Your Images Transferring Your Images Before you begin Using Memory Card Image • Set POWER to OFF before inserting a Data (CARD LINK (for USB)) recorded Memory Card. (See pages 32, 33.) Pictures captured with Palmcorder can • Make Palmcorder-PC connections. be transferred to your PC.
- Page 229 Connect the Palmcorder to your PC using the USB Cable (supplied) or DV interface Cable (i.LINK). (See pages 54, 62.) Click on “Start,” “Programs,” “Panasonic,” “Palmcorder,” then “Movie Messenger.” “PHOTOVU LINK/Movie Messenger” is opened. Note Refer to Help for information about application operations and Error messages.
- Page 230 Transferring Your Images Transferring Your Images Before you begin Using Tape Image Data • Insert a recorded tape. (See page 9.) (PHOTOVU LINK/Movie • Make Palmcorder-PC connections. (See page 54.) Messenger) (USB) • Turn your PC on. (See page 54.) •...
- Page 231 Transferring Your Images Transferring Your Images Playing back the saved Motion and Still images (PHOTOVU LINK/Movie Messenger) You can playback the saved Motion images and Still images (see page 58) for confirmation. Repeat steps 1~4 on page 57 to run the PHOTOVU LINK/Movie Messenger.
- Page 232 Transferring Your Images Transferring Your Images To select the e-mail Software (PHOTOVU LINK/Movie Messenger You can transfer and compress your Before you begin Motion images and Still images as • Insert a recorded tape. (See page 9.) attachments to your e-mail easily. •...
- Page 233 Transferring Your Images Transferring Your Images Before you begin Attaching captured Motion • Insert a recorded tape. (See page 9.) and Still images to your e-mail • Make Palmcorder-PC connections. (See page 54.) • Turn your PC on. (See page 54.) •...
-
Page 234: Transferring Your Images (I.link)
Transferring Your Images (i.LINK) Transferring Your Images (i.LINK) PC Connection with DV Interface Cable (i.LINK) A live image can be transferred directly to your PC (Personal Computer) via a DV Interface Cable (i.LINK) (not supplied) using products and software from a number of editing software companies including Digital Origin, Canopus, and Pinnacle. - Page 235 Transferring Your Images (i.LINK) Transferring Your Images (i.LINK) Before you begin Using Tape Image Data • Insert a recorded Tape. (See page 9.) (PHOTOVU LINK/Movie • Make Palmcorder-PC connections. (See page 62.) Messenger) • Turn your PC on. • Set Palmcorder POWER to VCR. By connecting the Palmcorder and PC with •...
-
Page 236: Palmcorder Accessory System
Palmcorder Accessory System Palmcorder Accessory System Description Accessory # Figure PV-DAC11 AC Adaptor with AC Cable and DC Cable CGR-D08A/1B 800mAH / 1 h 30 min, Battery Pack CGR-D16A 1600mAH / 3 h, Battery Pack 2800mAH/ 5 h, Battery Pack CGP-D28A1B CGR-D53A/1K 5300mAH / 9 h, Battery Pack... - Page 237 Palmcorder Accessory System Palmcorder Accessory System Concerning the MultiMediaCard and SD Memory Card SD Memory Card MultiMediaCard The SD Memory Card (optional), which is The MultiMediaCard is a compact, the same size as the MultiMediaCard, is an lightweight and removable external external memory card with an even bigger memory card.
-
Page 238: Notes On Operations
Notes On Operations Notes On Operations Cleaning EVF (Electronic Viewfinder) Slide the Viewfinder backward to its fully expanded position and then tilt it upward. Remove the 2 screws from the EVF Eyepiece with a screwdriver (+). Turn the Eyepiece counterclockwise 1/8 of a turn. - Page 239 Notes On Operations Notes On Operations Approximate Brightness Values Your Palmcorder has been designed for normal scene illumination of 150 footcandles (1500 lx). However, the Palmcorder may be used at F1:1.6, if illumination is more than 0.5 footcandles (5 lx). The table below shows the color temperature for reference.
-
Page 240: Specifications
Specifications Specifications Power Source: Palmcorder: 7.2 V DC (Battery) 7.8 V DC (AC Adaptor) AC Adaptor: 110/120/220/240 V AC, 50/60 Hz Battery: Lithium-Ion Type DC 7.2 V Power Consumption: Palmcorder: 7.2 V DC 6.5 W (Max. 9.5 W) AC Adaptor: 18 W 1 W (when not in use.) Digital Interface USB/i.Link (IEEE1394) -
Page 241: Before Requesting Service
(b) Cleaning the Heads: It is recommended that head cleaning Clogged Video Head be performed by a qualified service technician. Please contact your nearest Panasonic Servicenter. An alternate solution is to obtain a head cleaning cassette. Please use Panasonic cleaning cassette (AY-DVMCL). Be sure to follow the cleaning instructions carefully. - Page 242 Before Requesting Service Before Requesting Service If you have a problem with your Palmcorder, it may be something you can correct yourself. Check the list below for symptoms and corrections. Symptom Correction • Make sure the Power Source is connected. No picture in the EVF or LCD Monitor...
-
Page 243: Index Of Controls
Index of Controls Index of Controls Front View D.ZOOM Button BACK LIGHT See page 40. Button See page 47. EIS Button MULTI Button See page 39. See page 46. TRANSFER Button See page 55. FADE Button MAGICVU/0LUX See page 48. Switch A.DUB Button (PV-DV401 only) - Page 244 Index of Controls Index of Controls Rear View JOG KEY See pages 13, 14. VOLUME KEY See page 27. Electronic M.FOCUS DIAL Viewfinder (EVF) See page 47. See page 9. POWER ZOOM Button See pages 22, 40. Shoulder Strap Vision Adjustment Attachment Ring Control See page 8.
- Page 245 Index of Controls Index of Controls Side View FF Button See page 28. EDIT REW Button PLAY Button SEARCH Button See pages 10, 27. See pages 10, 27. See page 24. EDIT SEARCH M-PLAY Button Button PAUSE Button See pages 34, 35. See pages 24.
- Page 246 Index of Controls Index of Controls Color Enhancement Light (Optional) LIGHT Button LIGHT RELEASE See page 7. Button See page 7. Remote Control RESET Button DATE/TIME Button See pages 25, 50. See pages 20, 25. PHOTOSHOT Button See pages 25, 41. REC/PAUSE Button DISPLAY ON TV Button See pages 22, 25.
-
Page 247: Index
Index Index AC Adaptor 6, 11, 12, 64 Macro Focus Accessories (Optional) MAGICVU/0LUX Switch Accessories (Supplied) Manual Focus A/V Cable 6, 31, 51 Memory Counter Audio/Video Fade In/Out MENU OSD 14, 15, 16, 17, 18 Auto Focus Memory Card 6, 10, 64 M-CARD Door Backlight Battery Pack... - Page 248 Printed in Japan LSQT0451A S0101A0...
- Page 249 Ref. No. Side View Color Ref. No. Side View Color Black Black Black Black Black Gold Silver Silver Silver Gold...
- Page 250 Ref. No. Side View Color Ref. No. Side View Color Gold Gold Gold Black Silver Gold...
- Page 251 DSC control MODEL MARK Example: BATT TMP Battery temperature DSC CONT2 DSC control 2 The connections between C.B.A.s are shown below. PV-DV101 BEND Block end control DSC CONT3 DSC control 3 BL CONT Backlight control DSC DI DSC serial data 1...
- Page 252 ABBREVIATION (continue) Signal Name Description Signal Name Description Signal Name Description Signal Name Description Signal Name Description EVFPOL EVFpolarity LCD FRP LCD frame pulse POWER ON L Switching power on: low TPB- Transaction data B (-) ZOOM MT3 Zoom motror 3 LCD G LCD green signal TPB+...
- Page 253 MAIN I SCHEMATIC DIAGRAM COMPARISON CHART FOR SCHEMATIC DIAGRAM AND CIRCUIT BOARD LAYOUT NOTES/ OF MODELS & MARKS ABBREVIATION, REFER TO BEGINNING OF SCHEMATIC SECTION. MODEL MARK PV-DV101 PV-DV401 REC VIDEO SIGNAL PB VIDEO SIGNAL REC AUDIO SIGNAL PB AUDIO SIGNAL Not Used...
- Page 254 NOTE: MAIN II SCHEMATIC DIAGRAM COMPARISON CHART FOR SCHEMATIC DIAGRAM AND CIRCUIT BOARD LAYOUT NOTES/ OF MODELS & MARKS ABBREVIATION, REFER TO BEGINNING OF SCHEMATIC SECTION. MODEL MARK PV-DV101 PV-DV401 Not Used REGD3V REGD1.8V SW UNREG T-REEL S-REEL P.ON_L VREF...
- Page 255 I/O CHART OF IC6002 I/O CHART OF IC6007 Pin No. I/O Signal Name Description Pin No. I/O Signal Name Description VBATT Switching Battery voltage EEPROM chip select : high VBATT REF V-ref for Battery EEPROM serial clock BATT T Battery temp EEPROM serial data 0 BATT D Battery detect...
- Page 256 FOR SCHEMATIC DIAGRAM AND CIRCUIT BOARD LAYOUT NOTES/ OF MODELS & MARKS ABBREVIATION, REFER TO BEGINNING OF SCHEMATIC SECTION. MODEL MARK Types of IC6001 IC6001 REPLACEMENT NOTE: PV-DV101 Part M32121FCAWG Three types of IC6001 (M32121FCAWG, M32121MCA100, or M32121MCA101) are used on arunning change basis. number M32121FCAWG PV-DV401 When replacing IC6001, as in cases like the following, it is necessary to replace the resistor at the same time.
- Page 257 I/O CHART OF IC6001 Pin No. I/O Signal Name Description Pin No. I/O Signal Name Description Pin No. I/O Signal Name Description Pin No. I/O Signal Name Description +2.5V CNA(PINE) PLANET cable connection information TRDATA0 (Not used) MIC CLK MIC serial clock FSSEL0 (Not used) PWD(PINE)
- Page 258 MAIN IV SCHEMATIC DIAGRAM COMPARISON CHART FOR SCHEMATIC DIAGRAM AND CIRCUIT BOARD LAYOUT NOTES/ OF MODELS & MARKS ABBREVIATION, REFER TO BEGINNING OF SCHEMATIC SECTION. MODEL MARK REC VIDEO SIGNAL CAM_CG_CLK CAM_CG_DTO PV-DV101 CAM_CG_CS R326 C319 CAM_DAC_CS L302 L303 PV-DV401 CAM_DAC_DTO C314...
- Page 259 IC301 BLOCK DIAGRAM IC305 BLOCK DIAGRAM I/O CHART OF IC304 Pin No. I/O Signal Name Description LLVD (Not used) (Not used) V-sync pulse 10 BIT A/D CONVERTER H-sync pulse (Not used) Ground DRIVER VDD1 +3.0V SERIAL FCK2 2FCK clock (36MHz) CONVERTER DCLK TG serial clock...
- Page 260 FOR SCHEMATIC DIAGRAM AND CIRCUIT BOARD LAYOUT NOTES/ OF MODELS & MARKS ABBREVIATION, REFER TO BEGINNING OF SCHEMATIC SECTION. REC VIDEO SIGNAL PB VIDEO SIGNAL REC AUDIO SIGNAL PB AUDIO SIGNAL MODEL MARK L3012 REGA2.5V PV-DV101 LCDHD VBLK PV-DV401 L3004 EVFPOL BK1608HM102 LCDPOL REGD3V C3038 Not Used LCD_BOUT 10/6.3V...
- Page 261 MAIN VI SCHEMATIC DIAGRAM COMPARISON CHART FOR SCHEMATIC DIAGRAM AND CIRCUIT BOARD LAYOUT NOTES/ OF MODELS & MARKS ABBREVIATION, REFER TO BEGINNING OF SCHEMATIC SECTION. MODEL MARK PV-DV101 PV-DV401 Not Used REC VIDEO SIGNAL PB VIDEO SIGNAL REC AUDIO SIGNAL PB AUDIO SIGNAL...
- Page 262 IC3002 BLOCK DIAGRAM FILTER CHARACTER MIX CLAMP BUFFER /BLANKING THRU FILTER BLANKING BUFFER THRU S-DC V-REF MUTE V-REF MUTE MUTE MUTE SHIFT SHIFT SHIFT SHIFT MUTE MUTE MUTE MUTE V-REF...
- Page 263 MAIN VII SCHEMATIC DIAGRAM COMPARISON CHART FOR SCHEMATIC DIAGRAM AND CIRCUIT BOARD LAYOUT NOTES/ OF MODELS & MARKS ABBREVIATION, REFER TO BEGINNING OF SCHEMATIC SECTION. MODEL MARK PV-DV101 REGD1.8V PV-DV401 REGA2.5V Not Used REGD3V REC VIDEO SIGNAL PB VIDEO SIGNAL...
- Page 264 FOR SCHEMATIC DIAGRAM AND CIRCUIT BOARD LAYOUT NOTES/ OF MODELS & MARKS ABBREVIATION, REFER TO BEGINNING OF SCHEMATIC SECTION. MODEL MARK I/O CHART OF IC3201 I/O CHART OF IC3202 PV-DV101 Pin No. I/O Signal Name Description Pin No. I/O Signal Name Description Pin No.
- Page 265 MAIN VIII SCHEMATIC DIAGRAM COMPARISON CHART FOR SCHEMATIC DIAGRAM AND CIRCUIT BOARD LAYOUT NOTES/ OF MODELS & MARKS ABBREVIATION, REFER TO BEGINNING OF SCHEMATIC SECTION. MODEL MARK PV-DV101 PV-DV401 Not Used REC AUDIO SIGNAL PB AUDIO SIGNAL IC4301 BLOCK DIAGRAM SBA_DTI...
- Page 266 NOTE: MAIN IX SCHEMATIC DIAGRAM COMPARISON CHART FOR SCHEMATIC DIAGRAM AND CIRCUIT BOARD LAYOUT NOTES/ OF MODELS & MARKS ABBREVIATION, REFER TO BEGINNING OF SCHEMATIC SECTION. MODEL MARK PV-DV101 PV-DV401 Not Used REGD3V UNREG REGD1.8V CYL_VM (TO CYLINDER UNIT) CYL_SW...
- Page 267 IC2001 BLOCK DIAGRAM V-REF V CONT DRIVE UNREG DRIVE DRIVE UPPER START TIMING SOFT CYLINDER VCE DET CONTRL CONTROL SWITCHING MOTOR DRIVE DRIVE DRIVE CONTROL UPPER VCE DET DRIVE POSITION DETECTOR COMPOSITION DRIVE LOADING DECODER MOTOR DRIVE DRIVE CAPSTAN MOTOR DRIVE CAPSTAN LOGIC...
- Page 268 NOTE: MAIN X SCHEMATIC DIAGRAM COMPARISON CHART FOR SCHEMATIC DIAGRAM AND CIRCUIT BOARD LAYOUT NOTES/ OF MODELS & MARKS ABBREVIATION, REFER TO BEGINNING OF SCHEMATIC SECTION. MODEL MARK PV-DV101 PV-DV401 Not Used Q1201 2SD1819A EVF12V +12V REGULATOR 15V LCD LCD12V...
- Page 269 MAIN XI SCHEMATIC DIAGRAM COMPARISON CHART FOR SCHEMATIC DIAGRAM AND CIRCUIT BOARD LAYOUT NOTES/ OF MODELS & MARKS ABBREVIATION, REFER TO BEGINNING OF SCHEMATIC SECTION. MODEL MARK REC VIDEO SIGNAL PV-DV101 PV-DV401 L3504 Not Used REGA5V C3556 C3555 10/6.3V C3557...
- Page 270 I/O CHART OF IC3501 Pin No. I/O Signal Name Description Pin No. I/O Signal Name Description Pin No. I/O Signal Name Description Pin No. I/O Signal Name Description +1.8V +1.8V +1.8V Ground +1.8V +1.8V +1.8V Ground +1.8V +1.8V +1.8V CAM Y[4] (Not used) MONI O[6] (Not used)
- Page 271 Types of IC401 4 IC401 replacement note: Two types of IC401 (MN1030F01K, MN103001GDA) are used on a running change basis. PV-DV101 When replacing IC401, the resistor at the same time. Otherwise, IC401 may have a short life. PV-DV401 Part number...
- Page 272 I/O CHART OF IC401 Pin No. I/O Signal Name Description Pin No. I/O Signal Name Description (Not used) P73/CS3 (Not used) (Not used) USB/CS N USB chip select : low +3.2V P71/CS1 (Not used) (Not used) +3.2V MMC CS MMC chip select P70/CS0 (Not used) (Not used)
- Page 273 NOTE: MAIN XIII SCHEMATIC DIAGRAM COMPARISON CHART FOR SCHEMATIC DIAGRAM AND CIRCUIT BOARD LAYOUT NOTES/ OF MODELS & MARKS ABBREVIATION, REFER TO BEGINNING OF SCHEMATIC SECTION. MODEL MARK PV-DV101 PV-DV401 Not Used C5011 0.01 C5010 R5011 1800 R5012 C5003 C5012...
- Page 274 IC5001 BLOCK DIAGRAM (+5V) ENVE (+3V) LOGIC DRIVE LOGIC (+1.8V)
- Page 275 MODEL MARK 2A 32V 1A 32V TYPE 2A 32V TYPE 1A 32V IMPORTANT SAFETY NOTICE: PV-DV101 COMPONENTS IDENTIFIED BY THE SIGN HAVE PV-DV401 SPECIAL CHARACTERISTICS IMPORTANT FOR SAFETY. Not Used WHEN REPLACING ANY OF THESE COMPONENTS, USE ONLY THE SPECIFIED PARTS.
- Page 276 NOTE: MICROPHONE UNIT/FRONT SCHEMATIC DIAGRAM COMPARISON CHART FOR SCHEMATIC DIAGRAM AND CIRCUIT BOARD LAYOUT NOTES/ OF MODELS & MARKS ABBREVIATION, REFER TO BEGINNING OF SCHEMATIC SECTION. MODEL MARK PV-DV101 PV-DV401 Not Used REC AUDIO SIGNAL Q4801 R4816 C4817 R4825 R4801...
- Page 277 LCD SCHEMATIC DIAGRAM COMPARISON CHART FOR SCHEMATIC DIAGRAM AND CIRCUIT BOARD LAYOUT NOTES/ OF MODELS & MARKS ABBREVIATION, REFER TO BEGINNING OF SCHEMATIC SECTION. MODEL MARK VIDEO SIGNAL L8003 R8015 PV-DV101 R8018 Q8013 PV-DV401 UN5114 Q8004 SWITCHING Not Used 2SB1462 REVERSE...
- Page 278 COMPARISON CHART FOR SCHEMATIC DIAGRAM AND CIRCUIT BOARD LAYOUT NOTES/ OF MODELS & MARKS ABBREVIATION, REFER TO BEGINNING OF SCHEMATIC SECTION. MODEL MARK PV-DV101 IMPORTANT SAFETY NOTICE: PV-DV401 COMPONENTS IDENTIFIED BY THE SIGN HAVE SPECIAL CHARACTERISTICS IMPORTANT FOR SAFETY. Not Used WHEN REPLACING ANY OF THESE COMPONENTS, USE ONLY THE SPECIFIED PARTS.
- Page 279 NOTE: COLOR EVF SCHEMATIC DIAGRAM (B) COMPARISON CHART FOR SCHEMATIC DIAGRAM AND CIRCUIT BOARD LAYOUT NOTES/ OF MODELS & MARKS ABBREVIATION, REFER TO BEGINNING OF SCHEMATIC SECTION. MODEL MARK PV-DV101 PV-DV401 Not Used VIDEO SIGNAL IC902 R908 R925 L902 R901...
- Page 280 FOR SCHEMATIC DIAGRAM AND CIRCUIT BOARD LAYOUT NOTES/ OF MODELS & MARKS ABBREVIATION, REFER TO BEGINNING OF SCHEMATIC SECTION. MODEL MARK REC VIDEO SIGNAL PB VIDEO SIGNAL REC AUDIO SIGNAL PB AUDIO SIGNAL PV-DV101 PV-DV401 JK3702 Not Used L3710 BKMMZ1608D301B R3703 R3704 L3701 BKMMZ1608D301B TO MAIN C.B.A.
- Page 281 FOR SCHEMATIC DIAGRAM AND CIRCUIT BOARD LAYOUT NOTES/ OF MODELS & MARKS ABBREVIATION, REFER TO BEGINNING OF SCHEMATIC SECTION. MODEL MARK JACK C.B.A. MAIN C.B.A. CCD UNIT LCD SHAFT UNIT LCD C.B.A. PV-DV101 FP3701 FP301 PV-DV401 HEADPHONE LCD PANEL UNIT JACK SPEAKER Not Used TO INTERFACE BOARD...
- Page 282 PIN NO. PIN NO. PIN NO. PIN NO. PIN NO. PIN NO. PIN NO. MODEL MARK IC301 IC305 14.8 IC3002 TP3914 -7.0 Q1105 TP3915 PV-DV101 -7.0 Q3011 TP3916 PV-DV401 -0.5 TP3917 TP3918 IC304 -0.5 Q1106 TP3919 TP3920 TP3001 TP3921 TP3002 TP3922...
- Page 283 OF MODELS & MARKS PIN NO. PIN NO. PIN NO. PIN NO. PIN NO. PIN NO. PIN NO. PIN NO. PIN NO. MODEL MARK IC401 IC6009 Q6007 PV-DV101 PV-DV401 Q6008 IC6003 TP2001 TP2002 TP2003 TP2004 IC6004 TP6001 TP6002 TP6003 TP6004 TP6005 IC6005...
- Page 284 PIN NO. PIN NO. PIN NO. PIN NO. PIN NO. PIN NO. PIN NO. PIN NO. MODEL MARK IC1002 IC901 IC901 IC8001 Q8002 PV-DV101 12.0 11.9 PV-DV401 11.9 11.3 Q8015 Q8003 TP10 IC1003 TP11 15.1 TP12 15.1 Q8104 TP13 -15.0...
- Page 285 CCD DRIVE BLOCK DIAGRAM REC VIDEO(CAMERA) SIGNAL CCD C.B.A. MAIN C.B.A. IC601 (CCD) IC301 (CAMERA SIGNAL PROCESS) Q601 DOUBLE FP301 IMAGE 10BIT SAMPLING BUFFER CAMERA DATA (10 BIT) CAMERA DATA (0-9) A/D CONVERTER SENSOR HOLD CLAMP D/A CONVERTER CLAMP 46 47 48 CAMERA DAC SERIAL CLOCK CAMERA DAC SERIAL DATA CAMERA DAC CS (L)
- Page 286 VIDEO SIGNAL PROCESS I BLOCK DIAGRAM REC VIDEO SIGNAL PB VIDEO SIGNAL REC AUDIO SIGNAL PB AUDIO SIGNAL IC3001 (CAMERA DIGITAL SIGNAL PROCESS/SHUFFLING) DBR DATA (4 BIT) DBR(0 -3) FROM CCD DRIVE CAMERA 185 186 DIGITAL FILTER/ SHUFFLING DV BUS BLOCK DIAGRAM DATA (0-9) SEPARATION...
- Page 287 VIDEO SIGNAL PROCESS II BLOCK DIAGRAM REC VIDEO SIGNAL PB VIDEO SIGNAL REC AUDIO SIGNAL PB AUDIO SIGNAL MAIN C.B.A. CYLINDER UNIT IC3201 (FORMATTING/EQUALIZER) IC5001 (HEAD AMP) LOGIC DRIVE REC CLOCK CH 1 HEAD HEAD TO/FROM VIDEO I DBR (0-3) MODULATOR SIGNAL PROCESS BLOCK DIAGRAM...
- Page 288 ANALOG VIDEO I/F BLOCK DIAGRAM REC VIDEO SIGNAL PB VIDEO SIGNAL JACK C.B.A. MAIN C.B.A. IC3501 (SIF) IC3503 (SW) IC3504 JK3701 111 . FP3701 VIDEO . 112 Q3503 VIDEO Y DATA (0-7) 10 BIT A/D BUFFER FILTER CLAMP 115 . S-VIDEO CONVERTER SEPA.
- Page 289 AUDIO SIGNAL PROCESS BLOCK DIAGRAM REC AUDIO SIGNAL PB AUDIO SIGNAL MAIN C.B.A. FRONT C.B.A. IC4301(AUDIO I/F) ECM UNIT (WITH EXT MIC) (FROM IC3001 (101)) Q4804 Q4802,4803 Q4808 MIC-ON R4828 AUDIO DATA 1 FP10 FP4801 FJ4801 BUFFER BUFFER (TO IC3001 (100)) LINE-ON CONVERTER AUDIO DATA 0...