Table of Contents
Advertisement
Quick Links
Advertisement
Chapters
Table of Contents

Related Manuals for HP s979


Summary of Contents for HP s979
- Page 1 Car Camcorder 行車記錄器 行车记录器 User Manual 使用說明手冊 使用说明手册...
- Page 2 Car Camcorder User Manual...
-
Page 3: Table Of Contents
Contents About this Guide ..................2 Notes on Installation ................2 Regulatory notices ................... 2 CE Regulatory Notice ................2 WEEE Notice ..................... 2 Caution ....................3 1 Introduction ..................4 1.1 Features ..................... 4 1.2 Package Contents ................4 1.3 Product Overview ................ -
Page 4: About This Guide
About this Guide The content in this document is for information purpose and is subject to change without prior notice. We made every effort to ensure that this User Guide is accurate and complete. However, no liability is assumed for any errors and omissions that may have occurred. -
Page 5: Caution
the product or its accessories and void the warranty. HP Inc. is NOT responsible for the loss of any data/content during operation. Before you start using the Car Camcorder, it is assumed that you agree to the above statements. -
Page 6: Introduction
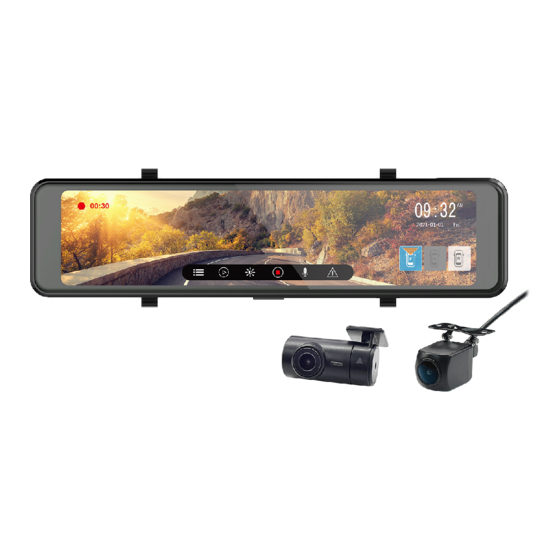
1 Introduction Thank you for purchasing this advanced camcorder. This camcorder is specifically designed for real time video and audio recording when driving. 1.1 Features • Full HD 1920*1080 • Sony’s Starvis Sensor • F/1.55 big aperture • Super Capacitor •... -
Page 7: Product Overview
1.3 Product Overview... - Page 8 Item Rearview mirror clip LCD Screen CH2 port for interior camera (option) GPS port for external GPS (option) MicroSD memory card slot USB port for car power adapter CH1 port for rear camera (option) Speaker Lens Short press: LCD on/off Press and hold 3 seconds: manually power on/off Press and hold 8 seconds: reset Microphone...
-
Page 9: Getting Start
2. Getting Start 2.1 Insert the Memory Card Insert the memory card with the gold contacts facing the back of the camcorder. Push the memory card until it clicks into place. (Use class V30 or greater speed micro SD cards for this camcorder; It is recommended to format the micro SD cards before the initial use.) To remove the memory card Push the edge of the memory card inward until you hear/feel it click,... -
Page 10: Install In Vehicles
2.2 Install in Vehicles Clip on to your original car mirror. Circle the clip with the band. Adjust the camcorder lens. Note: Image shown here is for installation illustration. The outlook may differ from what you purchased. -
Page 11: Connecting To Power
2.3 Connecting to Power Use only the supplied car adapter to power up the camcorder. 1. Connect one end of the car adapter to the USB connector of the camcorder. USB port input: DC 5V / 2A. 2. Plug the other end of the car adapter to the cigarette lighter socket of your vehicle. -
Page 12: Powering The Camcorder On / Off And Reset
2.4 Powering the Camcorder On / Off and Reset 2.4.1 Auto Power On/Off Once the vehicle engine is started, wait a few seconds to charge the camcorder, and then the screen will light up and camcorder automatically powers on, and start recording. Once the vehicle engine shuts down, the camcorder automatically saves the recording and turns off the power. -
Page 13: Initial Settings
2.5 Initial Settings 2.5.1 Set the Date and Time We recommend you to set up date and time before initial use. To set the correct date and time, do the following: In the recording screen, touch the panel to wake up function bar. Touch icon to enter Menu. -
Page 14: Using The Camcorder
3. Using the Camcorder 3.1 Recording Videos 3.1.1 Auto Recording When the vehicle engine starts up, wait a few seconds to charge the camcorder, then it will automatically turn on and start recording. Recording will automatically stop when the engine is switched off. Note: 1. -
Page 15: Recording Screen
3.1.2 Recording Screen icon Item Description Recording Indicates the video current duration. 00:10 Duration Function Menu set up and hot key. Date / Indicates the current recording date Time and time. Menu Menu set up. Playback File playback. Brightness LCD brightness set up. Start/Stop Start/stop video recording. -
Page 16: Emergency Recording
icon Item Description F: front camera M: middle/interior camera(option) R: rear camera(option) Preview If optional middle or rear camera is camera installed, the icon will be white, touch the icon, the preview screen will be the camera’s view, and icon will change to blue. -
Page 17: Gps (Option)
3.2 GPS (Option) Plug the optional GPS accessory into GPS port on the camcorder, you can preview current car speed and direction such information. Note: 1. GPS function is limited in certain areas. Please contact dealer for details. 2. When GPS is positioned, the icon will change from white to blue 3. -
Page 18: Middle Camera (Option)
3.4 Middle Camera (Option) Please power off the camcorder firstly, then plug the optional middle camera into CH2 port on the camcorder. After installation, you can turn on the main camcorder and enjoy triple channels recording. Note: 1. Middle camera doesn’t support hot plug-n-play. Please power off the main camcorder before plug into middle camera. -
Page 19: Parking Mode
Note: 1. Deleted files CANNOT be recovered. Ensure the files you wish to preserve are backup before deletion. 2. Use dual cameras or triple cameras recording, if you delete only FRONT file or REAR file or MIDDLE file, the other files will still remain existing and be able to playback, too. 3.6 Parking Mode To monitor the vehicle when it is parked, you can activate Parking Mode. -
Page 20: Adjust The Settings
4. Adjust the Settings In the recording screen, touch the panel to wake up function bar. Touch icon on function bar to stop recording. Touch icon enter Menu setting. Followings is available menu options. Menu Description Available option Resolution Setting of video resolution 1080P / 720P Set the recording duration for each 1 min/ 2 min/... - Page 21 Menu Description Available option Volume Adjust sound volume. 1 ~ 10 GPS (*1) To activate GPS function. On/ Off GPS Speech (*1) To activate GPS speech function. On/ Off Speed To adjust speed discrepancy of GPS and +8%, +5%, +2%, 0, Compensation (*1) your car.
-
Page 22: Specifications
5. Specifications Item Description Image Sensor 1/2.8” Sony’s Starvis CMOS sensor Effective Pixels 1920 (H) x 1080 (V) Supports micro SD V30 speed or greater, and capacity 16GB Storage Media and higher. LCD Display 11.26” LCD color TFT Lens Wide Angle Fixed Focus lens Focus Range 1.5m~Infinity Front camera:... - Page 23 Item Description Dimensions 291 x 74 x 39.2 mm Weight Approx. 392g (not include memory card)
- Page 24 行車記錄器 使用手冊...
- Page 25 目錄 關於本手冊 ....................2 安裝須知 ....................2 Regulatory notices..................2 CE Regulatory Notice .................. 2 WEEE 通知 ....................2 安全注意事項 .................... 3 簡介 .................... 4 1.1 特色 ..................... 4 1.2 包裝內容 ..................... 4 1.3 產品概觀 ..................... 5 開始 .................... 7 2.1 插入記憶卡...
-
Page 26: 關於本手冊
關於本手冊 本手冊內容僅供參考 , 且可隨時變更不事先通知。本公司已盡力確保此使用手冊內 容準確完整。然而 , 對於可能發生的任何錯誤或疏漏 , 本公司概不負責。 製造商保留變更技術規格與配件的權利不事先通知。 安裝須知 駕駛或車輛行進當中切勿設定行車記錄器。請先停靠在安全地點再調整或安裝。 行車記錄器請安裝在後視鏡位置以取得最開闊的視野。行車記錄器切勿安裝在阻 礙駕駛視線的地方。 確定鏡頭在擋風玻璃雨刷的擦拭範圍內 , 以確保下雨時視野清楚。 勿用手指觸碰鏡頭。手指上的油脂會留在鏡頭上導致影像或快照不清楚。請定期 清潔鏡頭。 本設備僅適用產品隨附之電源連接器 , 請勿使用其他廠牌以免設備燒毀。 Regulatory notices This document provides country- and region-specific non-wireless and wireless regulatory notices and compliance information for your product. Some of these notices may not apply to your product. -
Page 27: 安全注意事項
安全注意事項 千萬不要拆解或試圖修理本產品。此舉可能損壞行車記錄器 , 造成觸電並使 產品保固失效。 使用者須遵守當地法律並以行車安全為優先考量,請勿於行車中操作本設備。 使用設備前請先確認日期與時間已設定完成。 本設備內建的韌體功能僅供使用者參考, 道路駕駛請依實際路況作判斷。 本設備顯示之時速和方位等數值會因外在環境因素影響而有所誤差,僅供使用 者參考。 本產品僅供使用於非商業用途, 適用法律允許的最大限度內。本公司對於使 用本產品所造成的損失不承擔任何責任。 本產品在使用時會略微變熱, 純屬正常現象不代表故障。 不正確地使用本產品或操作不當導致設備或配件損壞, 您的保固將會無效。 HP Inc.對於操作中任何資料/內容的損失概不負責。 在您開始使用此行車記錄器時,表示您已同意上述聲明。... -
Page 28: 包裝內容
1 簡介 本公司在此先感謝您購買此行車記錄器 ( 以下簡稱 ” 設備 ”) 。此行車記錄器經過 特別設計 , 可于駕駛時錄下即時的影像與聲音。 1.1 特色 • 超高畫質 1920*1080 • 索尼星光級感光晶片 • F/1.55 超大光圈 • 內置超級電容 • 碰撞偵測 • 緊急錄影 • 停車監控模式 ( 支援縮時錄影 ) • 支援中路(車內)及後路(車後)錄影, 選配 1.2 包裝內容 包裝內包含下列項目。如有任何遺漏或毀損 , 請立刻聯絡經銷商。 行車記錄器... -
Page 29: 產品概觀
1.3 產品概觀... - Page 30 號碼 項目 綁帶扣 螢幕 CH2 插口 , 連接車內鏡頭 ( 選配 ) GPS 插口 , 連接 GPS( 選配 ) MicroSD 記憶卡槽 USB 插口 , 連接車充 CH1 插口 , 連接後置鏡頭 ( 選配 ) 喇叭 鏡頭 電源鍵 / 重置鍵 短按 : 螢幕開關 長按 3 秒 : 手動電源開關 長按...
-
Page 31: 插入記憶卡
2 開始 2.1 插入記憶卡 記憶卡金色接觸面朝向行車記錄器背面插入。將記憶卡推到底直到扣住。 ( 此 記錄器請使用 V30 或速度更快的 micro SD 記憶卡;建議在初次使用前先將 micro SD 卡格式化。 ) 移除記憶卡 將記憶卡邊緣往內推到你聽到 / 感覺到喀噠聲 , 然後讓它從卡槽推出直到你可 以移除。 備註: 1. 設備在開機狀態時 , 不要取出或插入記憶卡 , 以免損壞記憶卡。 2. 限使用速度等級 V30 以上 , 且記憶體容量 16GB 以上的 micro SD 記憶卡。最高支持 128GB 。... -
Page 32: 安裝車內
2.2 安裝車內 夾在原本的汽車後視鏡上。 用綁帶圈住綁帶扣子。 調整記錄器鏡頭。 備註: 以上圖示為安裝說明。實際外觀請以您購買機種為主。... -
Page 33: 連接電源
2.3 連接電源 限使用本產品包裝內附的車充供電給行車記錄器。 1. 車充的一端連接到記錄器的 USB 埠。電源連接孔輸入直流電壓 5V/2.5A 。 2. 將車充的另一端插到車內的點煙器插孔內。車輛的引擎一旦發動 , 記錄器電 源自動打開。車充輸入直流電壓 12/24V 。 備註: 本設備僅適用產品隨附之車充 , 請勿使用其他廠牌以免設備燒毀。 2.4 電源開 / 關及重置 2.4.1 自動開 / 關 車輛引擎發動 , 等待數秒自動為行車記錄器充電 , 數秒後將自動開機並啟動錄 影。 車輛引擎一旦關閉 , 記錄器便自動儲存錄影並關掉電源。 備註: 1. 前提是車充有連結到點煙器插孔內 , 則記錄器電源會自動打開及關閉。 2. -
Page 34: 手動開/關
2.4.2 手動開 / 關 長按電源鍵 3 秒以手動方式打開或關閉電源。 2.4.3 重置 長按電源鍵 8 秒重新設定。 2.5 初始設置 2.5.1 設定日期及時間 在使用設備之前, 我們建議先設置正確的日期與時間。 設置正確的日期與時間, 其方式如下: 1. 在錄影畫面 , 觸碰一下螢幕可顯示功能列 , 觸碰 圖示, 進入菜單。 手指上下滑動選單, 再點按[時間設定]進入設置。 觸碰[+][-]圖示修改數值, 完成設置後再觸碰[確定]確認。 按 圖示返回錄影畫面。... -
Page 35: 使用行車記錄器
使用行車記錄器 3.1 錄影 3.1.1 自動錄影 車輛引擎發動時 , 等待數秒自動為行車記錄器充電 , 數秒後將自動開機並啟動 錄影。引擎關閉時便自動停止錄影。 備註: 1. 某些車款因為點煙器 / 電源插座沒有連結點火系統 , 汽車熄火之後 , 依然持續錄影 , 此時 您需手動關閉行車記錄器的電源。 2. 循環錄影可設定 1 分鐘 , 2 分鐘 , 或 3 分鐘。 3. 行車記錄器將一般循環錄影儲存在記憶卡內 。 如果記憶卡容量已滿 , 會覆寫記憶卡內最舊 的檔案。... -
Page 36: 錄影畫面
3.1.2 錄影畫面 編號 圖示 項目 說明 錄影時長 顯示影片當前的錄影時長。 00:10 功能列 菜單設定及主功能快捷鍵。 日期與時間 顯示當前拍攝的日期與時間。 菜單設定 設定功能選項。 播放 播放錄影檔案及照片。 亮度 調整螢幕明暗度。 錄影/ 錄影或暫停錄影。 暫停錄影 聲音記錄 設定錄音或是不錄音。 在錄影期間按此圖示可進入緊急錄影模式 緊急錄影 加鎖檔案。 若有選配GPS, GPS定位之後, 圖示會由白 GPS狀態 色變為藍色 。 F: 前鏡頭 M: 車內鏡頭(選配) R: 後置鏡頭(選配) 預覽畫面 若有安裝選配車內或後置鏡頭, 該圖示會... -
Page 37: Gps (選配)
3.1.3 緊急錄影 本設備內建重力感應器, 若啟用碰撞偵測, 當設備偵測碰撞, 即會觸發自動緊 急錄影, 螢幕上會出現"鎖定目前檔案" 的提示, 左上螢幕的黃色圓點閃爍。在 緊急錄影模式中錄製的影片會被加鎖, 不會被一般循環錄影覆蓋。 在錄影期間觸碰螢幕上功能列的 圖示可手動啟用緊急錄影模式。 緊急錄影的時長與一般循環錄影時長相同。當緊急錄影達設置的時間, 系統會 恢復到一般的錄影模式。 備註: 碰撞偵測 功能可於菜單設定選擇關閉 , 低靈敏度 , 中靈敏度或高靈敏度。若選擇關閉 , 則 不會自動緊急錄影。 2. 緊急錄影的檔案會另外儲存成受保護的檔案 , 避免檔案被循環錄影所覆蓋。 緊急錄影資料夾約 20% 的記憶卡可用容量。緊急錄影資料夾已滿時 , 當新的緊急錄影檔 建立 , 最舊的緊急錄影檔會被自動刪除。 3.2 GPS ( 選配 ) 將選配的GPS配件插入行車記錄器的GPS插孔, 可以在錄影介面查看時速及方... -
Page 38: 後置鏡頭 (選配)
3.3 後置鏡頭 ( 選配 ) 先將行車記錄器關機, 再將選配的後置鏡頭配件插入行車記錄器的CH1插孔, 安裝完成後, 重新開機, 便可以使用車前/後雙鏡頭錄影功能。 備註: 1. 後置鏡頭不支援熱插拔 , 請先將主機關機 , 再插入後置鏡頭。 2. 點選觸控螢幕右下方的 F / R 小方塊 , 可切換前 / 後鏡頭預覽畫面。 3.4 車內鏡頭 ( 選配 ) 先將行車記錄器關機, 再將選配的車內鏡頭配件插入行車記錄器的CH2插孔, 安裝完成後, 重新開機, 便可以使用車前/內/後三鏡頭錄影功能。 備註: 1. 車內鏡頭不支援熱插拔 , 請先將主機關機 , 再插入車內鏡頭。 2. -
Page 39: 播放檔案
3.5 播放檔案 在錄影畫面, 輕觸一下螢幕可顯示功能列, 觸碰功能列上的 圖示暫停錄影, 再觸碰 圖示可進入檔案播放列表。手指上下滑動可選擇檔案。輕觸 圖 示可切換車前/內/後鏡頭拍攝的檔案列表。 在檔案播放畫面, 輕觸 可加鎖/解鎖該檔案, 或 可播放/暫停該 檔案, 或 可瀏覽上一個或是下一個檔案, 刪除該檔案, 返回上 一頁檔案播放列表。 備註: 1. 刪除的檔案不能復原。刪除前請先確定想保存的檔案有備份。 2. 同時使用雙鏡頭或是三鏡頭錄影,所儲存的檔案,若您只刪除其一檔案,則同時錄製的 另一個或是兩個鏡頭的檔案不會被刪除。... -
Page 40: 停車模式
3.6 停車模式 若啟用停車監控的功能, 可透過本記錄器監控車輛停置時的狀況。 啟用停車模式之前, 請您經由專門店安裝ACC常時電源線(或稱降壓線)。 打開停車監控的功能,其方式如下: 1. 在錄影畫面, 輕觸 圖示暫停錄影, 再觸碰 圖示進入菜單。 2. 手指滑動選擇[停車模式], 點按右方開關圖示並選擇”開”。 3. 按 圖示返回錄影畫面。 4. 汽車熄火後, 設備自動進入停車監控模式, 以一秒一幀的縮時錄影開始錄 影。 5. 停車監控的模式下, 當汽車受到外力撞擊時, 設備會進入緊急錄影模式, 檔 案會加鎖, 不會被循環錄影覆蓋。 備註: 1. 本包裝不包含 ACC 常時電源線 , 如欲購買 , 請洽經銷商。如需安裝 , 亦請透過專業的安裝 商店。... -
Page 41: 調整設定
調整設定 在錄影畫面, 輕觸一下螢幕可顯示功能列, 觸碰功能列上的 圖示暫停錄 影。再觸碰 圖示, 進入菜單設定。 功能選項的詳細說明, 請參考下表。 選項 說明 可用選項 影像解析度 設置錄影的解析度。 1080P / 720P 設備依循您所設置的時長分段存 1 分鐘 / 2 分鐘 / 錄影間隔 儲影片 , 並且循環錄影。 3 分鐘 聲音記錄 設置錄影時是否錄製聲音。 關閉 / 開啟 汽車熄火後 , 是否繼續錄影。若啟 用 , 錄影則以一秒一拍錄製。 停車模式... - Page 42 選項 說明 可用選項 設置螢幕關閉的時間。在待機或錄 影中達設置時間未操作 , 設備會暫 開 / 螢幕設定 時關閉螢幕 , 輕觸螢幕或短按電源 1 分鐘關閉 / 鍵即可開啟螢幕 ( 螢幕關閉時不影 3 分鐘關閉 / 響影片錄製 ) 。 關閉 / 低靈敏度 若啟用 , 當設備感測到碰撞時 , 設 碰撞偵測 / 中靈敏度 / 高 備會自動啟動緊急錄影。 靈敏度 音量...
- Page 43 選項 說明 可用選項 韌體版本 顯示當前韌體版本。 注1. GPS功能需搭配選配的GPS配件, 韌體自動偵測顯示這些選項。...
- Page 44 規格 項目 說明 影像感測器 1/2.8” SONY’s Starvis CMOS 感測器 有效畫素 1920 (H) x 1080 (V) 支援速度等級 V30以上, 且記憶體容量 16GB 以上的 存儲媒體 micro SD 卡 螢幕 11.26” TFT LCD 彩色觸控螢幕 鏡頭 廣角固定焦距鏡頭 對焦範圍 1.5m ~ 無限 前鏡頭 1920 x 1080P 25 fps 1280 x 720P 25 fps 影片解析度...
-
Page 45: 限用物質含有情況說明書
限用物質含有情況說明書 設備名稱:行車記錄器 型號(型式):s979 Equipment name: Car Camcorder Type designation (Type): s979 限用物質及其化學符號 Restricted substances and its chemical symbols 單元Unit 六價鉻 多溴聯苯 多溴二苯醚 鉛 汞 鎘 Lead Mercury Cadmium Hexavalent Polybrominated Polybrominated (Pb) (Hg) (Cd) chromium biphenyls diphenyl ethers (PBB) (PBDE) 主機外殼... - Page 46 行车记录器 使用手册...
- Page 47 目录 关于本手册 ....................2 安装须知 ....................2 Regulatory notices..................2 CE Regulatory Notice .................. 2 WEEE 通知 ....................2 安全注意事项 .................... 3 简介 .................... 4 1.1 特色 ..................... 4 1.2 包装内容 ..................... 4 1.3 产品概观 ..................... 5 开始 .................... 7 2.1 插入存储卡...
-
Page 48: 关于本手册
关于本手册 本手册内容仅供参考, 且可随时变更不事先通知。本公司已尽力确保此使用手册内 容准确完整。然而, 对于可能发生的任何错误或疏漏, 本公司概不负责。 制造商保留变更技术规格与配件的权利不事先通知。 安装须知 驾驶或车辆行进当中切勿设定行车记录器。请先停靠在安全地点再调整或安装。 行车记录器请安装在后视镜位置以取得最开阔的视野。行车记录器切勿安装在阻 碍驾驶视线的地方。 确定镜头在挡风玻璃雨刷的擦拭范围内, 以确保下雨时视野清楚。 勿用手指触碰镜头。手指上的油脂会留在镜头上导致影像或快照不清楚。请定期 清洁镜头。 本设备仅适用产品随附之电源连接器,请勿使用其他厂牌以免设备烧毁。 Regulatory notices This document provides country- and region-specific non-wireless and wireless regulatory notices and compliance information for your product. Some of these notices may not apply to your product. CE Regulatory Notice The product herewith complies with the requirements of CB IEC 62368-1:2014, EMC Directive 2014/30/EU and the RoHS Directive 2011/65/EU. -
Page 49: 安全注意事项
安全注意事项 千万不要拆解或试图修理本产品,此举可能损坏行车纪录器,造成触电并使 产品保固失效。 使用者须遵守当地法律并以行車安全为优先考量,请勿于行車中操作本设 备。 使用设备前请先确认日期与时间已设定完成。 本设备内建的韧体功能仅供用户參考,道路驾驶请依实际路况作判断。 本设备显示之时速和方位等数值会因外在环境因素影响而有所误差,仅供使 用者参考。 本产品仅供使用于非商业用途,适用法律允许的最大限度内。本公司对于使 用本产品所造成的损失不承担任何责任。 本产品在使用时会略微变热, 纯属正常现象不代表故障。 不正确地使用本产品或操作不当导致设备或配件损坏, 您的保固将会无效。 HP Inc.对于操作中任何数据/内容的损失概不负责。 在您开始使用此行车记录器时,表示您已同意上述声明。... -
Page 50: 包装内容
1 简介 本公司在此先感谢您购买此行车记录器(以下简称”设备”)。此行车记录器经过 特别设计, 可于驾驶时录下实时的影像与声音。 1.1 特色 • 超高画质 1920*1080 • 索尼星光级感光芯片 • F/1.55 超大光圈 • 内置超级电容 • 碰撞侦测 • 紧急录像 • 停车监控模式(支持缩时录像) • 支援中路(车内)及后路(车后)录像, 选配 1.2 包装内容 包装内包含下列项目。如有任何遗漏或毁损, 请立刻联络经销商。 行车记录器 绑带 车充 外挂式 GPS 车内镜头 后置镜头 说明书 (选配) (选配) (选配) -
Page 51: 产品概观
1.3 产品概观... - Page 52 号码 项目 绑带扣 屏幕 CH2 插口, 连接车内镜头(选配) GPS 插口, 连接 GPS(选配) MicroSD 存储卡槽 USB 插口, 连接车充 CH1 插口, 连接后置镜头(选配) 喇叭 镜头 电源键/复位键 短按: 屏幕开关 长按 3 秒: 手动电源开关 长按 8 秒: 复位 麦克风...
-
Page 53: 插入存储卡
2 开始 2.1 插入 存储 卡 存储卡金色接触面朝向行车记录器背面插入。将存储卡推到底直到扣住。(此 记录器请使用 V30 或速度更快的 micro SD 存储卡;建议在初次使用前先将 micro SD 卡格式化。) 移除存储卡 将存储卡边缘往内推到你听到/感觉到喀哒声, 然后让它从卡槽推出直到你可 以移除。 备注: 1. 设备在开机状态时, 不要取出或插入存储卡, 以免损坏存储卡。 2. 限使用速度等级 V30 以上, 且内存容量 16GB 以上的 micro SD 存储卡。最高支持 128GB。 3. 使用前请先用本机格式化 micro SD 存储卡。 4. -
Page 54: 安装车内
2.2 安装车内 夹在原本的汽车后视镜上。 用绑带圈住绑带扣子。 调整记录器镜头。 备注: 以上图示为安装说明。实际外观请以您购买机种为主。... -
Page 55: 连接电源
2.3 连接电源 限使用本产品包装内附的车充供电给行车记录器。 1. 车充的一端连接到记录器的 USB 埠。电源连接孔输入直流电压 5V/2.5A。 2. 将车充的另一端插到车内的点烟器插孔内。 车辆的引擎一旦发动,记录器电 源自动打开。车充输入直流电压 12/24V。 备注: 本设备仅适用产品随附之车充, 请勿使用其他厂牌以免设备烧毁。 2.4 电源开/关及复位 2.4.1 自动开/关 车辆引擎发动, 等待数秒自动为行车记录器充电, 数秒后将自动开机并启动录 像。 车辆引擎一旦关闭, 记录器便自动储存录像并关掉电源。 备注: 1. 前提是车充有连结到点烟器插孔内, 则记录器电源会自动打开及关闭。 2. 本行车记录器使用超级电容, 因此汽车引擎发动之后, 需等待数秒为内建超级电容充电, 数秒后记录器便会自动开机并启动录像。... -
Page 56: 手动开/关
2.4.2 手动开/关 长按电源键 3 秒以手动方式打开或关闭电源。 2.4.3 复位 长按电源键 8 秒重新设定。 2.5 初始设置 2.5.1 设定日期及时间 在使用设备之前, 我们建议先设置正确的日期与时间。 设置正确的日期与时间, 其方式如下: 1. 在录像画面, 触碰一下屏幕可显示功能列, 触碰 图标, 进入菜单。 手指上下滑动选单, 再点按[时间设定]进入设置。 触碰[+][-] 图标修改数值, 完成设置后再触碰[确定]确认。 按 图标返回录像画面。... -
Page 57: 使用行车记录器
使用行车记录器 3.1 录像 3.1.1 自动录像 车辆引擎发动时, 等待数秒自动为行车记录器充电, 数秒后将自动开机并启动 录像。引擎关闭时便自动停止录像。 备注: 1. 某些车款因为点烟器/电源插座没有链接点火系统, 汽车熄火之后, 依然持续录像, 此时 您需手动关闭行车记录器的电源。 2. 循环录像可设定 1 分钟, 2 分钟, 或 3 分钟。 3. 行车记录器将一般循环录像储存在记忆卡内。 如果记忆卡容量已满, 会覆写记忆卡内最旧 的档案。 4. 本行车记录器使用超级电容, 因此汽车引擎发动之后, 需等待数秒为内建超级电容充电, 数秒后记录器便会自动开机并启动录像。... -
Page 58: 录像画面
3.1.2 录像画面 编号 图示 项目 说明 录像时长 显示影片当前的录像时长。 00:10 功能列 菜单设定及主功能快捷键。 日期与时间 显示当前拍摄的日期与时间。 菜单设定 设定功能选项。 播放 播放录像档案及照片。 亮度 调整屏幕明暗度。 录像/ 录像或暂停录像。 暂停录像 声音记录 设定录音或是不录音。 在录像期间按此图标可进入紧急录像模式 紧急录像 加锁档案。 若有选配GPS, GPS定位之后, 图示会由白 GPS状态 色变为蓝色 。 F: 前镜头 M: 车内镜头(选配) R: 后置镜头(选配) 预览画面 若有安装选配车内或后置镜头, 该图示会... -
Page 59: Gps (选配)
3.1.3 紧急录像 本设备内建重力传感器, 若启用碰撞侦测, 当设备侦测碰撞, 即会触发自动紧 急录像, 屏幕上会出现"锁定目前档案" 的提示, 左上屏幕的黄色圆点闪烁。在 紧急录像模式中录制的影片会被加锁, 不会被一般循环录像覆盖。 在录像期间触碰屏幕上功能列的 图标可手动启用紧急录像模式。 紧急录像的时长与一般循环录像时长相同。当紧急录像达设置的时间, 系统会 恢复到一般的录像模式。 备注: 碰撞侦测 功能可于菜单设定选择关闭, 低灵敏度, 中灵敏度或高灵敏度。 若选择关闭, 则 不会自动紧急录像。 2. 紧急录像的档案会另外储存成受保护的档案, 避免档案被循环录像所覆盖。 紧急录像文件夹约20%的记忆卡可用容量。紧急录像文件夹已满时, 当新的紧急录像文 件建立, 最旧的紧急录像文件会被自动删除。 3.2 GPS ( 选配 ) 将选配的GPS配件插入行车记录器的GPS插孔, 可以在录像接口查看时速及方 向等信息, 同时会有语音播报提醒。 备注:... -
Page 60: 后置镜头 (选配)
3.3 后置镜头 ( 选配 ) 先将行车记录器关机, 再将选配的后置镜头配件插入行车记录器的CH1插孔, 安装完成后, 重新启动, 便可以使用车前/后双镜头录像功能。 备注: 1.后置镜头不支援热插入, 请先将主机关机, 再插入后置镜头。 2.点选触控屏幕右下方的 F / R 小方块, 可切换前/后镜头预览画面。 3.4 车内镜头 ( 选配 ) 先将行车记录器关机, 再将选配的车内镜头配件插入行车记录器的CH2插孔, 安装完成后, 重新启动, 便可以使用车前/内/后三镜头录像功能。 备注: 1.车内镜头不支援热插入, 请先将主机关机, 再插入车内镜头。 2.点选触控屏幕右下方的 F / M / R 小方块, 可切换车前/内/后镜头预览画面。... -
Page 61: 播放档案
3.5 播放档案 在录像画面, 轻触一下屏幕可显示功能列, 觸碰功能列上的 图标暂停录像, 再触碰 图标可进入档案播放列表。 手指上下滑动可选择档案。 轻触 图 标可切换车前/内/后镜头拍摄的档案列表。 在档案播放画面, 轻触 可加锁/解锁该档案, 或 可播放/暂停该 档案, 或 可浏览上一个或是下一个档案, 删除该档案, 返回上 一页档案播放列表。 备注: 1. 删除的档案不能复原。删除前请先确定想保存的档案有备份。 2. 同时使用双镜头或是三镜头录像,所储存的档案,若您只删除其一档案,则同时录制的 另一个或是两个镜头的档案不会被删除。... -
Page 62: 停车模式
3.6 停车模式 若启用停车监控的功能, 可透过本记录器监控车辆停置时的状况。 启用停车模式之前, 请您经由专门店安装ACC常时电源线(或称降压线)。 打开停车监控的功能,其方式如下: 1. 在录像画面, 轻触 图标暂停录像, 再触碰 图标进入菜单。 2. 手指滑动选择[停车模式], 点按右方开关图示并选择”开”。 3. 按 图标返回录像画面。 4. 汽车熄火后, 设备自动进入停车监控模式, 以一秒一帧的缩时录像开始录 像。 5. 停车监控的模式下, 当汽车受到外力撞击时, 设备会进入紧急录像模式, 档 案会加锁, 不会被循环录像覆盖。 备注: 1. 本包装不包含ACC常时电源线, 如欲购买, 请洽经销商。如需安装, 亦请透过专业的安装 商店。 2. 停车模式的档案储存在一般录像文件夹。... -
Page 63: 调整设定
调整设定 在录像画面, 轻触一下屏幕可显示功能列, 触碰功能列上的 图标暂停录 像。再触碰 图标, 进入菜单设定。 功能选项的详细说明, 请参考下表。 选项 说明 可用选项 图像分辨率 设置录像的分辨率。 1080P / 720P 设备依循您所设置的时长分段存 1分钟 / 2分钟 / 摄像间隔 储视频, 并且循环录像。 3分钟 声音记录 设置录像时是否录制声音。 关闭 / 开启 汽车熄火后, 是否继续录像。若启 停车模式 用, 录像则以一秒一拍录制。 关闭 / 开启 *请先安装原厂ACC降压线。... - Page 64 选项 说明 可用选项 插上选配的GPS之后, 如暂时不须 GPS语音播报 关闭 / 开启 此功能, 可于此菜单上选择关闭。 (注1) 选配GPS启动时, GPS定位后显示的 +8%, +5%, +2%, 0, 车速补偿(注1) 车速, 与实际车速有差别时, 可略 -2%, -5%, -8% 调整GPS的显示车速。 插上选配的GPS之后, 可水印车速 车速显示(注1) 于视频上, 如不须此功能, 可选择 关闭 / 开启 关闭。 回复原厂设定 将系统恢复到出厂的设置。 是 / 否 格式化...
- Page 65 规格 项目 说明 图像传感器 1/2.8” SONY’s Starvis CMOS 传感器 有效画素 1920 (H) x 1080 (V) 支持速度等级 V30以上, 且内存容量 16GB 以上的 存储媒体 micro SD 卡 屏幕 11.26” TFT LCD 彩色触控屏幕 镜头 广角固定焦距镜头 对焦范围 1.5m ~ 无限 前镜头 1920 x 1080P 25 fps 1280 x 720P 25 fps 视频分辨率...
-
Page 66: 产品中有害物质的名称及含量
产品中有害物质的名称及含量 有害物质 部件 铅 汞 镉 六价铬 多溴联苯 多溴二苯醚 名称 (Pb) (Hg) (Cd) (Cr(VI)) (PBB) (PBDE) 主机外壳及组 〇 〇 〇 〇 〇 〇 件 主机内部电子 〇 〇 〇 〇 〇 〇 组件 电源供应器外 〇 〇 〇 〇 〇 〇 壳及组件 电源供应器内...