
Related Manuals for Toshiba ML-EM23P


Summary of Contents for Toshiba ML-EM23P
- Page 1 MICROWAVE SOLO OVEN INSTRUCTION MANUAL ML-EM23P(BS) Please review this instruction manual before operating.
-
Page 2: Table Of Contents
CONTENTS PRODUCT SAFETY Precautions to avoid possible exposure to excessive microwave energy ............................EN-01 Important safety instructions ........................EN-03 To reduce the risk of injury to persons grounding installation ............EN-07 Cleaning ................................EN-09 Utensils .................................. EN-10 Materials you can use in microwave oven .............................. - Page 3 9. POTATO ................................EN-25 10. FROZEN VEGETABLE ..........................EN-25 11. BEVERAGE ..............................EN-25 12. DINNER PLATE ............................EN-26 13. PIZZA ................................EN-26 14. MEMORY FUNCTION ..........................EN-27 15. MULTI-STAGE COOKING .......................... EN-28 16. LOCK FUNCTION ............................EN-29 17. INQUIRING FUNCTION..........................EN-29 18.
-
Page 4: Product Safety
PRODUCT SAFETY PRECAUTIONS TO AVOID POSSIBLE EXPOSURE TO EXCESSIVE MICROWAVE ENERGY (a). Do not attempt to operate this oven with the door open since this can result in harmful exposure to microwave energy. It is important not to break or tamper with the safety interlocks. (b). - Page 5 SPECIFICATIONS MODEL ML-EM23P(BS) RATED VOLTAGE 230-240V~50Hz RATED INPUT POWER(MICROWAVE) 1200-1250W RATED OUTPUT POWER(MICROWAVE) 750W-800W OVEN CAPACITY TURNTABLE DIAMETER 270mm EXTERNAL DIMENSIONS 485 X397X293 mm NET WEIGHT Approx 13kg EN-02...
-
Page 6: Important Safety Instructions
IMPORTANT SAFETY INSTRUCTIONS To reduce the risk of fire, electric shock, injury to persons or exposure to excessive microwave oven energy when using your appliance, follow basic WARNING precautions, including the following: Read and follow the maintenance shall not be specific: "PRECAUTIONS made by children without TO AVOID POSSIBLE... - Page 7 IMPORTANT SAFETY INSTRUCTIONS If the supply cord is When heating food in damaged, it must plastic or paper containers, be replaced by the keep an eye on the oven manufacturer, its service due to the possibility of agent or similarly qualified ignition.
- Page 8 IMPORTANT SAFETY INSTRUCTIONS checked before The microwave oven must consumption, in order to be operated with the avoid burns. decorative door open. (for ovens with a decorative door.) The oven should be cleaned regularly and any This appliance is intended food deposits removed.
- Page 9 IMPORTANT SAFETY INSTRUCTIONS The appliance is intended decorative door in order to be used freestanding. to avoid overheating. (This is not applicable for appliances with decorative The rear surface of door.) appliances shall be placed against a wall. The microwave oven shall not be placed in a cabinet Eggs in their shell and unless it has been tested in...
-
Page 10: To Reduce The Risk Of Injury To Persons Grounding Installation
TO REDUCE THE RISK OF INJURY TO PERSONS GROUNDING INSTALLATION This appliance must be grounded. In the event of an electrical short circuit, grounding reduces the risk of electric shock by providing an escape wire for the electric current. This appliance is equipped with a cord having a grounding wire with a grounding plug. - Page 11 TO REDUCE THE RISK OF INJURY TO PERSONS GROUNDING INSTALLATION Electric Shock Hazard: Improper use of the grounding can result in electric shock. Do not plug into an outlet until appliance is properly installed and grounded. 1. A short power-supply cord is provided to reduce the risks resulting from becoming entangled in or tripping over a longer cord.
-
Page 12: Cleaning
CLEANING Be sure to unplug the appliance from the power supply. 1. Clean the cavity of the oven after using with a slightly damp cloth. 2. Clean the accessories in the usual way in soapy water. 3. The door frame and seal and neighbouring parts must be cleaned carefully with a damp cloth when they are dirty. -
Page 13: Utensils
UTENSILS Personal Injury Hazard: It is hazardous for anyone other than a competent person to carry out any service or repair operation that involves the removal of a cover which gives protection against exposure to microwave energy. See the instructions on " Materials you can use in microwave oven "... -
Page 14: Materials You Can Use In Microwave Oven
MATERIALS YOU CAN USE IN MICROWAVE OVEN UTENSILS REMARKS Follow manufacturer’s instructions. The bottom of browning dish must be at least 3/16 inch (5mm) above the turntable. Incorrect usage may cause Browning dish the turntable to break. Microwave-safe only. Follow manufacturer’s instructions. - Page 15 MATERIALS YOU CAN USE IN MICROWAVE OVEN UTENSILS REMARKS Microwave-safe only. Follow the manufacturer’s instructions. Should be labeled “Microwave Safe”. Some plastic containers soften, as the food inside gets hot. “Boiling bags” and tightly closed plastic bags should be Plastic slit, pierced or vented as directed by package.
-
Page 16: Materials Can Not Be Used In Microwave Oven
MATERIALS CAN NOT BE USED IN MICROWAVE OVEN UTENSILS REMARKS May cause arcing. Transfer food into microwave-safe dish. Aluminum tray May cause arcing. Transfer food into microwave-safe dish. Food carton with metal handle Metal shields the food from microwave energy. Metal trim may cause arcing. -
Page 17: Product Setting
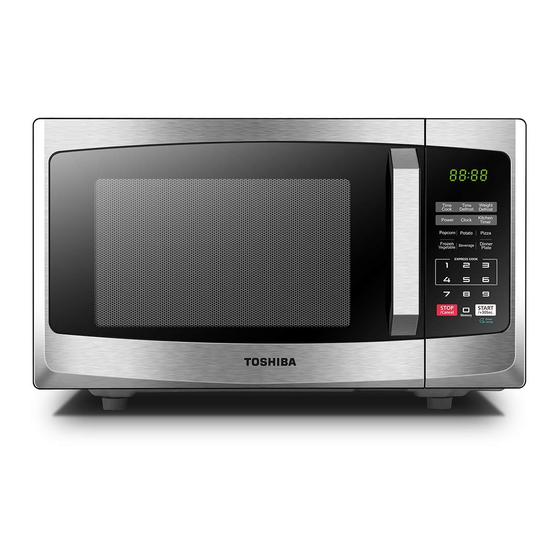
PRODUCT SETTING SETTING UP YOUR OVEN NAMES OF MICROWAVE OVEN PARTS AND ACCESSORIES Remove the oven and all materials from the carton and oven cavity. Glass Tray (Can be used under all functions) Instruction Manual A. Control panel E. Door assembly B. -
Page 18: Setting Up Your Oven
SETTING UP YOUR OVEN TURNTABLE INSTALLATION Cleaning the cooking compartment and putting the turntable in place. For new installations, make sure all packaging and shipping tape has been removed from the turntable shaft. Before using the appliance to prepare food for the first time, you will need to put the turntable in place correctly. - Page 19 SETTING UP YOUR OVEN COUNTERTOP INSTALLATION Remove all packing material and accessories. Examine the oven for any damage such as dents or broken door. Do not install if oven is damaged. Cabinet: Remove any protective film found on the microwave oven cabinet surface. Do not remove the light brown Mica cover that is attached to the oven cavity to protect the magnetron.
- Page 20 SETTING UP YOUR OVEN 2. Plug your oven into a standard household outlet. Be sure the voltage and the frequency is the same as the voltage and the frequency on the rating label. • Do not install oven over a range cooktop or other heat-producing appliance.
-
Page 21: Instruction For Use
INSTRUCTION FOR USE BEFORE USING FOR THE FIRST TIME The appliance may produce unpleasant odors when it is used for the first time. This section tells you what you need to do before using your microwave to prepare food for the first time. -
Page 22: Operation
OPERATION CONTROL PANEL AND FEATURES (12) (10) (11) Time Cook Time Defrost (3) Power Level (4) Clock and Settings Weight Defrost Kitchen Timer Auto Menu (Popcorn,Potato,Pizza,Frozen Vegetable,Beverage amd Dinner Plate) Number Pads Stop/Cancel: STOP Cancel Hold 3 sec: Before cooking starts, press to clear all previous settings. -
Page 23: Power Levels
1. POWER LEVELS 11 power levels are available. LEVEL POWER DISPLAY 100% PL10 2. CLOCK SETTING Press "Clock" once, "00:00" will appear in the display. Press the number pads to enter the current clock time. For example, if the time is now 10:12, press " 1, 0, 1, 2 " in order. Press "Clock"... -
Page 24: Kitchen Timer
• If the numbers entered are not within the range between 1:00 to 12:59, the setting will not be accepted until valid numbers are entered. • In the process of setting clock, if the pad is pressed or if there is no NOTE operation within 1 minute, the display will automatically return to the previous clock setting. - Page 25 Press number pads to enter the cooking time. The maximum cooking time is 99 minutes, 99 seconds. Press "Power", PL10 will flash. Press number pads 0 through 9 to select a different power level if desired. See the POWER LEVEL table above. Press to start cooking.
-
Page 26: One Touch Start
5. ONE TOUCH START Instant cooking at 100% power level and 1 to 6 minutes cooking time can be started by pressing number pads 1 to 6. Press to increase the cooking time by 30 seconds with each press. The maximum cooking time is 99 minutes, 99 seconds. -
Page 27: Weight Defrost Function
7. WEIGHT DEFROST FUNCTION Press "Weight Defrost" once, "dEF1" will display. Press number pads to input weight to be defrosted. Input the weight range between 100 to 2000 g. If the weight input is not between 100 to 2000 g, the input will be invalid. -
Page 28: Potato
9. POTATO Press "Potato" repeatedly until the number you wish appears in the display "1", "2", "3" will display in order. Press Once : 1 potato (approx. 8.0 oz) Press Twice: 2 potatoes (approx. 16.0 oz) Press 3 Times: 3 potatoes (approx. 24.0 oz) Press to cook. -
Page 29: Dinner Plate
Press to cook. The remaining time will display. Oven beeps 5 times when cooking finish. 12. DINNER PLATE Press "Dinner Plate", "250" will appear in the display. Press "Dinner Plate" two more times to choose the weight, "350" and "500" will display in order. Press to cook. -
Page 30: Memory Function
14. MEMORY FUNCTION Press Memory to program and choose up to three cooking procedures. Each procedure will be indicated by 1, 2 or 3 in the display. Press Memory until your desired procedure number appears in the display. Press to begin it. A maximum of two cooking stages can be set for each procedure. -
Page 31: Multi-Stage Cooking
15. MULTI-STAGE COOKING At most 2 stages can be set for cooking. If one stage is Defrost, it will automatically set to be the first stage. • Auto Menu cannot be set in Multi-stage Cooking. NOTE Example: 80% Power Level for 5 minutes followed by 60% Power Level for 10 minutes; saved as memory 3. -
Page 32: Lock Function
• If you do not want to save a particular multi-stage program as a procedure, do not press Memory as the first step. Press after programming both NOTE stages. 16. LOCK FUNCTION To lock the microwave so that it cannot be operated by children or other unintended users, press pad for 3 seconds. -
Page 33: Other Specifications
19. OTHER SPECIFICATIONS must be pressed to continue cooking if the door is opened during cooking. A single beep sounds to indicate that a pad is correctly pressed; if pad is not correctly pressed, no beep sounds. EN-30... -
Page 34: Cleaning
CLEANING With good care and cleaning, your appliance will retain its appearance and remain fully functioning for a long time to come. We will explain here how you should correctly care for and clean your appliance. • Scratched glass in the appliance door may develop into a crack. Do not use a glass scraper, sharp or abrasive cleaning aids or detergents. - Page 35 CLEANING APPLIANCE FRONT PLATE Hot soapy water: Clean using a dish cloth and then dry with a soft cloth. Remove splashes and patches of limescale, grease, starch and albumin immediately. Corrosion can form under these patches or splashes. Do not use glass cleaners or metal or glass scrapers for cleaning.
-
Page 36: Maintenance
MAINTENANCE TROUBLE SHOOTING NORMAL Radio and TV reception may be interfered when microwave oven operating. It is Microwave oven interfering TV reception similar to the interference of small electrical appliance, like mixer, vacuum cleaner, and electric fan. It is normal. In low power microwave cooking, oven light Dim oven light may become dim. - Page 37 EN-34...
- Page 40 Details Matter...