Table of Contents
Advertisement
Quick Links
Before operating the unit, read these operating instructions thoroughly and keep them for future reference.
85464609160011
CZ-256ESMC1U̲改.indb 1
CZ-256ESMC1U̲改.indb 1
Operating Instructions
Intelligent Controller
Model No. CZ-256ESMC1U
1006 Kadoma, Kadoma City, Osaka, Japan
CV6233189666
2011/11/11 11:24:52
2011/11/11 11:24:52
Advertisement
Table of Contents

Related Manuals for Panasonic CZ-256ESMC1U


Summary of Contents for Panasonic CZ-256ESMC1U
- Page 1 Operating Instructions Intelligent Controller Model No. CZ-256ESMC1U Before operating the unit, read these operating instructions thoroughly and keep them for future reference. 1006 Kadoma, Kadoma City, Osaka, Japan 85464609160011 CV6233189666 CZ-256ESMC1U̲改.indb 1 CZ-256ESMC1U̲改.indb 1 2011/11/11 11:24:52 2011/11/11 11:24:52...
- Page 2 CZ-256ESMC1U INTELLIGENT CONTROLLER Operating Instructions CZ-256ESMC1U̲改.indb 2 CZ-256ESMC1U̲改.indb 2 2011/11/11 11:24:54 2011/11/11 11:24:54...
-
Page 3: Table Of Contents
6.7 Maintenance and Test Runs .....................49 6.7.1 Checking inspection signs ..................49 Main 6.7.2 Checking the alarm logs ...................50 Main 6.7.3 Executing test runs ....................52 Main refers to the explanation of main menu 5, sub menu 1. Main CZ-256ESMC1U̲改.indb 2 CZ-256ESMC1U̲改.indb 2 2011/11/11 11:24:54 2011/11/11 11:24:54... - Page 4 10.2 Calculating air conditioner energy usage ...............85 10.3 Calculating loaded distribution ..................86 11 SUPPLEMENTARY INFORMATION-1 ...................87 12 SUPPLEMENTARY INFORMATION-2 ..................88 13 TROUBLESHOOTING ......................91 14 MAINTENANCE ........................93 15 SPECIFICATIONS ........................94 16 INSTALLATION (ELECTRIC) AND SERVICE INSTRUCTIONS ...........96 CZ-256ESMC1U̲改.indb 3 CZ-256ESMC1U̲改.indb 3 2011/11/11 11:24:55 2011/11/11 11:24:55...
-
Page 5: Important Safety Instructions
Have dealer performs any installation or wiring Specified air install procedures incorrectly. conditioners Electrical work must be carried out by qualifi ed personnel Contact your dealer for installation. Do not attempt to install the product yourself. CZ-256ESMC1U̲改.indb 4 CZ-256ESMC1U̲改.indb 4 2011/11/11 11:24:57 2011/11/11 11:24:57... - Page 6 ● Locations with large changes in voltage ● Near machines generating electromagnetic waves ● Locations close to organic solvents Do not use heaters near the Intelligent Controller Plastic parts of the Intelligent Controller may be deformed or discolored. CZ-256ESMC1U̲改.indb 5 CZ-256ESMC1U̲改.indb 5 2011/11/11 11:24:58 2011/11/11 11:24:58...
- Page 7 Use of pins or copper wire can result in fi re and damage to the system. Prohibited Prohibited Use only the specifi ed power source Use of any other power source can result in fi re and damage to the system.Use single-phase 100-240V power. CZ-256ESMC1U̲改.indb 6 CZ-256ESMC1U̲改.indb 6 2011/11/11 11:24:58 2011/11/11 11:24:58...
- Page 8 • Consult the dealer or an experienced radio/TV technician for help. ● FCC Caution: To assure continued compliance, follow thw attached installation instructions. Any changes or modifi cations not expressly approved by the party responsible for compliance could void the user’s authority to operate this equipment. CZ-256ESMC1U̲改.indb 7 CZ-256ESMC1U̲改.indb 7 2011/11/11 11:24:59 2011/11/11 11:24:59...
-
Page 9: Features Of The System
Tenant number Tenant No., Tenant Zone number Zone No., Zone Unit name Unit Air conditioning distribution ratio Distribution ratio, Distr. ratio Central control address Central address, CNTR Thermostat * For more information about terms, see “9 Terms”. CZ-256ESMC1U̲改.indb 8 CZ-256ESMC1U̲改.indb 8 2011/11/11 11:24:59 2011/11/11 11:24:59... -
Page 10: System Configuration
W: Electricity meter connection also possible Link systems: (Indoor/outdoor control wires) * When connecting link systems (inter-unit control wires), always connect beginning with LINK1 and LINK2 on the Intelligent Controller. Up to 4 link systems can be connected. CZ-256ESMC1U̲改.indb 9 CZ-256ESMC1U̲改.indb 9 2011/11/11 11:25:00 2011/11/11 11:25:00... -
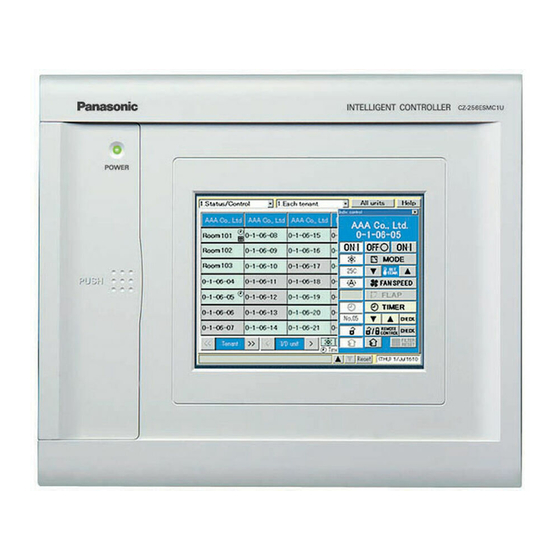
Page 11: Names And Functions Of Parts
Push the cover to open it. The LCD display. compartment inside is used to store the touch pen and to insert and eject PC Cards for backup. PC Card socket Used to insert optional PC Cards for backup. CZ-256ESMC1U̲改.indb 10 CZ-256ESMC1U̲改.indb 10 2011/11/11 11:25:00 2011/11/11 11:25:00... - Page 12 4 NAMES AND FUNCTIONS OF PARTS ● Rear Panel CZ-256ESMC1U̲改.indb 11 CZ-256ESMC1U̲改.indb 11 2011/11/11 11:25:01 2011/11/11 11:25:01...
- Page 13 ADAPT communication (RS-485) adaptor. LINK1 Indoor/outdoor control wire 1 LINK2 Indoor/outdoor control wire 2 DO-COMM DO 1 All alarm output DO 2 All operation output DI-COMM DI 1 All stop input DI 2 All start input CZ-256ESMC1U̲改.indb 12 CZ-256ESMC1U̲改.indb 12 2011/11/11 11:25:01 2011/11/11 11:25:01...
-
Page 14: Quick Reference
➢ 8.I/D unit settings page 64 “Operation” password. (Only the ➢ 9.Other settings page 65 soft-remote controller is protected. ➢ page 69 10.WEB settings ➢ The status is visible.) 11.User settings page 72 CZ-256ESMC1U̲改.indb 13 CZ-256ESMC1U̲改.indb 13 2011/11/11 11:25:01 2011/11/11 11:25:01... - Page 15 Powering off Intelligent Controllers desired → 6.8.9.8 Power off button Page 68 Outputting distribution in progress desired → 6.5.5.3 Outputting distribution data in progress Page 44 Calibrating touch panel deviations → 6.8.9.7 Calibrating touch panels Page 67 CZ-256ESMC1U̲改.indb 14 CZ-256ESMC1U̲改.indb 14 2011/11/11 11:25:02 2011/11/11 11:25:02...
-
Page 16: Using The System
The message “Exit this program?” appears. Press the OK button. The message “It is now safe to turn off the Intelligent Controller.” appears ( ∗ ). Turn the power off. ( ∗ Several minutes may be required before the message appears.) CZ-256ESMC1U̲改.indb 15 CZ-256ESMC1U̲改.indb 15 2011/11/11 11:25:02... -
Page 17: Operating Screen Example
Indoor address (1-64) Outdoor address (1-30) Link number (1,2) Adaptor number (Intelligent Controller, 1-7) Filter cleaning signs are issued only as approximate guides. We recommend that filters be cleaned regularly, even if no sign has been issued. CZ-256ESMC1U̲改.indb 16 CZ-256ESMC1U̲改.indb 16 2011/11/11 11:25:04 2011/11/11 11:25:04... - Page 18 [Tenant] list (FRI) 4/Aug 2:56PM A similar list appears for the other buttons. [I/D unit] list [Weekly timer] list Tenant holiday [Date] list CZ-256ESMC1U̲改.indb 17 CZ-256ESMC1U̲改.indb 17 2011/11/11 11:25:05 2011/11/11 11:25:05...
-
Page 19: Initial Settings
Pulse meter installation is unnecessary. When pulse meters are not set, “0” is displayed for usage. You can remove connected units from management by this system. For details, see “6.8.2 Setting zone numbers and management targets”. CZ-256ESMC1U̲改.indb 18 CZ-256ESMC1U̲改.indb 18 2011/11/11 11:25:06 2011/11/11 11:25:06... -
Page 20: System Setting Fl Ow
Note 5 Note 4 Note 5 Distribution “Loaded” or Note 14 “Simple” ↓ Pulse meter setting Main (1) Pulse meter type (2) Distribution group (3) Pulse unit value (4) Ice heat accumulation night power / system selection CZ-256ESMC1U̲改.indb 19 CZ-256ESMC1U̲改.indb 19 2011/11/11 11:25:07 2011/11/11 11:25:07... - Page 21 ↓ Other settings Main (1) Checking system confi guration (2) Set/Clear password (3) No-communications mode Note 11 (4) Buzzer Note 12 (5) Initialization (6) Auto display off (7) Touch panel calibration Note 15 (8) Power off CZ-256ESMC1U̲改.indb 20 CZ-256ESMC1U̲改.indb 20 2011/11/11 11:25:12 2011/11/11 11:25:12...
- Page 22 Note 15 Although the touch panel is adjusted before factory shipment, calibrate deviations if any. Note 16 Do not restore any data imprudently as it may return them to their backed-up status. Note 17 Settings are necessary when you would like to control/monitor the unit via network. CZ-256ESMC1U̲改.indb 21 CZ-256ESMC1U̲改.indb 21 2011/11/11 11:25:15...
-
Page 23: Setting The Date, Cut-Off Date, And Distribution Ratio Calculation Method
3.Ten. name/Distrib. Gr. 5.Initial settings 4.Pulse meter setting 6.Auxiliary settings 5.Clear accum. data If the time set is ahead of the current time, the program timer set in that period becomes invalid and transmission is not performed. CZ-256ESMC1U̲改.indb 22 CZ-256ESMC1U̲改.indb 22 2011/11/11 11:25:16 2011/11/11 11:25:16... - Page 24 (However, this is effective only when plural distribution groups have been set.) E In the Language pull-down menu (5), select the language you would like to use. CZ-256ESMC1U̲改.indb 23 CZ-256ESMC1U̲改.indb 23 2011/11/11 11:25:17...
-
Page 25: Setting Central Addresses, Unit Names And Tenant Numbers
It may take several minutes before the central address settings are refl ected in the display. When other central controllers (system controller, etc.) are connected, it is recommended to set the central addresses on those units. CZ-256ESMC1U̲改.indb 24 CZ-256ESMC1U̲改.indb 24 2011/11/11 11:25:17 2011/11/11 11:25:17... - Page 26 * You can copy and paste text using the [Copy] and [Paste] buttons. See “7.2 Entering Text” for details. C Touch a tenant number.A keyboard window like the one shown below appears. Use the keyboard to enter the tenant number. * The tenant number range is from 1 to 256. CZ-256ESMC1U̲改.indb 25 CZ-256ESMC1U̲改.indb 25 2011/11/11 11:25:18 2011/11/11 11:25:18...
-
Page 27: Setting Tenant Names And Distribution Groups
A Touch a tenant name. A keyboard window appears. Use the keyboard to enter the tenant name. Tenant names can be up to 20 characters long. * See “7 ENTERING TEXT AND NUMBERS” for details about entering text on software keyboards. * The tenant number range is from 1 to 256. CZ-256ESMC1U̲改.indb 26 CZ-256ESMC1U̲改.indb 26 2011/11/11 11:25:18 2011/11/11 11:25:18... -
Page 28: Main 5 Sub
• HOT Tenants cannot be set at the “Load” distribution. • “Load” distribution tenants cannot be set at “HOT”. • Air conditioners unadaptable to loaded distribution cannot be set at “Load” Distribution. • Interface adaptors are also unadaptable to loaded distribution. CZ-256ESMC1U̲改.indb 27 CZ-256ESMC1U̲改.indb 27 2011/11/11 11:25:19 2011/11/11 11:25:19... -
Page 29: Making Pulse Meter Settings
(see Main D Touch the pulse unit amount column and enter the amount of electricity (kWh) or gas (m ) per pulse. E If the product type is HOT Multi, select the unit for fuel metering. CZ-256ESMC1U̲改.indb 28 CZ-256ESMC1U̲改.indb 28 2011/11/11 11:25:19 2011/11/11 11:25:19... - Page 30 * This cannot be set for electricity meters confi gured for use with HOT Multi or simple distribution. G For the night power meter set in F , select which outdoor system to meter ice heat accumulation by selecting the address. CZ-256ESMC1U̲改.indb 29 CZ-256ESMC1U̲改.indb 29 2011/11/11 11:25:20...
-
Page 31: Clear Accumulation Data
6.Auxiliary settings 5.Clear accum. data 1.60(160) 09.Mar.2011 A Touch Clear accum. data . A window like the following appears. Touch Yes . Total data up to now is erased, and calculation of total operating time restarts. CZ-256ESMC1U̲改.indb 30 CZ-256ESMC1U̲改.indb 30 2011/11/11 11:25:20 2011/11/11 11:25:20... -
Page 32: Status Monitoring And Operation Screens
“---” is displayed in the tenant name row for indoor units not registered to a tenant. The fi rst 12 characters are displayed for tenant names and unit names. If the Interface Adaptor is used, the color becomes light purple during the ON operation. CZ-256ESMC1U̲改.indb 31 CZ-256ESMC1U̲改.indb 31 2011/11/11 11:25:21... -
Page 33: Operating Units Individually
In such a case, once stop the unit, hold it for several minutes, and then vary the operation mode. • In the remote control window, the fi rst 16 characters for tenant names and the fi rst 12 characters for unit names are displayed. CZ-256ESMC1U̲改.indb 32 CZ-256ESMC1U̲改.indb 32 2011/11/11 11:25:22 2011/11/11 11:25:22... -
Page 34: Operating All Units By Tenant
, a remote control window appears. This window allows you to make detailed settings for operations on all units of the tenant. 1.Status/Control 2.Total data/Cut-off 1.Each tenant 2.Each tenant details 3.Distrib. ratio/Usage 3.Each zone 4.Maintenance/Test Run 5.Initial settings 4.Each zone details 5.All units 6.Auxiliary settings CZ-256ESMC1U̲改.indb 33 CZ-256ESMC1U̲改.indb 33 2011/11/11 11:25:22 2011/11/11 11:25:22... -
Page 35: Operating All Connected Units
, a remote control window appears. This window allows you to make detailed settings for all connected units. 1.Status/Control 1.Each tenant 2.Total data/Cut-off 2.Each tenant details 3.Distrib. ratio/Usage 3.Each zone 4.Maintenance/Test Run 5.Initial settings 4.Each zone details 5.All units 6.Auxiliary settings 4/Aug 2:56PM CZ-256ESMC1U̲改.indb 34 CZ-256ESMC1U̲改.indb 34 2011/11/11 11:25:22 2011/11/11 11:25:22... -
Page 36: Displaying Detailed Information By Tenant
C When you touch All units , a remote control window for operating all connected units appears. 1.Status/Control 1.Each tenant 2.Total data/Cut-off 2.Each tenant details 3.Distrib. ratio/Usage 4.Maintenance/Test Run 3.Each zone 4.Each zone details 5.Initial settings 5.All units 6.Auxiliary settings CZ-256ESMC1U̲改.indb 35 CZ-256ESMC1U̲改.indb 35 2011/11/11 11:25:23 2011/11/11 11:25:23... -
Page 37: Displaying General Information By Zone
5.Initial settings 4.Each zone details 6.Auxiliary settings 5.All units (FRI) 4/Aug 3:10PM Move the display position on the screen up and down one line. The fi rst twelve characters are displayed for zone names and unit names. CZ-256ESMC1U̲改.indb 36 CZ-256ESMC1U̲改.indb 36 2011/11/11 11:25:24 2011/11/11 11:25:24... -
Page 38: Displaying Detailed Information By Zone
C When you touch All units , a remote control window for operating all connected units appears. 1.Status/Control 2.Total data/Cut-off 1.Each tenant 2.Each tenant details 3.Distrib. ratio/Usage 3.Each zone 4.Maintenance/Test Run 4.Each zone details 5.Initial settings 5.All units 6.Auxiliary settings CZ-256ESMC1U̲改.indb 37 CZ-256ESMC1U̲改.indb 37 2011/11/11 11:25:24 2011/11/11 11:25:24... -
Page 39: Displaying And Operating All Indoor Units
1.Status/Control 1.Each tenant 2.Total data/Cut-off 2.Each tenant details 3.Distrib. ratio/Usage 4.Maintenance/Test Run 3.Each zone 4.Each zone details 5.Initial settings 5.All units 6.Auxiliary settings (FRI) 4/Aug 3:10PM The fi rst four characters are displayed for unit names. CZ-256ESMC1U̲改.indb 38 CZ-256ESMC1U̲改.indb 38 2011/11/11 11:25:25 2011/11/11 11:25:25... -
Page 40: Main Sub
3.Out of hours 5.Initial settings 4.Pulse meter 4.Special Day 6.Auxiliary settings 5.Cut-off/Data backup 4/Aug 3:10PM D If you want to display operating time by fan speed, touch Operating time . The display changes as shown below. CZ-256ESMC1U̲改.indb 39 CZ-256ESMC1U̲改.indb 39 2011/11/11 11:25:26 2011/11/11 11:25:26... -
Page 41: Main Sub
5.Initial settings 4.Pulse meter 3.Out of hours 6.Auxiliary settings 5.Cut-off/Data backup 4.Special Day 4/Aug 3:10PM D If you want to display operating time by fan speed, touch Operating time . The display changes as shown below. CZ-256ESMC1U̲改.indb 40 CZ-256ESMC1U̲改.indb 40 2011/11/11 11:25:27 2011/11/11 11:25:27... -
Page 42: Displaying Total Data By Outdoor Unit
• Monthly values are displayed for “Operating time” and “Operating count”. (The values reset to “0” after cut-off processing.) • Cumulative values from the starting point are displayed for “Running time after oil exchange (Hour)” and “Power output (kWh)”. (The values do not reset to “0” even after cut-off processing.) CZ-256ESMC1U̲改.indb 41 CZ-256ESMC1U̲改.indb 41 2011/11/11 11:25:28 2011/11/11 11:25:28... -
Page 43: Main Sub
6.Auxiliary settings 5.Cut-off/Data backup 4.Special Day Intelligent Ctrl Adaptor 1 Adaptor 2 Adaptor 7 If the product type is HOT Multi, unit amount will be displayed in m or liters. The meter type will be “fuel metering”. CZ-256ESMC1U̲改.indb 42 CZ-256ESMC1U̲改.indb 42 2011/11/11 11:25:28 2011/11/11 11:25:28... -
Page 44: Performing Manual Cut-Off Processing And Saving Data
5.Initial settings 4.Pulse meter 6.Auxiliary settings 5.Cut-off/Data backup B When a window like the one shown below C When a window like the one shown below appears, touch the OK button. appears, touch the Check button. CZ-256ESMC1U̲改.indb 43 CZ-256ESMC1U̲改.indb 43 2011/11/11 11:25:28 2011/11/11 11:25:28... -
Page 45: Saving Data
H When a screen like the one shown below appears, touch the OK button. As data output by pressing the Distrib. dt out button are strictly in progress, it is impossible to apply these data for cut-off processing for the tenant who leaves halfway. (Manual cut-off processing is necessary). CZ-256ESMC1U̲改.indb 44 CZ-256ESMC1U̲改.indb 44 2011/11/11 11:25:29 2011/11/11 11:25:29... -
Page 46: Restoring Data
Use the special optional PC Cards to back up and restore Intelligent Controller data. For details about using PC Cards, refer to the instructions of the PC Cards. Depending on the amount of data, backup and restore operations may require up to 15 minutes. CZ-256ESMC1U̲改.indb 45 CZ-256ESMC1U̲改.indb 45 2011/11/11 11:25:30... -
Page 47: Air Conditioning Distribution Ratios And Energy Usage
• If the product type is HOT Multi, unit amount will be displayed in m or liters. • If no pulse meter is connected, power usage and gas usage are not displayed. • Gas usage and distribution ratios are not displayed for PAC units. CZ-256ESMC1U̲改.indb 46 CZ-256ESMC1U̲改.indb 46 2011/11/11 11:25:30 2011/11/11 11:25:30... -
Page 48: Displaying Distribution Ratios And Energy Usage By Tenant
• If the product type is HOT Multi, unit amount will be displayed in m or liters. • If no pulse meter is connected, power usage and gas usage are not displayed. • Gas usage and distribution ratios are not displayed for PAC units. CZ-256ESMC1U̲改.indb 47 CZ-256ESMC1U̲改.indb 47 2011/11/11 11:25:31 2011/11/11 11:25:31... -
Page 49: Time Zone Totals And Distribution
The usage of “all hours” is calculated from the ratio of distributed portion of the entire group based on the total of operation data in all time zones. Therefore, it is not consistent with the total usage of “regular hours”, “Out of hours”, and “special day”. CZ-256ESMC1U̲改.indb 48 CZ-256ESMC1U̲改.indb 48 2011/11/11 11:25:31... -
Page 50: Maintenance And Test Runs
1.Inspection sign 5.Initial settings 2.Alarm log 6.Auxiliary settings 3.Test run (MON) 7/Aug11:31AM Filter cleaning signs are only an approximate guide. We recommend that you clean indoor unit fi lters regularly, even if no signs have been issued. CZ-256ESMC1U̲改.indb 49 CZ-256ESMC1U̲改.indb 49 2011/11/11 11:25:32 2011/11/11 11:25:32... -
Page 51: Checking The Alarm Logs
C Touch the Del this unit button to delete the alarm logs of the selected unit only, or touch the Del all units button to delete the alarm logs of all units. When a window like the following appears, touch the Yes button. CZ-256ESMC1U̲改.indb 50 CZ-256ESMC1U̲改.indb 50 2011/11/11 11:25:32... - Page 52 Intelligent Controller or the communication adaptor. (WED)21/Apr 5:56PM [Adaptor alarm log] logs the history of warnings as determined by the Intelligent Controller or the communication adaptor. (Duplicate adaptor addresses, communication error between the Intelligent Controller and adaptor, etc.) (WED)21/Apr 5:57PM CZ-256ESMC1U̲改.indb 51 CZ-256ESMC1U̲改.indb 51 2011/11/11 11:25:33 2011/11/11 11:25:33...
-
Page 53: Executing Test Runs
D To operate all units in an outdoor unit system, touch the outdoor unit system address column. A remote control window for operating an outdoor unit system appears. Use this window to execute a test run. Select Cool, Heat, or Fan as the operating mode. CZ-256ESMC1U̲改.indb 52 CZ-256ESMC1U̲改.indb 52 2011/11/11 11:25:34... -
Page 54: Auxiliary Settings
B Enter the name with the keyboard. Names can be up to 20 characters long. * See “7 ENTERING TEXT AND NUMBERS” for details about entering text in keyboard windows. * Zones name can be registered in the range 1 to 128. CZ-256ESMC1U̲改.indb 53 CZ-256ESMC1U̲改.indb 53 2011/11/11 11:25:35 2011/11/11 11:25:35... -
Page 55: Setting Zone Numbers And Management Targets
1.Zone name 2.ZoneNo./Mng.target 3.Program timer 4.Ten.Ho/TimerSp.Day 5.Prohibit R/C 1.Status/Control 6.Distribution time zone 2.Total data/Cut-off 7.Special distrib. day 3.Distrib. ratio/Usage 8.I/D unit settings 4.Maintenance/Test Run 9.Other settings 5.Initial settings 10.WEB settings 6.Auxiliary settings 11.User settings (MON) 7/Aug12:37PM CZ-256ESMC1U̲改.indb 54 CZ-256ESMC1U̲改.indb 54 2011/11/11 11:25:36 2011/11/11 11:25:36... -
Page 56: Main Sub
However, external all-unit alarm output and external all-unit operation output are possible. • Not Target: No operations are possible for Not Target units, including information display (except for ), totals Main Main calculation, and distribution. CZ-256ESMC1U̲改.indb 55 CZ-256ESMC1U̲改.indb 55 2011/11/11 11:25:37 2011/11/11 11:25:37... -
Page 57: Programming Timers
A With Daily timer, select a timer number ( D1 to D50 , Holiday , Sp1 to Sp5 ). The Holiday number is reserved for tenant holiday settings. The timer numbers Sp1 to Sp5 are reserved for setting timer special days. B Touch the Set time column. C Select the time to set. CZ-256ESMC1U̲改.indb 56 CZ-256ESMC1U̲改.indb 56 2011/11/11 11:25:38 2011/11/11 11:25:38... - Page 58 Confirms the setting. G Touch the Op mode column and set in the following window. Closes the window. Sets the operating mode. Select from among Heat, Cool, Fan, Dry, and Auto. Cancels the setting. Confirms the setting. CZ-256ESMC1U̲改.indb 57 CZ-256ESMC1U̲改.indb 57 2011/11/11 11:25:38 2011/11/11 11:25:38...
- Page 59 Since different air conditioner models have different upper and lower temperature limits, the temperature is set automatically within the supported range when an air conditioner is actually controlled. Items for which no time is set are ignored. CZ-256ESMC1U̲改.indb 58 CZ-256ESMC1U̲改.indb 58 2011/11/11 11:25:39...
-
Page 60: Programming Weekly Timers
50,1,2 , 49,50,1 , 48,49,50 . B Select the daily timer number ( D1 to D50 , Holiday , Sp1 to Sp5 ) to set and confi rm or cancel each button. CZ-256ESMC1U̲改.indb 59 CZ-256ESMC1U̲改.indb 59 2011/11/11 11:25:39... -
Page 61: Setting Tenant Holiday/Timer Special Day
G Touch the OK button to copy two years of holidays from the tenant on the left to the tenant on the right. * Set the system mode at “Regular day” to cancel settings of holidays and timer special days. CZ-256ESMC1U̲改.indb 60 CZ-256ESMC1U̲改.indb 60 2011/11/11 11:25:40... -
Page 62: Prohibiting Remote Control Use
B To allow remote control use, touch the O (Accept) button. To prohibit remote control use, touch the X (Prohibition) button. C Touch the Set button to confi rm the setting, or the Cancel button to cancel it. D Touch the Initial setting button to restore the initial setting (described above). CZ-256ESMC1U̲改.indb 61 CZ-256ESMC1U̲改.indb 61 2011/11/11 11:25:41 2011/11/11 11:25:41... -
Page 63: Sub
F Set the end time of regular hours to a time between 12:00 AM and 12:00 AM (30-minute intervals). G Touch the Set or Cancel button. * Refer also to “6.6.3 Time zone totals and distribution”. CZ-256ESMC1U̲改.indb 62 CZ-256ESMC1U̲改.indb 62 2011/11/11 11:25:41 2011/11/11 11:25:41... -
Page 64: Sub
E A window like the one on the right appears when you touch Copy . F Touch the OK button to copy two years of special distribution days from the distribution group on the left to the distribution group on the right. CZ-256ESMC1U̲改.indb 63 CZ-256ESMC1U̲改.indb 63 2011/11/11 11:25:42 2011/11/11 11:25:42... -
Page 65: Sub
D Touching the heater capacity column for the indoor unit having an electric heater will have a soft ten-key for the heater capacity setting displayed. Input numbers 0.0 to 100.00 by kW. However, these are effective only for loaded distribution settings. CZ-256ESMC1U̲改.indb 64 CZ-256ESMC1U̲改.indb 64 2011/11/11 11:25:43... -
Page 66: Other Settings
If the system confi guration has changed, cut-off processing and confi rmation of the system processing messages appear. For details, see “6.9 System Confi guration Changes”. Up to 10 minutes may be required to check the system confi guration. CZ-256ESMC1U̲改.indb 65 CZ-256ESMC1U̲改.indb 65 2011/11/11 11:25:43... -
Page 67: Registering Passwords
Touch the Yes button to erase all data and return the system to the factory default state. * Everyday, at 11:30 p.m. to 12:00 a.m., cut-off processing takes place and you cannot press the Initialization button then. CZ-256ESMC1U̲改.indb 66 CZ-256ESMC1U̲改.indb 66 2011/11/11 11:25:44... -
Page 68: Lcd Auto Off Settings
Then press somewhere on the screen and the result of calibration will become effective to restore the original screen. When 30 seconds passes without operating the screen, the calibration result is cancelled to restore the previous screen. CZ-256ESMC1U̲改.indb 67 CZ-256ESMC1U̲改.indb 67 2011/11/11 11:25:44 2011/11/11 11:25:44... -
Page 69: Power Off Button
Intelligent Controller.” Wait until this message appears before powering the system off. (If there is a large amount of data, several minutes may be required for this message to appear.) Powering off before this message appears may cause malfunction or prevent booting. CZ-256ESMC1U̲改.indb 68 CZ-256ESMC1U̲改.indb 68 2011/11/11 11:25:45... -
Page 70: Web Settings
Refer to settings for other equipment (PC, router, etc.). I Input the Intelligent Controller subnet mask. Refer to settings for other equipment (PC, router, etc.). J Input the IP address of the default gateway connected to the Intelligent Controller as necessary. CZ-256ESMC1U̲改.indb 69 CZ-256ESMC1U̲改.indb 69 2011/11/11 11:25:45 2011/11/11 11:25:45... -
Page 71: Main Sub
B Select an encryption type to use for sending mails: “None”, “SSL”, “TLS”, or “STARTTLS”. C Select this check box if you want to perform authentication during mail transmission. Settings D to H below are valid only when you have selected this check box. CZ-256ESMC1U̲改.indb 70 CZ-256ESMC1U̲改.indb 70 2011/11/11 11:25:46... -
Page 72: Receiving Server Settings
B Specify a user ID and a password for receiving mails. For each of them, you can use within 50 characters. C Specify a port to use for receiving mails, using a number within 6 digits. D Select this check box if you want to use SSL protected connection to receive mails. CZ-256ESMC1U̲改.indb 71 CZ-256ESMC1U̲改.indb 71 2011/11/11 11:25:46 2011/11/11 11:25:46... -
Page 73: User Settings
Select 6.Auxialiary settings in the main menu and 11.User settings in the sub menu. 1.Zone name 2.ZoneNo./Mng.target 3.Program timer 4.Ten.Ho/TimerSp.Day 5.Prohibit R/C 1.Status/Control 6.Distribution time zone 2.Total data/Cut-off 7.Special distrib. day 3.Distrib. ratio/Usage 8.I/D unit settings 4.Maintenance/Test Run 9.Other settings 5.Initial settings 10.WEB settings 6.Auxiliary settings 11.User settings CZ-256ESMC1U̲改.indb 72 CZ-256ESMC1U̲改.indb 72 2011/11/11 11:25:47 2011/11/11 11:25:47... - Page 74 F Delete the tenant selected on the right side from among the operatable tenants. G Select all the tenants on the left side. H Cancel this tenant setting change. I Make register setting for this user as the operatable tenant. J Select all the tenants on the right side. CZ-256ESMC1U̲改.indb 73 CZ-256ESMC1U̲改.indb 73 2011/11/11 11:25:47 2011/11/11 11:25:47...
-
Page 75: System Confi Guration Changes
This returns you to the fi rst alarm message, where you can perform cut-off processing. While this message is visible, no other operations can be performed except OK and Cancel . CZ-256ESMC1U̲改.indb 74 CZ-256ESMC1U̲改.indb 74 2011/11/11 11:25:48... -
Page 76: When System Confi Guration May Change
When this alarm message is displayed, do not operate the system and contact the store where you purchased it or its service agency. This message may be displayed also in inspecting the air conditioner. In such a case inform the person in charge of service of the fact. CZ-256ESMC1U̲改.indb 75 CZ-256ESMC1U̲改.indb 75 2011/11/11 11:25:49 2011/11/11 11:25:49... -
Page 77: Entering Text And Numbers
C Numeric keys Add the digit shown on the key face to the number in the input fi eld. D Set button Confi rms the number in the input fi eld. E Cancel button Clears the numbers entered. CZ-256ESMC1U̲改.indb 76 CZ-256ESMC1U̲改.indb 76 2011/11/11 11:25:49 2011/11/11 11:25:49... -
Page 78: Entering Text
E Input mode selection buttons Select the type of characters to input. F Space button Inputs a space. G <- and -> buttons Move the input cursor to the left and right in the input fi eld. CZ-256ESMC1U̲改.indb 77 CZ-256ESMC1U̲改.indb 77 2011/11/11 11:25:50 2011/11/11 11:25:50... - Page 79 Copies text displayed in the input fi eld. You can also copy portions of the text by dragging the touch pen over the desired portion. M Paste button Pastes the text copied with the Copy button to the input fi eld in which the cursor is currently located. Alphanumeric, upper case CZ-256ESMC1U̲改.indb 78 CZ-256ESMC1U̲改.indb 78 2011/11/11 11:25:50 2011/11/11 11:25:50...
-
Page 80: Connection Of External Signals
See “6.3.5 Making pulse meter settings” for more information. 2) Operation Each pulse is counted. The amount of energy consumed per pulse (m , kWh, liters) must be defi ned by “ Main Pulse meter setting”. See “6.3.5 Making pulse meter settings”. CZ-256ESMC1U̲改.indb 79 CZ-256ESMC1U̲改.indb 79 2011/11/11 11:25:51 2011/11/11 11:25:51... -
Page 81: All Stop Input
2) Operation When inputting ON from OFF, the operation signal will be transmitted to all the indoor units. When both “All stop input” and “All start input” are set ON simultaneously, only “All stop input” is enabled. CZ-256ESMC1U̲改.indb 80 CZ-256ESMC1U̲改.indb 80 2011/11/11 11:25:51... -
Page 82: All-Unit Alarm Output
Intelligent Controller: DO2, DO-COMM 2) Operation The signal goes ON when any connected unit (including Interface adaptor) is operating, and goes OFF when all units are stopped. Operation during alarms and errors is included. CZ-256ESMC1U̲改.indb 81 CZ-256ESMC1U̲改.indb 81 2011/11/11 11:25:51 2011/11/11 11:25:51... -
Page 83: Terms
A zone is unrelated to distribution. It is a range for performing all-unit operation, monitoring, and timer operation. GHP, PAC, and HOT units can be mixed in a zone. The system as a whole supports up to 128 zones. CZ-256ESMC1U̲改.indb 82 CZ-256ESMC1U̲改.indb 82 2011/11/11 11:25:52... -
Page 84: Calculating Air Conditioner Distribution
• Weighing by wind speed is not carried out for models with their speed set only as High or only as High and low. • Distribution ratios are not calculated when you have chosen not to perform distribution ratio calculations. (See “6.3.2 Setting the date, cut-off date, and distribution ratio calculation method”) CZ-256ESMC1U̲改.indb 83 CZ-256ESMC1U̲改.indb 83 2011/11/11 11:25:52... - Page 85 * The following table shows which of the formulas on the previous page are used by the two distribution modes. T/S ON+OFF time T/S ON time distribution mode distribution mode Electricity Electricity Electricity See “About distribution ratios in 12 Supplementary Information-2”. CZ-256ESMC1U̲改.indb 84 CZ-256ESMC1U̲改.indb 84 2011/11/11 11:25:52 2011/11/11 11:25:52...
-
Page 86: Calculating Air Conditioner Energy Usage
Gas usage for indoor unit = Gas usage for distribution group × Gas consumption distribution ratio for indoor unit The usage is rounded to two decimal places and displayed. See ”About distribution ratios and energy usage” in “12 Supplementary Information-2”. CZ-256ESMC1U̲改.indb 85 CZ-256ESMC1U̲改.indb 85 2011/11/11 11:25:53 2011/11/11 11:25:53... -
Page 87: Calculating Loaded Distribution
Standing-by power and various heater powers Indoor unit loaded ratio (Calculated using the values (Overheat degree) detected by multiple internal thermo sensor of indoor unit) :parameters considered in distribution calculation :parameters not considered in distribution calculation CZ-256ESMC1U̲改.indb 86 CZ-256ESMC1U̲改.indb 86 2011/11/11 11:25:53 2011/11/11 11:25:53... -
Page 88: Supplementary Information-1
The contents of this manual are subject to change without notice. • We will not be liable for any violation of the rights of any third party stemming from use of information in this manual, or for violation of other rights. CZ-256ESMC1U̲改.indb 87 CZ-256ESMC1U̲改.indb 87 2011/11/11 11:25:54... -
Page 89: Supplementary Information-2
This is more likely to occur with all-unit operations. The cause is communications delay, not any malfunction in the system. If you wait a few minutes, the display will show the correct information. CZ-256ESMC1U̲改.indb 88 CZ-256ESMC1U̲改.indb 88 2011/11/11 11:25:54... - Page 90 Passwords should be recorded and saved in a safe place. They should never be disclosed to third parties. If you forget your password, contact your dealer or service provider. ■ Flickering on the screen This may occur occasionally. It is due to data refreshing and is not a malfunction. CZ-256ESMC1U̲改.indb 89 CZ-256ESMC1U̲改.indb 89 2011/11/11 11:25:55 2011/11/11 11:25:55...
- Page 91 When only one centralized control unit is installed in a system without remote controller, if the centralized control unit is damaged, the air conditioner(s) may become inoperable, or other troubles may occur. To avoid this problem, we recommend that you install multiple centralized control units. CZ-256ESMC1U̲改.indb 90 CZ-256ESMC1U̲改.indb 90 2011/11/11 11:25:55...
-
Page 92: Troubleshooting
• Try using the “Check confi guration” button in the “Other The Intelligent Controller cannot detect a single indoor unit. Or it cannot fi nd all of settings” screen ( Main them. CZ-256ESMC1U̲改.indb 91 CZ-256ESMC1U̲改.indb 91 2011/11/11 11:25:56 2011/11/11 11:25:56... - Page 93 Press the [Check] button to close, and press [Reset] to the displayed. (xx is a number from 1 to 4) left of the clock display. If the same message appears again, consult your local dealer or service representative. CZ-256ESMC1U̲改.indb 92 CZ-256ESMC1U̲改.indb 92 2011/11/11 11:25:56 2011/11/11 11:25:56...
-
Page 94: Maintenance
Doing so is extremely dangerous. It may damage the unit or cause electrical shock. ■ Check the mounting of components Several times a year, check to make certain that the mounting of components such as the control panel has not been weakened by rust or corrosion. CZ-256ESMC1U̲改.indb 93 CZ-256ESMC1U̲改.indb 93 2011/11/11 11:25:57 2011/11/11 11:25:57... -
Page 95: Specifications
15 SPECIFICATIONS Product number CZ-256ESMC1U External dimensions 10-5/8 in. (H) × 17-3/64 in. (W) × 6-9/64 in. (D) Method of installation Front door of control panel Maximum 128 air conditioners (indoor units) Maximum number of Maximum 256 air conditioners (indoor units) with communication adaptor... - Page 96 15 SPECIFICATIONS CZ-256ESMC1U̲改.indb 95 CZ-256ESMC1U̲改.indb 95 2011/11/11 11:25:57 2011/11/11 11:25:57...
-
Page 97: Installation (Electric) And Service Instructions
Operating temperature ··· 41 to 104 °F Operation Operating Manual Operating humidity ·········· 20 to 80% (non-condensing) Instructions Cautions regarding the design of the control box External dimensions Control box machining diagram 25/32 5-23/64 17-3/64 13-13/16 16-11/32 14-61/64 (Unit: inch) CZ-256ESMC1U̲改.indb 96 CZ-256ESMC1U̲改.indb 96 2011/11/11 11:25:57 2011/11/11 11:25:57... - Page 98 (1) Remove the two pan-head bolts from the lower sides and bottom of the front panel. (2) Mount the controller unit to the control box using the four supplied bolts, washers, and nuts. (3) Replace the front panel. CZ-256ESMC1U̲改.indb 97 CZ-256ESMC1U̲改.indb 97 2011/11/11 11:25:58...
- Page 99 * When connecting link systems (inter-unit control wires), always connect beginning with LINK1 and LINK2 on the Intelligent Use terminal 2 (LINK1-U2) instead of terminal 1 Controller. Up to 4 link systems can be connected. Use terminal 5 (LINK2-U2) instead of terminal 4 CZ-256ESMC1U̲改.indb 98 CZ-256ESMC1U̲改.indb 98 2011/11/11 11:25:59 2011/11/11 11:25:59...
- Page 100 E Perform the necessary settings. Be sure to set the central control address. Educating the customer ● Give the Operating Instructions to the customer. ● Explain the operation to the customer, following the explanations given in the Operating Instructions. CZ-256ESMC1U̲改.indb 99 CZ-256ESMC1U̲改.indb 99 2011/11/11 11:25:59 2011/11/11 11:25:59...
- Page 101 DC1011-11111 Printed in Japan CZ-256ESMC1U̲改.indb 100 CZ-256ESMC1U̲改.indb 100 2011/11/11 11:26:00 2011/11/11 11:26:00...