Table of Contents
Advertisement
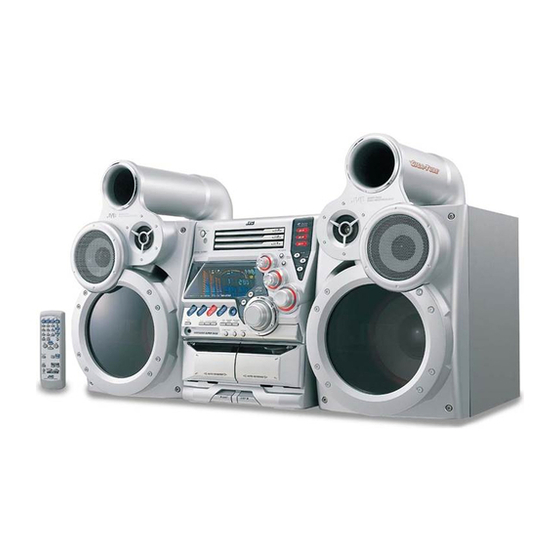
COMPACT COMPONENT SYSTEM
CA-MXGT95V / CA-MXGT98V
CA-MXGT85V / CA-MXGT88V
CA-MXG75V / CA-MXG78V
CA-MXGT95V
CA-MXGT98V
CA-MXGT85V
CA-MXGT88V
INSTRUCTIONS
CA-MXG75V
CA-MXG78V
COMPACT
DIGITAL AUDIO
DIGITAL VIDEO
For Customer Use:
Enter below the Model No. and Serial
No. which are located either on the rear,
bottom or side of the cabinet. Retain this
information for future reference.
Model No.
Serial No.
GVT0063-001B
[UN, US, UX]
COMPACT
Advertisement
Table of Contents

Related Manuals for JVC MX-G75VUN


Summary of Contents for JVC MX-G75VUN
- Page 1 COMPACT COMPONENT SYSTEM CA-MXGT95V / CA-MXGT98V CA-MXGT85V / CA-MXGT88V CA-MXG75V / CA-MXG78V CA-MXGT95V CA-MXGT98V INSTRUCTIONS CA-MXGT85V CA-MXGT88V COMPACT DIGITAL VIDEO For Customer Use: Enter below the Model No. and Serial No. which are located either on the rear, bottom or side of the cabinet. Retain this information for future reference.
- Page 2 Warnings, Cautions and Others Caution — STANDBY/ON button! Disconnect the mains plug to shut the power off completely. The STANDBY/ON button in any position does not disconnect the mains line. The power can be remote controlled. – G-1 –...
- Page 3 CAUTION To reduce the risk of electrical shocks, fire, etc.: 1. Do not remove screws, covers or cabinet. 2. Do not expose this appliance to rain or moisture. CAUTION • Do not block the ventilation openings or holes. (If the ventilation openings or holes are blocked by a newspaper or cloth, etc., the heat may not be able to get out.) •...
-
Page 4: Important For Laser Products
IMPORTANT FOR LASER PRODUCTS / REPRODUCTION OF LABELS / 1 CLASSIFICATION LABEL, PLACED ON REAR ENCLOSURE CLASS LASER PRODUCT 1. CLASS 1 LASER PRODUCT 2. DANGER: Invisible laser radiation when open and interlock failed or defeated. Avoid direct exposure to beam. 3. - Page 5 Introduction We would like to thank you for purchasing one of our JVC products. Before operating this unit, read this manual carefully and thoroughly to obtain the best possible performance from your unit, and retain this manual About This Manual This manual is organized as follows: •...
-
Page 6: Table Of Contents
Contents Location of the Buttons and Controls ... 3 Front Panel ... 3 Remote Control ... 5 Getting Started ... 6 Supplied Accessories ... 6 Putting the Batteries into the Remote Control ... 6 Connecting Antennas ... 6 Connecting Speakers ... 7 Connecting Other Equipment ... -
Page 7: Location Of The Buttons And Controls
Location of the Buttons and Controls Become familiar with the buttons and controls on your unit. Front Panel Front Panel – 3 –... - Page 8 Display Window See pages in the parentheses for details. Front Panel 1 Disc trays 2 STANDBY/ON button and STANDBY lamp (9, 28, 29) 3 Remote sensor 4 PRESET +/– NEXT/PREV control 4 / ¢ (reverse search/forward search) (9, 11 – 12, 14 –...
-
Page 9: Remote Control
Remote Control When using the remote control, point it at the remote sensor on the front panel. Remote Control 1 Disc number buttons (CD1, CD2, and CD3) (14 – 15) Pressing one of these buttons also turns on the unit. 2 Number buttons (12, 14 –... -
Page 10: Getting Started
Getting Started Supplied Accessories Make sure that you have all the following items. The number in the parentheses indicates the quantity of the pieces supplied. • AM loop antenna (1) • FM antenna (1) • Remote control (1) • Batteries (2) •... -
Page 11: Connecting Speakers
AM antenna Vinyl-covered wire (not supplied) AM loop antenna (supplied) Connect the AM loop antenna to the AM LOOP terminals as illustrated. • If the AM loop antenna wire is covered with vinyl, remove the vinyl by twisting it as shown in the diagram. Turn the AM loop antenna until you have the best reception. -
Page 12: Connecting Other Equipment
Connecting Other Equipment You can connect both analog and digital equipment. • DO NOT connect any equipment while the power is on. • DO NOT plug in any equipment until all connections are complete. To connect an analog component Be sure that the plugs of the audio cords are colored: White plugs and jacks are for left audio signals, and red ones for right audio signals. -
Page 13: Common Operations
Common Operations Turning On or Off the Power To turn on the unit, press STANDBY/ON so that the STANDBY lamp goes off. To turn off the unit (on standby), press STANDBY/ON again so that the STANDBY lamp lights up. • A little power is always consumed even while the unit is on standby. -
Page 14: Adjusting The Volume
Adjusting the Volume You can adjust the volume level only while the unit is turned on. The volume level can be adjusted in 32 steps (VOL MIN, VOL 01 — VOL 30, and VOL MAX). Turn VOLUME + / – clockwise (+) to increase the volume or counterclockwise (–) to decrease it. -
Page 15: Creating Your Own Sound Mode - Manual Mode
Creating Your Own Sound Mode — Manual Mode You can change SEA patterns to suit your preference. These changed settings can be stored in the MANUAL 1, MANUAL 2, and MANUAL 3 modes. • There is a time limit in performing the following steps. If the setting is canceled before you finish, start from step 1 again. -
Page 16: Listening To Fm And Am Broadcasts
Listening to FM and AM Broadcasts Tuning in a Station Press FM/AM. The unit automatically turns on and tunes in the previously tuned station (either FM or AM). • Each time you press the button, the band alternates between FM and AM. Start searching for stations. -
Page 17: Playing Back Cds (Cd/Cd-R/Cd-Rw)
Playing Back CDs (CD/CD-R/CD-RW) This unit has been designed to playback the following CDs: • CD (Audio CD) • CD-R (CD-Recordable) • CD-RW (CD-ReWritable) Continued use of irregular shape CDs (heart-shape, octagonal, etc.) can damage the System. General Notes In general, you will have the best performance by keeping your CDs and the mechanism clean. -
Page 18: Playing Back The Entire Discs - Continuous Play
Playing Back the Entire Discs — Continuous Play Load CDs. Press one of the disc number buttons (CD1, CD2 and CD3) for the disc you want to play. CD play starts from the first track of the selected disc and the disc number lamp starts flashing. Tracks of the currently playing disc (Track numbers exceeding 16 are not displayed.) Track number... -
Page 19: Programming The Playing Order Of The Tracks - Program Play
Programming the Playing Order of the Tracks — Program Play You can arrange the order in which tracks play before you start playing. You can program up to 50 tracks. • To use Repeat play (see page 16) for Program play, press REPEAT after starting Program play. -
Page 20: Playing At Random - Random Play
Playing at Random — Random Play The tracks of all loaded CDs will play at random. • To use Repeat play for Random play, press REPEAT after starting Random play. Load CDs. • If the current playing source is not the CD player, press CD 3¥8 SELECT, then 7 before going to the next step. -
Page 21: Playing Back Video Cds
Playing Back Video CDs Selecting Video Output (PAL, MULTI, NTSC) You can set this setting in Standby mode. Before playing a VCD, use the buttons on the unit to select a video output mode to match your TV system. Video output is preset for PAL. Press and hold one of the disc number buttons (CD1, CD2 or CD3) for more than 2 sec. -
Page 22: Playing Video Cds With Pbc Function - Menu Play
Playing Video CDs with PBC Function — Menu Play This System provides Playback Control (PBC) which utilizes a procedure (menu selection) programmed in a video CD. The playback operation procedure may differ depending on the disc you use. For Menu Play, use the following buttons: On the unit: NEXT (¢) ... -
Page 23: Playing Video Cds Without Pbc - Continuous Play
Screen-saver • When a menu screen of a karaoke disc is displayed for a few minutes without any selection being made, it automatically starts from the first song. Reminder! Do not paused Video CD for more then 10 minutes to prevent screen burns. -
Page 24: Playing A Multiplex Sound Cd
The TV screen will show the following: VIDEO INTRO Press the number button for the video intro you want to select. Playback starts from the selected track. To stop and cancel the video intro play, press 7. Viewing the Highlights of a Video CD You can view highlight scenes of the selected track on a video CD only when PBC is off. -
Page 25: Playing Back Tapes
Playing Back Tapes You can playback type I, type II, and type IV tapes without changing any settings. Playing Back a Tape Press EJECT (0) for the deck you want to use. For Deck A Put a cassette in with the exposed part of the tape down. - Page 38 Mains (AC) Line Instruction (not applicable for Europe, U.S.A., Canada, Australia, and U.K.) VOLTAGE SELECTOR 230V 240V 127V IMPORTANT for mains (AC) line BEFORE PLUGGING IN, do check that your mains (AC) line voltage corresponds with the position of the voltage selector switch provided on the outside of this equipment and, if different, reset the voltage selector switch, to prevent from damage or risk of fire/electric shock.