Table of Contents
Advertisement
Quick Links
Thank you for purchasing this product.
Please read these instructions carefully before using this product, and save this manual for future use.
GH
Operating Instructions
Model No.
Firmware updates
Panasonic is constantly improving the unit's firmware to ensure that
our customers are enjoying the latest technology.
Panasonic recommends updating your firmware as soon as you are
notified.
For details, refer to "Firmware updates" (
https://panasonic.jp/support/global/cs/ (This site is in English only.)
Blu-ray Disc
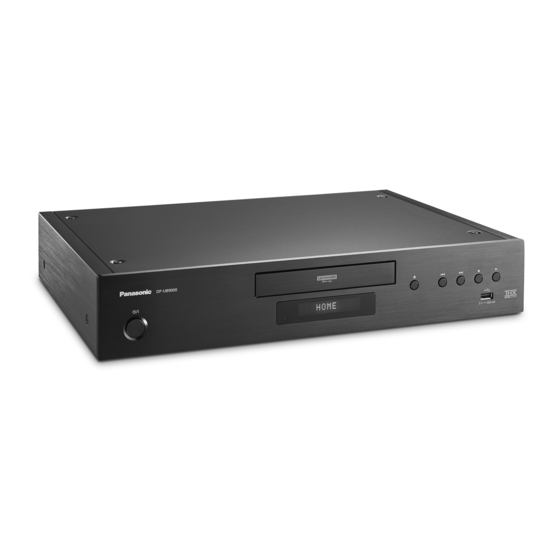
DP-UB9000GH1
Player
TM
19) or
TQBS0482
Advertisement
Table of Contents

Related Manuals for Panasonic DP-UB9000GH1


Summary of Contents for Panasonic DP-UB9000GH1
- Page 1 Player DP-UB9000GH1 Model No. Firmware updates Panasonic is constantly improving the unit’s firmware to ensure that our customers are enjoying the latest technology. Panasonic recommends updating your firmware as soon as you are notified. For details, refer to “Firmware updates” ( 19) or https://panasonic.jp/support/global/cs/ (This site is in English only.)
- Page 2 Precautions CAUTION Unit ≥ This unit utilizes a laser. Use of controls or adjustments or WARNING performance of procedures other than those specified herein may result in hazardous radiation exposure. ≥ Do not place sources of naked flames, such as lighted Unit candles, on this unit.
- Page 3 You must be aware of these limits before using this unit. This unit adopts the following technology for copyright protection. Panasonic will in no way be responsible for any incidental Cinavia Notice damage which may arise due to a failure to obey these limits, This product uses Cinavia technology to limit the use of or to any condition of use or disuse of this unit.
-
Page 4: Table Of Contents
Control reference guide ..8 Range (HDR) compatible TV.” Connecting to a TV ..10 1) When you use a Panasonic TV that is Connecting to compatible with 4K/High Dynamic Range (HDR) and was released in 2015 or later, an amplifier/receiver . -
Page 5: Getting Started
Getting started Accessories Unit and media care Getting started ∫ Clean this unit with a soft, dry Check the supplied accessories before using this cloth unit. Remote control ≥ Never use alcohol, paint thinner or benzine to (N2QAYA000244) clean this unit. Batteries for remote control ≥... -
Page 6: Playable Media
Getting started Playable media Device Media markings Device types Contents format Ultra HD Blu-ray* Video BD-Video Video BD-RE Video, BD-RE DL JPEG, MPO BD-R Video, MKV, BD-R DL JPEG, MPO DVD-Video Video Video, AVCHD, MKV, DVD-R JPEG, MPO, AAC, AIFF, ALAC, DSD (DFF, DSF), FLAC, MP3, WAV, DVD-R DL... - Page 7 Getting started ∫ Types of discs that cannot be ∫ USB device played by this unit ≥ Connect a USB device while the HOME menu Any other disc that is not specifically is displayed. supported or previously described. ≥ This unit does not guarantee connection with all USB devices.
-
Page 8: Control Reference Guide
15 Light up the remote control buttons 16 Transmit the remote control signal 17 TV operation buttons You can operate the Panasonic TV using this unit’s remote control. Some buttons may not work depending on the TV. 18 Show Setup menu (... - Page 9 ≥ When inserting a media item, ensure that it is facing the correct way, which is the right side facing up. ≥ If you connect a Panasonic product with a USB connection cable, the setup screen may be displayed on the connected equipment.
-
Page 10: Connecting To A Tv
When outputting 1080p or 24p (4K) signal, please use HDMI cables 5.0 meters or less. It is recommended that you use Panasonic’s HDMI cable. ≥ If you connect this unit to a 4K-compatible TV and perform “Easy Settings”, 4K (50p/60p) will be automatically selected. -
Page 11: Connecting To An Amplifier/Receiver
Getting started Connecting to an amplifier/receiver Enjoying video with a 4K-compatible TV and audio with an amplifier You can enjoy richer sound by using the HDMI AUDIO OUT terminal. (Audio is output in high resolution.) HDMI cable (18 Gbps) HDMI cable HDMI IN HDMI IN Amplifier/receiver... - Page 12 Getting started Enjoying audio with an amplifier connected to the DIGITAL AUDIO OUT/Analogue AUDIO OUT terminals Setting Set the following items in the Setup menu ( 30): ≥ Set “HDMI(VIDEO) Output Mode” to “Automatic ( Video Only / Video+Audio )”. ( ≥...
- Page 13 Getting started 7.1ch AUDIO OUT (Analogue AUDIO OUT) Set the speaker presence and size according to your environment. ( (Audio is not output from HDMI OUT terminal.) Connect Audio cables to terminals corresponding to the speakers you have connected. Cable connections D Subwoofer A Front speaker (L/R) E Surround back speaker (L/R)
- Page 14 Getting started Enjoying video with a 4K-compatible TV in combination with an amplifier connected to the HDMI AUDIO OUT terminal and another amplifier connected to the DIGITAL AUDIO OUT/ Analogue AUDIO OUT terminals HDMI cable HDMI cable (18 Gbps) HDMI IN HDMI IN Amplifier/receiver Amplifier/receiver...
- Page 15 Getting started Enjoying video with a 4K-compatible TV in combination with a 2K-compatible projector and an amplifier that is connected to the DIGITAL AUDIO OUT/Analogue AUDIO OUT terminals HDMI cable HDMI cable (18 Gbps) HDMI IN HDMI IN Projector (2K-compatible) Amplifier/receiver Setting Set the following items in the Setup menu (...
- Page 16 Getting started Enjoying video with a 4K-compatible TV in combination with a 2K-compatible projector and an amplifier that is connected to the HDMI AUDIO OUT terminal and another amplifier that is connected to the DIGITAL AUDIO OUT/Analogue AUDIO OUT terminals HDMI cable HDMI cable (18 Gbps)
-
Page 17: Connecting To The Network
Getting started Connecting to the network The following services can be used when this unit is connected to broadband. ≥ Firmware can be updated ( ≥ You can enjoy BD-Live ( ≥ You can access other devices (Home Network) ( ≥... -
Page 18: Settings
RETURN continue with the settings. ∫ “Wired” connection (e.g., “Quick Start”) Follow the on-screen instructions to apply your ≥ Certain recent models of Panasonic TVs connection settings. (VIERA) may automatically apply their language setting to this unit. ∫ “Wireless” connection ∫... - Page 19 Enter manually by using “Manual setting”. Do you want to start firmware update? For the update information, please visit the following website: ≥ If your wireless network is encrypted, http://panasonic.net/support/ Encryption Key input screen will be displayed. Input the encryption key of your network. RETURN Select “Yes”...
-
Page 20: Playback
Playback HOME menu Playback Playback Major functions of this unit can be operated from Insert the media. the HOME menu. Playback starts depending on the media. Preparation Select the item to play and press [OK]. Turn on the TV and select the appropriate video Repeat this step if necessary. - Page 21 Playback Skip Show the status messages While playing or paused, press [:] or While playing, press [PLAYBACK INFO.]. [9]. You can check the detailed video content* Skip to the title, chapter or track. playback status. ≥ When outputting HDR material tagged with Manual Skip metadata, such as Ultra HD Blu-ray content, Skip forward 1 minute...
- Page 22 Playback Enjoying 3D video and photos e.g., JPEG Date 11.12.2010 Size 500 x 375 Manufacturer Preparation Equipment Connect this unit to a 3D compatible TV. ( ≥ Perform the necessary preparations for the TV. ≥ During music playback, the elapsed time, file ≥...
- Page 23 Playback Slideshow Play a slideshow of photos and adjust various settings during the playback. Insert the media. Select “View Photos”. Select an item and press the green button. The following items can be set. Start the slideshow. Start You can display still pictures in Slideshow the selected folder one by one at a constant interval.
-
Page 24: Home Network Feature
Playback Home Network feature Playing back contents on the Network Contents server Before using the following features, be sure to configure the connected equipment on your Home Network. You can share photos, videos and music stored in the Network Contents server* [PC, smartphone, Using Mirroring recorders, etc.] connected to your home network. - Page 25 Playback Using the Digital Media Controller You can use a smartphone or tablet as the Digital Media Controller (DMC) to playback contents from Network Contents server* on the Renderer (this unit). Possible applications: Server Renderer Controller Server Renderer Controller Press [HOME]. Select “Home Network”...
-
Page 26: Viera Link
Playing music continuously even after turning off the TV What is VIERA Link? When the unit is connected to a Panasonic TV VIERA Link is a convenient function (VIERA) that supports VIERA Link and an which will link the operations of this unit amplifier/receiver supports VIERA Link. -
Page 27: Option Menu
Playback Option menu ∫ Shuffle Select whether to play shuffle or not. A variety of playback operations and settings can ∫ Start Slideshow be performed from this menu. Start the slideshow. Available options differ depending on the playing contents and the condition of the unit. ∫... - Page 28 Playback ≥ DR Conversion Adjustment : Picture Settings When this unit is connected to a TV that does not support HDR (High Dynamic Range) input, These settings are also displayed by pressing HDR video is output converting to a SDR [PICTURE SETTING].
- Page 29 Playback ∫ DSD Decode Sampling Frequency Sound Settings Select the settings that suit your sound quality preferences. ∫ Sound Effects* ≥ Even when “352.8kHz” is set, the same audio Select the sound effect. output setting as “176.4kHz” is applied during (Upsampling up to 192 kHz/32 bit is possible.) digital audio output.
-
Page 30: Reference
Reference Setup menu ∫ 24p Output Reference Content recorded at 24p* , such as BD-Video Change the unit’s settings if necessary. The films, is output at 24p when played back. settings remain intact even if you switch the unit ≥ When this unit is connected to TV compatible to standby. - Page 31 Reference ∫ HDR10+ Setting Audio Output You can set enable/disable of the HDR10+ This setting selects whether or not to output function. audio from HDMI. By changing this setting to “On”, you can use the ≥ To enjoy audio with the HDMI terminal, select HDR10+ function under the following conditions: “On”.
- Page 32 Reference BD-Video Secondary Audio Picture Select whether or not to mix the primary and secondary audio (including the button click ∫ Still Mode sound). Select the type of picture shown when you pause If “Off” is selected, the unit outputs the primary playback.
- Page 33 Reference ∫ HDMI Output Settings(Music Playback) Language Minimise the audio noise during music playback by automatically switching the video output to ∫ Soundtrack Preference 1080i. Choose the language for audio. ≥ If “Original” is selected, the original language of ∫ Settings for High Clarity Sound each disc will be selected.
- Page 34 Reference Remote Device Settings ( Network Press [OK] to show the following settings: ∫ Easy Network Setting ( Device Name Entry Set the name of this unit to be displayed on ∫ Network Settings the connected equipment. Perform network-related settings individually. Press [OK] to show the following settings: Registration Type LAN Connection Mode...
- Page 35 Perform the setup so it matches the TV System Change the remote control code if other of the connected TV. Panasonic products react to this remote control. Screen Saver Function ∫ Firmware Update ( This is to prevent image retention on the Press [OK] to show the following settings: screen.
-
Page 36: Troubleshooting Guide
To return all settings to the factory preset. Do you have the latest firmware installed? Reset the unit as follows: Panasonic is constantly improving the unit’s 1 While the unit is off firmware to ensure that our customers are Press and hold [OK], the yellow button and enjoying the latest technology. - Page 37 Reference You have forgotten your ratings password. Picture You want to cancel the ratings level. The ratings level returns to the factory Images from this unit do not appear on the TV defaults. screen, or they are distorted. 1 While the unit is on An incorrect resolution is selected in “Video Press and hold [OK], the yellow button and Format”.
- Page 38 Reference Video is not output. 3D video is not output. Video is not output when the “High Clarity Connect to a 3D compatible device (TV and Sound” is set to “On (Video Off)”. ( amplifier/receiver, etc.). Video from the HDMI AUDIO OUT terminal is When a non-3D compatible amplifier/receiver not output when the “HDMI(AUDIO) Output is connected between this unit and a TV, 3D...
- Page 39 Reference There is no sound coming out. Audio To output audio using OPTICAL/COAXIAL terminal, set “OPTICAL / COAXIAL Down Cannot hear the desired audio. Sampling” properly. ( Check the connections and the “Digital Audio Refer to “Connecting to an amplifier/receiver” Output”...
- Page 40 Reference ≥7.1ch AUDIO OUT terminals When using wireless LAN connection, video – While playback is being performed with from the Network Contents server* is not “Audio Output” in “Settings for High Clarity played back or video frames are dropped Sound” set to “OPTICAL / COAXIAL Only” during playback.
- Page 41 Reference Messages on the unit’s display The unit fails to operate properly. Press [Í/I] on the main unit for 3 seconds to switch the unit to standby, then switch back on. While connecting to a network. NO PLAY There is a viewing restriction on a BD-Video or DVD-Video.
-
Page 42: Specifications
Reference Specifications Power supply AC 220 V to 240 V, 50 Hz Power consumption Approx. 45 W General Power consumption in Approx. 0.4 W standby mode (Quick Start: Off) Dimensions (WkHkD) 430 mmk81 mmk325 mm Signal system PAL/NTSC Including the projecting Operating temperature i5 oC to i35 oC parts... - Page 43 Reference Audio information File format Extension Reference This unit supports tags, but only titles, artist names and The audio output differs depending on which “.FLAC”, album names can be FLAC terminals are connected to the amplifier/receiver, “.flac” displayed. Maximum sampling rate: 192 kHz/ and the settings on the unit.
- Page 44 Reference Supported format for Language code list Network Contents Playback Language Code Language Code Language Code When this unit works as a Network Contents Abkhazian: 6566 Gujarati: 7185 Rhaeto-Romance: client, following contents are playable. Afar: 6565 Hausa: 7265 8277 Afrikaans: 6570 Hebrew: 7387...
-
Page 45: Licenses
Entertainment & Communication Co., Ltd., Java is a registered trademark of Oracle and/or its affiliates. (2) the software owned by third party and licensed to Panasonic Entertainment & Communication Co., Ltd. , Dolby, Dolby Vision, Dolby Atmos, Dolby Audio, and the double-D... - Page 46 Reference - 46 -...
- Page 47 (Inside of product) Panasonic Entertainment & Communication Co., Ltd. Web Site: https://www.panasonic.com TQBS0482 © Panasonic Entertainment & Communication Co., Ltd. 2022 F0822SK0...