Miele SmartLine Operating And Installation Instructions
Downdraft extractor
Hide thumbs
Also See for SmartLine:
- Operating and installation instructions (84 pages) ,
- Operating and installation instructions (72 pages)
Table of Contents
Advertisement
Quick Links
Advertisement
Table of Contents

Related Manuals for Miele SmartLine


Summary of Contents for Miele SmartLine
- Page 1 Operating and installation instructions SmartLine downdraft extractor To avoid the risk of accidents or damage to the appliance it is essential to read these instructions before it is installed and used for the first time. en-SA M.-Nr. 11 507 870...
-
Page 3: Table Of Contents
Controls and display ................... 17 Accessories supplied ..................18 How it works ...................... 19 Tips on saving energy ..................20 Cleaning the SmartLine element for the first time ......... 21 Operation......................22 Switching the downdraft extractor on ..............22 Setting/changing the power level................ 22 Switching the downdraft extractor off .............. - Page 4 Contents Worktop cutout – flush-fit..................56 Spacer bars – flush-fit ..................59 Installation dimensions – Flush-fit ............... 60 Air duct dimensions – flush-fit – worktop depth 600 mm ........61 Air duct dimensions – flush-fit – worktop depth greater than 600 mm ....65 Installation –...
-
Page 5: Warning And Safety Instructions
Miele cannot be held liable for injury or damage caused by non- compliance with these instructions. Keep these instructions in a safe place and pass them on to any future owner. - Page 6 Warning and Safety instructions Correct application This downdraft extractor is intended for use in domestic households and similar working and residential environments. The downdraft extractor is not suitable for outdoor use. It must only be used as a domestic appliance to extract vapours and remove odours from cooking.
- Page 7 Warning and Safety instructions Safety with children Children under 8 years of age must be kept away from the countertop extractor unless they are constantly supervised. Children aged 8 and older may only use the countertop extractor without supervision if they have been shown how to use it in a safe manner.
- Page 8 Unauthorised installation, maintenance and repairs can cause considerable danger for the user. Installation, maintenance and repairs must only be carried out by your Miele dealer. The downdraft extractor must only be installed and operated in combination with those SmartLine elements and hob units specified by Miele.
- Page 9 The manufacturer's warranty will be invalidated if the downdraft extractor is not repaired by a Miele authorised technician. Miele can only guarantee the safety of the appliance when genuine original Miele replacement parts are used. Faulty components must only be replaced by Miele spare parts.
- Page 10 Warning and Safety instructions If the mains connection cable is damaged, it must be replaced with a special mains connection cable by a qualified electrician (see “Electrical connection” in the “Installation” chapter). During installation, maintenance and repair work, the downdraft extractor must be completely disconnected from the mains electricity supply.
- Page 11 Warning and Safety instructions Using at the same time as other heating appliances that depend on the air from the room Danger of toxic fumes! Great care should be taken when using the downdraft extractor in the same room or the same area of the house as another heating appliance that depends on the air from the room.
- Page 12 Warning and Safety instructions In order to ensure safe operation and to prevent gases given off by the heating appliance from being drawn back into the room, when the downdraft extractor and the heater are both operated simultaneously, an underpressure in the room of 0.04 mbar (4 Pa) is the maximum permissible.
- Page 13 Warning and Safety instructions Correct use Open flames are a fire hazard. Never use an open flame beside the downdraft extractor. To avoid the danger of fire, do not flambé or grill over an open flame. When switched on, the downdraft extractor could draw flames into the filter.
- Page 14 There is a risk of fire if the cooker hood is not cleaned as described in these operating instructions. Miele will guarantee to supply functional spare parts for a minimum of 10 years and up to 15 years following the discontinuation of your CombiSet.
-
Page 15: Caring For The Environment
Use household waste. material-specific collection points for valuable materials and take advantage of return options. Your Miele dealer will take the packaging material away. Please dispose of it at your local community waste collection / recycling centre or contact your Miele dealer for advice. -
Page 16: Guide To The Appliance
Guide to the appliance Downdraft extractor a Extraction grille b Grease filter c Cover with control unit d Casing e Removable drip tray f Air duct (supplied as accessory) g Fan In the plinth on the floor h E-box... -
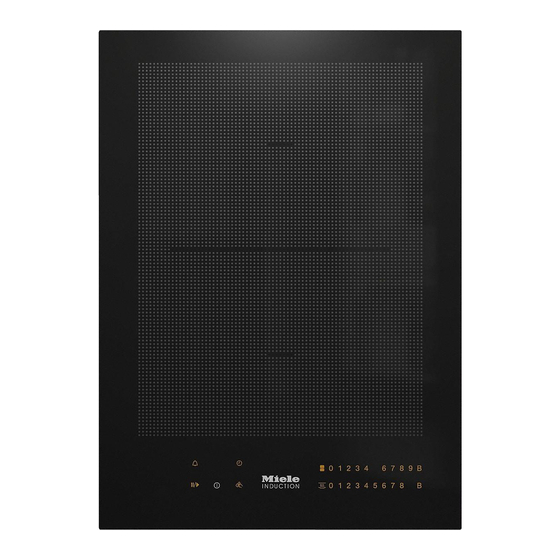
Page 17: Controls And Display
Guide to the appliance Controls and display a Countertop extractor On/Off b Numerical display To set a power level... -
Page 18: Accessories Supplied
Accessories supplied The accessories supplied with your appliance as well as a range of optional ones are available to order from your Miele dealer (see „Optional accessories“). Air duct Flat ducting system for routing air from the casing to the fan. -
Page 19: How It Works
How it works Extraction mode Recirculation mode The air is drawn in and cleaned by the (DUU 1000(-1) conversion kit required) grease filter and directed outside. The air is drawn in and cleaned by the grease filter. The air is then directed into the recirculation box where it is also cleaned by the charcoal filters. -
Page 20: Tips On Saving Energy
Tips on saving energy This downdraft extractor operates very efficiently and economically. The following will help you to save even more energy when using it: - It is important to ensure that the kitchen is well ventilated during operation. In extraction mode if there is insufficient air flow, the downdraft extractor cannot operate efficiently and this causes increased operating... -
Page 21: Cleaning The Smartline Element For The First Time
Cleaning the SmartLine element for the first time Please stick the extra data plate for the appliance supplied with this documentation in the space provided in the “After sales service” section of this booklet. Remove any protective wrapping and stickers. -
Page 22: Operation
Operation Switching the downdraft Switching the downdraft extractor on extractor off Touch the sensor control. The sensor controls go out. If the downdraft extractor is not switched off, it will switch itself off 12 hours after the last automatic operation. Run-on time ... -
Page 23: Cleaning And Care
Cleaning and care Allow the SmartLine element to cool Danger of burning due to hot down before cleaning. surfaces. The surfaces will be hot after Clean the SmartLine element and cooking. accessories after each use. Switch the countertop extractor and ... -
Page 24: Cleaning The Ceramic Surface
Risk of damage by pointed over or spilled into the countertop objects. extractor. The seal between the SmartLine Remove and clean the grease filter as element and the worktop could described in the “Grease filter” suffer damage. section. -
Page 25: Grease Filter/Extraction Grille
Cleaning and care Cleaning the extraction grille and the Grease filter/extraction grille grease filter in the dishwasher The extraction grille and the reusable Place the extraction grille upright in metal grease filter in the vapour the lower basket. extraction fan collect solid matter from kitchen vapours (grease, dust, etc.) and ... - Page 26 Cleaning and care Fitting the grease filter Fit the grease filter so that the straight side of the grease filter is on the side that connects to the air duct. Example: connector for air duct on the left Interior of the casing ...
-
Page 27: Problem Solving Guide
The SmartLine element There is no power to the SmartLine element. cannot be switched on. Check whether the mains fuse has tripped. Contact your Miele dealer (for the minimum fuse rating, see data plate). -
Page 28: Optional Accessories
FlameGuard useful accessories as well as cleaning and conditioning products for your Miele appliances. These can be ordered from your Miele dealer (see end of this booklet for contact details). For installing between the downdraft extractor and a gas cooking element Ceramic and stainless steel hob cleaner 250 ml... -
Page 29: After Sales Service
In the event of any faults which you cannot remedy yourself, please contact your Miele dealer. Contact details for your Miele dealer are given at the end of this document. Please note that telephone calls may be monitored and recorded for training purposes and that a call-out charge will be applied to service visits where the problem could have been resolved as described in this booklet. -
Page 30: Installation
The SmartLine element must only be installed by a qualified person. Damage from falling objects. Take care not to damage the SmartLine element when fitting wall units above it. Fit the wall units before the SmartLine element. After installation, the mains connection cable of the SmartLine element must not come into contact with any moving kitchen component (e.g. -
Page 31: Installation Examples
*INSTALLATION* Installation Installation examples Recirculation mode Extraction mode... -
Page 32: Installation Notes - Surface-Mounted
Grout lines and the hatched area underneath the SmartLine element frame must be smooth and even. If they are not, the SmartLine element will not sit flush with the worktop and the sealing strip underneath the top part of The SmartLine element and worktop... - Page 33 SmartLine elements The downdraft extractor can be The gaps between the individual installed with the connector for the air SmartLine elements are sealed with a duct on either the right or the left-hand silicone sealant that is heat-resistant to side.
-
Page 34: Worktop Cutout - Surface-Mounted
*INSTALLATION* Installation Worktop cutout – surface-mounted... - Page 35 *INSTALLATION* Installation Installation with a countertop extractor Combination examples Number x width [mm] Dimension B Cooking Countertop [mm] elements extractor 1 x 378 1 x 120 2 x 378 1 x 120 1 x 378 2 x 120 1226 1 x 620 3 x 378 2 x 120 1365 2 x 378 2 x 120 1607 1 x 620 4 x 378 2 x 120 1746 1 x 620 2 x 120...
- Page 36 *INSTALLATION* Installation Installation without a countertop extractor Combination examples Number x width [mm] Dimension B [mm] Cooking elements 1 x 378 2 x 378 1 x 378 1 x 620 3 x 378 1121 2 x 378 1363 1 x 620 4 x 378 1502 2 x 378 1554 1 x 800 2 x 378 1680 1 x 936...
-
Page 37: Spacer Bars - Surface-Mounted
*INSTALLATION* Installation Spacer bars – surface-mounted If you are installing several appliances, you must fit spacer bars between them. The clips supplied with the spacer bars are only required for installing a CSDA 700x FL. Installing 3 elements and 2 spacer bars Spacer bars for the downdraft extractor – surface-mounted a Brackets... -
Page 38: Installation Dimensions - Surface-Mounted
*INSTALLATION* Installation Installation dimensions – Surface-mounted All dimensions are given in mm. a Front b Fan In the plinth on the floor c Air duct (supplied as accessory) d E-box... -
Page 39: Air Duct Dimensions - Surface-Mounted - Worktop Depth 600 Mm
*INSTALLATION* Installation Air duct dimensions – surface-mounted – worktop depth 600 mm Side view... - Page 40 *INSTALLATION* Installation a For maintenance work it must be possible to remove the rear cabinet wall. The cabinet wall and an adjoining room wall or a piece of furniture must be at least 110 mm apart to ensure sufficient room for the ducting. b After installation the removable drip tray must be accessible.
- Page 41 *INSTALLATION* Installation Front view...
- Page 42 *INSTALLATION* Installation View from above...
-
Page 43: Air Duct Dimensions - Surface-Mounted - Worktop Depth Greater Than 600 Mm
*INSTALLATION* Installation Air duct dimensions – surface-mounted – worktop depth greater than 600 mm View from the side – right air duct connection... - Page 44 *INSTALLATION* Installation a For maintenance work it must be possible to remove the rear cabinet wall. The cabinet wall and an adjoining room wall or a piece of furniture must be at least 110 mm apart to ensure sufficient room for the ducting. b Duct connecter, adapted to the worktop depth c After installation the removable drip tray must be accessible.
- Page 45 *INSTALLATION* Installation View from the front – right air duct connection View from above – right air duct connection...
- Page 46 *INSTALLATION* Installation If you want to install the air duct to the left of the downdraft extractor, the worktop must be at least 665 mm deep. View from the front – left air duct connection View from above – left air duct connection...
-
Page 47: Installation - Surface-Mounted
*INSTALLATION* Installation Wooden worktops Installation – surface-mounted If the worktop is more than 24 mm deep, it must be cut out underneath on the building-in side on the right or left hand side. Fit the bracket so that it sits flush with the top edge of the worktop cutout. - Page 48 Fitting the spacer bars Natural stone worktops Use the middle screw holes if one of the following SmartLine elements is You will need heavy-duty double- installed to the right or left of the spacer sided tape (not supplied) to secure the bar: CS 7611, CS 7641, CS 7101(-1),...
- Page 49 *INSTALLATION* Installation Installing the countertop extractor The countertop extractor can be installed with the connector for the air duct on either the right or the left-hand side. Remove the grease trap from the casing. a Connector for air duct on the right ...
- Page 50 *INSTALLATION* Installation Installing the air duct Length compensation – worktop depth 600 mm Mount the air duct. Length compensation does not fit. The duct piece must be at least 100 mm long. Divide the flat ducting into 2 pieces to suit your installation situation.
- Page 51 *INSTALLATION* Installation Length compensation – worktop Installing the fan motor depth greater than 600 mm Divide the flat ducting into 2 pieces. 1 piece must correspond to the difference between 600 mm and the worktop depth. a Sealing strip Stick the sealing strip supplied to the fan connection.
- Page 52 *INSTALLATION* Installation E-box Connection to window contact, if required The window contact connection is live! Danger of electric shock! Disconnect the countertop extractor from the mains before connecting the switching system. The connection cable of the switching system must only be a Mains connection cable connected by a suitably qualified and b Connection to window contact...
- Page 53 Open the casing. Sealing the gaps Remove the stopper. Seal the gaps between the individual SmartLine elements, and between the flush-mounted SmartLine elements and the worktop, with a silicone sealant that is heat-resistant to at least 160 °C.
-
Page 54: Installation Notes - Flush-Fit
*INSTALLATION* Installation Natural stone worktops Installation notes – flush-fit The SmartLine element is set directly in Flush-fit installation is only possible in the cutout. natural stone (granite, marble), solid wood and tiled worktops. For Solid wood worktops, tiled worktops, installation in worktops made of other... - Page 55 SmartLine elements The downdraft extractor can be The gaps between the individual installed with the connector for the air SmartLine elements are sealed with a duct on either the right or the left-hand silicone sealant that is heat-resistant to side.
-
Page 56: Worktop Cutout - Flush-Fit
*INSTALLATION* Installation Worktop cutout – flush-fit ß R 4 + 0,5 + 0,5 + 0,5 + 0,5 Natural stone worktop Wooden worktop + 0.5 mm with CS 7611 FL... - Page 57 *INSTALLATION* Installation Installation with a countertop extractor Combination examples Number x width [mm] Dimensi Dimensi on A on B Cooking Counterto [mm] [mm] elements extractor 1 x 378 1 x 120 2 x 378 1 x 120 1 x 378 2 x 120 1250 1226 1 x 620 3 x 378 2 x 120 1389 1365 2 x 378 2 x 120 1631 1607 1 x 620 4 x 378 2 x 120 1770 1746...
- Page 58 *INSTALLATION* Installation Installation without a countertop extractor Combination Number x width Dimension A Dimension B examples [mm] [mm] [mm] Cooking elements 1 x 378 2 x 378 1 x 378 1006 1 x 620 3 x 378 1145 1121 2 x 378 1387 1363 1 x 620 4 x 378 1526 1502 2 x 378 1567 1543 1 x 800 2 x 378 1703 1679 1 x 936...
-
Page 59: Spacer Bars - Flush-Fit
*INSTALLATION* Installation Spacer bars – flush-fit If you are installing several appliances, you must fit spacer bars between them. The clips supplied with the spacer bars are only required for installing a CSDA 700x FL. Installing 3 elements and 2 spacer bars Spacer bars for the downdraft extractor – flush-fit a Brackets... -
Page 60: Installation Dimensions - Flush-Fit
*INSTALLATION* Installation Installation dimensions – Flush-fit All dimensions are given in mm. a Front b Fan In the plinth on the floor c Stepped cutout (for detailed illustrations, see “Installation – Worktop cutout – flush-fit”) d 12 mm wooden frame (not supplied, for detailed illustrations, see “Installation – Worktop cutout –... -
Page 61: Air Duct Dimensions - Flush-Fit - Worktop Depth 600 Mm
*INSTALLATION* Installation Air duct dimensions – flush-fit – worktop depth 600 mm Side view... - Page 62 *INSTALLATION* Installation a For maintenance work it must be possible to remove the rear cabinet wall. The cabinet wall and an adjoining room wall or a piece of furniture must be at least 110 mm apart to ensure sufficient room for the ducting. b After installation the removable drip tray must be accessible.
- Page 63 *INSTALLATION* Installation Front view...
- Page 64 *INSTALLATION* Installation View from above...
-
Page 65: Air Duct Dimensions - Flush-Fit - Worktop Depth Greater Than 600 Mm
*INSTALLATION* Installation Air duct dimensions – flush-fit – worktop depth greater than 600 mm View from the side – right air duct connection... - Page 66 *INSTALLATION* Installation a For maintenance work it must be possible to remove the rear cabinet wall. The cabinet wall and an adjoining room wall or a piece of furniture must be at least 110 mm apart to ensure sufficient room for the ducting. b Duct connecter, adapted to the worktop depth c After installation the removable drip tray must be accessible.
- Page 67 *INSTALLATION* Installation View from the front – right air duct connection View from above – right air duct connection...
- Page 68 *INSTALLATION* Installation If you want to install the air duct to the left of the downdraft extractor, the worktop must be at least 665 mm deep. View from the front – left air duct connection View from above – left air duct connection...
-
Page 69: Installation - Flush-Fit
*INSTALLATION* Installation Wooden worktops Installation – flush-fit If the worktop is more than 28 mm deep, it must be cut out underneath on the building-in side on the right or left hand side. Fit the bracket so that it sits flush with the top edge of the lower step of the stepped cutout. - Page 70 Fitting the spacer bars Use the middle screw holes if one of the following SmartLine elements is installed to the right or left of the spacer bar: CS 7611, CS 7641, CS 7101(-1), CS 7102(-1) Stick the tape onto the lower step of the stepped cutout.
- Page 71 *INSTALLATION* Installation Installing the countertop extractor The countertop extractor can be installed with the connector for the air duct on either the right or the left-hand side. Remove the grease trap from the casing. a Connector for air duct on the right ...
- Page 72 *INSTALLATION* Installation Installing the air duct Length compensation – worktop depth 600 mm Mount the air duct. Length compensation does not fit. The duct piece must be at least 100 mm long. Divide the flat ducting into 2 pieces to suit your installation situation.
- Page 73 *INSTALLATION* Installation Length compensation – worktop Installing the fan motor depth greater than 600 mm Divide the flat ducting into 2 pieces. 1 piece must correspond to the difference between 600 mm and the worktop depth. a Sealing strip Stick the sealing strip supplied to the fan connection.
- Page 74 *INSTALLATION* Installation E-box Connection to window contact, if required The window contact connection is live! Danger of electric shock! Disconnect the countertop extractor from the mains before connecting the switching system. The connection cable of the switching system must only be a Mains connection cable connected by a suitably qualified and b Connection to window contact...
- Page 75 Open the casing. Sealing the gaps Remove the stopper. Seal the gaps between the individual SmartLine elements, and between the flush-mounted SmartLine elements and the worktop, with a silicone sealant that is heat-resistant to at least 160 °C.
-
Page 76: Ducting
*INSTALLATION* Installation Ducting Remember that any constriction of the air flow will reduce air throughput If the downdraft extractor is used and increase operating noise. at the same time as a heating appliance that relies on oxygen from the same room, there is a risk of toxic fumes. -
Page 77: Electrical Connection
Installation These operating instructions and the Electrical connection data plate indicate the nominal power The SmartLine element is supplied with consumption and the appropriate fuse a mains cable with moulded plug ready rating. Compare this information with for connection to a suitable earthed the data of the on-site electrical socket. - Page 79 Tel. +966 11 2013501, Fax. +966 11 2013502 Taif Hadiya Street Tel. +966 12 7327001, Fax. +966 12 7369596 Khobar Al Zahran Road Tel. +966 13 8646150, Fax. +966 13 8646190 Manufacturer: Miele & Cie. KG, Carl-Miele-Straße 29, 33332 Gütersloh, Germany...
- Page 80 CSDA 7001 FL en-SA M.-Nr. 11 507 870 / 00...