Table of Contents
Advertisement
Advertisement
Table of Contents

Related Manuals for Asus ROG SWIFT OLED PG42UQ


Summary of Contents for Asus ROG SWIFT OLED PG42UQ
- Page 1 SWIFT OLED PG42UQ...
- Page 2 Product warranty or service will not be extended if: (1) the product is repaired, modified or altered, unless such repair, modification of alteration is authorized in writing by ASUS; or (2) the serial number of the product is defaced or missing.
-
Page 3: Table Of Contents
Contents Notices ......................iv Safety information ..................v Care & Cleaning ..................1-1 Welcome ..................1-3 Package contents ................. 1-3 Attaching the Stand ..............1-4 1.3.1 Cable Management ............1-4 1.3.2 Remote Control ............... 1-5 Connect cables ............... 2-1 1.4.1 Rear of the LCD monitor .......... -
Page 4: Notices
Notices Federal Communications Commission Statement This device complies with Part 15 of the FCC Rules. Operation is subject to the following two conditions: • This device may not cause harmful interference. • This device must accept any interference received including interference that may cause undesired operation. -
Page 5: Safety Information
Canadian Department of Communications Statement This digital apparatus does not exceed the Class B limits for radio noise emissions from digital apparatus set out in the Radio Interference Regulations of the Canadian Department of Communications. This class B digital apparatus complies with Canadian ICES-003. This Class B digital apparatus meets all requirements of the Canadian Interference -Causing Equipment Regulations. - Page 6 • Slots and openings on the back or top of the cabinet are provided for ventilation. Do not block these slots. Never place this product near or over a radiator or heat source unless proper ventilation is provided. • The monitor should be operated only from the type of power source indicated on the label.
- Page 7 The product may fall, causing serious personal injury or death. To prevent injury, this product must be securely attached to the floor/wall in accordance with the installation instructions. A product may fall, causing serious personal injury or death. Many injuries, particularly to children, can be avoided by taking simple precautions such ALWAYS use cabinets or stands or installation methods recommended by the manufacturer of the product set.
- Page 8 Disposal of waste equipment by user in private household in the European Union This symbol on the product or on its packaging indicates that this product must not be disposed of with your other household waste. Instead, it is your responsibility to dispose of your waste equipment by handing it over to a designated collection point for the recycling of waste electrical and electronic equipment.
- Page 9 Prevent Tipping When using the display, fasten the LCD to a wall using a cord or chain that can support the weight of the monitor in order to prevent the monitor from falling. Гвинт M4 або M6 Мотузка • Display design may differ from those illustrated. •...
-
Page 10: Care & Cleaning
CAUTION: Information to prevent damage to the components when trying to complete a task. IMPORTANT: Information that you MUST follow to complete a task. NOTE: Tips and additional information to aid in completing a task. ASUS LCD Monitor PG Series... - Page 11 These documents are not part of the standard package. Takeback Services ASUS recycling and takeback programs come from our commitment to the highest standards for protecting our environment. We believe in providing solutions for our customers to be able to responsibly recycle our products, batteries and other components as well as the packaging materials.
-
Page 12: Welcome
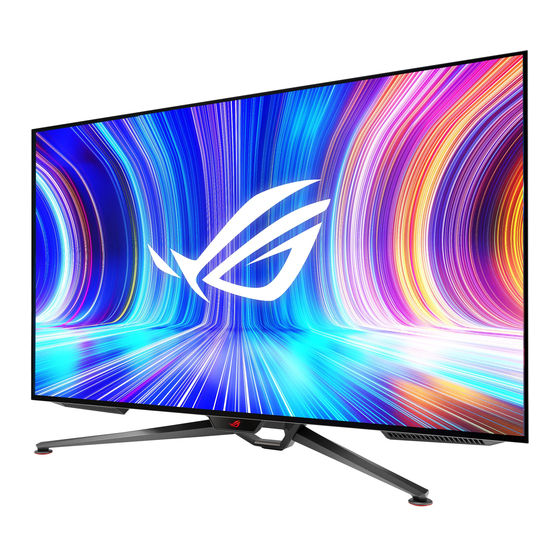
® Thank you for purchasing the ASUS OLED Gaming monitor! The latest widescreen OLED monitor from ASUS provides a crisper, broader, and brighter display, plus a host of features that enhance your viewing experience. With these features, you can enjoy the convenience and delightful visual... -
Page 13: Attaching The Stand
Attaching the Stand Remove the input/output port cover from the rear of the monitor. Then remove the Allen wrench from the cover. Replace the input/output port cover. Then align and install the stand onto its slot. Using the Allen wrench, secure the stand with the four (4) screws. •... -
Page 14: Remote Control
Mute button: Turn off the sound temporarily. 6. Shortcut 1 button: By default, it is GamePlus hotkey. To change the hotkey function, go to the MyFavorite > Shortcut > Shortcut1 menu. Shortcut 2 button: By default, it is GameVisual hotkey. To ASUS LCD Monitor PG Series... - Page 15 change the hotkey function, go to the MyFavorite > Shortcut > Shortcut2 menu. Volume Down button: Decrease the volume level. Volume Up button: Increase the volume level. For battery replacement: Open the battery cover and install the batteries into the battery compartment. Then replace the battery cover.
-
Page 16: Connect Cables
Connect cables 1.4.1 Rear of the LCD monitor 4 5 6 7 S/PDIF HDMI2.0 Port HDMI2.0 Port HDMI2.1 Port HDMI2.1 Port DisplayPort USB type B Port USB3.0 Downstream Port Earphone Jack 10. USB3.0 Downstream Port 11. Kensington Lock 12. USB3.0 Upstream Port Chapter 2: Setup... -
Page 17: Monitor Introduction
Press this button to turn the monitor off. Press any key to turn on the monitor. (5-way) Button: • Press this button to turn on the OSD menu. • Increases/Decreases values or moves your selection up/down/ left/right Close Button: • Exit the OSD menu. ASUS LCD Monitor PG Series... -
Page 18: Adjusting The Monitor
• Hold the stand to prevent the monitor from falling when you change its angle. • You can adjust the monitor’s angle from -5˚ to 5˚. -5 ~ 5 It is normal that the monitor slightly shakes while you adjust the viewing angle. ASUS LCD Monitor PG Series... -
Page 19: Outline Dimension
Outline dimension Unit: mm [inch] Chapter 2: Setup... -
Page 20: Turning On The Monitor
Turning on the monitor Press the power button. See page 1-3 for the location of the power button. The power indicator lights up in white to show that the monitor is ON. ASUS LCD Monitor PG Series... -
Page 21: Osd (On-Screen Display) Menu
OSD (On-Screen Display) menu 3.1.1 How to reconfigure You can either use the remote control or the Control buttons on the monitor to navigate through the menu and make adjustments. DisplayPort 3840x2160 120Hz Racing Mode ROG Swift PG42UQ HDR OFF Gaming Overclocking Image Adaptive-Sync Color... -
Page 22: Osd Function Introduction
GameVisual: Select the picture mode. See 1.3.5 GameVisual Function for details. • Shadow Boost: Adjust the monitor gamma curve to enrich the dark tones in an image, making dark scenes and objects much easier to be seen. ASUS LCD Monitor PG Series... - Page 23 VividPixel: Enhance the outline of the displayed picture and generates high-quality images on screen. • HDR Setting: Set the HDR mode to ASUS Gaming HDR, ASUS Cinema HDR, or Console HDR. The HDR brightness can be adjusted when the Brightness Adjustable function is enabled.
- Page 24 Slowly roll your eyes (3) Move your eyes diagonal. • High energy blue light may lead to eye strain and AMD (Age- Related Macular Degeneration). Blue light filter to reduce 70%(max.) harmful blue light to avoiding CVS (Computer Vision Syndrome). ASUS LCD Monitor PG Series...
- Page 25 Color Select the image color you like from this function. DisplayPort 3840x2160 120Hz Racing Mode ROG Swift PG42UQ HDR OFF Gaming Display Color Space Image Color Temp. Color Saturation Input Select Six-axis Saturation PIP/PBP Setup Gamma MyFavorite System Setup MOVE/ENTER BACK EXIT •...
-
Page 26: Pip/Pbp Setup
PIP Size: Adjust the PIP size to “Small”, “Middle”, or “Large”. • Disable Adaptive-Sync/Variable Refresh Rate and HDR function to enable PIP/PBP function. 6. MyFavorite Assign a function to the shortcut button, save the current system configurations, or restore the system configuration. ASUS LCD Monitor PG Series... - Page 27 DisplayPort 3840x2160 120Hz Racing Mode ROG Swift PG42UQ HDR OFF Gaming Shortcut Image Customised Setting Color Input Select PIP/PBP Setup MyFavorite System Setup MOVE/ENTER BACK EXIT • Shortcut: Assign a function for the designated shortcut button. • Customized Setting: Load/Save all settings on the monitor. Chapter 3: General Instruction...
- Page 28 • AudioWizard: Select the sound mode. • USB Setup: Sets the USB Hub availability during standby. • Power Indicator: urn the power LED indicator on/off. • Power Key Lock:Disable/Enable the Power key. ASUS LCD Monitor PG Series...
- Page 29 • Key Lock: Enable this function to disable all function keys. Press the Navigation button down for more than five seconds to cancel the key lock function. • Power Setting:Select the power setting mode. If the setting is set to Standard Mode, it may result in higher power consumption.
- Page 30 HDMI ports. • Information: Display the monitor information. • All Reset: Select YES to revert all settings to the factory default mode. ASUS LCD Monitor PG Series...
-
Page 31: Specifications
3.3 Specifications Panel type OLED Panel Size 41.5” W (106 cm) Max. Resolution 3840x2160 Pixel Pitch 0.2395 mm x 0.2395 mm Brightness 135 nits(Type.)(APL 100%) Contrast Ratio 1500000:1(APL 25%)Type 178°(V) /178°(H) Viewing Angle (H/V) Display Colors 1.07B Response Time 0.1 ms (G TO G ) Color temperature selection color temperatures Analog input... - Page 32 Turkey, Simplified Chinese, Traditional Chinese, Japanese, Korean, Persian, Thai, Indonesian, Ukrainian DP cable, HDMI cable, USB cable, power cord, quick start guide, warranty Accessories card, color calibration testing report, ROG sticker, Input/Output port cover *Specifications subject to change without notice. ASUS LCD Monitor PG Series 3-11...
-
Page 33: Troubleshooting (Faq)
Troubleshooting (FAQ) Problem Possible Solution Power LED is not ON • Press the button to check if the monitor is in the ON mode. • Check if the power cord is properly connected to the monitor and the power outlet. •... -
Page 34: Supported Timing List
25Hz 16:9 25Hz 16:9 3840 x 2160 P 3840 x 2160 P 3840 x 2160 P 3840 x 2160 P 3840 x 2160 P 50Hz 16:9 30Hz 16:9 30Hz 16:9 30Hz 16:9 30Hz 16:9 ASUS LCD Monitor PG Series 3-13... - Page 35 3840 x 2160 P 3840 x 2160 P 3840 x 2160 P 3840 x 2160 P 3840 x 2160 P 60Hz 16:9 50Hz 16:9 50Hz 16:9 50Hz 16:9 50Hz 16:9 720 x 480 P 3840 x 2160 P 3840 x 2160 P 3840 x 2160 P 3840 x 2160 P 59.94/60Hz 16:9...