Table of Contents

Related Manuals for Siemens WM14VMH0NL


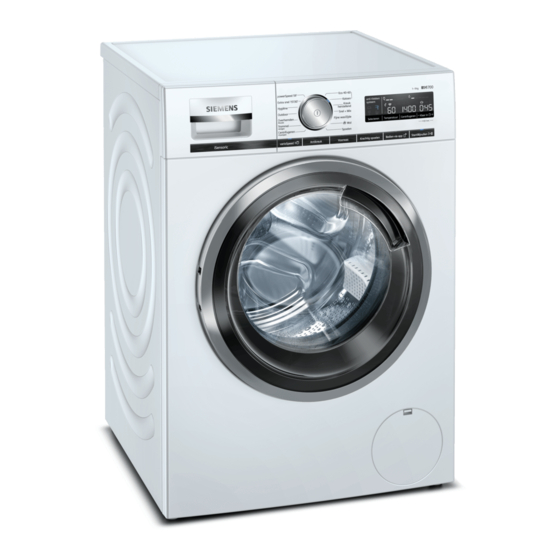
Summary of Contents for Siemens WM14VMH0NL
- Page 1 Washing machine WM14VMH0NL User manual and installation instructions Register your product on My Siemens and discover exclusive services and offers. siemens-home.bsh-group.com/welcome The future moving in. Siemens Home Appliances...
-
Page 2: Table Of Contents
Table of contents 1 Safety..........4 10 Before using for the first time ... 34 1.1 General instructions ....4 10.1 Washing cycle without washing good start ........34 1.2 Destination of the device rate ........4 11 Laundry........35 1.3 Restriction of users .. - Page 3 15 Home Connect ......43 18 Troubleshooting ....... 58 15.1 Device with WLAN home 19 Transporting, Storing and network (WiFi) with WPS dispose of........67 connect function....43 19.1 Disassembling the device ....67 15.2 Connecting a device to a WLAN home 19.2 Placing transport network (WiFi) without WPS locks..........
-
Page 4: Safety
NL Safety 1 Safety Observe the following safety instructions. 1.1 General instructions ¡ Read this manual carefully. ¡ Keep the operating instructions and product information for later use or for subsequent owners. ¡ Do not connect the device in case of transport damage. 1.2 Destination of the device Only use the device: ¡... -
Page 5: Safe Installation
Safety NL 1.4 Secure installation Observe the safety regulations when installing the device. WARNING ‒ Risk of electric shock! Improper installations are dangerous. ▶ Only connect and use the device in accordance with the information on the type plate. ▶ Only connect the device to a mains supply with alternating current via a properly installed earthing socket. - Page 6 NL Safety ▶ If the power cord is too short, contact customer service. ▶ Only use adapters approved by the manufacturer. WARNING ‒ Risk of injury! The high weight of the device can cause injuries when lifted. ▶ Do not lift the device alone. If this appliance is installed improperly in a washer-dryer column, the installed appliance may fall down.
-
Page 7: Safer Use
Safety NL If the appliance is moved by protruding parts, such as the loading door, the parts can break off. ▶ Do not move the appliance by protruding parts. CAUTION ‒ Risk of cutting! Sharp edges on the device can lead to cuts if touched. ▶... - Page 8 NL Safety ▶ In the case of discarded appliances, remove the mains plug from the socket, then cut the mains cable and damage the lock of the appliance door so that the appliance door no longer closes. WARNING ‒ Risk of suffocation! Children can inhale or swallow small parts and choke.
-
Page 9: Safe Cleaning And Maintenance
Safety NL CAUTION ‒ Risk of burns! The glass of the appliance door gets hot when washing at high temperatures. ▶ Do not touch the hot appliance door. ▶ Keep children away from the hot appliance door. CAUTION ‒ Risk of burns! The suds get hot when washing at high temperatures. - Page 10 NL Safety WARNING ‒ Risk of injury! The use of non-original spare parts and non-original accessories is dangerous. ▶ Only use original spare parts and accessories from the manufacturer. WARNING ‒ Risk of poisoning! Toxic fumes can be generated when cleaning agents containing solvents are used.
-
Page 11: Avoiding Material Damage
Avoid material damage NL Make sure that the inner diameter ▶ 2 Material damage of the water tap is at least 17 avoid Make sure that the length of the ▶ thread on the connection to the observe this instruction to avoid water tap is at least 10 mm. -
Page 12: Environmental Protection And Saving
NL Environmental protection and saving Only clean the appliance ▶ Dose the detergent according to the degree of soiling of the laundry → with water and a soft, damp cloth. Page 37. Direct contact with the device ▶ a For a light to normal degree remove all detergent residue, of contamination, a small amount spray mist or residue. -
Page 13: Set-Up And Connection
Set up and connect NL saving mode. All instructions LOOK OUT! disappear and Start/Refill Objects that remain in the drum and clipping that are not intended for use with the pert. Energy-saving mode is exited when device can lead to material and device you operate the appliance again, e.g. -
Page 14: Package Contents
NL Set up and connect 4.2 Package contents After unpacking, check all parts for transport damage and the complete ness of the delivery. WARNING Washing machine Risk of electric shock! Accompanying documents The device contains live parts. Touching live parts is dangerous. Water supply hose cover caps Do not use the appliance without... -
Page 15: Removing Transport Locks
Set up and connect NL LOOK OUT! installation site To demand If the appliance is installed in areas on a wall no snakes with a risk of frost or outdoors, frozen between wall and residual water can damage the device clamping appliance and frozen hoses can man. -
Page 16: Connecting The Device
NL Set up and connect Loosen and remove all bolts of the Install the 4 cover caps. 4 transport locks with a SW13 open-end wrench Push the 4 cover caps down. Pull the mains connection cable out of the holder. 4.5 Connecting the device Connect water supply hose Note Remove the 4 sleeves. -
Page 17: Adjusting The Device
Set up and connect NL Connect the water inlet hose to the Remark: Observe the pumping appliance. heights. The maximum pumping height wears 100 cm. The connection position tie with a hose clamp (24-40 mm) bore gene. Drain in a the water drainage Connect the water inlet hose to the feeding hose with... -
Page 18: Connecting The Appliance Electrically
NL Set up and connect Loosen the lock nuts with a SW17 Tighten the lock nuts against the open-end wrench. housing with an open-end wrench SW17 hand-tight. To adjust the appliance, turn the Hold the appliance foot while appliance feet. Check the horizontal doing so and do not adjust the adjustment of the appliance with a height. -
Page 19: Getting To Know Your Device
Getting to know your device NL 5 Getting to know your device 5.1 Device Here you will find an overview of the components of your device. Depending on the device type, details in the picture may differ, e.g. the color and the shape. Transport protections Service valve and pump →... -
Page 20: Detergent Drawer
NL Getting to know your device 5.2 Detergent drawer Detergent dispenser II: ¡ Detergent for the main used to be, ¡ softener ¡ Bleach ¡ Stain salt Compartment : ¡ fabric softener ¡ Liquid starch ¡ Impregnating agent Detergent dispenser I: ¡... -
Page 21: Display
Display NL 6 Display The display shows the current setting values, options or instructions. song lyrics. name Description Indication 0:40 Program duration / Approximate expected program time or remaining time of program time remaining. the program Finished in time The program end has been recorded and the remaining hours are displayed. - Page 22 NL Display name Description Indication Centrifuge Program status Pause Program status - 0- Program end Program status Child lock ¡ lights up: the childproof lock is activated. ¡ flashes: the child lock is activated and the device was operated. → "Deactivate child lock", page 43 Blood The stain type is activated.
-
Page 23: Keys
Tests NL 7 Keys The selection of the program settings depends on the program set. The selection options for each program are shown in the front view → "Programs", Page 26. Knob Description Choice Start/Refill ¡ start Start, cancel or pause a programme. ¡... - Page 24 NL Tests Knob Description Choice ¡ activate When you press the button, the Control via app appliance is enabled for remote start ¡ deactivate via the Home Connect app ¡ Home Connect Open menu When you press the button for approx. 3 s, the Home Connect menu opens.
- Page 25 Tests NL Knob Description Choice The laundry is so damp after washing that it hangs out well on the washing line.
- Page 26 NL Programs Anti wrinkle prewash Centrifuge (Rinse hold) Powerful rinse varioSpeed max. spin speed 1400 rental (rpm) max. temperature (°C) 90 max. load (kg)
- Page 27 Programs NL – Anti wrinkle – prewash Centrifuge – (Rinse hold) – Powerful rinse – – varioSpeed max. spin speed 1400 1200 rental (rpm) max. temperature (°C) – max. load (kg)
- Page 28 NL Programs – Anti wrinkle – prewash Centrifuge (Rinse hold) – Powerful rinse – – – varioSpeed max. spin speed 1400 rental (rpm) max. temperature (°C) 60 max. load (kg)
- Page 29 Programs NL – Anti wrinkle – – – prewash Centrifuge – – (Rinse hold) – – Powerful rinse – – – – – – varioSpeed max. spin speed 1400 1400 1200 rental (rpm) – – – max. temperature (°C) max. load (kg)
- Page 30 NL Programs Anti wrinkle prewash Centrifuge (Rinse hold) Powerful rinse varioSpeed max. spin speed rental (rpm) max. temperature (°C) max. load (kg)
- Page 31 Programs NL – Anti wrinkle – prewash Centrifuge (Rinse hold) Powerful rinse – – varioSpeed max. spin speed 1400 1400 rental (rpm) max. temperature (°C) 40 max. load (kg)
- Page 32 NL Programs Anti wrinkle prewash Centrifuge (Rinse hold) Powerful rinse – varioSpeed max. spin speed rental (rpm) max. temperature (°C) max. load (kg)
- Page 33 Programs NL – Anti wrinkle – prewash Centrifuge (Rinse hold) Powerful rinse – varioSpeed max. spin speed 1200 rental (rpm) max. temperature (°C) 40 max. load (kg)
-
Page 34: Accessories
NL accessories 9 Accessories Use only original accessories. These are adapted to the device. Usage Order number Cold water or Aquastop WZ10131 Extension water supply water supply hose feeding hose lengthen (2.50 m). Mounting brackets Improve the firmness WX975600 of the device. bend Fix the water drain hose. -
Page 35: Laundry
laundry NL 1 1 Laundry Place the powder detergent in compartment II. 11.1 Preparing the laundry Remark: Take the information on the topic of safety → Page 4 and avoid material damage → Page 11 take care of your device to use safely. -
Page 36: Sorting The Laundry
NL laundry – Type of fabric/fibres 11.2 Sorting laundry Wash laundry of the same Remark: Take the information on the type of fabric and fiber topic of safety → Page 4 together. and avoid material damage – Care instructions on the care →... -
Page 37: Detergent And Fabric Care Ginger
Detergent and laundry care product NL Comments 2 Detergent and detergent ¡ with liquid detergents only care product tend to use self-flowing liquid detergents ¡ various liquid detergents note: Take the information on the don't mix topic of safety → Page 4 ¡... -
Page 38: The Ministry At Its Core
NL The Ministry in essence You can request the water hardness from your local water company or determine it with a water hardness tester. Water hardness Total hardness in Hardness Range German hardness in °dH mmol/l soft (I) 0 - 1.5 0 - 8.4 average (II) 1.5 - 2.5... -
Page 39: Set Program
The Ministry in essence NL Remark: The drum is illuminated after ¡ To prevent creasing, keep opening, closing and starting the the maximum load of the → "Programs", Page 26 in program. The lighting goes out automatically. take into account. Required: The laundry is prepared 13.2 Set program and sorted. -
Page 40: Inserting The Dosing Aid For Liquid Detergent
NL The Ministry in essence Insert the detergent drawer. 13.5 Inserting the dosing aid for liquid detergent If you order the dosing aid as an accessory, you must fit the dosing aid. Pull out the detergent drawer. 13.6 Using the dosing aid for liquid detergent know You can use a dosing aid in the... -
Page 41: Dosing Detergent And Care Agent
The Ministry in essence NL Fold the dosing aid down and click a The drum rotates and a into place. load recognition takes place, which can take up to 2 minutes, after which the water flows into the appliance. a The display shows whether the program duration or the ready-in time is displayed. -
Page 42: Program Cancel
NL The Ministry in essence 13.11 Program Cancel Remove the laundry from the appliance. You can cancel the program at any time after starting the program. Remark: Take the information on the topic of safety → Page 4 and avoid material damage →... -
Page 43: Child Lock
Child lock NL availability of Home Connect services in 1 4 Child lock your country. Information on this can be found at: www.home-connect.com. Secure your device against ¡ → " Device with WLAN home network unintentional operation via the control work (WiFi) with WPS function", elements. -
Page 44: Connecting A Device To A Wlan Home Network (Wifi) Without Wps Function
NL Home Connect Observe the information in your work and transfer the network router's documentation. information from the WLAN home a flashes in the display. network (WiFi) to your device. a The device is trying to connect Required: The Home Connect app is to do with the WiFi home open and you have logged in. -
Page 45: Connecting The Appliance To The Home Connect App
Home Connect Set the program to level 3. a The display shows APP reflected to give. Press Start/Refill a The device is connecting with the Home Connect app. As soon as the device is in the Ho- me Connect app is displayed, follow the last steps in the Home Connect app. -
Page 46: Device
NL Home Connect a The device is connecting expiry of the set time period. The with the Smart Energy system program ends when this time (energy manager). frame has elapsed. aWhen the display shows and is displayed, the device is Onote successfully connected to the The Flex Start is deactivated... -
Page 47: Software Update
Home Connect Remark: If the WiFi is deactivated and Tip: If you want to operate your your device was previously connected appliance again via the Home to your home network, the Connect app, you must reconnect it connection is automatically re- to the home network and the Home established when the WiFi is switched Connect app. - Page 48 NL Home Connect ¡ Status of any previous reset to factory settings. During the first registration, the use of the Home Connect functions is prepared. This registration should only be carried out when you want to use the Home Connect functionalities for the first time.
-
Page 49: Basic Settings
Basic settings NL 1 6 Basic settings You can set up your device according to your needs. 16.1 Overview of the basic settings Here you will find an overview of the basic settings of the device. Basic setting Description program position Where the Signal 0 (off) -
Page 50: Changing Basic Settings
NL Cleaning and maintenance 16.2 Changing basic settings Recent deposit Delete immediately all detergent gene can make residues, spray lighter and sun- Set the program selector to of the remains skin remnants or position 1. den removed. remaining residual aunts. The door of the residual water can device and the... -
Page 51: Descaling
Cleaning and maintenance NL Press the insert down and take out Place the insert and click into place. the detergent drawer. Press out insert from bottom to Clean the opening for the top. detergent drawer. Slide in the detergent drawer. Clean and dry the detergent drawer and the insert with water and a 17.4 Descaling... -
Page 52: Cleaning The Drain Pump
NL Cleaning and maintenance Place a sufficiently large 17.5 Cleaning the drain pump container under the opening. Clean the drain pump in the event of malfunctions, e.g. blockages or chattering. Emptying the drain pump Remark: Take the information on the topic of safety →... - Page 53 Cleaning and maintenance NL Press the stopper back on. As there may still be residual water in the pump, carefully unscrew the lid. Clamp the drain hose in the holder. Clean the interior, threads of the pump cover and pump housing. Cleaning the drain pump Remark: Take the information on the topic of safety →...
-
Page 54: Cleaning The Inlet Opening In The Rubber Sleeve
NL Cleaning and maintenance Install the pump cover. 17.6 Cleaning the inlet opening Check that the pump cover in the rubber sleeve components are correctly Regularly check the inlet opening in assembled. the rubber sleeve for blockages and clean the inlet opening. Open door. -
Page 55: Clean The Sieve In The Water Supply
Cleaning and maintenance NL Loosen the hose clamp and carefully 17.8 Clean the strainer in the pull off the water drain hose. water supply. Empty the water inlet hose To clean the strainer, first empty the water inlet hose. Close the water tap. Set a schedule, but not Rinse, Spin or Drain. - Page 56 NL Cleaning and maintenance Clean the sieve with a small brush. Detach the hose at the back of the device. Connect the water inlet hose and Remove the sieve with pliers. check for leaks. Clean the sieve with a small brush. Cleaning the strainer on the device Remark: Take the information on the topic of safety →...
- Page 57 Cleaning and maintenance NL Connect the hose and check for leaks.
-
Page 58: Troubleshooting
NL Troubleshooting 1 8 Troubleshooting You can remedy minor faults on the device yourself. Before contacting customer service, please refer to the troubleshooting information. This way you avoid unnecessary costs. WARNING Risk of electric shock! Improper repairs are dangerous. Only qualified personnel may carry out repairs on the device ▶... - Page 59 Troubleshooting NL Cause and Troubleshooting Malfunction "E:30 / -80" Remove unauthorized extensions to the wa- ▶ discharge hose. Connect device "E:36 / -25 / -26" Drain pump is clogged. → " Cleaning the drain pump", page 52 ▶ "E:38 / -25 / -26" Drain pump is clogged.
- Page 60 NL Troubleshooting Cause and Troubleshooting Malfunction flashes. Door is not closed. Close the door. To start the program, press Start/Additional to fill All other error codes. Malfunction Please contact customer service. ▶ → "Service", Page 69 Device not working. Mains plug of the power cable is not plugged in. Connect the appliance to the mains.
- Page 61 Troubleshooting NL Cause and Troubleshooting Malfunction Door cannot be Water level is too high. opened. Start the program pump down. ▶ Power cut. Open the door with the emergency release. ▶ → "Emergency release", Page 67 Drain pipe or water drain hose is clogged. Washing water is not pumped out.
- Page 62 NL Troubleshooting Cause and Troubleshooting Malfunction No water flows into Water supply hose is kinked or pinched. the device. The Make sure that the water inlet hose is not ▶ detergent was not nods or clenches. washed in. Start several times The imbalance control system eliminates the imbalance by distributing the laundry several times.
- Page 63 Troubleshooting NL Cause and Troubleshooting Malfunction Remove transport locks Vibration and movement ▶ of the appliance during the spin run. Load recognition is active. Drum is spinning, er no water flows into No error, no action necessary. ▶ the appliance. Remark: The load detection can take up to 2 minutes.
- Page 64 NL Troubleshooting Cause and Troubleshooting Malfunction Program centrifugal Remark: If possible, place large and small items of laundry together in the drum. Laundry of different run does not start. sizes is more evenly distributed when spinning. Start the program Centrifuge. ▶...
- Page 65 Troubleshooting NL Cause and Troubleshooting Malfunction Spin result is Select a suitable program for the type of fabric. ▶ → "Programs", Page 26 not to satisfaction- ness. The laundry is Drain pipe or water drain hose is clogged. too wet / too damp. Clean the drain pipe and the water drain hose.
- Page 66 NL Troubleshooting Cause and Troubleshooting Malfunction No connection to Reconnect the device to the home network. the home network. → "Device with WLAN home network (WiFi) with Connect WPS function", page 43 → "Device with WLAN home network (WiFi) without Connect WPS function", page 44 The water inlet hose is not correctly / firmly At the water supply...
-
Page 67: Disassembling The Device
Transport, storage and disposal NL Unplug the appliance from the 18.1 Emergency release mains. unlock door Drain remaining soap. → "Clean the drain pump", Required: The drain pump is empty. → Page 52 Page 52 Disassemble the hoses. Running water can 1. -
Page 68: Dispose Of
NL Transport, storage and disposal Fit all bolts of the 4 transport locks 19.3 Recommissioning the and tighten them slightly. device Remove the transport locks ▶ run. 19.4 Disposal of your old device Environmentally friendly disposal means that valuable raw materials can be reused. -
Page 69: Customer Service
customer service NL 20.1 Product number (E no.) chemical equipment (waste electrical and electronic and production number equipment - WEEE). (FD) The directive sets the framework for the take- The product number (E-Nr.) and the back valid in the EU production number (FD) can be found and disposal of old on the type plate of the device. -
Page 70: Consumption Values
NL Consumption values 1 Consumption values The following information is provided in accordance with the EU Ecodesign Regulation. The specified values for other programs asEco 40-60 are only guide values and have been determined in accordance with the applicable standard EN60456. pole. -
Page 71: Declaration Of Conformity
¡ Maximum: 2014/53/EU. 1000 kPa A detailed RED declaration of conformity (10 bar) can be found on the Internet at www.siemens-home.bsh-group.com on Length of the 150 cm the product page of your appliance in the water supply additional documents. feeding hose... - Page 72 NL Declaration of Conformity 5 GHz WLAN (WiFi): for indoor use only.
- Page 76 BSH Hausgeräte GmbH Carl-Wery-Straße 34 81739 Munich GERMANY www.siemens-home.bsh-group.com Manufactured by BSH Hausgeräte GmbH under the trademark license of Siemens AG * 9001611402* 9001611402 (010224)