KitchenAid 5KHM9212 Manual
Hide thumbs
Also See for 5KHM9212:
- Manual (176 pages) ,
- Instructions manual (15 pages) ,
- Use & care manual (287 pages)

Related Manuals for KitchenAid 5KHM9212


Summary of Contents for KitchenAid 5KHM9212
- Page 1 Hand Mixer 5KHM9212 W11606022A.indb 1 W11606022A.indb 1 5/10/2022 10:15:53 AM 5/10/2022 10:15:53 AM...
-
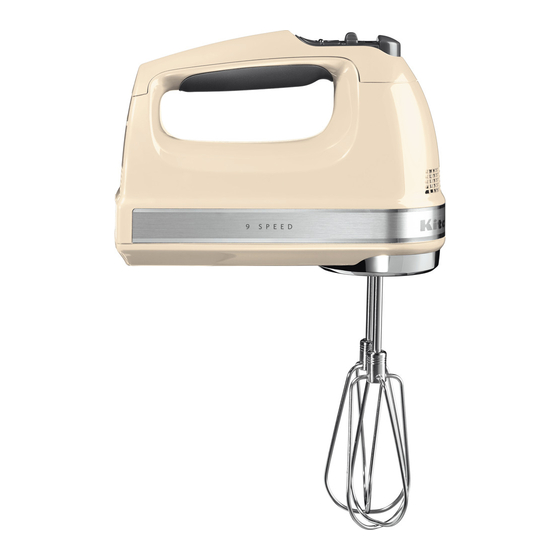
Page 2: Parts And Features
PARTS AND FEATURES Swivel Lock Power Cord Non-tip Heel Rest Cord Strap Flex Edge Beater Soft Grip Handle Liquid Blender Rod Accessory Digital Speed Control Dough Hooks Accessory Oversized Beater Ejector Button 16-tine Pro Whisk Accessory Air Vents W11606022A.indb 2 W11606022A.indb 2 5/10/2022 10:15:54 AM 5/10/2022 10:15:54 AM... -
Page 3: Product Safety
7. The use of accessories or attachments not recommended or sold by the KitchenAid may cause fire, electric shock or injury. 8. Do not use the appliance outdoors. 9. Do not let the cord hang over the edge of table or counter. -
Page 4: Electrical Requirements
PRODUCT SAFETY 10. Do not let cord contact hot surface, including the stove. 11. Remove any accessories from the Hand Mixer before washing. 12. Allow the appliance to cool completely before putting on or taking off parts, and before cleaning the appliance. SAVE THESE INSTRUCTIONS ELECTRICAL REQUIREMENTS Voltage: 220-240 V... -
Page 5: Speed Control Guide
SPEED CONTROL GUIDE First, clean all parts and accessories (see “Care and Cleaning” section). IMPORTANT: Hand Mixer should always be set on the lowest speed to start mixing. Move to higher speeds as needed; the speed setting indicator control will light up with the corresponding number for each speed. -
Page 6: Product Assembly
PRODUCT ASSEMBLY ATTACHING THE ACCESSORIES Before attaching any accessories, unplug IMPORTANT: Read and follow the specific the Hand Mixer from the electrical outlet. instructions in this manual for proper use of the Hand Mixer. Paired accessories (Turbo Beater Insert the accessory shaft with the collar Accessories, Dough Hooks) include one (D) into the larger opening (B) of the accessory with a collar (D) and one without... -
Page 7: Removing The Accessories
PRODUCT USAGE OPERATING THE SPEED CONTROL This KitchenAid Hand Mixer will beat faster and more thoroughly than most other electric hand mixers. Therefore, the beating time in most recipes must be adjusted to avoid over beating. -
Page 8: Care And Cleaning
PRODUCT USAGE When finished, slide the Power switch to the “O” (Off) position. Then unplug the Hand Mixer from an electrical outlet. CARE AND CLEANING IMPORTANT: Allow the appliance to cool completely before putting on or taking off parts, and before cleaning the appliance. Do not immerse the Hand Mixer body in water or other liquids. -
Page 9: Troubleshooting Guide
If the Hand Mixer fails to start: If you have a circuit breaker box, make sure the circuit is closed. Then contact KitchenAid or an Authorized Service Center. If the problem cannot be fixed: Do not return the Hand Mixer to the retailer; retailers do not provide service. - Page 10 ส่ ่ ว นประกอบและคุุ ณ ส่มบ ัติิ สายไฟแบบหมุุ น ล็็ อ ค ฐานรัองวางแบบกั น พล็ิ ก ที่่ � รั ั ด สายไฟ ไมุ ้ต่ ข อบอ� อ น มุื อ จัั บ แบบนุ � มุ แกนปุ่ั � น ของเหล็วเสรัิ มุ ปุุ่�...
- Page 11 ที่ ่ � ส ุ ด เพ ื � อ ที่ ำ า การัตรัวจัสอบ ซ่ � อ มุแซ่มุ หรั ื อ เปุ่ล็ ่ � ย นส � ว นปุ่รัะกอบที่างไฟฟ ้ า แล็ะกล็ไกต � า ง ๆ 7. การัใช่ ้ อุ ปุ่ กรัณ์์ เ สรัิ มุ หรัื อ อุ ปุ่ กรัณ์์ ต � อ พ� ว งที่่ � ไ มุ� ไ ด ้แนะนำ า หรัื อ จัำ า หน� า ยโดย KitchenAid อาจั...
- Page 12 คุวามปลอดภั ัยของผลิ ติ ภั ัณฑ์์ 10. อย� า ให ้สายส ั มุ ผั ส กั บ พื � น ผิ ว ที่่ � รั ้อน รัวมุที่ั � ง เตาอบหรัื อ หั ว เตาไฟ 11. นำ า อุ ปุ่ กรัณ์์ เ สรัิ มุ ออกจัากเครัื � อ งผสมุอาหารัแบบมุมุื อ ถ้ื อ ก� อ นนำ า ไปุ่ล็ ้าง 12.
- Page 13 คุำ า แนะนำ า เก่ � ย วก ับระบบคุวบคุุ ม คุวามเร็ ว เรัิ � มุ จัากที่ำ า ความุสะอาดช่ ิ � น ส � ว นแล็ะอุ ปุ่ กรัณ์์ เ สรัิ มุ ที่ั � ง หมุด (ดู รั ายล็ะเอ่ ย ดในหั ว ข ้อ “การัดู แ ล็แล็ะที่ำ า ความุสะอาด”) ข้...
- Page 14 การประกอบผลิ ติ ภั ัณฑ์์ การัติ ด ตั � ง ส � ว นปุ่รัะกอบเสรัิ มุ ก� อ นติ ด ตั � ง อุ ปุ่ กรัณ์์ เ สรัิ มุ ใด ๆ ให ้ถ้อดปุ่ล็ั � ก ข้ อ ส่ ำ า คุ ัญ: อ� า นแล็ะปุ่ฏิิ บ ั ต ิ ต ามุคำ า แนะนำ า ที่่ � รั ะบุ ไ ว ้ใน เครัื...
- Page 15 การใช้ ้ ผ ลิ ติ ภั ัณฑ์์ การัใช่ ้ ปุุ่� มุควบคุ มุ ความุเรั็ ว เครัื � อ งผสมุอาหารัแบบมุื อ ถ้ื อ KitchenAid น่ � ส ามุารัถ้ ต่ ส � ว นผสมุได ้เรั็ ว แล็ะที่ั � ว ถ้้ ง มุากกว� า เครัื � อ งผสมุอาหารั...
- Page 16 การใช้ ้ ผ ลิ ติ ภั ัณฑ์์ หล็ั ง จัากเสรั็ จั ส ิ � น ให ้เล็ื � อ นสวิ ต ช่ ์ เ ปุ่ิ ด ปุ่ิ ด ไปุ่ที่่ � ตำ า แหน� ง “O” (ปุ่ ิ ด ) จัากนั � น ถ้อดปุ่ล็ั � ก เครัื � อ ง ผสมุอาหารัแบบมุื...
- Page 17 หากคุ ณ์ มุ่ ก ล็� อ งไฟฟ้ า ให ้ปุ่ิ ด วงจัรัไว ้ก� อ น ให ้ติ ด ต� อ KitchenAid หรัื อ ศู น ย์ บ รัิ ก ารัที่่ � ไ ด ้รัั บ อนุ ญ่ าต อย� า ส � ง คื น...
- Page 18 NOTES W11606022A.indb 18 W11606022A.indb 18 5/10/2022 10:15:58 AM 5/10/2022 10:15:58 AM...
- Page 19 NOTES W11606022A.indb 19 W11606022A.indb 19 5/10/2022 10:15:58 AM 5/10/2022 10:15:58 AM...
- Page 20 NOTES W11606022A.indb 20 W11606022A.indb 20 5/10/2022 10:15:58 AM 5/10/2022 10:15:58 AM...
- Page 21 NOTES W11606022A.indb 21 W11606022A.indb 21 5/10/2022 10:15:58 AM 5/10/2022 10:15:58 AM...
- Page 22 NOTES W11606022A.indb 22 W11606022A.indb 22 5/10/2022 10:15:58 AM 5/10/2022 10:15:58 AM...
- Page 23 NOTES W11606022A.indb 23 W11606022A.indb 23 5/10/2022 10:15:58 AM 5/10/2022 10:15:58 AM...
- Page 24 ©2022 All rights reserved. Todos os direitos reservados. W11606022A 05/22 W11606022A.indb 24 W11606022A.indb 24 5/10/2022 10:15:58 AM 5/10/2022 10:15:58 AM...