
Related Manuals for Toro 58620


Summary of Contents for Toro 58620
- Page 1 Form No. 3454-644 Rev A String Mower Model No. 58620—Serial No. 322006065 and Up *3454-644* Register at www.Toro.com. Original Instructions (EN)
- Page 2 Section 4442 or 4443 to use or operate the engine on additional information, contact an Authorized Service any forest-covered, brush-covered, or grass-covered Dealer or Toro Customer Service and have the model land unless the engine is equipped with a spark and serial numbers of your product ready.
-
Page 3: Table Of Contents
Contents Safety Safety ............... 3 This machine has been designed in accordance with General Safety ........... 3 EN 14910:2007+A1:2009. Safety and Instructional Decals ......4 Setup ................ 5 General Safety 1 Raising the Handle .......... 5 2 Installing the Discharge Chute ......6 This product is capable of throwing objects. -
Page 4: Safety And Instructional Decals
Safety and Instructional Decals Safety decals and instructions are easily visible to the operator and are located near any area of potential danger. Replace any decal that is damaged or missing. decal133-8062 133-8062 decal144-4838 144-4838 1. Install the line. decal144-4840 144-4840 1. -
Page 5: Setup
Setup Loose Parts Use the chart below to verify that all parts have been shipped. Procedure Description Qty. – No parts required Raise the handle. Discharge chute Install the discharge chute. Screw Engine oil Add oil to the engine. Raising the Handle No Parts Required Procedure Hold the handle with 1 hand and use the other to... -
Page 6: Installing The Discharge Chute
Installing the Discharge Chute Parts needed for this procedure: g334792 Figure 5 Discharge chute 1. Dipstick 3. Add Screw 2. Full Procedure Insert the dipstick into the oil-fill tube, then remove the dipstick. Install the discharge chute to the mower deck as Read the oil level on the dipstick (Figure shown. -
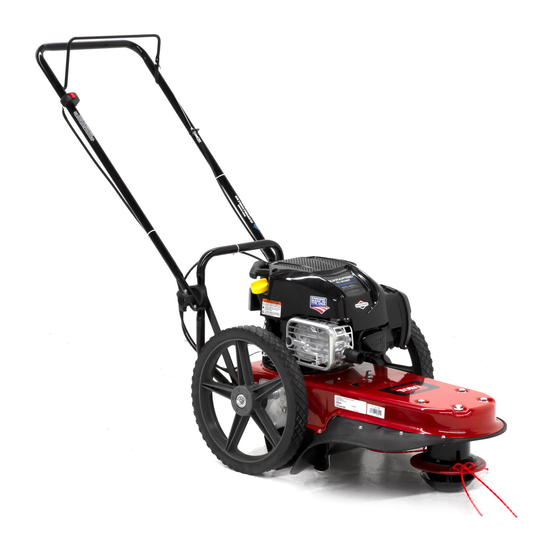
Page 7: Product Overview
4. Recoil start handle 8. Mower line 12. Fuel cap Specifications To ensure optimum performance and continued safety certification of the machine, use only genuine Toro Note: Specifications and design are subject to replacement parts and accessories. Replacement change without notice. -
Page 8: Before Operation
Operation containers on the ground, away from the vehicle before filling. • Remove the machine from the truck or trailer Determine the left and right sides of the machine from before filling the fuel tank. If this is not possible, the normal operating position. -
Page 9: Adjusting The Handle Height And Angle
Filling the Fuel Tank Adjusting the Height of Cut Fill the fuel tank as shown in Figure You can adjust the height of cut from 38 to 76 mm (1-1/2 to 3 inches). The recommended cutting height for most yards is 51 mm (2 inches). Move the machine to a level surface, shut off the engine, and wait for all moving parts to stop. -
Page 10: During Operation
During Operation • If the engine has been running, it will be hot and can severely burn you. Keep away from the hot engine. During Operation Safety • Operate the engine only in well-ventilated areas. Exhaust gases contain carbon monoxide, which is an odorless, deadly poison. -
Page 11: Engaging The Mower Head
Engaging the Mower Head After Operation After starting the engine, hold the mower bail against the handle to start mower head. After Operation Safety Push the machine forward to mow. Release the bail to disengage the mower head. General Safety •... -
Page 12: Maintenance
Disconnect the spark-plug wire from the spark plug To ensure optimum performance of the machine, before performing any maintenance procedure. use only genuine Toro replacement parts and accessories. Replacement parts and accessories • Never tamper with safety devices. Check their made by other manufacturers could be dangerous, proper operation regularly. -
Page 13: Pre-Maintenance Procedures
Pre-Maintenance Engine Maintenance Procedures Servicing the Air Filter Preparing for Maintenance Service Interval: Every 25 hours Yearly Move the machine to a level surface, shut off the engine, and wait for all moving parts to stop. Unclip the top of the air-filter cover. Disconnect the spark-plug wire from the spark plug. -
Page 14: Changing The Engine Oil
Changing the Engine Oil Service Interval: Yearly Changing the engine oil is not required, but if you want to change the oil, use the following procedure. Note: Run the engine a few minutes before changing the oil to warm it. Warm oil flows better and carries more contaminants. -
Page 15: Servicing The Spark Plug
Servicing the Spark Plug Installing the Spark Plug Ensure that the air gap between the center and side electrodes is correct before installing the spark plug. Use a spark plug wrench for removing and installing the spark plug(s) and a gapping tool/feeler gauge to check and adjust the air gap. -
Page 16: Drive System Maintenance
Replacing the Drive Belt Drive System Maintenance Remove the 2 fasteners securing the rear of the shield to the mower housing. Removing and Installing the Wheels Service Interval: Every 25 hours—Lubricate the jackshaft assembly. Remove and install the wheels as shown. g393641 Figure 19 4. -
Page 17: Adjusting The Drive Belt Tension
Adjusting the Drive Belt Tension Service Interval: Every 2 hours Maintain proper belt tension to improve machine performance. Engage the drive lever and ensure that the spring extends 3 to 6 mm (1/8 to 1/4 inch). If it does not, adjust the belt tension. Note: You may hear a short buzzing sound after releasing the engagement lever while using the... -
Page 18: Mower Maintenance
Mower Maintenance Replacing the Mower Line Service Interval: Before each use or daily—Check the mower lines. Replace the line when it is half the original length. Use a 4 mm (0.155 inch diameter) mower line, with a length of 55 cm (21-1/2 inches). Important: Do not allow the line lengths to vary g337972... -
Page 19: Cleaning
Cleaning Removing Debris from the Machine Regular cleaning and washing increases the lifespan of the machine. Clean the machine directly after use. Check before cleaning that the fuel tank cap is properly in place to avoid getting water in the tank. Important: You can wash the machine with mild detergent and water. -
Page 20: Storage
Storage Check and tighten all fasteners. Repair or replace any part that is damaged. Paint all scratched or bare metal surfaces. Paint Storage Safety is available from your Authorized Service Dealer. • Always shut off the machine, wait for all moving Store the machine in an upright position in a parts to stop, and allow the machine to cool before clean, dry garage or storage area. -
Page 21: Troubleshooting
Troubleshooting Problem Possible Cause Corrective Action The engine does not start. 1. The spark-plug wire is loose or 1. Install the wire on the spark plug. disconnected. 2. Install a new, correctly gapped spark 2. The spark plug is wet, pitted, fouled, or the gap is incorrect. - Page 22 Notes:...
- Page 23 Notes:...
- Page 24 While the exposure from Toro products may be negligible or well within the “no significant risk” range, out of an abundance of caution, Toro has elected to provide the Prop 65 warnings. Moreover, if Toro does not provide these warnings, it could be sued by the State of California or by private parties seeking to enforce Prop 65 and subject to substantial penalties.