Advertisement
Quick Links
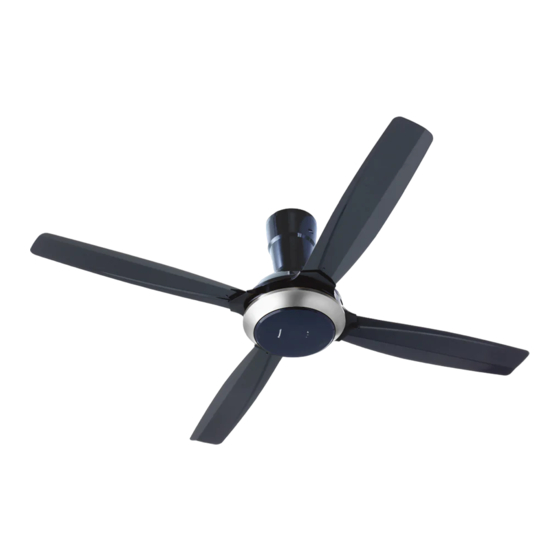
Operating and
Installation Instructions
Ceiling Fan
Model No. / Kiểu máy
F-56XPG
OFF/ON
SPEED
Operating and
Installation Instructions
Ceiling Fan
Thank you for purchasing this Panasonic product.
Before operating this product, please read the instructions
carefully, and save this manual for future use. Be sure to
read the Safety precautions section (P.2-3) before install
and operate.
Contents
Maintenance
Specifi cations
Hướng Dẫn Sử Dụng và
Lắp Đặt
Quạt Trần
Cảm ơn quý khách hàng đã mua Quạt Trần của
Panasonic.
Trước khi sử dụng sản phẩm này, xin vui lòng đọc kỹ các
hướng dẫn và cất giữ sách hướng dẫn sử dụng này để
tham khảo trong tương lai. Đảm bảo đọc phần Biện pháp
an toàn (P.4-5) trước khi cài đặt và vận hành.
Nội dung
Bảo dưỡng
Thông số kỹ thuật
2 - 3
6
7 - 12
13 - 15
Back cover
Back cover
4 - 5
6
7 - 12
13 - 15
Bìa sau
Bìa sau
Advertisement

Related Manuals for Panasonic F-56XPG


Summary of Contents for Panasonic F-56XPG
-
Page 1: Table Of Contents
Installation Instructions Ceiling Fan Ceiling Fan Model No. / Kiểu máy Thank you for purchasing this Panasonic product. Before operating this product, please read the instructions F-56XPG carefully, and save this manual for future use. Be sure to read the Safety precautions section (P.2-3) before install and operate. -
Page 2: Safety Precautions
Safety precautions Always follow these instructions To avoid the possibility of causing injury to users or damage to properties, please follow all the explanations written below. This symbol denotes an action that is COMPULSORY. This symbol denotes an action that is PROHIBITED. WARNING A state that may be caused by the mishandling of products, which, if not avoided, may lead to the possibility of death or serious injury of users. - Page 3 Safety precautions Always follow these instructions CAUTION Wipe away dirt with a clean soft cloth, ordinary soap To avoid the possibility of causing injury to users and water to keep the Ceiling Fan clean. Do not or damage to properties, please follow all the use solvents (gasoline and petroleum) or any other explanation written in this manual.
-
Page 4: Chú Ý Về An Toàn
Chú ý về an toàn Phải luôn thực hiện theo các hướng dẫn này Để tránh khả năng người sử dụng bị chấn thương hay thiết bị bị hư hỏng, hãy tuân theo những hướng dẫn sau đây. Biểu tượng này thể hiện những hành động BẮT BUỘC. Biểu tượng này thể... - Page 5 Chú ý về an toàn Phải luôn thực hiện theo các hướng dẫn này LƯU Ý Để tránh trường hợp bị chấn thương với người dùng Lau chùi các vết bẩn bằng vải mềm, sạch, các loại xà hay có những hư hỏng với thiết bị, hãy tuân theo tất bông thông thường và...
-
Page 6: Name Of Parts
Name of parts Các bộ phận Parts piece(s) Các bộ phận chiếc Upper Canopy ………………………………………………… 2 Nắp Chụp Trên …………………………………………… 2 Motor Unit ……………………………………………………… 1 Bộ Động Cơ ………………………………………………… 1 Cánh Quạt ………………………………………………… 4 Blade …………………………………………………………… 4 Decoration Cap ……………………………………………… 1 Nắp Trang Trí... -
Page 7: How To Install
How to install Cách lắp đặt ■ ■ Install to the ceiling Lắp lên trần nhà Take out the Pulley Set from the parts set. Lấy Bộ Puly từ bộ phụ tùng. Cross the C Hook of the Pulley Set to the Pipe Luồn Móc C của Bộ... - Page 8 How to install Cách lắp đặt ■ ■ Wiring instruction Hướng dẫn nối dây Connect the house’s supply wire to the Terminal Nối dây nguồn điện của nhà vào Chốt Nối theo according to the diagram shown. sơ đồ hướng dẫn. Blue (Neutral) / Xanh dương (Trung tính) Brown (Live) /...
- Page 9 How to install Cách lắp đặt Power supply / Power supply / Nguồn điện Nguồn điện Connect directly / Connect directly / Nối trực tiếp Nối trực tiếp Regulator / Dimmer switch / Regulator / Dimmer switch / Bộ điều chỉnh Chiết áp Bộ...
- Page 10 How to install Cách lắp đặt ■ ■ Install the Blades Lắp đặt Cánh Quạt Remove the supplied Screw Tháo Vít đi kèm. Assemble the Blade towards the Hook Lắp Cánh Quạt về phía Móc Treo Blade Safety Hanger / Móc Treo An Toàn Cánh Quạt Pull the Blade accordingly to direction in fi...
- Page 11 How to install Cách lắp đặt ■ ■ Fix the Decoration Cap Cố định Nắp Trang Trí Cố định Nắp Trang Trí . Đảm bảo dẫn hướng trên Fix the Decoration Cap . Make sure guide at Motor Bộ Động Cơ và...
- Page 12 How to install Cách lắp đặt ■ ■ Final confi rmation Xác minh cuối cùng Measure the distance (L), W, H using a measuring tape. Đo khoảng cách (L), W, H bằng thước đo. Điều chỉnh Adjust all the Blades to get an equal distance from the toàn Cánh Quạt để...
-
Page 13: How To Use
How to use Cách sử dụng ■ ■ Before use Trước khi sử dụng Tháo nắp Điều Khiển Từ Xa Remove the cover of Remote Control • Kéo Nắp Gập để tháo. • Pull the Flap to remove. Lắp Pin (2 viên AAA / R03 / LR03). - Page 14 How to use Cách sử dụng The fi gure above shows the best coverage area (W) Sơ đồ trên đây thể hiện vùng bao phủ tốt nhất (W) là around 8 m if the height (H) is 4 m. The Remote Control khoảng 8 m nếu chiều cao của trần nhà...
- Page 15 How to use Cách sử dụng Timer Cancel Hủy Đồng Hồ Hẹn Giờ • Push this button to cancel SLEEP MODE or OFF TIMER. • Ấn nút này để hủy CHẾ ĐỘ NGỦ hoặc HẸN GIỜ TẮT. SLEEP MODE CHẾ ĐỘ NGỦ •...
- Page 16 Air Velocity (m/min) Vận Tốc Gió (m/min) Air Delivery (m /min) Lưu Lượng Gió (m /min) Net Weight (kg) Trọng Lượng Tịnh (kg) Printed in Vietnam Panasonic Corporation 56XPG8850ZV Web site: http://www.panasonic.com/ M1120-0 © Panasonic Ecology Systems Co., Ltd 2020...