Table of Contents
Advertisement
Available languages
Available languages
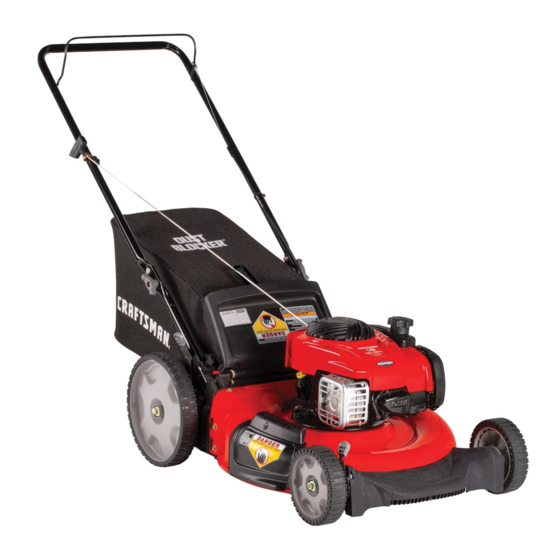
MOWER
Model Nos.
M115
M125
Safety Instructions . . . . . . . . . . . . . . . . . . . . . . . . . . . . . . . . . . . . . . . . . . . . . . . Pages 2-5
Slope Guide . . . . . . . . . . . . . . . . . . . . . . . . . . . . . . . . . . . . . . . . . . . . . . . . . . . . . . . . . .Page 6
Unpacking . . . . . . . . . . . . . . . . . . . . . . . . . . . . . . . . . . . . . . . . . . . . . . . . . . . . . . . . . . .Page 7
Assembly . . . . . . . . . . . . . . . . . . . . . . . . . . . . . . . . . . . . . . . . . . . . . . . . . . . . . . . . .Pages 7-9
Adjustments . . . . . . . . . . . . . . . . . . . . . . . . . . . . . . . . . . . . . . . . . . . . . . . . . . . . . . . . . . . . . .9
IF YOU HAVE QUESTIONS OR COMMENTS, CONTACT US.
SI TIENE DUDAS O COMENTARIOS, CONTÁCTENOS.
1-888-331-4569
Before using this equipment, read the manual and follow all safety rules and operating instructions. SAVE THESE INSTRUCTIONS.
NOTE: This Operator's Manual covers several models. Features may vary by model. Not all features in this manual are applicable to all models and the model depicted may differ
from yours.
INSTRUCTION MANUAL | MANUAL DE INSTRUCTIONES
TABLE OF CONTENTS
Operation . . . . . . . . . . . . . . . . . . . . . . . . . . . . . . . . . . . . . . . . . . . . . . . . . . . . . . . Pages 10-11
Service and Maintenance . . . . . . . . . . . . . . . . . . . . . . . . . . . . . . . . . . . . . . . . Pages 12-14
Off-Season Storage . . . . . . . . . . . . . . . . . . . . . . . . . . . . . . . . . . . . . . . . . . . . . . . . . . Page 15
Troubleshooting . . . . . . . . . . . . . . . . . . . . . . . . . . . . . . . . . . . . . . . . . . . . . . . . . . . . .Page 16
Español . . . . . . . . . . . . . . . . . . . . . . . . . . . . . . . . . . . . . . . . . . . . . . . . . . . . . . . . . . . Page 17
WARNING!
WWW.CRAFTSMAN.COM
Form No. 769-20451
(February 13, 2019)
Advertisement
Chapters
Table of Contents

Related Manuals for Craftsman M115


Summary of Contents for Craftsman M115
-
Page 1: Table Of Contents
INSTRUCTION MANUAL | MANUAL DE INSTRUCTIONES MOWER Model Nos. M115 M125 TABLE OF CONTENTS Safety Instructions ..........Pages 2-5 Operation . -
Page 2: Safety Instructions
SAFETY INSTRUCTIONS WARNING DANGER This symbol points out important safety instructions which, if not This machine was built to be operated according to the safe operation followed, could endanger the personal safety and/or property of practices in this manual. As with any type of power equipment, yourself and others. - Page 3 SAFETY INSTRUCTIONS CHILDREN • If the equipment should start to vibrate abnormally, stop the engine and check immediately for the cause. Vibration is generally a warning of trouble. Tragic accidents can occur if the operator is not alert to the presence of children. Children are often attracted to the mower and the mowing activity.
- Page 4 SAFETY INSTRUCTIONS DO NOT MODIFY ENGINE • Never store the machine or fuel container near an open flame, spark or pilot light as on a water heater, space heater, furnace, clothes dryer or other gas To avoid serious injury or death, do not modify engine in any way. Tampering appliances.
- Page 5 SAFETY INSTRUCTIONS SAFETY SYMBOLS This page depicts and describes safety symbols that may appear on this product. Read, understand, and follow all instructions on the machine before attempting to assemble and operate. Symbol Description READ THE OPERATOR’S MANUAL(S) Read, understand, and follow all instructions in the manual(s) before attempting to assemble and operate DANGER —...
-
Page 6: Slope Guide
SLOPE GAUGE... -
Page 7: Unpacking
ASSEMBLY IMPORTANT: This unit is shipped without gasoline or oil in the engine. Be certain While stabilizing mower so it doesn’t move, pivot upper handle up as to service engine with gasoline and oil as instructed in the Operation section of the shown in Figure 2. - Page 8 ASSEMBLY Follow the steps below to complete handle assembly: Hold blade control against upper handle. Pull upward on the handle until holes in lower handle (shown in Slowly pull starter rope handle from engine and slip starter rope into the rope guide. See Figure 6. Figure 3 deck cutaway) line up with holes in handle bracket.
-
Page 9: Adjustments
ADJUSTMENTS Pull the height adjustment lever outward towards wheel (unit will tend to Place grass catcher into the slots in the handle brackets as shown in fall when lever is moved outward). See Figure 10. Figure 8. Let go of discharge door so that it rests on the grass catcher. To remove grass catcher, lift rear discharge door on the mower. -
Page 10: Operation
This is called pull the recoil starter rope to start the unit. mulching. Meets ANSI Safety Standards Craftsman Lawn Mowers conform to the safety standard of the American National Standards Institute (ANSI). - Page 11 OPERATION GAS AND OIL FILL-UP Using as Mulcher IMPORTANT: Refer to the separate Engine Operator’s Manual for additional engine For mulching grass, remove the grass catcher or side discharge chute from the information. mower. When you remove the grass catcher from the mower, the rear discharge door will close.
-
Page 12: Service And Maintenance
SERVICE AND MAINTENANCE MAINTENANCE SCHEDULE Follow the maintenance schedule given below. This chart describes service WARNING guidelines only. Use the Service Log column to keep track of completed Before performing any type of maintenance/service, disengage all controls maintenance tasks. To locate the nearest Service Center or to schedule service, call and stop the engine. - Page 13 SERVICE AND MAINTENANCE Engine Maintenance CAUTION Refer to the Engine Operator’s Manual packed with your mower for a detailed Make certain the mower’s discharge chute is directed AWAY from your description of all engine-related service specifications. house, garage, parked cars, etc. Clean Engine Remove the fast attach deck wash nozzle from the mower deck and thread it onto the end of your garden hose.
- Page 14 SERVICE AND MAINTENANCE Blade Care Lubricate the engine crankshaft and the inner surface of the blade adapter with light oil. Slide the blade adapter onto the engine crankshaft. Place the blade on the adapter such that the side of the blade marked “Grass Side” WARNING (or with part number) faces the ground when the mower is in the operating When removing the cutting blade for sharpening or replacement, protect...
-
Page 15: Off-Season Storage
OFF-SEASON STORAGE WARNING Never store lawn mower with fuel in tank indoors or in poorly ventilated areas where fuel fumes may reach an open flame, spark, or pilot light as on a furnace, water heater, clothes dryer, or gas appliance. Preparing The Engine Preparing The Lawn Mower For engines stored over 30 days:... -
Page 16: Troubleshooting
TROUBLESHOOTING WARNING Disconnect the spark plug wire and ground it against the engine to prevent unintended starting. Before performing any type of maintenance/service, disengage all controls and stop the engine. Wait until all moving parts have come to a complete stop. Always wear safety glasses during operation or while performing any adjustments or repairs. -
Page 17: Español
INSTRUCTION MANUAL | MANUAL DE INSTRUCTIONES MOWER Model Nos. M115 M125 ÍNDICE Instrucciones de seguridad . . . . . . . . . . . . . . . . . . . . . . . . 18-21 Operación . -
Page 18: Instrucciones De Seguridad
INSTRUCCIONES DE SEGURIDAD ADVERTENCIA PELIGRO La presencia de este símbolo indica que se trata de instrucciones Esta máquina fue construida para ser operada de acuerdo con las reglas importantes de seguridad que se deben respetar para evitar poner en de seguridad contenidas en este manual. Al igual que con cualquier tipo peligro su seguridad personal y/o material y la de otras personas. - Page 19 INSTRUCCIONES DE SEGURIDAD • Nunca opere la podadora en césped húmedo. Siempre esté seguro de su No haga lo siguiente: equilibrio. Si tropieza y cae puede lesionarse gravemente. Si siente que • No corte el césped cerca de pozos, hundimientos, bancos, podría perder el pierde el equilibrio, suelte inmediatamente la manija de control de la equilibrio.
- Page 20 INSTRUCCIONES DE SEGURIDAD • Nunca recargue el tanque de combustible. Llene el tanque no más de 1 • No cambie la configuración del regulador del motor ni acelere demasiado el pulgada por debajo de la base del cuello de llenado para dejar espacio para la mismo.
- Page 21 INSTRUCCIONES DE SEGURIDAD SÍMBOLOS DE SEGURIDAD Esta página representa y describe la seguridad los símbolos que pueden parecer en este producto. Lea, comprenda, y siga todas instrucciones en la máquina antes procurar para reunir y operar. Símbolo Descripción LEA EL MANUAL(S) DEL OPERADOR Lea, comprenda, y siga todas instrucciones en el manual (manuales) antes procurar para reunir y operar.
-
Page 22: Pendiente De Calibre
PENDIENTE DE CALIBRE... -
Page 23: Desembalaje
MONTAJE IMPORTANTE: Esta unidad se envía sin gasolina ni aceite en el motor. Antes de Si bien la estabilización de cortacésped por lo que no se mueve, comenzar o correr la máquina cargue el motor con gasolina y aceite como se indica pivote asa superior como se muestra en la Figura 2. - Page 24 MONTAJE Inserte el T-pernos quitó anteriormente a través del mango La atadura de cable uso para garantizar cable para bajar de manejar. corchetes y asa inferior y apriete bien para asegurar el mango en su lugar. Vea la Figura 4. Figura 6 Figura 4 Conexión de la colectora de césped...
-
Page 25: Ajustes
AJUSTES Para quitar al receptor de hierba, levante la puerta de descarga trasera en el Presione la palanca hacia la rueda (unidad tenderá a caer cuando se suelta la cortacésped. Ascensor césped y fuera de las ranuras en el mango entre paréntesis. palanca). -
Page 26: Operación
Cumple con las normas de seguridad de ANSI Las cortadoras de césped Craftsman cumplen con las normas de seguridad del Instituto Estadounidense de Normas Nacionales (ANSI). - Page 27 OPERACIÓN Llenado de gasolina y aceite Uso como Abonadora Consulte en el Manual del operador del motor información adicional sobre el motor. Para abonar el césped, quite el colector de césped y el canal de descarga lateral de la máquina. La puerta de descarga posterior deberá estar cerrada. Para un abono Agregue el aceite provisto antes de arrancar la cortadora de césped la eficiente, no corte césped húmedo.
-
Page 28: Servicio Y Mantenimiento
SERVICIO Y MANTENIMIENTO PROGRAMA DE MANTENIMIENTO Siga el cronograma de mantenimiento que se presenta a continuación. Esta tabla ADVERTENCIA sólo describe pautas de servicio. Utilice la columna Registro de Servicio para hacer el Antes de realizar cualquier tipo de mantenimiento o servicio, desenganche seguimiento de las tareas de mantenimiento completadas. - Page 29 SERVICIO Y MANTENIMIENTO Lavado de la Plataforma Mantenimiento del motor La plataforma de su podadora está equipada con un puerto de agua sobre su Consulte el manual del operador del motor entregado con su cortadora para obtener superficie como parte del sistema de lavado de la plataforma. una descripción detallada de todas las especificaciones de servicio relacionadas con el motor.
- Page 30 SERVICIO Y MANTENIMIENTO Cuidado de la cuchilla Lubrique el cigüeñal del motor y la superficie interna del adaptador de la cuchilla con aceite ligero. Deslice el adaptador de la cuchilla sobre el cigüeñal del motor. Instale la cuchilla en el adaptador con el lado marcado ADVERTENCIA “Hierba Side”...
-
Page 31: Almacenamiento Fuera De Temporada
ALMACENAMIENTO FUERA DE TEMPORADA ADVERTENCIA Nunca almacene la cortadora de césped con combustible en el tanque en un espacio cerrado o en áreas con poca ventilación, donde los gases del combustible puedan alcanzar el fuego, chispas o una luz piloto como la que tienen algunos hornos, calentadores de agua, secadores de ropa o algún otro dispositivo a gas. -
Page 32: Solución De Problemas
2. La cuchilla de la cortadora no está afilada. 2. Afile o cambie la cuchilla. CRAFTSMAN® is a registered trademark of Stanley Black & Decker, Inc., used under license. CRAFTSMAN® es una marca registrada de Stanley Black & Decker, Inc., utilizada bajo licencia.