Table of Contents
Advertisement
Quick Links
Advertisement
Table of Contents

Related Manuals for Bosch HBF114BR0Y


Summary of Contents for Bosch HBF114BR0Y
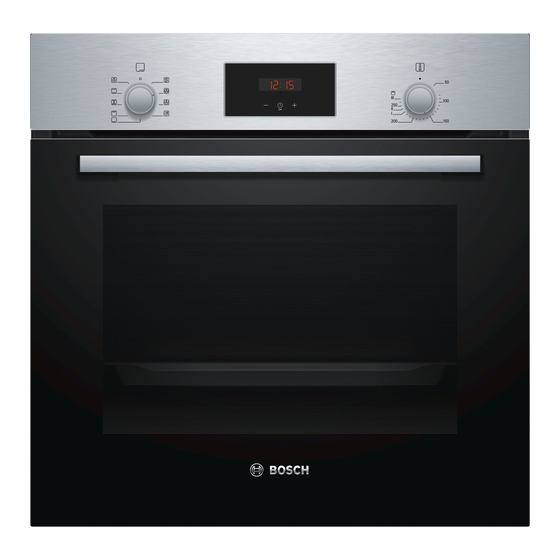
- Page 1 Oven HBF114BR0Y User manual and installation instructions [en]...
-
Page 2: Table Of Contents
en Safety Only use this appliance: Table of contents ¡ To prepare meals and drinks. ¡ In private households and in enclosed spaces in a domestic environment. INFORMATION FOR USE ¡ Up to an altitude of max. 4000 m above sea level. Safety .............. -
Page 3: Safety
Safety en WARNING ‒ Risk of burns! WARNING ‒ Risk of electric shock! The appliance and its parts that can be Incorrect repairs are dangerous. touched become hot during use. ▶ Repairs to the appliance should only be ▶ Caution should be exercised here in order carried out by trained specialist staff. -
Page 4: Preventing Material Damage
en Preventing material damage 1.5 Halogen bulb WARNING ‒ Risk of electric shock! When changing the bulb, the bulb socket con- WARNING ‒ Risk of burns! tacts are live. The bulbs in the cooking compartment get ▶ Before replacing the bulb, ensure that the very hot. There is still a risk of burning for appliance is switched off in order to pre- some time after they have been switched off. - Page 5 Environmental protection and saving energy en Use dark-coloured, black-coated or enamelled baking tins. ¡ These types of baking tin absorb the heat particu- larly well. Open the appliance door as little as possible during operation. ¡ This maintains the temperature in the cooking com- partment and eliminates the need for the appliance to reheat.
-
Page 6: Familiarising Yourself With Your Appliance
en Familiarising yourself with your appliance 4 Familiarising yourself with your appliance 4.1 Control panels Buttons and display The buttons are touch-sensitive surfaces. To se- You can use the control panel to configure all functions lect a function, simply press lightly on the relev- of your appliance and to obtain information about the ant field. - Page 7 Familiarising yourself with your appliance en Symbol Type of heating What it's used for and how it works Hot air gentle Cook selected dishes gently on one level without preheating. The fan distributes the heat from the ring-shaped heating element in the back wall evenly around the cooking compartment.
-
Page 8: Rails
en Familiarising yourself with your appliance You can remove the rails, e.g. for cleaning. Appliance door → "Rails", Page 14 If you open the appliance door during operation, the operation continues. Cooling fan The cooling fan switches on and off depending on the appliance's temperature. - Page 9 Before using for the first time en Note: Take any accessories that you will not be using www.bosch-home.com out of the cooking compartment while the appliance is Accessories vary from one appliance to another. When in operation. purchasing accessories, always quote the exact product number (E no.) of your appliance.
- Page 10 en Time-setting options 7.1 Setting rapid heating a Rapid heating starts after a few seconds. a When the rapid heating process ends, an audible To ensure an even cooking result, do not place the signal sounds and the heating indicator goes out. food in the cooking compartment until rapid heating Use the function selector to set a suitable type of has come to an end.
- Page 11 Childproof lock en is highlighted in the display. When the cooking time has elapsed: Requirement: Press any button to end the signal prematurely. ‒ Reset the cooking time to zero using the button. ▶ To set another cooking time, press the ...
- Page 12 en Cleaning and servicing Using oven cleaner in a hot cooking compartment New sponge cloths contain residues from production. damages the enamel. Wash new sponge cloths thoroughly before use. ▶ Do not use oven cleaner in the cooking compart- ▶ ment when it is still warm. Remove all food remnants from the cooking com- ▶...
- Page 13 Cleaning aid en Area Suitable cleaning agents Information Rails ¡ Hot soapy water Soak any heavily soiled areas and use a brush or steel wool. Tip: Remove the shelf supports for cleaning. → "Rails", Page 14 Accessories ¡ Hot soapy water Soak any heavily soiled areas and use a brush or steel wool. Enamelled accessories are dishwasher-safe.
- Page 14 en Rails 12 Rails To clean the rails and cooking compartment thor- 12.2 Attaching the rails oughly, you can remove the shelf supports. First insert the rail into the rear socket, press it to the back slightly 12.1 Unhooking the rails WARNING ‒ Risk of burns! The rails can be very hot.
- Page 15 Appliance door en When the locking levers are open in order to detach Detach the oven door. the oven door, the hinges are secured. → "Removing the appliance door", Page 15 Position it on a cloth with its handle pointing down- wards. To remove the upper cover of the oven door, press in the tabs on the left and right using your fingers.
- Page 16 en Appliance door When attaching the oven door, ensure that both 13.4 Fitting the door panes hinges are inserted in the opening direction. When fitting the panes, ensure that the lettering "top right" is not upside down at the bottom left. Insert the pane diagonally towards the back. The notch on the hinge must engage on both sides.
-
Page 17: Troubleshooting
Troubleshooting en 14 Troubleshooting You can rectify minor faults on your appliance yourself. WARNING ‒ Risk of electric shock! Read the troubleshooting information before contacting Incorrect repairs are dangerous. after-sales service. This will avoid unnecessary costs. Repairs to the appliance should only be carried out ▶... -
Page 18: Transportation And Disposal
en Transportation and disposal Pull out the halogen bulb without turning it. WARNING ‒ Risk of electric shock! When changing the bulb, the bulb socket con- tacts are live. ▶ Before replacing the bulb, ensure that the appli- ance is switched off in order to prevent a poten- tial electric shock. -
Page 19: How It Works
How it works en 16.1 Product number (E-Nr.) and production number (FD) You can find the product number (E-Nr.) and the pro- duction number (FD) on the appliance's rating plate. Make a note of your appliance's details and the Cus- You will see the rating plate with these numbers if you tomer Service telephone number to find them again open the appliance door. - Page 20 en How it works ¡ For best results, we recommend using dark-col- WARNING ‒ Risk of fire! oured metal baking tins. Opening the appliance door creates a draught. Greaseproof paper may come into contact with the 17.5 Cakes and other baked goods heating element and catch fire. Never place greaseproof paper loosely over ac- ▶...
- Page 21 How it works en Meal Accessory/cookware Shelf posi- Type of Temperature Cooking tion heating in °C time, minutes Fruit tart or cheesecake with shortcrust Springform cake tin, 160–180 70–90 pastry base diameter 26 cm Strudel Tart dish or tin 200–240 25–50 Springform cake tin...
- Page 22 en How it works Meal Accessory/cookware Shelf posi- Type of Temperature Cooking tion heating in °C time, minutes Puff pastry, 2 levels Universal pan 180–200 25–35 Baking tray Puff pastry, 3 levels 5+3+1 170–190 30–45 Baking tray Universal pan Choux pastry, e.g. profiteroles, eclairs Universal pan ...
- Page 23 How it works en Topic Topic Your cake collapses. ¡ Note the ingredients Your cake is cooked on ¡ Reduce the baking and preparation in- the outside but is not fully temperature and in- structions that are baked through on the in- crease the baking given in the recipe.
- Page 24 en How it works Meal Accessory/cookware Shelf posi- Type of Temperature Cooking tion heating in °C time, minutes Flatbread, frozen Universal pan 200–220 10–25 Bread rolls, sweet, fresh Universal pan 170–180 20–30 Bread rolls, sweet, fresh, 2 levels Universal pan ...
- Page 25 How it works en WARNING ‒ Risk of injury! If hot glass cookware is placed on a wet or cold sur- face, the glass may shatter. Place hot glass ovenware on a dry mat after cook- ▶ ing. Recommended settings Bakes and gratins Meal Accessory/cookware Shelf posi- Type of...
- Page 26 en How it works ¡ The liquid in the cookware evaporates as the meat ATTENTION! roasts. Carefully pour in more hot liquid if required. Acidic food may damage the grid ¡ The distance between the meat and the lid must be Do not place acidic food, such as fruit or food with ▶...
- Page 27 How it works en Recommended settings Poultry Food Accessories/cook- Shelf posi- Type of Temperature Cooking ware tion heating in °C/grill time in mins setting Chicken, 1.3 kg, unstuffed Cookware without lid 200–220 60–70 Small chicken portions, 250 g each Cookware without lid ...
- Page 28 en How it works Topic Topic Your roast is too dry. ¡ Select a lower temper- Your roasting juices are ¡ Use a larger item of ature. too clear and watery. cookware so that more ¡ Reduce the roasting liquid evaporates. time.
- Page 29 How it works en 17.12 Tips for keeping acrylamide levels to 17.13 Drying a minimum when cooking You can achieve outstanding drying results for the food using hot air. With this type of preserving, flavours are Acrylamide is harmful to your health and is produced concentrated as a result of the dehydration.
- Page 30 en How it works Preparing fruit or vegetables for preserving Pour 500 ml hot water (approx. 80 °C) into the uni- versal pan. Thoroughly wash the fruit and vegetables. Use the recommended setting values when config- Prepare the fruit and vegetables, e.g. peel, remove uring the appliance settings.
- Page 31 How it works en Use the recommended settings when configuring 17.15 Proving dough the appliance settings. You can prove yeast dough more quickly in your appli- Only start operation when the cooking compartment ance than at room temperature. has fully cooled down. Do not open the appliance door while the dough is Proving dough proving, otherwise moisture will escape.
- Page 32 en How it works Baking with two springform cake tins: Shelf positions Shelf positions for baking on one level: If you can use your appliance to cook on multiple ¡ Universal pan/baking tray: Shelf position 3 levels, position baking tins either next to one another or offset on different shelves so that they are not directly ¡...
- Page 33 Installation instructions en 18 Installation instructions Observe this information when installing the appliance. 18.1 Important information This appliance is designed for use up to a maximum height of 4000 metres above sea level. Do not use the door handle to transport or install the appliance. The appliance must be disconnected from the power sup- ply whenever installation work is being carried out.
- Page 34 en Installation instructions ¡ Only fit the appliance up to a height which allows ¡ Place the appliance in front of the surround unit to accessories to be easily removed. connect it. The connection cable must be long enough. Caution: During the installation, ensure that the power cord is not jammed and does not come 18.5 Corner installation into contact with hot appliance parts.
- Page 35 Installation instructions en Cable colour Cable type Green-yellow Earthing cable Blue Neutral conductor (zero) Brown Phase conductor (external conductor) 18.10 Securing the appliance ¡ Slide the appliance in fully and centre it. ¡ Screw the appliance into place. The gap between the worktop and the appliance must not be closed by additional battens.
- Page 36 Expert advice for your Bosch home appliances, help with problems or a repair from Bosch experts. Find out everything about the many ways Bosch can support you: www.bosch-home.com/service Contact data of all countries are listed in the attached service directory.