Toshiba TOSVERT VF-A7 Instruction Manual
Control power option unit
Hide thumbs
Also See for TOSVERT VF-A7:
- Instruction manual (255 pages) ,
- Manual (14 pages) ,
- Function manual (5 pages)
Table of Contents
Advertisement
Quick Links
TOSVERT VF-A7/P7
Control Power Option Unit Instruction Manual
1. Make sure that this instruction manual is delivered to the end user who
actually uses the VF-A7/P7 Control power Option Unit.
2. Read this manual before connecting or operating the VF-A7/P7 Control
Power Option Unit, and store it in a safe place for reference.
© Toshiba Schneider Inverter Corporation 2002
Safety precautions
Handling in general
Transportation and Installation
Wiring
Operations
Disposal of Product
1. Introduction
2. Names and functions
External view
3. Connection method
Connection method
Turning power on
Circuit explanatory drawing
Connection explanatory drawing
4. Outside dimensions
5. Specifications
6. Warranty
NOTICE
All Rights Reserved.
E 6 5 8 1 1 3 6
P1
P3
P4
P5
P11
P12
P12
Advertisement
Table of Contents

Related Manuals for Toshiba TOSVERT VF-A7


Summary of Contents for Toshiba TOSVERT VF-A7
- Page 1 VF-A7/P7 Control power Option Unit. 2. Read this manual before connecting or operating the VF-A7/P7 Control Power Option Unit, and store it in a safe place for reference. © Toshiba Schneider Inverter Corporation 2002 All Rights Reserved.
-
Page 2: Safety Precautions
- Do not install or operate the inverter if it is damaged or any part is missing. Operating the inverter in a defective condition can result in electric shock or fire. Contact TOSHIBA group representative for repairs. - Do not place any inflammable material near the inverter. - Page 3 E 6 5 8 1 1 3 6 Wiring Danger - Be sure to perform the following preparatory work before proceeding to wiring. 1) Turn off all input power to the inverter. 2) Wait for at least ten minutes and check to make sure that the charge lamp (on the inverter and in the option unit) is no longer lit.
- Page 4 E 6 5 8 1 1 3 6 1. Introduction Thank you for your purchase the Toshiba "TOSVERT VF-A7/P7 Control Power Option Unit" industrial inverter. Using this unit, control power and main circuit power for VF-A7/P7 Series (0.4 – 22kW class) inverters can be supplied separately.
-
Page 5: Names And Functions
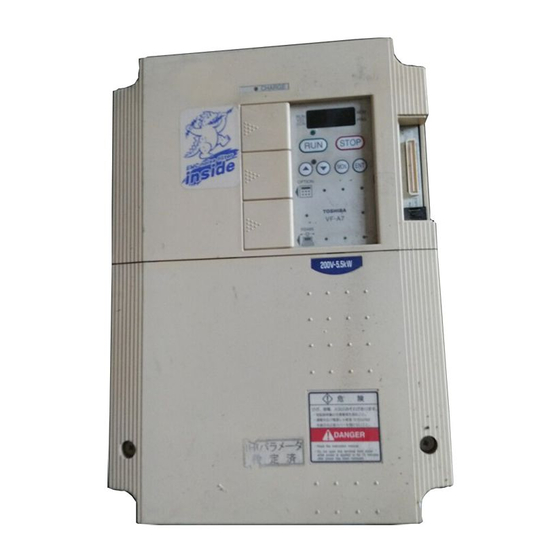
2. Names and functions The external view of the control power option unit and names of each part are shown below. External view Nameplate and warning TOSHIBA CONTROL POWER OPTION DANGER Windows for LED and vent holes Windows used to watch the LED... -
Page 6: Connection Method
E 6 5 8 1 1 3 6 3. Connection method Proceed as follows to connect the unit to the inverter. (Use the circuit explanatory drawing and the connection explanatory drawing.) Connection method (1) Check to make sure all input powers to the inverter are off. <Note>... - Page 7 E 6 5 8 1 1 3 6 Turning power on (1) Turn on the control power. <Note> This control power option unit can be used for both 200V inverters and 400V inverters. (2) LED lamp by the side of the connector (CN21) of the inverter main unit and LED lamp inside the control power option unit light and a message appears on the monitor of the inverter and the system is ready for setting and waiting for operation.
- Page 8 E 6 5 8 1 1 3 6 Circuit explanatory drawing <Standard> <<Inverter main unit>>: 22kW or less R/L1 S/L2 Main circuit power T/L3 <Note> R0 and S0 are normally not connected to the control power circuit. R0-S0 POWER Jumper connector DC/DC CN21...
- Page 9 E 6 5 8 1 1 3 6 Connection explanatory drawing <VFA7 - 0.4 to 3.7kW> Connector (CN21) LED for R0 and S0 R0, S0 terminal board 2-M4 screws Recommended Wiring tightening torque 1.2N・m(11lbs-in) Keyhole for wiring Wiring inlet plate...
- Page 10 E 6 5 8 1 1 3 6 <VFA7 - 5.5 / 7.5kW> Connector (CN21) LED for R0 and S0 Wiring R0, S0 terminal board 2-M3 screws Recommended tightening torque 0.5N・m(4.4lbs-in) Keyhole for wiring...
- Page 11 E 6 5 8 1 1 3 6 <VFA7 - 11 to 22kW, VFP7 - 18.5/22kW > Connector (CN21) LED for R0 and S0 R0, S0 Wiring terminal board 2-M3 screws Recommended tightening torque 0.5N・m(4.4lbs-in) Keyhole for wiring...
-
Page 12: Outside Dimensions
E 6 5 8 1 1 3 6 4. Outside dimensions Be careful not to leave out cable wiring space when installing the unit. Use M4 screws to install the unit. Control Power Option Unit (Unit: mm) dia. TOSHIBA CONTROL POWER OPTION 10.3 Dia. 700 length... -
Page 13: Specifications
1. A failure of the unit occurs after it is installed correctly and under normal use within one year from the date of delivery and the cause of the failure is apparently attributable to the Toshiba Schneider Inverter Corporation’s design and manufacturing processes.