Table of Contents
Advertisement
Quick Links
Advertisement
Chapters
Table of Contents

Related Manuals for Philips HR2355


Summary of Contents for Philips HR2355
- Page 1 HR2355 HR2356 User manual 使用手冊...
-
Page 3: Table Of Contents
Contents 1 Important Safety 2 Your noodle maker 3 Overview Noodle maker overview Control panel overview 4 Disassemble and cleaning before first use 5 Assemble 6 Use the noodle maker 7 Cleaning 8 Recipes Noodle making recipes Cooking recipes 9 Troubleshooting 10 Product information 11 Recycling 12 Guarantee and service... -
Page 4: Important
• If the power cord is damaged, you must switch. have it replaced by Philips, a service center authorized by Philips or similarly qualified persons to avoid a hazard. •... -
Page 5: Your Noodle Maker
Congratulations on your purchase, and welcome to Philips! To fully benefit from the support that Philips offers, register your product at www.Philips.com/welcome. Read this user manual carefully before you install and use the unit. Save it for future reference. -
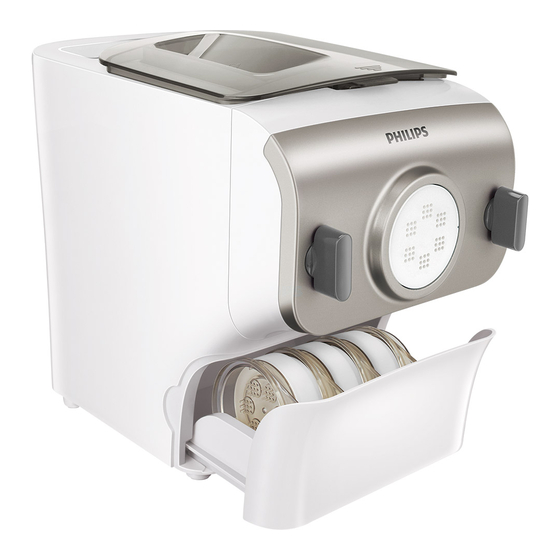
Page 6: Noodle Maker Overview
Noodle maker overview Control panel overview Control panel Safety switch hole of the mixing chamber lid Power cord Main unit Shaping discs storage Mixing chamber lid Mixing chamber Mixing paddle Power on/off button Disc holder Disc holder safety switch Programs button - select the extrusion-only program ( ) or Flat thin noodle automatic program ( ). -
Page 7: Disassemble And Cleaning Before First Use
4 Disassemble and cleaning before first Cautions • Before using the noodle maker, make sure all parts and accessories are completely dry. • Do not use water to rinse nor soak the main unit. • Do not use a scourer or similar cleaners as these will scratch the plastic surface and affect the lifetime of the noodle maker. -
Page 8: Assemble
5 Assemble 6 Use the noodle maker Follow the assembling steps below to install the noodle maker. Caution Cautions • • Make sure to tighten the front panel knob Never put in excessive ingredients in the during assembling. noodle maker. Otherwise, it will damage the appliance. - Page 9 Open the chamber lid, and pour Press the power on/off button ( ) to the flour into the chamber. If you start the noodle maker. want to make 3-4 servings (~500g), » Automatic indicator ( ) and the repeat step 1 as you will need 2 start/pause indicator ( ) will cups of flour.
- Page 10 Notes • After the noodle making is complete, if you notice there are some leftover doughs inside the chamber, you can press the program button ( ) to select the extrusion-only program. • The countdown timer of the extrusion-only program is 3 minutes. •...
-
Page 11: Cleaning
7 Cleaning Cautions • Disconnect the power and remove the power cord before cleaning or disassembling this appliance. • Do not immerse the main unit in water. • Do not use a scourer, caustic cleaners, or abrasive cleaners ( for examples, gasoline, alcohol, and propanol) to clean the appliance. -
Page 12: Recipes
8 Recipes For more recipes, you can visit Philips MyKitchen websites www.philips.com.tw/ mykitchen. Notes • To guarantee the quality of the noodle, use gluten flour to make noodle. Follow the recommended proportion to add the ingredients. • Seasonal changes and using ingredients from different regions may affect the flour/water ratio. You may adjust based on the recommended proportion. -
Page 13: Cooking Recipes
Recipes Flour (g) Ingredients Spinach juice (Use a juicer to freshly extract the juice, then use the water cup to measure it to 1 cup of flour (~250g) the water marking of . Total volume is around 95ml. Spinach noodle Spinach juice (Use a juicer to freshly extract the juice, then use the water cup to measure it to 2 cups of flour (~500g) - Page 14 Recipes Ingredients Cooking • 2 pounds boneless a In a 4- to 5-quart slow cooker, combine beef shank, cut into beef, water, broth, soy sauce, rice wine, 1-inch pieces tomato paste, ginger, spicy bean paste, • 5 cups water sugar, five spice powder and half of the •...
- Page 15 Recipes Ingredients Cooking • 1 lb. Chinese egg noodles, fresh or frozen • ¼ cup toasted sesame oil • 3½ tbsp. soy sauce • 2 tbsp. rice wine vinegar • 2 tbsp. sesame paste a Bring a large pot of water to a boil. Add •...
-
Page 16: Troubleshooting
9 Troubleshooting This chapter summarizes the most common problems you could encounter with the appliance. If you are unable to solve the problem with the information below, contact the Consumer Care Center in your country. Problem Cause Possible solution The power plug is Check whether the power plug is connected incorrectly. - Page 17 Problem Cause Possible solution The mixing paddle can The appliance be blocked by some stops during Disconnect from the power, clean the foreign objects. processing, then noodle maker, and follow the user the indicators are The dough can be too manual again to restart the noodle flashing quickly, dry.
-
Page 18: Product Information
343mm x 215mm x 300mm www.philips.com/support or contact the Capacity: 500g (for 1-4 servings) Philips Consumer Care Center in your country. For rated voltage and frequency information, refer to the typeplate on the product. Product information is subjected to change without prior notice. - Page 19 目錄 1 重要事項 安全 EMF 2 您的愛麵機 3 概覽 愛麵機概覽 控制面板概覽 4 第一次使用前的拆卸與清潔 5 組裝 6 使用愛麵機 7 清潔 8 食譜 麵條製作食譜 烹煮食譜 9 疑難排解 10 產品資訊 11 回收 12 保固與服務 ZH-TW...
-
Page 20: 重要事項
主機不可放入水中清洗。 • 請先確定您的雙手乾燥,再將插頭插入電源插 • 本產品使用過後,請將其放置於乾燥及通風良好 座。 處。 • 為了避免發生危險,本產品不可加裝定時開關。 • 為免造成短路或觸電,請勿將水或其他液體倒入 • 將插頭插入電源插座之前,請先確認已正確組裝 安全開關處。 本產品。 • 如果電源線、插頭或其他部分損壞,請勿使用本 產品。 • 如果電源線損壞,您必須將其交由 Philips、Philips 授權之服務中心,或是具備相同 資格的技師進行更換,以免發生危險。 • 請勿自行更換本產品零件。 • 如果負責安全的人員沒有在旁監督或給予使用本 本飛利浦產品符合所有電磁波暴露的相關 產品的相關指示,則身體官能或心智能力退化 者,或是經驗與知識缺乏者 (包括孩童在內) 將不 適用標準和法規。 適合使用本產品。 • 為安全起見,請勿讓孩童把玩本產品。 請勿讓孩 童接觸產品與電源線。 • 為避免意外發生,如果本產品出現任何損壞,請 勿繼續使用。 • 請勿將任何物體插入裝置。 •... -
Page 21: 您的愛麵機
2 您的愛麵機 3 概覽 感謝您購買本產品。歡迎來到飛利浦的世 界! 請至 www.Philips.com/welcome 登錄您 的產品,以獲得 Philips 提供的完整支援。 在您安裝和使用本裝置前,請先詳讀本使 用手冊。敬請妥善保管本手冊,以供日後 參考。 ZH-TW... -
Page 22: 愛麵機概覽
愛麵機概覽 控制面板概覽 控制面板 攪拌室上蓋安全開關孔 電源線 主裝置 麵條模頭收納處 攪拌室上蓋 攪拌室 攪拌棒 模頭固定座 電源開/關按鈕 模頭固定座安全開關 程式設定按鈕 - 選擇追加擠麵程式 窄扁麵 ( ) 或自動製麵程式 ( )。 寬扁麵 麵條模頭 控制面板顯示 粗圓麵 份量按鈕 - 選擇 (約 250 公克) 細圓麵 (約 500 公克) 或 前面板旋鈕 麵粉杯 開始/暫停按鈕 水杯 量麵粉時用於刮去 多餘的麵粉。 模頭清理 用於切割麵條。 工具 用尖頭端清除麵條 模頭洞口的麵團殘... -
Page 23: 第一次使用前的拆卸與清潔
4 第一次使用前 的拆卸與清潔 注意 • 使用愛麵機前,請確認所有零件與配件完全乾 燥。 • 請勿以水沖洗或浸泡主裝置。 • 請勿使用鋼絲絨或類似清潔用品清理本產品,以 免造成塑膠表面刮傷,影響愛麵機的壽命。 備註 • 取出所有零件與配件。 • 第一次使用前,請清理零件與配件 (請參閱「清 潔」一節)。 ZH-TW... -
Page 24: 使用愛麵機
5 組裝 6 使用愛麵機 請依照下列組裝步驟安裝愛麵機。 注意 注意 • 請勿在愛麵機內裝入過多食材。否則,本產品可 能會損壞。 • 組裝時請確實將前面板旋鈕轉緊。 • 請勿將 60°C 以上的食材放入愛麵機,或將本產 品置於高溫消毒等高溫環境中 (60°C)。這會造 成本產品變形。 • 請確實遵守操作指示。首先將麵粉放入攪拌室, 然後蓋妥攪拌室上蓋。啟動愛麵機,沿著上蓋的 開口緩緩將水倒入。 • 攪拌室上蓋未蓋妥前請勿加水。請勿將任何液體 倒入安全開關孔。 備註 • 若攪拌室上蓋於調理過程中打開或鬆開,愛麵機 會自動停止調理。 • 請使用隨附的麵粉杯與水杯以準確量取麵粉與水 的比例。這對麵條口感非常重要。 • 調理完成後,攪拌室內會有少許麵團殘渣,這是 正常現象。 量取一整杯的麵粉。使用隨附的清理工 具將多餘的麵粉由杯緣刮除。一整杯相 當於 1-2 人份 (約 250 公克)。 注意 • 請勿以搖晃或敲打麵粉杯的方式去除多餘麵粉。 這會影響麵粉的重量。... - Page 25 依據「麵粉與水比例表」測量所需水 量。 (圖 4-5) 注意 • 預設設定為自動製麵程式。若您需要另行設定, 請按下程式設定按鈕 ( ) 重新選擇。 按下份量按鈕 ( ),依據麵粉量為不 同份量選擇 或 。(圖 10) 按下開始/暫停按鈕 ( ) 開始調理。 (圖 11) 備註 調理時間會開始倒數。 • 隨附的水杯上有 2 組水位標記。一組用於製作一 調理過程中,將隨附水杯測量的水 般的麵條,另一組則是用於製作雞蛋麵條及其他 口味的麵條。 或其他食材沿著上蓋的開口緩緩倒 入。( 圖 12) 連接電源。愛麵機會發出一聲聲響 (圖 6),所有的指示燈均會閃爍一次。按下 電源開/關按鈕 ( ) 啟動愛麵機。 自動製麵指示燈 ( ) 和開始/暫停指 示燈 ( ) 會亮起。...
- Page 26 麵粉與水比例表 注意 • 麵團攪拌過程中,請勿在倒入水後加入其他食 一般麵條 雞蛋麵條 材。 否則,這將會影響麵條口感。 調理時 • 若您在麵條擠出時發現程式並非設定為「自動製 雞蛋與水 麵粉 水 ( 標 間 麵」,請按下開始/暫停按鈕 ( ) 停止程式。 然 混合 ( 標 記 ) 後,按下電源開/關按鈕 ( ) 將電源關閉。清理 記 ) 麵條模頭後,按下電源開/關按鈕 ( ) 即可重新 開始製作麵條。 麵條會在幾分鐘後開始擠出。在出麵口 10 分鐘 正下方放置容器。使用隨附的模頭清理 1 杯 一杯麵粉 一杯麵粉 工具將麵條切成所需的長度。(圖 13) ( 約 250 所需蛋液 所需水量 公克 ) ( 約 85 量 ( 約 95 毫升...
- Page 27 7 清潔 注意 • 清潔或拆卸本產品之前,請先切斷電源並拔除電 源線。 • 請勿將主裝置浸泡在水中。 • 請勿使用鋼絲絨、腐蝕性的清潔劑或磨蝕性的清 潔液 (例如汽油、酒精或丙醇) 清潔本產品。 秘訣 • 麵糰殘渣乾燥後較好清理。 ) 將愛麵機關 按下電源開/關按鈕 ( 閉。 拔除電源。將前面板旋鈕轉鬆。 將前面板、麵條模頭、麵條模頭固定 座、攪拌棒等零件依序拆下。(圖 1-4) 使用隨附的清理工具將麵條模頭上的麵 團殘渣清除。之後,您可以用水加以清 洗。(圖 5-6) • 將麵條模頭置於一旁,風乾約 20 分鐘。 稍後會較好清理。 秘訣 清理所有零件。(圖 7) 使用乾布擦拭主 • 裝置、控制面板與愛麵機外部。 清理產品後,務必確認所有零件與麵條模頭收納 處已完全乾燥。重新組裝愛麵機,以備下次使 用。 ZH-TW...
-
Page 28: 麵條製作食譜
8 食譜 如果需要更多食譜,您可以造訪 Philips MyKitchen 網站:www.philips.com.tw/ mykitchen。 備註 • 為確保麵條品質,請使用高筋麵粉製作麵條。依照建議比例添加食材。 • 季節變化與食材產地均可能影響麵粉與水比例。您可以建議比例為基礎進行調整。 • 製作雞蛋麵條或蔬菜麵條時,務必將蛋液或蔬菜汁均勻打散再倒入攪拌室。 麵條製作食譜 首先將麵粉倒入攪拌室,接著選擇對應的份量,愛麵機就會啟動。沿著攪拌室上蓋的開口緩 緩將水或其他混拌好的食材倒入。在出麵口正下方放置容器。使用隨附的清理工具將麵條切 成所需的長度。本產品會發出聲響,表示麵條製作完成。製作好的麵條經過滾水烹煮後即可 食用。 秘訣 • 麵條烹煮時間因個人偏好、麵條類型與烹煮份量而有所不同。 食譜 麵粉 (公克) 成份 1 杯麵粉 (約 250 公克) 85 毫升水 (使用水杯量取 的水)。 原味麵條 2 杯麵粉 (約 500 公克) 170 毫升水 (使用水杯量取 的水)。 一顆中等大小雞蛋 (約 45 公克),在水杯中將蛋打 1 杯麵粉 (約 250 公克) 散,然後加水至 水位標記處。總量約為 95 毫 升。 雞蛋麵條 2 顆中等大小雞蛋 (約 90 公克),在水杯中將蛋打 2 杯麵粉 (約 500 公克) 散,然後加水至 水位標記處。總量約為 190 毫 升。... -
Page 29: 烹煮食譜
食譜 麵粉 (公克) 成份 胡蘿蔔汁 (使用果菜榨汁機榨出新鮮原汁,然後使用 1 杯麵粉 (約 250 公克) 水杯量至 水位標記處)。總量約為 95 毫升。 胡蘿蔔 麵條 胡蘿蔔汁 (使用果菜榨汁機榨出新鮮原汁,然後使用 2 杯麵粉 (約 500 公克) 水杯量至 水位標記處)。總量約為 190 毫升。 烹煮食譜 食譜 成份 烹煮 a 準備鍋子,煮水。加入麵條,熬煮半分鐘。 • 1 包新鮮麵條 b 將麵條撈起,瀝乾後置於一旁。 • 1 磅豬嫩腰肉(切 碎或磨碎) c 準備平底鍋,熱油,將紅洋蔥和大蒜加入。翻炒至 • 6 個丁香大蒜(切碎) 大蒜變成褐色。 • 1 個中等大小的紅 台灣擔 d 加入豬肉,翻炒至肉幾乎煮熟。 洋蔥(切成薄片) 仔麵 • 500 毫升雞高湯 e 加入雞湯煮至沸騰。... - Page 30 食譜 成份 烹煮 • 1 磅中式新鮮或冷 藏的雞蛋麵條 • 1/4 杯烤過的芝 麻油 • 3 湯匙醬油 • 2 湯匙黃酒醋 • 2 湯匙芝麻糊 a 將 一大壺水煮至沸騰。加入麵條,將其烹煮成柔 • 2 湯匙花生醬 軟麵條,約5分鐘;將麵條撈出,以冷水沖洗後瀝 • 1 湯匙糖 乾。重複此步驟兩次。接著將麵條撈到碗中,加入 • 2 湯匙蒜泥 3湯匙的芝麻油,攪拌使麵條均勻地沾有芝麻油, • 21/2 湯匙烘烤過的 台灣涼 置於一旁。 芝麻 拌芝麻 • 2 個丁香大蒜, b 在 另一個碗裡,攪拌剩餘的麻油、醬油、醋、芝麻 麵...
-
Page 31: 疑難排解
9 疑難排解 本單元概述您使用本產品時可能遇到的最常見問題。如果您無法利用以下資訊解決您遇到的 問題,請聯絡您所在國家/地區的客戶服務中心。 問題 原因 可能的解決方法 電源插頭未正確連接。 檢查電源插頭是否已正確連接。 指示燈未亮起。 未按下電源按鈕。 按下電源開/關按鈕 。 ( ) 攪拌室未正確組裝 請確認所有零件已按使用手冊正確組 按下電源開/關 麵條模頭或前面板未正確組 裝。 按鈕 後,發 裝。 出產品聲響但無 按下開始/暫停按鈕 前,請確認已 ( ) 法運作。 未選擇所需的份量。 選擇份量。 調理過程中產品 前面板旋鈕鬆脫。 請確認前面板已穩固組裝。 突然停止運轉, 隨即又重新啟 動。麵條模頭固 請依照「麵粉與水比例表」量取所需的 定座的安全開關 麵粉與水比例不正確。 麵粉與水份量。... - Page 32 問題 原因 可能的解決方法 有少量的水從產 倒水的方式錯誤。 請依照使用手冊的指示製作麵條。 品溢出。 攪拌棒空轉,擠 拔除電源、清理愛麵機後,依照使用手 麵粉與水比例不正確。 不出麵條。 冊的指示重新開始製作麵條。 ZH-TW...
-
Page 33: 產品資訊
10 產品資訊 11 回收 本產品使用壽命結束時,請勿與一般家庭 馬達功率:200W 尺寸 (長 x 寬 x 高): 廢棄物一併丟棄。請將該產品送至政府指 定的回收點或進行回收。 此舉能為環保盡 343 公釐 x 215 公釐 x 300 公釐 一份心力。 容量:500 公克 (適合 1-4 人份) 請遵循您所在國家/地區對電氣與電子產品 分類收集的規定。 正確處理廢棄產品有助 如需額定電壓與頻率資訊,請參閱本產品 於避免對環境和人類健康帶來負面影響。 的型號牌。產品資訊如有變更,恕不另行 通知。 12 保固與服務 如果您有任何問題、需要維修或資訊,請 參閱 www.philips.com/support 或聯絡您 當地的 Philips 客戶服務中心。 ZH-TW... - Page 36 Specifications are subject to change without notice © 2018 Koninklijke Philips N.V. 4241 210 14823 B All rights reserved.