Hitachi UX2 Instruction Manual
Hide thumbs
Also See for UX2:
- Technical manual (184 pages) ,
- Basic operation manual (70 pages) ,
- User manual (69 pages)

Related Manuals for Hitachi UX2


Summary of Contents for Hitachi UX2
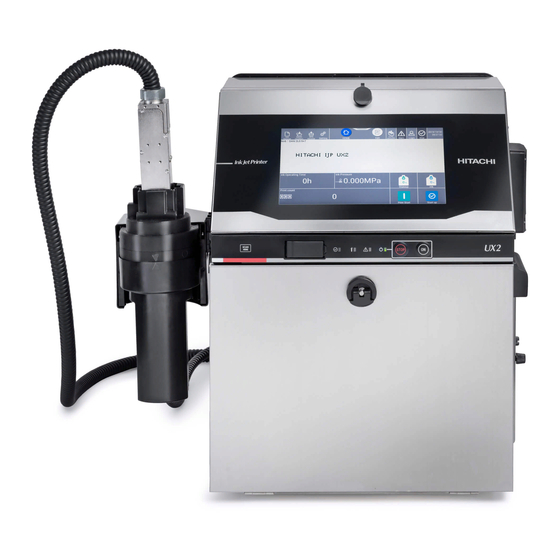
- Page 1 HITACHI Printer Model UX2 Instruction Manual ● Before using the printer, thoroughly read this instruction manual for optimum printer use. ● After reading the manual, properly keep it for future reference.
- Page 2 January 2022 (rev. A) ● No part of this manual may be copied or reproduced without permission. ● The contents of this manual are subject to change without notice for improvement. All Right Reserved, Copyright © 2021, Hitachi Industrial Equipment Systems Co.,Ltd.
-
Page 3: Important Notes
Should any failure occur, Hitachi will send a technician as soon as possible to try to minimize the downtime. - It is recommended that you check the printing state periodically in a process even during production. - Page 4 However, the security level required in control systems varies depending on the system. In addition, potential security risks are not consistent but change on a daily basis. Not only in Hitachi products but also in system components, the security protection support functions are just one means to ensure the security level required for the system but do not completely prevent increased security risks.
- Page 5 THIS SOFTWARE, EVEN IF ADVISED OF THE POSSIBILITY OF SUCH DAMAGE. ■ Intellectual property Hitachi owns the rights of intellectual property for all the contents of this instruction manual. No part of the manual shall be disclosed to third parties without prior written consent of Hitachi.
-
Page 7: Safety Precautions
Safety Precautions ● You should observe the precautions set forth below in order to use the product properly and avoid endangering you or other persons or damaging property. For the purpose of clarifying the severity of injury or damage and likelihood of occurrence, the precautions are classified into three categories, WARNING, CAUTION, and NOTE, all of which describe hazardous situations that may arise if you ignore the precautions and perform an incorrect handling or operating procedure. - Page 8 Safety Precautions (Continued) Installation environment (continued) WARNING ● Install the product in an adequately ventilated location. ● Do not install the product in an enclosed space. ● Connect the product to exhaust equipment to prevent it from being filled with organic solvent vapor.
- Page 9 Safety Precautions (Continued) Grounding WARNING ● Ensure that all electrical wiring, connections, and grounding comply with applicable cords. Properly connect the product to its dedicated ground. Complete the above procedure to avoid electrical shock hazards. ● When welding, keep enough space between the product and the welding work area to prevent the arc from starting a fire.
- Page 10 Safety Precautions (Continued) Ink and makeup handling WARNING ● If you need to clean the casing of the product with wiping paper soaked with makeup, be sure to do so when the power is off. Attempting to clean it with the power on will cause makeup or vapors of makeup to enter the product, possibly catching on or causing a fire.
- Page 11 Do not perform this operation in any other situation than emergency. NOTE ● Only people who have completed an operator training course for Hitachi can operate and service the product. - If the printer is operated or serviced incorrectly, it may malfunction or break down.
- Page 12 Safety Precautions (Continued) Related Regulations WARNING ● Never drain the ink or makeup waste solution into a public sewer system. Waste disposal must comply with all appropriate regulations. Consult the appropriate regulatory agency for further information. ● The printer must be managed in compliance with all appropriate regulations. Read and understand the appropriate Safety Data Sheet (SDS) before using any ink or makeup.
- Page 13 Safety Precautions (Continued) Related Regulations (continued) WARNING < Keep all fire away.> ⚫ Ink and Makeup are flammable. ⚫ All fire must be kept away from the machine. ⚫ Spilled Ink and Makeup must be wiped off and dried up immediately. <Caution when handling Ink/Makeup>...
-
Page 15: Preface
After reading the instruction manual, properly keep it for future reference. < Scope of application> This instruction manual is prepared for all the models of "HITACHI IJ Printer Model UX2 for Dye Ink", which are listed in the table below. - Page 16 Read these manuals as needed. Basic Operation Manual The basic operation manual is prepared for all the models of "HITACHI IJ Printer Model UX2 for Dye Ink", which describes basic operations, ink and makeup replenishment, and emergency operations. It is suitable for those who use it for regular work or those who want to instantly know individual operation methods.
- Page 18 <Contents of the instruction manual> This instruction manual consists of the following chapters. Chapter 1. Overview This chapter describes the purposes and functions of the Hitachi IJ Printer and the usage precautions. Chapter 2. Specifications This chapter describes the specifications of the Hitachi IJ Printer.
- Page 19 This chapter describes the basic operations of the safe clean station. Chapter 12. When Fault or Warning Occurs This chapter describes what is displayed when a warning or fault occurs in the Hitachi IJ Printer and how to check the occurrence status and handle the warning or fault.
-
Page 20: Table Of Contents
Contents Important Notes ..................I Safety Precautions ................1 Preface ....................i 1. Overview ..................1-1 1.1. Purpose and Function Description ..................1-2 1.2. Usage Precautions ......................1-2 1.2.1. Ink and Makeup........................1-2 1.2.2. IJ Printer Long-term Shutdown ..................1-4 1.2.3. - Page 21 4.2.1. Procedure for Starting Operation ..................4-11 4.2.2. When Error Occurs at Start of Operation ................. 4-17 4.2.3. Ready and Standby State Switching Operation ............... 4-20 4.2.4. Specifying Login User ...................... 4-22 4.3. Shutdown Operation......................4-24 4.3.1. Automatically Stopping by Pressing STOP Switch Button ..........4-24 4.3.2.
- Page 22 7. Auxiliary Functions ................ 7-1 7.1. Managing Messages ......................7-3 7.1.1. Changing Message Name ....................7-6 7.1.2. Deleting Saved Message ....................7-7 7.1.3. Changing Message Number ....................7-8 7.1.4. Changing Group to Which Message Belongs ..............7-10 7.1.5. Checking Print Image of Saved Messages ..............7-11 7.2.
- Page 23 10.1. Checking Unit Information ....................10-3 10.2. Checking Operational Status ..................10-4 10.3. Printing with No Sensor Signal (Start Printing) .............. 10-6 10.4. Checking Registered Software ..................10-7 10.5. Checking Accessible Functions ..................10-8 11. Safe Clean Station (Optional parts) .......... 11-1 11.1.
-
Page 25: Overview
Chapter 1. Overview 1.1. Purpose and Function Description 1.2. Usage Precautions... -
Page 26: Ink And Makeup
Chapter 1. Overview This chapter describes the purposes and functions of this unit and the usage precautions. 1.1. Purpose and Function Description This unit adopts a non-contact, ink-jet printing method. It can be used to print various types of outer shapes and materials, such as rough surfaces, uneven surfaces, soft objects, and fragile objects. - Page 27 Chapter 1. Overview (3) When using the cartridge bottle makeup as a cleaning solution (a) Open the makeup cartridge bottle by turning its cap. At this time, do not remove the over cap. Over cap Makeup cartridge bottle (b) Use the makeup by transferring it to the cleaning bottle. Cleaning bottle [Note]...
-
Page 28: Ij Printer Long-Term Shutdown
Chapter 1. Overview 1.2.2. IJ Printer Long-term Shutdown When this unit is shut down for a long time due to production or other circumstances, the ink may accrete inside the unit after shutdown and cause such problems as inability to be ejected or to be recovered. If this occurs, one of the following actions (1) and (2) must be taken. -
Page 29: Print Head Cleaning
Chapter 1. Overview 1.2.3. Print Head Cleaning Take the following precautions when cleaning ink from around the nozzle. (1) Face the end of the print head downward and pour makeup onto the dirty part and clean while catching the makeup in a beaker. Do not pour the makeup over this section. -
Page 30: Shutdown (No-Cleaning Stop)
Chapter 1. Overview 1.2.4. Shutdown (No-cleaning Stop) OK at the bottom right of the [HOME] screen, the unit stops after completing When you press Shutdown its automatic nozzle cleaning sequence. If you repeatedly press Shutdown to stop the operation, excessive makeup will enter the unit, resulting in thinner ink or an exceeded solution level of the ink main tank. - Page 31 Chapter 1. Overview Press No-cleaning stop in the [Shutdown Process Confirmation] message. Press No-cleaning stop. [Shutdown Process Confirmation] screen...
-
Page 32: Cautions On Operating Time When Unit Is In Service
Chapter 1. Overview 1.2.5. Cautions on Operating Time When Unit Is in Service (1) Cautions when the unit is repeatedly stopped immediately after the start of operation If you repeatedly stop the unit immediately after the start of operation, automatic nozzle cleaning at shutdown will cause the ink in the unit to gradually become thinner. -
Page 33: Heating Of Ink
Chapter 1. Overview 1.2.6. Heating of Ink (1) If the ambient temperature is 20 °C or lower, the ink is heated by a heating unit in the print head. The startup processing time is longer than when the unit is not operating. When not operating: Approximately 1.5 minutes When operating: Up to approximately 10 minutes (The startup processing time changes... -
Page 34: Ink Concentration Control
Chapter 1. Overview 1.2.7. Ink Concentration Control (1) In this unit, the ink is automatically controlled to maintain optimum concentration for printing. (2) If an error occurs in the viscometer used to control ink concentration, note the following. (a) There are the following three types of viscometer errors: - [Inside Temperature Sensor Fault] - [Viscosity Reading Instable] - [Viscosity Reading Out of Range]... -
Page 35: Gutter Cleaning
Chapter 1. Overview 1.2.8. Gutter Cleaning This unit collects ink from the gutter. At the same time, it sucks in atmospheric gas, dust, and other matter from the air. If these substances are mixed with the ink in the gutter, undissolved components in the ink or makeup may stick to the gutter. -
Page 36: Protection Sheet
Chapter 1. Overview 1.2.9. Protection Sheet A protection sheet is provided to protect the screen display of this unit. This is used to prevent the screen display from becoming dirty, scratched, etc. (1) Installing the protection sheet (a) Clean dirt, debris, ink, etc. from the panel surface. Use wiping paper, etc. -
Page 37: Specifications
Chapter 2. Specifications... - Page 38 Chapter 2. Specifications The table below shows the specifications of the unit. Unit specifications Item UX2-D160W Nozzle size 65μm Maximum print line number Up to 6 lines 1 line 240 characters x 1 line (Upgrade option: 1,000 characters x 1 line)
- Page 39 Chapter 2. Specifications Unit specifications (Continued) Standard characters Alphanumeric (A-Z, a-z, 0-9) symbols (27) space: Total 90 User pattern Fixed size: 200 patterns (each font) / Free size: 50 patterns code39, ITF, NW-7, JAN-13, JAN-8, code128 (EAN128), UPC-A, Print characters UPC-E, DM code (Alphabetical characters only: 49, Numbers only: Barcode 98), QR code (Alphabetical characters only: 20, Numbers only: 34),...
- Page 40 Chapter 2. Specifications *1: A USB to RS-232C conversion cable is required. *2: The operating temperature limit differs depending on the ink types. See the handling guidance of each ink for details.
- Page 42 This page is blank.
- Page 43 Chapter 3. Component Names and Functions 3.1. External Views 3.2. Unit Internal Parts Arrangement 3.3. Print Head 3.4. Safe-Clean Station (Optional parts) 3.5. Screen Display...
-
Page 44: Component Names And Functions
Chapter 3. Component Names and Functions This chapter describes the names and functions of components of this unit. 3.1. External Views (1) External views (front side) The external views of the unit are as follows. Operating status indicator Operation screen lamps Used to operate this unit. - Page 45 Chapter 3. Component Names and Functions Safe-Clean Station (Optional parts) Cleaning Station Unit external view (front side)
- Page 46 Chapter 3. Component Names and Functions (2) External views (rear side) Signal connection ports Filter cover Air-purge connection port Exhaust duct connection port [Precautions for use] Stainless steel of the main body is not easily rusted, but it may be affected by the environment or cause rust if the unit is left for a long time.
- Page 47 Chapter 3. Component Names and Functions Safe-Clean Station (Optional parts) Cable of Cleaning Station Unit external view (rear side)
-
Page 48: Unit Internal Parts Arrangement
Chapter 3. Component Names and Functions 3.2. Unit Internal Parts Arrangement The internal structure of the unit is as follows. Inner cover Makeup cartridge bottle (*1) Ink cartridge bottle (*1) Makeup reservoir Ink reservoir Lever handle Lever handle Pressure adjusting screw *1: The ink cartridge bottle and the makeup cartridge bottle are optional parts. -
Page 49: Print Head
Chapter 3. Component Names and Functions 3.3. Print Head The internal structure of the print head is as follows. UX2-D160W (Standard model) for Safe-Clean Station (Optional parts) The ends of the print head Head cover lock screw cover and the gutter are... -
Page 50: Safe-Clean Station (Optional Parts)
Chapter 3. Component Names and Functions 3.4. Safe-Clean Station (Optional parts) The structure of the Cleaning station is as follows. Left perspective view Right perspective view Head cover rest Print head inlet Slide block Place the print head An inlet for inserting the Used to mount the cover temporarily. -
Page 51: Screen Display
Chapter 3. Component Names and Functions 3.5. Screen Display NOTE A touch screen is employed for data entry to operation screen. To manipulate the touch screen, use only fingers. If the touch panel is operated with a metal or sharp object such as a ballpoint pen, it may malfunction or break down. - Page 52 Chapter 3. Component Names and Functions (2) Message For details on messages, see "Chapter 12. When Warning or Fault Occurs". Message name Message type Message No. Animation display Detail, cause, and solution Button Close [Main Ink Tank Too Full] warning screen 3-10...
- Page 54 This page is blank.
-
Page 55: Basic Operation
Chapter 4. Basic Operation 4.1. Basic Operation Flow 4.2. Start Operation 4.3. Shutdown Operation... -
Page 56: Operating Scheme
Chapter 4. Basic Operation This chapter describes the basic operation flow of the unit and procedures to start and stop operation. 4.1. Basic Operation Flow This section describes the basic operations of the unit. 4.1.1. Operating Scheme Power Power HOME Edit (print description) Select message... -
Page 57: Status
Chapter 4. Basic Operation 4.1.2. Status The following table describes status types of the unit. Status types Status Description Stop The ink is stopped. No deflection voltage is applied. Standby The ink is ejected. No deflection voltage is applied. The ink is ejected. The deflection voltage is applied (printing is permitted by Ready the sensor signal). - Page 58 Chapter 4. Basic Operation (2) If there is an alarm that has not been reset, the display color of Warn. is changed. When you press Warn., the warning list appears. Press Warn.. Press Ink Low Warning. Warning list Ink low warning [Ink Low Warning] screen...
-
Page 59: Operation Of Screen Transition
Chapter 4. Basic Operation 4.1.3. Operation of Screen Transition This section describes operation of screen transition. (1) Overview ● Pressing menu buttons shown in the table below will take you to their corresponding screens. Menu button list Item Description Reference ●... - Page 60 Chapter 4. Basic Operation Press Edit. The print description edit screen is now displayed. Print description edit screen...
-
Page 61: Basic Operation To Change Settings
Chapter 4. Basic Operation 4.1.4. Basic Operation to Change Settings This section describes how to change the setting values of the unit. (1) Overview ● There are two types of setting items as shown in the table below. Setting item list Classification How to check setting values How to change setting values... - Page 62 Chapter 4. Basic Operation (a) Inputting values for the setting item (e.g. Character height) Open the numeric key window by pressing the value and input a new value. Closes the numerical key window and reverts the value to the original. Sets the maximum value.
-
Page 63: Operation To Exit From Setting Screen
Chapter 4. Basic Operation 4.1.5. Operation to Exit from Setting Screen This section describes operation to exit from setting screen. (1) Overview ● There are two types of setting screens as shown in the table below. Classification Description ● When OK pressed, new settings are confirmed, and the display returns to the previous screen. - Page 64 Chapter 4. Basic Operation (b) Screen with Back [Example of the [Save message] screen] Back HOME Save Example of [Save message] screen 4-10...
-
Page 65: Start Operation
Chapter 4. Basic Operation 4.2. Start Operation This section describes how to start the unit. Required operations are explained in detail, including the procedure for starting the unit. 4.2.1. Procedure for Starting Operation CAUTION ● Ink and makeup may contain organic solvents. When handling ink or makeup, wear protective gloves and goggles so that it does not come in direct contact with your skin. - Page 66 Chapter 4. Basic Operation Turn ON the power by pressing the main power switch. If the unit was stopped last time only by the STOP switch without using the main power switch, the main power switch does not have to be pressed. Operating status indicator lamps Displays "Ready",...
- Page 67 Chapter 4. Basic Operation If the [Select login user] screen appears when the power is turned on Turn on the power. The [Select login user] screen appears. Select any user. The saved user names are displayed. An icon showing a binder An icon showing no binder represents a user with represents a general user.
- Page 68 Chapter 4. Basic Operation Place a piece of wiping paper, etc., against the ink ejection port at the end of the print head to be ready for ink ejection. (* Immediately after ink ejection, a little amount of ink may spurt out and soil the surroundings.) Print head Wiping paper, etc.
- Page 69 Chapter 4. Basic Operation Note: If ink continuously splashes and soils the wiping paper even when not printing, there may be some fault in the print head, such as the ink stream not entering the gutter or the ink not being recovered from the gutter.
- Page 70 Chapter 4. Basic Operation Wait until the status changes from [Starting] to [Ready]. ● When this unit is used at a low temperature (approximately 25 ℃ or lower), it may take longer than usual for the printer to enter the [Ready] state. ●...
-
Page 71: When Error Occurs At Start Of Operation
Chapter 4. Basic Operation 4.2.2. When Error Occurs at Start of Operation When an error occurs at the start of operation, use the following procedure. Make sure that the unit is in the [Stop] state. Loosen the head cover lock screw and remove the print head cover. Head cover lock screw Loosen to remove the print head cover. - Page 72 Chapter 4. Basic Operation Remove the print head cover and put the end of the print head in the beaker to be ready for ink ejection. Press Startup at the bottom right of the [HOME] screen. Press Startup. Press Eject ink. ●Cannot eject ink when the print head is inserted into the Print head inlet of the Cleaning station.
- Page 73 Chapter 4. Basic Operation Make sure that the ink stream is at the center of the gutter. WARNING ● Wear protective gear (goggles and mask) when checking the position of the ink stream. ● If any ink or makeup enters your eyes or mouth, immediately flush with warm or cold water and consult a physician.
-
Page 74: Ready And Standby State Switching Operation
Chapter 4. Basic Operation 4.2.3. Ready and Standby State Switching Operation This section describes operation of switching between ready state and standby state. (1) [Ready] state → [Standby] state switching ● When the conveyor interlock is activated by the [Ready] output signal, if the status is changed to [Standby], the conveyor will stop. - Page 75 Chapter 4. Basic Operation (2) [Standby] state → [Ready] state switching Press Standby at the top of the screen, and the [Print Confirmation] message appears. Then, press OK. Press Standby. Press OK. [Print Confirmation] screen 4-21...
-
Page 76: Specifying Login User
Chapter 4. Basic Operation 4.2.4. Specifying Login User This section describes the procedure to specify a user to be logged in. (1) Functions ● Specify the user to be logged in at power-on. ● Select the user and input the password when logging in. ●... - Page 77 Chapter 4. Basic Operation Press the user name user. The password input window appears. Input the password for the user name "user". User password input screen Input the password for the user name [user] and press Enter. The initial screen appears. 4-23...
-
Page 78: Shutdown Operation
Chapter 4. Basic Operation 4.3. Shutdown Operation This section describes the shutdown operation of the unit. 4.3.1. Automatically Stopping by Pressing STOP Switch Button Press and hold the STOP switch for about two seconds. All operations up to the unit power OFF are performed automatically. Operating status indicator lamps Main power switch... -
Page 79: Stopping Ink Ejection By Pressing Screen Button
Chapter 4. Basic Operation 4.3.2. Stopping Ink Ejection by Pressing Screen Button ● Use the following procedure to stop ink ejection. Procedure to stop ink ejection Press Shutdown at the bottom right of the [HOME] screen. Press Shutdown. Turns OFF the power automatically after ink jet is stopped, like the STOP switch. Stops ink ejection without cleaning the circulation route. -
Page 80: Turning Off Main Power Switch
Chapter 4. Basic Operation 4.3.3. Turning Off Main Power Switch When turning off the main power switch, note the following. ● Normally, press the STOP switch instead of the main power switch to turn off the power at the end of operation. -
Page 81: Careful Cleaning Stop Function
Chapter 4. Basic Operation 4.3.4. Careful Cleaning Stop Function This section describes the careful cleaning stop function. (1) Overview ● This is a function to clean the printer carefully when the unit is frequently used in a high-temperature environment, or before the weekend, such as a 2-3 day shutdown period. This careful cleaning uses a larger amount of makeup than normal cleaning. -
Page 83: Creation And Setting Of Print Messages
Chapter 5. Creation and Setting of Print Messages 5.1. [HOME] Screen (Initial Screen) 5.2. Editing Messages to be Printed (Message Edit Screen) 5.3. Calling and Printing Saved Messages 5.4. Saving Created Messages 5.5. Setting Print Format (Fixed Layout) 5.6. Setting Print Specifications... - Page 84 Chapter 5. Creation and Setting of Print Messages This chapter describes how to create and edit messages to be printed and set the print format. 5.1. [HOME] Screen (Initial Screen) This section describes the [HOME] screen (initial screen). (1) Overview ●...
- Page 85 Chapter 5 Creation and Setting of Print Messages (2) Current message and saved message ● There are two types of messages: Current messages and saved messages. Message types Type Feature ● The message currently being printed is called a "current message". ●...
- Page 86 Chapter 5. Creation and Setting of Print Messages 5.2. Editing Messages to be Printed (Message Edit Screen) This section describes operation of editing current message. (1) Overview ● Edit the current message (message currently being printed). ● [Style] displayed in the detail view mode of the message name list display on the [Select message] screen shows the type of print format.
- Page 87 Chapter 5 Creation and Setting of Print Messages (2) Operation The [HOME] screen appears. Press the [Edit] button on the [HOME] screen. [HOME] screen (position of message edit button) The message edit screen appears. ふ Message edit screen (editing current message)
- Page 88 Chapter 5. Creation and Setting of Print Messages 5.3. Calling and Printing Saved Messages This section describes operation of calling and printing saved messages. (1) Overview ● Calls and prints saved messages. ● The message currently being printed is called a "current message". ●...
- Page 89 Chapter 5 Creation and Setting of Print Messages (2) Operation Press Select message from the menu. The [Select message] screen appears. Current message name Prev., Next Sort Group No. [Select message] screen Press display and Display switching and then displays the following screen. Appeared the window after pressing display Sort Thumbnail list screen...
- Page 90 Chapter 5. Creation and Setting of Print Messages Change the display contents using [Group], sort, [Prev.], [Next], or [Display All] so that the desired message name is displayed. Select the message name. ● The [Select Message Confirmation] message appears. ● The print image can be checked in the preview. [Select Message Confirmation] message screen Press on the [Select Message Confirmation] message screen.
- Page 91 Chapter 5 Creation and Setting of Print Messages 5.4. Saving Created Messages This section describes operation of saving created messages. (1) Overview ● Saves created messages. ● A saved number is automatically assigned. ● The same message name cannot be assigned. ●...
- Page 92 Chapter 5. Creation and Setting of Print Messages (2) Operation Press Save message on the [HOME] screen. The [Save message] screen appears. [Save message] screen Select the message name. The keyboard appears. For details on the keyboard, see "6.1.1. Printing Fixed Characters". Select the message name.
- Page 93 Chapter 5 Creation and Setting of Print Messages Input the message name and press Enter. Input the message name. Screen for inputting message name Press the save button. The message is saved to the specified number. [Save message] screen 5-11...
-
Page 94: Selecting Print Items To Be Edited
Chapter 5. Creation and Setting of Print Messages 5.5. Setting Print Format (Fixed Layout) This section describes settings of print format (fixed layout). 5.5.1. Selecting Print Items to be Edited There are two methods of selecting the print item to be edited. ●... -
Page 95: Setting Number Of Print Lines
– The number of lines that can be set is "1 to 6". Maximum number of lines by model type Model type Maximum line count UX2-D ● Press and Screen for setting number of print lines appears The colored print item is the editing target. -
Page 96: Deleting, Inserting And Adding Print Items
Chapter 5. Creation and Setting of Print Messages 5.5.3. Deleting, Inserting and Adding Print Items This section describes deletion, insertion, and addition of print items. ● Functions – Deletes, inserts, and adds print items for each column. Methods of deleting, inserting and adding print items Type Operation description Delete col. - Page 97 Chapter 5 Creation and Setting of Print Messages Delete col. Insert col. Add col. Modifying columns 5-15...
-
Page 98: Setting Dot Matrix, Inter-Character Space, And Other Parameters
Chapter 5. Creation and Setting of Print Messages 5.5.4. Setting Dot Matrix, Inter-character Space, and Other Parameters This section describes settings of dot matrix, inter-character space, etc. ● Functions – Sets the line spacing, dot matrix, inter-character space, bold font, and barcode. (4) Inter-character space (1) Bold (3) Dot matrix... - Page 99 Chapter 5 Creation and Setting of Print Messages (3) [Dot matrix] ● Sets the dot matrix. Available sizes (horizontal dots x vertical dots) 4 x 5, 5 x 5, 5 x 8 (5 x 7), 9 x 8 (9 x 7), 7 x 10, 11 x 11, 10 x 12,...
- Page 100 Chapter 5. Creation and Setting of Print Messages Limitation of total number of vertical dots Model type UX2-D Total number of vertical dots Dot matrix patterns of eight or fewer vertical dots are calculated as eight dots. ● Chimney characters consist of characters which can be written vertically.
- Page 101 Chapter 5 Creation and Setting of Print Messages (4) [Inter-char. space] ● Sets the spacing between characters. Alphabet A Alphabet B Vertical 8 dots [Dot matrix]: 5 x 8 Horizontal 5 dots Inter-character space [Inter-char. space]: 2 dots Relationship between characters and inter-character spaces User pattern (saved character) Alphabet A Vertical...
- Page 102 Chapter 5. Creation and Setting of Print Messages Dot matrix inter-character space Dot matrix Number of horizontal Inter-character space to be Maximum inter- (horizontal x vertical) character dots input by user pattern creation character size to be set 4 x 5 5 x 5 5 x 8 (5 x 7) * 9 x 8 (9 x 7)
- Page 103 Chapter 5 Creation and Setting of Print Messages (5) [Adjust Inter-character space] ● An inter-character space can be set in units of characters using Adjust Inter-character space. Select the character column to which you want to set an inter-character space using Start and End, input the setting value in [Inter-char.
-
Page 104: Printing Barcode
Chapter 5. Creation and Setting of Print Messages 5.5.5. Printing Barcode This section describes operation of printing barcodes. (1) Barcode types ●Different types of barcodes can be set for each print item. ●Press and Screen for setting of barcodes appears. Barcode types Character types that can be input Remarks... - Page 105 Chapter 5 Creation and Setting of Print Messages ●When a barcode of the same kind was set at adjacent print items, only the continuous series barcode is assumed. However, fixed length barcodes such as EAN-13, EAN-8, UPC-A, UPC-E, EAN-13 Add- On 5 and GS1 DataBar become independent barcodes.
- Page 106 Chapter 5. Creation and Setting of Print Messages (2) EAN Prefix ●Press and Screen for setting “Print Format” appears. Barcode is shown if a barcode is set in advance. Then press Barcode and Screen to set features for barcode appears. ●Whether to set barcode EAN-13, EAN-8 country code by character input or print format is selected.
- Page 107 Chapter 5 Creation and Setting of Print Messages Screen to set features for barcode Number of digits of barcode Country code Data Check digit Total number of digits EAN-13 EAN-8 EAN Prefix Set value Character input Print format Handling of country Country code is input at the head Set by print format without including country code in the data.
- Page 108 Chapter 5. Creation and Setting of Print Messages (4) Barcode print ●Set the barcode print system. The barcode dot data will be printed as is. Normal (With yellow ink, a yellow bar is created.) The barcode dot data will be reversed and printed.
-
Page 109: Setting Print Specifications
Chapter 5 Creation and Setting of Print Messages 5.6. Setting Print Specifications This section describes settings of print specifications. 5.6.1. Setting Character Height, Character Width, and Character Orientation Set the character height, character width, character orientation, and print start delay. Set the character height, character width, character orientation, and print start delay. - Page 110 Chapter 5. Creation and Setting of Print Messages (1) [Character orientation] ● Sets the printing shape and direction. ● The table below describes available settings and directions and print results. * When using High-speed print mode, “HM” mode is possible to select orientation setting “0 ~ 3”. Other High-speed print mode is possible to select orientation setting “0, 1”...
- Page 111 Chapter 5 Creation and Setting of Print Messages (5) [Print start delay] ● Sets the printing start position. ● Select the units of characters (CH) or length (mm) and then fine-adjust the value on an individual scan basis (SC). ● To input in units of length (mm), need to specify [Speed]. ●...
- Page 112 Setting value 1/2 to 1/16 65 μm UX2-D (Upgrade option: 1/1 to 1/16) ● When [Ink drop use] is 1/1 or 1/2, high-speed printing is possible. When [Ink drop use] is 1/16, printing is performed at a low speed but with higher quality.
- Page 113 Chapter 5 Creation and Setting of Print Messages (9) [Printing method] ● Displays the printing method. ● There are the following two printing methods: [Single scan] and [Interlaced]. ● The printing method will be automatically set according to the [Print format] and [Ink Drop Charge Rule] settings.
- Page 114 Chapter 5. Creation and Setting of Print Messages (10) [Target sensor timer] ● Specifies the time before displaying a fault message when the sensor remains blocked. ● When the sensor blocking time exceeds this value, the [Target Sensor Timer Out] message appears.
- Page 115 Chapter 5 Creation and Setting of Print Messages Speed compensation (13) [ ● Set to prevent changes in the print position. ● Cannot be set when a [Product speed matching] feature is not specified. ● Adjusts print start delay according to the set value of "Distance between print head and work". ●...
-
Page 116: Setting Repeat Print
Chapter 5. Creation and Setting of Print Messages 5.6.2. Setting Repeat Print This section describes settings of repeat print. ● Overview – Set the repeat print when printing the same content successively. – Set [Repeat intervals] and [Repeat count] when printing successively. –... - Page 117 Chapter 5 Creation and Setting of Print Messages (b) [Repeat count] ● Sets the number of times repeat print is performed. ● If [Repeat print] is not needed, set the value to "0". ● Printing is performed according to the setting of [Repeat print] mode. ●...
-
Page 119: Character Print
Chapter 6. Character Print Chapter 6. Character Print 6.1. Printing Characters 6.2. Using Calendar Function 6.3. Printing Shift Code 6.4. Updating Print Description at Fixed Interval (Time Count) 6.5. Using Count Function 6-6-1... -
Page 120: Printing Characters
4 lines x 5 lines x 6 lines *) UX2-D Upgrade option: Up to 1,000 characters ● There are no limits on the number of digits which can be input at one print item. 6.1.1. Printing Fixed Characters (1) Functions ●... - Page 121 Chapter 6. Character Print (2) Operation Press Edit on the [HOME] screen. The print description edit screen appears. Touch the print item for character input. The specified print item is enclosed in a red box. Touch the input start position in the print description edit area and move the cursor. Alternatively, you can press the cursor button or scroll button to move the cursor.
- Page 122 Chapter 6. Character Print Pressing the Input mode button displays the following screen. Copy Delete Paste Input mode Number, symbol Space To input Punct., press Pressing Punct. displays the following screen. Input mode buttons Print description edit screen (inputting characters)
-
Page 123: Using Calendar Function
(*) Upgrade option ● A group of calendar characters is called a "calendar block". Maximum number of calendar blocks Model type Maximum number of calendar blocks UX2-D 3 (Upgrade option: Up to 8) (Maximum number of digits: 20 per calendar block) - Page 124 Chapter 6. Character Print ● Set calendar conditions for each calendar block. ● Calendar characters cannot be input to the calendar block of a shift code or time count value. Calendar block Calendar block The target calendar block is enclosed in a green box.
- Page 125 Chapter 6. Character Print (4) [Week number] ● Use when printing the week of the year. ● A week starts on Monday and ends on Sunday. ● A week including January 4 of the year is considered the first week. To put it another way, a week including the first Thursday of the year is the first week.
- Page 126 Chapter 6. Character Print (6) Operation The print description edit screen is displayed. Print description edit screen (printing calendar characters) Press The keyboard is changed to the calendar keyboard. Calendar keyboard Calendar keyboard display screen...
- Page 127 Chapter 6. Character Print Touch the print item to be input. Print item to be input Print item input screen Input calendar characters from the keyboard. The target calendar block is enclosed in a green box. Inputting calendar characters...
-
Page 128: Printing Future Date (Offset)
Chapter 6. Character Print 6.2.2. Printing Future Date (Offset) This section describes operation of printing future dates. (1) Offset function ● Sets the date/time by adding the date/time and offset value of the internal clock. ● The offset values that can be set are shown in the table below. Offset value range Item Offset value range... - Page 129 Chapter 6. Character Print Example of year offsets (2024 is leap year) Offset from yesterday From today Calendar time Offset value Offset value 1 year 4 years 1 year 4 years 2024.02.29 2025.02.28 2028.02.28 2025.02.28 2028.02.29 (2) Operation Set an offset of one month to the "YY.MM.DD" calendar block. The print description edit screen is displayed.
- Page 130 Chapter 6. Character Print Press in the print description edit area to change the target calendar block. Calendar block No. The target calendar block Change the is enclosed in target a green box. calendar block. Offset setting Changing calendar conditions Input "1"...
-
Page 131: Printing By Substituting Different Characters For Date (Substitution Rules)
Maximum number of substitution rules Model type Maximum number of substitution rules UX2-D 48 (Upgrade option: Up to 99) ● Kana, alphanumeric characters, and user patterns can be set as substitution characters. ● Substitution characters for the year are applied for 25 years from the year of the calendar date. - Page 132 Chapter 6. Character Print (3) Operation In this example, set the substitution rule for the calendar character [Hour]. The print description edit screen is displayed. Press Calendar conditions. The [Calendar conditions] screen appears. Press in the print description edit area to change the target calendar block. Set the substitution rule for [Hour] to [Enable].
- Page 133 Chapter 6. Character Print Input the substitution rule for [Hour]. [Edit substitution rule] screen 6-15...
-
Page 134: Printing Shift Code
Chapter 6. Character Print 6.3. Printing Shift Code This section describes operation of printing shift code. (1) Overview ● Divides one day into multiple work shifts and prints a different code for each work shift. Example of dividing a day into three work shifts Range Printing result 0:30 to 8:14... - Page 135 Chapter 6. Character Print (2) Operation The print description edit screen is displayed. Print description edit screen (printing shift code) Press The keyboard is changed to the calendar keyboard. Press Shift code. The print description edit area displays "E", which indicates a shift code. Print description edit area...
- Page 136 Chapter 6. Character Print Input the start time and print description for each shift. When the start time is input, the end time one line above changes. To add a shift, press Add line to end or Insert line Back Start time Insert line Add line to end...
-
Page 137: Updating Print Description At Fixed Interval (Time Count)
Chapter 6. Character Print 6.4. Updating Print Description at Fixed Interval (Time Count) This section describes operation of updating the print description at a fixed interval. (1) Time count function ● Updates the print description at predetermined update intervals (minutes). ●... - Page 138 Chapter 6. Character Print (2) Operation The print description edit screen is displayed. Print description edit screen (updating time count print description) Press The keyboard is changed to the calendar keyboard. Press Time count. The print description edit area displays "F", which indicates a time count. Print description edit area...
- Page 139 Chapter 6. Character Print Press Time count conditions. The [Time count conditions] screen appears. Back [Time count conditions] screen Input the range, reset, reset time, and renewal period. Press Back The display returns to the [Calendar conditions] screen. Press OK and settings are confirmed 6-21...
-
Page 140: Using Count Function
● A group of calendar characters is called a "count block". Maximum number of count blocks Model type Maximum number of count blocks UX2-D 3 (Upgrade option: Up to 8) (Maximum number of digits: 20 per count block) 6-22... - Page 141 Chapter 6. Character Print ● Sets count conditions for each count block. ● When there are multiple count blocks, set count conditions for each count block so that the count is updated independently for them. There is no carry from another count block. Count block The target count block...
- Page 142 Chapter 6. Character Print (2) Count condition setup example (a) Number from "000" to "999" in increments of 1. Example of [Count conditions] setup screen (1) Count result [Note] Set the range for each digit. Setting the range from "001" to "999" ends up being the following count result because "0"...
- Page 143 Chapter 6. Character Print (b) Number from "A01" to "Z99" in increments of 1. Example of [Count conditions] setup screen (2) Count result A01 A02 A03 ‥‥ A98 A99 B01 B02 B03 ‥‥ B98 B99 : : : : : :...
- Page 144 Chapter 6. Character Print (c) Set user patterns as count values. Example of [Count conditions] setup screen (3) [Example] Define user patterns as circled numbers as shown in the table below. User pattern code Defined pattern If printing is performed five times each in the forward and reverse directions in reverse printing, the same column is printed with the same number ((1) to (5)).
- Page 145 Chapter 6. Character Print (d) Reset the count value to the predetermined value. Set the reset value "001" beforehand. Example of [Count conditions] setup screen (4) Pressing Count reset resets the count value to the predetermined value "001". 6-27...
- Page 146 Chapter 6. Character Print (3) Operation The print description edit screen is displayed. Print description edit screen (printing count characters) Press The keyboard is changed to the count keyboard. Count keyboard Count Count conditions Count keyboard display screen (printing count characters) Input Count.
- Page 147 Chapter 6. Character Print Press to change the [Count conditions] screen. Print description Count block No. edit area Change the The target count target count block is enclosed block. in a green box. [Count conditions] screen switching [Count conditions] screen (first screen) 6...
-
Page 148: Using Count Multiplication Printing
Chapter 6. Character Print 6.5.2. Using Count Multiplication Printing This section describes how to use the count multiplication printing. (1) Functions ● Prints by incrementing a specified amount at every printing. ● Multiplies the count value by the predetermined value and prints the result. ●... - Page 149 Chapter 6. Character Print (2) Operation The following shows how to set 0.3048 in [Multiplier] for printing with feet to meter conversion (1 foot = 0.3048 m). [Note] ● To return to the normal count, input an invalid character in [Multiplier] to make the multiplier invalid. ●...
- Page 150 Chapter 6. Character Print Print Missing description edit area Back [Count conditions] screen switching Multiplier [Multiplier] input screen Multiply the count value by the input multiplier and print the result. The following tables show printing examples. (One shows an example when zero-suppression is enabled while the other shows when it is disabled.) Count multiplication print example (with zero-suppression disabled) Input character CCCCCC...
- Page 151 Chapter 6. Character Print Count multiplication print example (with zero-suppression enabled) Input character CCCCCC Multiplier 0. 3048 Zero-suppression Enable Value Multiplication result Printing result Remarks 000001 0. 3048 0. 3048 000002 0. 6096 0. 6096 Zero-suppresses the rightmost 000010 3. 0480 3.
-
Page 152: Skipping Specified Characters And Printing (Count Skip)
Chapter 6. Character Print 6.5.3. Skipping Specified Characters and Printing (Count Skip) This section describes operation of printing with specified characters skipped. (1) Functions ● Skips the specified characters and prints the next print value. ● Count skip characters must be one of three types: Uppercase alphabet characters, lowercase alphabet characters, and user patterns. - Page 153 Chapter 6. Character Print (3) Operation The following shows how to set I and Q in [Count skip] for printing with alphabet letters I and Q skipped. [Note] ● When a count character is added, overwritten, or deleted, the [Changed Skip condition] confirmation message appears on the screen, making count skip characters invalid.
- Page 154 Chapter 6. Character Print Set the range using numbers, uppercase alphabet characters, lowercase alphabet characters, and user patterns. When [Count skip] is used, no numbers can be set in [Range] (max.). Display the first screen of the [Count conditions] screen and input [Value] and [Range]. Back [Count conditions] screen switching...
- Page 155 Chapter 6. Character Print Press in the count conditions to change the [Count conditions] screen. Display the second screen of the [Count conditions] screen and input I and Q in [Count skip]. Back [Count conditions] screen switching Count skip [Count conditions] screen (second screen) (when using [Count skip]) Count values are printed with the characters set in [Count skip] skipped.
- Page 156 This page is blank.
-
Page 157: Auxiliary Functions
Chapter 7. Auxiliary Functions 7.1. Managing Messages 7.2. Managing Groups 7.3. Creating User Pattern 7.4. Back Up Data to USB Memory 7.5. Editing Pattern of Standard Character 7.6. Editing Substitution Rules 7.7. Switching Display Language 7.8. Changing Layout of [HOME] Screen... - Page 158 Chapter 7. Auxiliary Functions This chapter describes auxiliary functions of this unit. (1) Functions Auxiliary function item list Item Description Reference ● Performs message name change, deletion, save number Manage messages 7.1. change, group change of saved messages, and preview. ●...
-
Page 159: Managing Messages
Chapter 7. Auxiliary Functions 7.1. Managing Messages This section describes the management of saved messages. (1) Functions There are five types of functions related to managing saved messages as shown in the table below. [Manage messages] functions Item Description Reference ●... - Page 160 Chapter 7. Auxiliary Functions (2) Operation Press Manage messages/Group from the [Setting (1/3)] menu. (See "[Home] (print description) screen (Setting menu)" on page 7-2.) The [Manage messages] screen appears. Change the message selection method. Search condition Sort Group Select the message.
- Page 161 Chapter 7. Auxiliary Functions (3) Message selection methods (a) [Normal] For a screen example, see the previous section. (b) [Multiple] Multiple The functions [Delete Stored message] and [Change group] can be started. Messages in specific positions can be selected. [Manage message] screen (Multiple) (c) [Area] Area The functions...
-
Page 162: Changing Message Name
Chapter 7. Auxiliary Functions 7.1.1. Changing Message Name Sections from here through 7.1.5 describe the functions related to managing saved message individually. First, this section describes the [Change message name] function. (1) Functions ● Changes the message name of a saved message. (2) Operation Enter the [Normal] mode and select the message, and then press Menu. -
Page 163: Deleting Saved Message
Chapter 7. Auxiliary Functions 7.1.2. Deleting Saved Message Secondly, this section describes the [Delete Stored message] function. (1) Functions ● Deletes a saved message. (2) Operation Enter the [Normal] mode and select the message. Then, press Menu. direction Normal Select the message. -
Page 164: Changing Message Number
Chapter 7. Auxiliary Functions 7.1.3. Changing Message Number Thirdly, this section describes the [Change message number] function. (1) Functions ● Changes the save number of a stored message. ● Specifies two messages and swaps the message numbers. ● A group number accompanies its message name. (2) Operation Enter the [Normal] mode and select the first message, and then press Menu. - Page 165 Chapter 7. Auxiliary Functions Select the second message. * To display numbers where no message is saved, press Display and press Free number. All numbers are displayed. First message Select the second message. [Manage messages] screen (selecting message number to change) (2) Press OK.
-
Page 166: Changing Group To Which Message Belongs
Chapter 7. Auxiliary Functions 7.1.4. Changing Group to Which Message Belongs Fourth, this section describes the function to [Change group] to which a message belongs. (1) Functions ● Changes the group of a saved message. (2) Operation Enter the [Normal] mode and select the message, and then press Menu. Normal Select the message. -
Page 167: Checking Print Image Of Saved Messages
Chapter 7. Auxiliary Functions 7.1.5. Checking Print Image of Saved Messages Fifth, this section describes the [Preview] function. (1) Functions ● The print image of a saved message can be checked. ● The contents currently being printed are not affected. (2) Operation Enter the [Normal] mode and select the message, and then press Menu. -
Page 168: Managing Groups
Chapter 7. Auxiliary Functions 7.2. Managing Groups This section describes the function to [Manage group] of saved messages. (1) Functions There are three types of functions related to managing groups of saved messages as shown in the table below. [Manage group] functions Item Description Reference... - Page 169 Chapter 7. Auxiliary Functions (2) Operation Press Print data/Manage group from the [Setting (1/3)] menu. (See "[Home] (print description) screen (Setting menu)" on page 7-2.) The [Manage messages] screen appears. [Manage messages] screen (message/ Manage group) Press Manage group. The [Manage group] screen appears. Change the message selection method.
-
Page 170: Changing Group Name
Chapter 7. Auxiliary Functions 7.2.1. Changing Group Name This section describes the [Change/create group name] function. (1) Functions ● Changes a group name. ● Inputs a new group name. (2) Operation Enter the [Normal] mode and select the group, and then press Menu. Normal Select a group. -
Page 171: Deleting Saved Group
Chapter 7. Auxiliary Functions 7.2.2. Deleting Saved Group This section describes the [Delete group] function. (1) Functions ● Deletes a group and the messages belonging to that group. (2) Operation Enter the [Normal] mode and select the group, and then press Menu. Change the message selection method. -
Page 172: Changing Group Number
Chapter 7. Auxiliary Functions 7.2.3. Changing Group Number This section describes the [Change group number] function. (1) Functions ● Changes the group number. ● Specifies two groups and swaps the group numbers. ● For messages belonging to that group, the group number is changed, but the group name is not changed. (2) Operation Enter the [Normal] mode and select the first group. - Page 173 Chapter 7. Auxiliary Functions Select the second group. First group Select the second group. [Manage group] screen (selecting group number to change) (2) Press OK. The save number of the group is changed. [Manage group] screen (after changing group number) 7-17...
-
Page 174: Creating User Pattern
● In the [Free] size, a pattern of any size can be created within the range of horizontal 320 dots x vertical 32 dots. ● Indicates the number of characters that can be created. Number of user patterns that can be created Model type UX2-D [Fixed] size 200 types (per dot matrix) [Free] size 50 types (2) Operation Press Create user pattern from the [Setting (2/3)] menu. - Page 175 Chapter 7. Auxiliary Functions Set [Dot matrix] and [Inter-char. space]. Create/Edit [Create user pattern] screen (Dot matrix, Inter-character space) Press Create/Edit. The [Create/Edit] screen appears. Change display magnification (x0.5, x1, x2, x4) [Create user pattern] screen (Create/Edit) 7-19...
- Page 176 Chapter 7. Auxiliary Functions Set [Zoom] to change the display magnification of the dot pattern creation area. The display magnification of the dot pattern creation changes. [Create user pattern] screen (enlarging display magnification) Create a pattern in the dot pattern creation area. Touch the screen directly to invert the dots. A dot in the touched position is inverted.
- Page 177 Chapter 7. Auxiliary Functions Press Save. The [Save] screen appears. When specifying Touch the the saved position, corresponding the code and position on the pattern of stored keyboard where destination appear. the pattern is saved. Press to display next view. [Create user pattern] screen (OK) Press OK.
-
Page 178: Calling User Pattern
Chapter 7. Auxiliary Functions 7.3.2. Calling User Pattern This section describes how to call the user pattern. (1) Functions ● Calls the saved user patterns to the [Create user pattern] screen. (2) Operation The [Create user pattern] or [Create/Edit] screen is displayed. Select [Create user pattern] screen (Select) Press Select. -
Page 179: Editing Pattern
Chapter 7. Auxiliary Functions 7.3.3. Editing Pattern This section describes how to edit the pattern. (1) Functions Various pattern edit functions Name Function ● Copy, paste Copies the pattern in the specified range. ● Move Moves the pattern in the specified range. ●... - Page 180 Chapter 7. Auxiliary Functions Touch the start point to render a rectangle. The red mark appears in the position touched. Start position [Create user pattern] screen (Rectangle, Start) Touch the end point to render a rectangle. position [Create user pattern] screen (Rectangle, End) 7-24...
- Page 181 Chapter 7. Auxiliary Functions After touching the end position, A rectangular area with the start and end positions diagonally opposite is rendered in red. Apply [Create user pattern] screen (Apply) Press Apply. A rectangular pattern is displayed. [Create user pattern] screen (Rectangle) 7-25...
-
Page 182: Creating User Pattern Of [Free] Size
Chapter 7. Auxiliary Functions 7.3.4. Creating User Pattern of [Free] Size This section describes how to create the user pattern of [Free] size. (1) Functions ● Creates user patterns of arbitrary size. ● The maximum size is horizontal 320 dots x vertical 32 dots. (2) Operation The [Create user pattern] screen is displayed. - Page 183 Chapter 7. Auxiliary Functions Create a pattern in the dot pattern creation area. Touch the screen directly to invert the dots. A dot in the position touched is inverted. Save You can change display magnification. Edit patterns (see 7.3.3) [Create user pattern] screen ([Free] size, dot pattern creation area) Press Save.
-
Page 184: Calling Bitmap (Bmp) File
Chapter 7. Auxiliary Functions 7.3.5. Calling Bitmap (BMP) File This section describes how to call bitmap (BMP) files. (1) Functions ● Calls bitmap files saved in the USB memory as a user pattern. ● The files can be called in the screen for calling user patterns and the screen for pasting the pattern during editing [Free] size. - Page 185 Chapter 7. Auxiliary Functions Select a required file name from the bitmap file list, and press OK. (Up to 30 file names are listed) The display returns to the [Create user pattern] (Select bitmap data) screen. File Name File Name Select a file from the bitmap file list [Create user pattern] screen (selecting file name) Press OK in the screen for calling the user pattern.
-
Page 186: Back Up Data To Usb Memory
Chapter 7. Auxiliary Functions 7.4. Back Up Data to USB Memory This section describes how to backup data to the USB memory. 7.4.1. Copying data at once [NOTE] The backup data is due for 14 days. If it exceeds that, it cannot be used. (1) Functions ●... - Page 187 Chapter 7. Auxiliary Functions (2) Backup operation Insert the USB memory. Press Copy data IJPUSB from the [Setting (3/3)] menu. The [Backup] screen appears. [Copy data (IJP USB)] screen Press Backup. The backup in progress screen appears. Indicates the backup progress.
- Page 188 Chapter 7. Auxiliary Functions (3) Data copy Insert the USB memory. Press Copy data USB IJP from the [Setting] menu. The [Copy data] screen appears. Select the data type to Select the manufacturing number of copy. the copy destination. [Copy data (USB IJP)] screen ...
- Page 189 Chapter 7. Auxiliary Functions Select the manufacturing number of the copy destination. Select the data type to copy. Press Start copy. The copy in progress screen appears. Indicates the copy progress. Copy data (USB IJP) in progress After the copy, the display returns to the [Setting] menu. Remove the USB memory.
- Page 190 ● Data created on RX, RX2 or UX can be copied to UX2. Following operations 1 through 3 must be conducted prior to using other models' data on UX2 to store the backup data of other models in the USB memory via a PC.
- Page 191 Chapter 7. Auxiliary Functions (5) Copy data from the Upper model to the Lower model ● When the model combinations satisfy those tabulated below in Table 1, "Copy data" to the lower model is available even if the Print data/User pattern is created on the upper model. ●...
- Page 192 Chapter 7. Auxiliary Functions Detailed explanation of Classification No.2 (Table 2) ● The conditions of Print data are described in Table 3, which can be used when a part of setting is corrected. Table 3. Conditions with which display color of Message name changes to Brown on "Select message" screen Item Conditions and corrections...
-
Page 193: Copy Data Individually
Chapter 7. Auxiliary Functions 7.4.2. Copy data individually (1) Functions ● Print data and User pattern which are backed-up in USB memory can be copied separately. ● When copying data, a separate copying operation is required for Print data and User pattern respectively. ●... - Page 194 Chapter 7. Auxiliary Functions (2) Individual Copy data operation for Print data Insert backed-up USB memory into IJP. Press Copy data (USB → IJP) . Individual copy Select the folder (serial number) to be copied. Press Individual copy . "Copy individual print data" screen is displayed. Select Copy Select how you method.
- Page 195 Chapter 7. Auxiliary Functions Select Copy method and press how you select Print data. Select Print data to be copied from USB memory. Press Start copy . The message "Copying in progress" will be displayed. The copy will be executed. Press HOME and return to Print description screen, then remove USB memory.
- Page 196 Chapter 7. Auxiliary Functions (3) Individual Copy data operation for User pattern Insert USB memory into IJP. Press Copy data (USB → IJP) . Individual copy Select the folder (serial number) to be copied. Press Individual copy . "Copy individual print data" screen is displayed. User pattern 7-40...
- Page 197 Chapter 7. Auxiliary Functions Press User pattern . "Copy individual user pattern" screen is displayed. User pattern in USB memory Select Copy method. Select how you select User pattern. Start copy Select Copy method and press how you select User pattern. Select User pattern to be copied from USB memory.
-
Page 198: Editing Pattern Of Standard Character
Chapter 7. Auxiliary Functions 7.5. Editing Pattern of Standard Character This section describes how to edit the standard character patterns. (1) Functions ● Edits the character pattern in dots. ● Edits single-byte symbols as different patterns from the double-byte symbols. ●... - Page 199 Chapter 7. Auxiliary Functions Select characters to call. Select character type. Select characters to call. [Edit Standard pattern] screen (Select) Press OK. The pattern is called. Edit [Edit Standard pattern] screen (OK) Press Edit. Create a pattern in the dot pattern creation area. Touch the screen directly to invert the dots.
-
Page 200: Editing Substitution Rules
Chapter 7. Auxiliary Functions 7.6. Editing Substitution Rules This section describes how to edit the substitution rules. (1) Functions ● Selects [Year], [Month], [Day], [Hour], [Minute], [Week number], or [Day of week] and inputs or edits the substitution rule. ● Inputs or changes the name of the selected substitution rule. See "6.2.3 Printing by Substituting Different Characters for Date (Substitution Rules)". - Page 201 Chapter 7. Auxiliary Functions Select the substitution rule you want to edit. The [Edit substitution rule] screen appears. Select the substitution rule type [Year], [Month], [Day], [Hour], [Minute], [Week number], or [Day of week]. Copy the previous item. Substitution rule type selection screen Select the substitution rule type [Year], [Month], [Day], [Hour], [Minute], [Week number], or [Day of week] and input or edit it.
-
Page 202: Switching Display Language
Chapter 7. Auxiliary Functions 7.7. Switching Display Language This section describes how to switch the display language. (1) Functions ● Switches the display language. ● The input mode is fixed to "Default". Operation In [Setting (2/3)] menu, press Select Languages. [Select Languages] screen Select language from “Current language”, and then press OK. -
Page 203: Changing Layout Of [Home] Screen
Chapter 7. Auxiliary Functions 7.8. Changing Layout of [HOME] Screen This section describes how to change the layout of the [HOME] screen. (1) Functions ● The display position of the item displayed on the [HOME] screen can be changed. ● The item to display on the [HOME] screen can be changed. Operation Press Widget edit from the [Setting (2/3)] menu. - Page 204 Chapter 7. Auxiliary Functions Select a function to change the arrangement of the home area. [Widget edit] screen When selecting the cell to which you want to place the function, the home area will be edited. [Widget edit] screen Press OK. The change is applied to the [HOME] screen. 7-48...
- Page 205 Chapter 7. Auxiliary Functions [HOME] screen (after editing widget) 7-49...
- Page 206 This page is blank.
-
Page 207: Ink And Makeup Replenishment
Chapter 8. Ink and Makeup Replenishment 8.1. Replenishing Ink 8.2. Replenishing Makeup... - Page 208 Chapter 8. Ink and Makeup Replenishment This chapter describes the replenishment of ink and makeup. When operating, note the following. WARNING ● Exercise caution to avoid inadvertently disconnecting, forcibly pulling, or bending piping tubes. Since the ink and solvent in some portions of piping tubes are pressurized, they may splash into your eyes or mouth or onto your hands or clothing.
- Page 209 Chapter 8. Ink and Makeup Replenishment CAUTION ● Pay careful attention to the following items regarding handling of the ink and makeup: - Wear protective gloves and goggles so that it does not come in direct contact with your skin. If the ink or makeup comes into contact with skin, wash with soap and warm or cold water.
-
Page 210: Replenishing Ink
Chapter 8. Ink and Makeup Replenishment 8.1. Replenishing Ink This section describes how to replenish ink in this unit. It also provides ink replenishment timing and precautions. (1) Overview ● Ink can be refilled when the remaining ink icon screen is positioned in a range where the cartridge bottle can be replaced. - Page 211 Chapter 8. Ink and Makeup Replenishment (2) Operation NOTE ● Do not lift the ink cartridge bottle by holding the over cap. Otherwise, the ink cartridge bottle may fall. ● Since the ink cartridge bottle contains an IC chip, avoid strong shock/electromagnetic waves or liquid leakage.
- Page 212 Chapter 8. Ink and Makeup Replenishment Hold the IC tag mark of the label on the ink cartridge bottle over the RFID reader of the printer to read the ink ID. NOTE ● If there is ink remaining in the ink cartridge bottle even when the bottle is replaceable, do not replace it but contact your nearest local distributor because some parts may be broken.
- Page 213 Chapter 8. Ink and Makeup Replenishment -1 If you manually input the ink ID, touch the ink icon on the [HOME] screen of the unit to open the [Ink ID entry] screen and input the ink ID. ● The ink ID is printed on the label of the cartridge bottle. Ink ID Ink ID display area Ink icon...
- Page 214 Chapter 8. Ink and Makeup Replenishment -2 Manually input the ink ID in the ink ID input area. To toggle between uppercase and lowercase characters, press Ink ID input screen * If the ink ID is too stained by ink to be read, contact your nearest local distributor. When the ink ID is recognized, the lever handle on the ink side is unlocked.
- Page 215 Chapter 8. Ink and Makeup Replenishment NOTE ● After removing the ink cartridge bottle from the unit, face the cap upward immediately. Also, do not expose the removed ink cartridge bottle to any impact. Doing so may cause ink to splatter. ●...
- Page 216 Chapter 8. Ink and Makeup Replenishment Set a new ink cartridge bottle in the specified position. Install the boss of the ink cartridge bottle on the boss guide of the ink supply port. Set a new ink cartridge bottle. Ink side Ink supply port Boss guide Align the boss with the guide.
- Page 217 Chapter 8. Ink and Makeup Replenishment When a new ink cartridge bottle is set, push the lever handle down and then push it all the way into the unit. CAUTION ● Be careful not to get your hand or fingers pinched when pushing down the lever handle. (See the figure below.) Lever handle Lever handle...
- Page 218 Chapter 8. Ink and Makeup Replenishment The ink cartridge replacement (ink refilling) is now completed. Press Complete on the guidance screen of the unit. Pressing Complete confirms that ink refilling is complete. Complete [Replacement Ink cartridge] (Complete) screen 8-12...
-
Page 219: Replenishing Makeup
Chapter 8. Ink and Makeup Replenishment 8.2. Replenishing Makeup This section describes how to replenish makeup in this unit. It also provides makeup replenishment timing and precautions. (1) Overview ● Makeup can be refilled when the remaining makeup icon screen is positioned in a range where the makeup cartridge bottle can be replaced. - Page 220 Chapter 8. Ink and Makeup Replenishment (2) Operation NOTE ● Do not lift the makeup cartridge bottle by holding the over cap. Otherwise, the makeup cartridge bottle may fall. ● Since the makeup cartridge bottle contains an IC chip, avoid strong shock/electromagnetic waves or liquid leakage.
- Page 221 Chapter 8. Ink and Makeup Replenishment Hold the IC tag mark of the label on the cartridge bottle over the RFID reader of the printer to read the makeup ID. NOTE ● If there is makeup remaining in the makeup cartridge bottle even when the bottle is replaceable, do not replace it but contact your nearest local distributor.
- Page 222 Chapter 8. Ink and Makeup Replenishment -1 If you manually input the makeup ID, touch the makeup icon on the [HOME] screen of the unit to open the [Makeup ID entry] screen and input the makeup ID. ● The makeup ID is printed on the label of the cartridge bottle. Makeup ID Makeup ID display area Makeup icon...
- Page 223 Chapter 8. Ink and Makeup Replenishment -2 Manually input the makeup ID in the makeup ID input area. To toggle between uppercase and lowercase characters, press Makeup ID input screen * If the makeup ID is too stained by ink to be read, contact your nearest local distributor. When the makeup ID is recognized, the lever handle on the makeup side is unlocked.
- Page 224 Chapter 8. Ink and Makeup Replenishment (1) Tilt the lever handle toward yourself, (2) lift it, and (3) remove the empty makeup cartridge bottle. NOTE ● If the lever handle cannot be lifted, do not pull it with excessive force but push the lever handle all the way in.
- Page 225 Chapter 8. Ink and Makeup Replenishment Set a new makeup cartridge bottle in the specified position. Install the boss of the makeup cartridge bottle on the boss guide of the makeup supply port. Set a new makeup cartridge bottle. Makeup side Makeup supply port Boss guide...
- Page 226 Chapter 8. Ink and Makeup Replenishment When a new makeup cartridge bottle is set, push the lever handle down. CAUTION ● Be careful not to get your hand or fingers pinched when pushing down the lever handle. (See the figure below.) Lever handle Lever handle Lever handle...
- Page 227 Chapter 8. Ink and Makeup Replenishment The makeup cartridge replacement (makeup refilling) is now completed. Press Complete on the guidance screen of the unit. Pressing Complete confirms that makeup refilling is complete. Complete [Replacement Makeup cartridge] (Complete) screen * In the unit where the fault [Makeup Level Sensor Broken 1] occurred, the makeup cartridge cannot be replaced until the warning [Makeup Low Warning] appears.
- Page 228 This page is blank.
-
Page 229: Environment Setup
Chapter 9. Environment Setup 9.1. Setting User Environment 9.2. Setting Date and Time 9.3. Setting Touch Screen 9.4. Changing Login User 9.5. Setting Password for Each User 9.6. Setting Communication Environment... - Page 230 Chapter 9. Environment Setup This chapter describes the environment setup of the unit. (1) Functions Environment setup item list Item Description Reference ● User environment setup Sets the print values. 9.1. ● Sets the current date and time, calendar time, and Date/time setup 9.2.
- Page 231 Chapter 9. Environment Setup 9.1. Setting User Environment This section describes how to set the user environment. (1) Functions ● Sets the user environment values. (a) [Repeat print sensor mode] ● Sets the conditions for printing repeatedly at specified intervals. signal ON While the print target detection signal is ON OFF-ON transition When the print target detection signal is turned ON once...
- Page 232 Chapter 9. Environment Setup (c) Change Character orientation (switching signal mode) ● Sets the forward and reverse character orientation method when performing reverse direction printing. ● The "Change mode" selection menu is different depending on the "Change Character Orientation" set value. Character orientation by "Change Character Orientation"...
- Page 233 Chapter 9. Environment Setup (e) [Dot matrix] ● Sets the size of characters to be used. ● The following sizes can be set. Char. Size menu 1 5 x 8, 5 x 7 Char. Size menu 2 9 x 8, 9 x 7 (f) [Excitation V-ref.
- Page 234 Chapter 9. Environment Setup (2) Operation Press User environment setup from the [Setting] menu. The [User environment setup] screen (consisting of two views) appears. [User environment setup] screen (1/2) (Second screen) [User environment setup] screen (2/2) Select the desired item to change it.
- Page 235 Chapter 9. Environment Setup (3) Change character orientation (Change mode) supplement ● The character orientation at reciprocative printing signal input is different depending on the "Change Character orientation" and "Change mode" set values. See the table below. Reciprocative printing signal and character orientation (When "Change Character orientation"...
- Page 236 Chapter 9. Environment Setup Reciprocative printing signal and Character orientation (When "Change Character Orientation" = "Character orientation 0 or 3") Reciprocative printing signal Change mode Character orientation 0:ABC(→) 3: (→) Order of printing Order of printing OFF=normal and forward 2: (←)...
- Page 237 Chapter 9. Environment Setup ②Change Character Orientation : "Normal or inverted" Change mode : "OFF = normal" Reciprocative ABC printing signal: OFF order of printing order of printing Reciprocative ABC printing signal: ON order of printing order of printing Reciprocative ABC...
- Page 238 Chapter 9. Environment Setup 9.2. Setting Date and Time This section describes how to set the date and time. (1) Functions ● Sets the date and time values. Date/time setup item list Setting item Description Default ● – Current time Sets the current date and time (clock function).
- Page 239 Chapter 9. Environment Setup (2) Operation Press Date/time setup from the [Setting] menu. The [Date/time setup] screen appears. [Date/time setup] screen Select the desired item to change it. 9-11...
- Page 240 Chapter 9. Environment Setup 9.3. Setting Touch Screen This section describes how to set the touch screen. (1) Functions ● Sets the touch screen environment values. Touch screen setup item list Setting item Description Default ● Specifies the time the touch screen turns off when not Display OFF in 3 min in operation.
- Page 241 Chapter 9. Environment Setup (2) Operation Press Touch screen setup from the [Setting] menu. The [Touch screen setup] screen appears. [Touch screen setup] screen Select the desired item to change it. 9-13...
- Page 242 Chapter 9. Environment Setup 9.4. Changing Login User This section describes how to change a user to be logged in. (1) Functions ● Logs in again as a different user from the currently logged in user. ● When logging in, select the user and input the password. ●...
- Page 243 Chapter 9. Environment Setup Press the user name user. The password input window appears. Enter Input the password for the Closes the user name "user". window. Backspace Shift Cursor Login password input screen Input the password for the user name [user] and press Enter . Log in again with the user name "user"...
- Page 244 Chapter 9. Environment Setup 9.5. Setting Password for Each User This section describes how to set a password for each user. (1) Functions ● Each user needs to set their own password. ● However, if the administrator restricts users from setting a password, the [Password setup] screen does not appear.
- Page 245 Chapter 9. Environment Setup Press Password setup. The [Password setup] screen appears. Input the old password. This is not displayed when the password has not been set. Input a new password. Login password setup screen Input [Old password], [New password], and [New password reentry]. Press OK.
- Page 246 Chapter 9. Environment Setup 9.6. Setting Communication Environment This section describes how to set the communication environment. (1) Functions ● Sets the communication environment setup values. ● Detail about communication setting, refer to Communication Manual. Communication environment setup item list Setting item Description Default...
- Page 248 This page is blank.
-
Page 249: Maintenance
Chapter 10. Maintenance 10.1. Checking Unit Information 10.2. Checking Operational Status 10.3. Printing with No Sensor Signal (Start Printing) 10.4. Checking Registered Software 10.5. Checking Accessible Functions 10-1... - Page 250 Chapter 10. Environment Setup This chapter describes the guidelines for maintenance. The following shows the maintenance procedures and the functions that should be checked. (1) Functions Maintenance function item list Item Description Reference ● Unit information Displays the unit's model name, serial number, etc. 10.1.
- Page 251 Displays the model name (TYPE-FORM) of the unit. Serial number Displays the serial number of the unit. Ink type Displays the type of ink used. (2) Operation Press Unit information from the [Setting] menu. The [Unit information] screen appears. Check each item. UX2-D160W [Unit information] screen 10-3...
- Page 252 Chapter 10. Environment Setup 10.2. Checking Operational Status This section describes how to check the operational status. (1) Functions ● Displays the operational status of the IJ printer. ● Saves the ink operating time and print count once an hour (on the first minute of every hour). When there is a power failure, the last saved state is restored.
- Page 253 Chapter 10. Maintenance (2) Operation Press Operation management from the [Setting] menu. The [Operation management] screen appears. Check each item. [Operation management] screen 10-5...
- Page 254 Chapter 10. Environment Setup 10.3. Printing with No Sensor Signal (Start Printing) This section describes how to print without inputting the print start signal. (1) Functions ● Allows you to print using buttons without inputting the print start signal. ● In [Ready] state, also allows you to print pressing START PRINTING in the [HOME] screen. (2) Operation In [Ready] state, press START PRINTING from the [HOME] screen.
- Page 255 Chapter 10. Maintenance 10.4. Checking Registered Software This section describes how to check the registered software. (1) Functions ● Displays the name and version of each registered software. (2) Operation Press View software version from the [Setting] menu. The [View software version] screen appears. Check each item.
- Page 256 Chapter 10. Environment Setup 10.5. Checking Accessible Functions This section describes how to check if each function is accessible. (1) Functions ● Check to see if each function is accessible or restricted. ● To restrict a function, the administrator should do so by setting the login function accordingly. ●...
- Page 257 Chapter 10. Maintenance (2) Operation Press Password protection from the [Setting (3/3)] menu. The [Password protection] screen appears. Blue items are settings currently selected. [Password protection] screen 10-9...
- Page 258 This page is blank.
-
Page 259: Safe Clean Station (Optional Parts)
Chapter 11. Safe Clean Station (Optional parts) 11.1. Setting Head Cleaning Mode 11.2. Head Cleaning Using Head Cleaning Station 11.3. Starting Operation Using Cleaning station 11-1... - Page 260 Chapter 11. Safe Clean Station This chapter describes the function and operation instructions of the Safe Clean Station (cleaning station). When operating the station, note the following. WARNING ● Solvent steam is produced during head cleaning. If you have no choice but to touch the print head or cleaning station during head cleaning, be sure to remove static electricity from your body in advance.
- Page 261 Chapter 11. Safe Clean Station 11.1. Setting Head Cleaning Mode Set the head cleaning function mode on the [Safe clean station environment setup] screen. This setting is applied for only [Head cleaning]. (It is not applied for [Gutter cleaning (S)] or [Nozzle backwash (S)].) Press Setting on the [HOME] screen.
- Page 262 Chapter 11. Safe Clean Station Set each setting on the [Safe clean station environment setup] screen. (a) Print Head Cleaning Mode selection [Print Head Cleaning Mode selection] You can select [ECO], [Standard], or [Deep]. The volume of solvent used by the cleaning station for a single head cleaning varies depending on the selection.
- Page 263 Chapter 11. Safe Clean Station 11.2. Head Cleaning Using Head Cleaning Station This section describes how to clean the print head using the cleaning station. ● Operation procedure Make sure that the unit is in the [Standby] or [Stop] state. Status: Shows the state of the unit.
- Page 264 Chapter 11. Safe Clean Station Loosen the head cover lock screw and remove the print head cover. Head cover lock screw Pull out Print head cover How to remove print head cover Make sure that the print head cover is not lost after it is removed, such as by hanging it on the head cover rest for the cleaning station.
- Page 265 Chapter 11. Safe Clean Station Insert the print head into the print head slot of the cleaning station in the direction indicated in the figure below. Print head Insert Print head slot How to insert print head NOTE ● Do not insert the print head into the cleaning station forcibly. Otherwise, some parts may deform, fall off, or be damaged.
- Page 266 Chapter 11. Safe Clean Station Hang the head cable on the cable hook attached to the cleaning station so as not to apply the load due to the head cable's own weight to the base of the print head. Head cable Cable hook How to fix head cable ●...
- Page 267 Chapter 11. Safe Clean Station Press the Head cleaning button on the [Manual Control Menu] screen. Press Head cleaning. [Manual Control Menu] screen The confirmation message appears. The following describes how to perform head cleaning when the unit is in the [Stop] state and when in the [Standby] state.
- Page 268 Chapter 11. Safe Clean Station (2) When the cleaning starts, the following screen appears. [Head cleaning in progress] screen (*) The set head cleaning mode is displayed. Head cleaning mode Display [ECO] [Eco Head Cleaning] [NORMAL] [Head Cleaning] [INTENSIVE] [Careful Head Cleaning] For details on changing the head cleaning mode, see "11.1.
- Page 269 Chapter 11. Safe Clean Station <<When performing head cleaning in [Standby] state>> Operations from ink stop to head cleaning are automatically performed. (1) The following confirmation message appears. Make sure that the print head is inserted into the cleaning station, and press [OK]. Press OK.
- Page 270 Chapter 11. Safe Clean Station Remove the print head from the cleaning station and make sure that the area around the nozzle including the end of the print head is cleaned and the makeup is dried up. Nozzle periphery End of the print head Print head end surface, nozzle periphery NOTE ●...
- Page 271 Chapter 11. Safe Clean Station Remove the cleaning solvent container from the cleaning station and drain the makeup in the container. <<How to remove the cleaning solvent container>> Hold and turn the cleaning solvent container until its "" mark is aligned with the "" mark on the cleaning station.
- Page 272 Chapter 11. Safe Clean Station 11.3. Starting Operation Using Cleaning station This section describes how to start operation using the cleaning station ([Eject ink (S)] operation procedure). If a fault is detected during [Eject ink (S)] process, the nozzle is automatically cleaned and ink ejection starts again.
- Page 273 Chapter 11. Safe Clean Station Insert the print head into the print head slot of the cleaning station. Perform operation steps described in "11.2. Head Cleaning Using Cleaning Station". Press the [Manual Control Menu] button on the [HOME] screen to display the [Manual Control Menu] screen.
- Page 274 Chapter 11. Safe Clean Station The following message appears. Press Start/Continue. Press Start/Continue. [Eject ink (S)] confirmation screen ● When the ink ejection starts, the following screen appears. Starting screen ● To abort the ink ejection, press the [Abort] button. * If press Abort in progress, then No-cleaning stop sequence run.
- Page 275 Chapter 11. Safe Clean Station This completes the start operation (startup process). Press Start/Continue on the guidance screen of the unit. Press Start/Continue. Startup process completion screen NOTE ● If an abnormality in ink drop charge is detected during ink ejection, the ink ejection process is performed again after the automatic head cleaning process.
- Page 276 This page is blank.
-
Page 277: When Fault Or Warning Occurs
Chapter 12. When Fault or Warning Occurs 12.1. Display When Fault or Warning Occurs 12.2. On-screen Message Descriptions 12.3. Checking Fault and Warning Occurrence Status 12.4. Action to be Taken in Event of Printing Failure 12-1... - Page 278 Chapter 12. When Warning or Fault Occurs This chapter describes what is displayed when a fault or warning occurs in this unit and how to check the occurrence status and handle the warning or fault. 12.1. Display When Fault or Warning Occurs ●...
- Page 279 Chapter 12. When Warning or Fault Occurs (2) When a warning occurs The name of the warning Message No. message is displayed. The detail, cause, and solution are displayed. [Ink Low Warning] screen ● When Close is pressed, the warning window is closed, but the warning state is not cleared. The warning name is displayed in the warning display area (see the figure above).
- Page 280 Chapter 12. When Warning or Fault Occurs (4) Fault/warning guidance Displays the guidance. [Main Ink Tank Too Full] fault/warning guidance screen When you press , the animation appears. ● According to the animation displayed, when Reset is pressed after the cause is removed, the fault state is cleared, and the message is closed.
-
Page 281: Fault Messages
Chapter 12. When Warning or Fault Occurs 12.2. On-screen Message Descriptions This section describes the messages that appear on the unit. 12.2.1. Fault Messages The following table describes fault messages and their solutions. (1) Faults that stop the ink jet Fault message list (faults that stop the ink jet) Message Message... - Page 282 Chapter 12. When Warning or Fault Occurs Fault message list (faults that stop the ink jet) (Continued) Message Message Message description Solution Makeup ● Contact your nearest local E-010 Replenishment Automatic makeup refilling takes long. distributor. Time-out Printing cannot continue because the makeup reservoir is almost empty.
- Page 283 Chapter 12. When Warning or Fault Occurs Fault message list (faults that stop the ink jet) (Continued) Message Message Message description Solution ● Ink Heating Unit Contact your nearest local E-024 The ink heating unit shorted out. Over Current distributor. Ambient ●...
- Page 284 Chapter 12. When Warning or Fault Occurs (2) Faults that do not stop the ink jet Fault message list (faults that do not stop the ink jet) Message Message Message description Solution The print data change procedure was Print Data ●...
- Page 285 Chapter 12. When Warning or Fault Occurs Fault message list (faults that do not stop the ink jet) (Continued) Message Message Message description Solution The number of format types (the order of Excessive Format ● E-057 [Line], [Line spacing], and [Dot matrix]) Set eight or fewer format types.
-
Page 286: Warning Messages
Chapter 12. When Warning or Fault Occurs 12.2.2. Warning Messages The following table describes warning messages and their solutions. Warning message list Message Message Message description Solution ● Find the appropriate excitation V-ref. Excitation V-ref. The excitation V-ref. value needs to be W-065 value on the [Nozzle test] screen. - Page 287 Chapter 12. When Warning or Fault Occurs Warning message list (Continued) Message Message Message description Solution ● Replace the ink and reset the Ink Shelf Life W-083 The ink needs to be replaced. operating time. Expired Technical Manual 5.3) Ambient ●...
-
Page 288: Other Messages
Chapter 12. When Warning or Fault Occurs 12.2.3. Other Messages The following table describes messages related to settings and setups and their solutions. Other message list Message Message Message description Solution ● Ink Temperature The ink temperature is set not to be Contact your nearest local C-187 Correction Notice... -
Page 289: Checking Fault And Warning Occurrence Status
Chapter 12. When Warning or Fault Occurs 12.3. Checking Fault and Warning Occurrence Status This section describes how to check the fault and warning occurrence status. (1) Functions ● Allows you to view the occurrence time and description of a fault or warning message. ●... -
Page 290: Action To Be Taken In Event Of Printing Failure
Chapter 12. When Warning or Fault Occurs 12.4. Action to be Taken in Event of Printing Failure ● If a printing failure occurs, take action appropriate to the symptom according to the solution table below. ● If the action does not solve the problem, the board or circulation system may be faulty. Contact your nearest local distributor. - Page 291 Chapter 12. When Warning or Fault Occurs Action to be taken in event of printing failure (continued) *1: See the Technical Manual. Printing failure Cause Solution Reference description (symptom) ● The distance between the print Adjust the distance between head and print target has the print head and print changed.
-
Page 293: Troubleshooting Guide
Chapter 13. Troubleshooting Guide 13-1... - Page 294 Chapter 13. Troubleshooting Guide If the unit does not start up normally, check the following before concluding that it is malfunctioning. Troubleshooting Guide Symptom Check item Solution ● Check if the main power switch is ● Turn ON the main power switch. ●...
- Page 295 If the above action does not solve the problem, stop using the unit. Then, disconnect the power plug from the power outlet and contact your Hitachi distributor. ■ Necessary information □□□□□□ 1. TYPE-FORM (model number): ________ IJ printer (UX2- □□□□□□□□ 2. SER. No. (serial number): ___________ UX2 3. Failure description: _________________ Be as specific as possible.
- Page 296 This page is blank.
-
Page 297: Emergency Procedures
Chapter 14. Emergency Procedures 14-1... - Page 298 Chapter 14. Emergency Procedures This chapter describes the operations to be performed if an emergency such as an earthquake or fire occurs while the unit is running. WARNING ● If an earthquake, fire, or other emergency occurs while the printer is engaged in printing or just turned on, press the main power switch to turn off the power.