
Related Manuals for AEG FAVORIT 55022WO


Summary of Contents for AEG FAVORIT 55022WO
- Page 1 Návod k použití FAVORIT 55022WO Myčka nádobí FAVORIT 55022MO Gebruiksaanwijzing Afwasautomaat User Manual Dishwasher...
-
Page 2: Table Of Contents
13. TECHNICKÉ INFORMACE................17 PRO DOKONALÉ VÝSLEDKY Děkujeme vám, že jste si zvolili výrobek značky AEG. Aby vám bezchybně sloužil mnoho let, vyrobili jsme jej s pomocí inovativních technologií, které usnadňují život, a vybavili jsme jej funkcemi, které u obyčejných spotřebičů nenajdete. Stačí... -
Page 3: Bezpečnostní Informace
ČESKY BEZPEČNOSTNÍ INFORMACE Tento návod si pečlivě přečtěte ještě před instalací spotřebiče a jeho prvním použitím. Výrobce nezodpovídá za škody a zranění způsobená nesprávnou instalací či chybným používáním. Návod k použití vždy uchovávejte spolu se spotřebičem pro jeho budoucí použití. 1.1 Všeobecné... -
Page 4: Bezpečnostní Pokyny
Spotřebič musí být připojen k vodovodnímu potrubí • pomocí nové dodané soupravy hadic. Neinstalujte již jednou použitou soupravu hadic znovu. 1.2 Bezpečnost dětí a postižených osob Tento spotřebič smí používat děti starší osmi let nebo • osoby se sníženými fyzickými, smyslovými nebo duševními schopnostmi nebo osoby bez patřičných... - Page 5 ČESKY 2.3 Vodovodní přípojka • Nepijte ani si nehrajte s vodou ve spotřebiči. • Dbejte na to, abyste hadice • Nádobí ze spotřebiče nevyjímejte, nepoškodili. dokud se nedokončí program. Na • Před připojením spotřebiče k novým nádobí mohou být zbytky mycího hadicím nebo k hadicím, které...
-
Page 6: Popis Spotřebiče
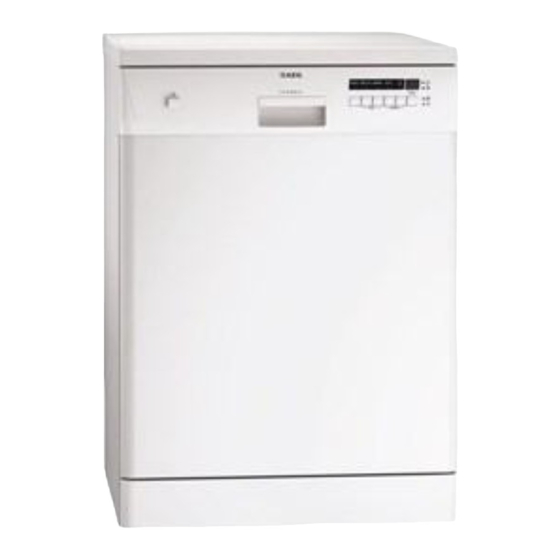
3. POPIS SPOTŘEBIČE Horní deska Větrací otvor Nejvyšší ostřikovací rameno Dávkovač leštidla Horní ostřikovací rameno Dávkovač mycího prostředku Dolní ostřikovací rameno Dolní koš Filtry Horní koš Typový štítek Zásobník na sůl 4. OVLÁDACÍ PANEL Tlačítko Zap/Vyp Kontrolky Displej Tlačítko Delay... -
Page 7: Programy
ČESKY Tlačítka programů 5. PROGRAMY Program Stupeň znečištění Fáze programu Funkce Druh náplně • Normálně zne‐ • Předmytí • Multitab čištěné • Mytí 50 °C • Nádobí a příbory • Oplachy • Sušení • Vše • Předmytí • Multitab • Nádobí, příbory, •... -
Page 8: Nastavení
Voda Energie Délka Program (kWh) (min) 10 - 12 0.7 - 0.8 60 - 70 1) Hodnoty se mohou měnit v závislosti na tlaku a teplotě vody, na kolísání v dodávce proudu, na zvole‐ ných funkcích a na množství nádobí. - Page 9 ČESKY Německé Francouzské mmol/l Clarkovy Nastavení změkčo‐ stupně (°dH) stupně (°fH) stupně vače vody 19 - 22 33 - 39 3,3 - 3,9 23 - 27 15 - 18 26 - 32 2,6 - 3,2 18 - 22 11 - 14 19 - 25 1,9 - 2,5 13 - 17...
-
Page 10: Funkce
5. Seřiďte dávkování leštidla. – = dávkovač leštidla je 6. Naplňte dávkovač leštidla. zapnutý. 3. Stisknutím změňte nastavení. 4. Potvrďte nastavení stisknutím tlačítka Zap/Vyp. 7. FUNKCE obsahují sůl, leštidlo a mycí prostředek. Před spuštěním programu je Mohou také obsahovat další čisticí nebo nutné... -
Page 11: Denní Používání
ČESKY 4. Odstraňte sůl, která se vysypala okolo zásobníku na sůl. POZOR! Používejte pouze leštidlo pro myčky nádobí. 1. Stiskněte uvolňovací tlačítko (D) a otevřete víko (C). 2. Nalijte leštidlo (A), dokud kapalina nedosáhne hladiny „max“. 3. Rozlité leštidlo setřete savým 5. - Page 12 9.2 Nastavení a spuštění • Pokud kontrolka stavu leštidla svítí, doplňte dávkovač leštidla. programu 3. Naplňte koše. 4. Přidejte mycí prostředek. Pokud Funkce Auto Off používáte kombinované mycí tablety, zapněte funkci Multitab. Tato funkce snižuje spotřebu energie 5. Nastavte a spusťte správný program automatickým vypnutím nepracujícího...
-
Page 13: Tipy A Rady
ČESKY Zrušení odloženého startu 1. Stisknutím tlačítka Zap/Vyp spotřebič vypněte. během jeho odpočítávání 2. Zavřete vodovodní kohoutek. Když zrušíte odložený start, musíte opět Pokud spotřebič nevypnete, nastavit program a jeho funkce. po třech minutách od konce programu: Současně stiskněte a podržte •... -
Page 14: Čištění A Údržba
• Nepoužívejte větší množství mycího • Přesvědčte se, že se sklenice prostředku, než je správné. Řiďte se vzájemně nedotýkají. pokyny na balení mycího prostředku. • Malé předměty vložte do košíčku na příbory. 10.3 Co dělat, pokud chcete • Lehké kusy vložte do horního koše. -
Page 15: Odstraňování Závad
ČESKY POZOR! Nesprávné umístění filtrů může mít z následek špatné výsledky mytí a poškození spotřebiče. 11.2 Čištění ostřikovacích ramen Ostřikovací ramena nevyjímejte. Jestliže 2. Rozmontujte filtry. se otvory v ostřikovacích ramenech zanesou nečistotami, odstraňte je úzkým špičatým předmětem. 11.3 Čištění vnějších ploch •... - Page 16 Problém a výstražný kód Možné řešení Nelze zapnout spotřebič. • Ujistěte se, že je zástrčka zapojená do síťové zásuvky. • Ujistěte se, že není poškozená domovní pojistka či jistič. Nespustil se program. • Přesvědčte se, že jsou dvířka spotřebiče zavřená.
-
Page 17: Technické Informace
ČESKY Ostatní možné příčiny viz „Tipy a rady“. 13. TECHNICKÉ INFORMACE Rozměry Šířka / výška / hloubka 600 / 850 / 610 (mm) Napětí (V) 220-240 Připojení k elektrické síti Frekvence (Hz) Tlak přívodu vody Min. / max. bar (MPa) 0.5(0.05) - 8 (0.8) Přívod vody max. - Page 18 13. TECHNISCHE INFORMATIE................33 VOOR PERFECTE RESULTATEN Bedankt dat u voor dit AEG-product heeft gekozen. Dit apparaat is ontworpen om vele jaren uitstekend te presteren, met innovatieve technologieën die het leven gemakkelijker helpen maken met functies die gewone apparaten wellicht niet hebben.
-
Page 19: Veiligheidsinformatie
NEDERLANDS VEILIGHEIDSINFORMATIE Lees zorgvuldig de meegeleverde instructies voor installatie en gebruik van het apparaat. De fabrikant is niet verantwoordelijk voor letsel en schade veroorzaakt door een foutieve installatie. Bewaar de instructies van het apparaat voor toekomstig gebruik. 1.1 Algemene veiligheid Dit apparaat is bedoeld voor huishoudelijk gebruik of •... -
Page 20: Veiligheidsvoorschriften
Het apparaat moet met de nieuwe slangset worden • aangesloten op een kraan. Oude slangsets mogen niet opnieuw worden gebruikt. 1.2 Veiligheid van kinderen en kwetsbare mensen Dit apparaat kan worden gebruikt door kinderen van 8 • jaar en ouder en door mensen met beperkte... - Page 21 NEDERLANDS stekker verwisseld moet worden, • Speel niet met het water van het gebruik dan zekering: 13 amp ASTA apparaat en drink het niet op. (BS 1362). • Verwijder de borden pas uit het apparaat als het programma is 2.3 Aansluiting aan de voltooid.
-
Page 22: Beschrijving Van Het Product
3. BESCHRIJVING VAN HET PRODUCT Bovenblad Luchtopening Top sproeiarm Glansmiddeldoseerbakje Bovenste sproeiarm Afwasmiddeldoseerbakje Onderste sproeiarm Onderkorf Filters Bovenkorf Typeplaatje Zoutreservoir 4. BEDIENINGSPANEEL Aan/uit-toets Indicatielampjes Delay-toets Weergave... -
Page 23: Programma's
NEDERLANDS Programmakeuzetoetsen 5. PROGRAMMA’S Programma Mate van vervuil- Programmafasen Opties Type wasgoed • Normaal bevuild • Voorspoelen • Multitab • Serviesgoed en • Wassen 50 °C bestek • Spoelgangen • Drogen • Alle • Voorspoelen • Multitab • Serviesgoed, • Wassen van 45 °C tot bestek en pan- 70 °C •... -
Page 24: Instellingen
Water Energie- Programmaduur Programma (kWh) (min) 12 - 23 1.1 - 1.8 90 - 140 13 - 14 1.5 - 1.6 140 - 150 10 - 12 0.7 - 0.8 60 - 70 1) De druk en temperatuur van het water, de variaties in stroomtoevoer, de opties en de hoeveelheid vaat kan de verbruikswaarden veranderen. - Page 25 NEDERLANDS Duitse graden Franse graden mmol/l Clarke-gra- Wateronthardings- (°dH) (°fH) niveau 23 - 28 40 - 50 4.0 - 5.0 28 - 35 19 - 22 33 - 39 3.3 - 3.9 23 - 27 15 - 18 26 - 32 2.6 - 3.2 18 - 22 11 - 14...
-
Page 26: Opties
• Het display toont de huidige 4. Druk op de knop aan/uit om de instelling. instelling te bevestigen. 5. Pas de dosering van het – = Glansmiddeldosering glansspoelmiddel aan. gedeactiveerd. 6. Vul het glansmiddeldoseerbakje. – = Glansmiddeldosering geactiveerd. 3. Druk op om de instelling te wijzigen. - Page 27 NEDERLANDS 8.1 Het zoutreservoir 8.2 Het vullen van het glansmiddeldoseerbakje LET OP! Gebruik uitsluitend zout dat specifiek is bedoeld voor gebruik in vaatwassers. Het zout wordt gebruikt om de hars in de waterontharder te herladen en voor goede wasresultaten voor dagelijks gebruik.
-
Page 28: Dagelijks Gebruik
9. DAGELIJKS GEBRUIK 1. Draai de waterkraan open. een kleine dosis afwasmiddel in 2. Druk op de aan-/uittoets om het doseerbakje (D). 4. Sluit het deksel. Zorg ervoor dat het apparaat te activeren. Zorg dat het apparaat in de ontgrendelknopje op zijn plaats programmakeuzemodus staat. -
Page 29: Aanwijzingen En Tips
NEDERLANDS Als het aftelproces voltooid is, wordt het Controleer of er afwasmiddel in het programma gestart. afwasmiddeldoseerbakje aanwezig is voordat u een nieuw programma start. De deur openen als het Einde van het programma apparaat in werking is Als het programma voltooid is, zijn de Als u de deur opent terwijl een faseindicatielampjes uit en toont het programma loopt, stopt het apparaat. - Page 30 • Maak aangebrande voedselresten op glansmiddel en zout apart voor de voorwerpen zachter. optimale reinigings- en • Plaats holle voorwerpen (bijv. kopjes, droogresultaten. glazen en pannen) met de opening • Als u multitabletten gebruikt kunt u naar beneden.
-
Page 31: Onderhoud En Reiniging
NEDERLANDS 11. ONDERHOUD EN REINIGING WAARSCHUWING! Schakel het apparaat uit en trek de stekker uit het stopcontact voordat u onderhoudshandelingen verricht. Vuile filters en verstopte sproeiarmen verminderen de wasresultaten. Controleer LET OP! regelmatig de filters en Een onjuiste plaatsing van reinig deze zo nodig. -
Page 32: Probleemoplossing
12. PROBLEEMOPLOSSING Het apparaat start of stopt niet tijdens de Bij sommige problemen wordt er op werking. Kijk voordat u contact opneemt de display een alarmcode weergegeven. met de klantenservice of u het probleem zelf kunt oplossen met behulp van de informatie in de tabel. -
Page 33: Technische Informatie
NEDERLANDS 12.1 De was- en droogresultaten zijn niet naar tevredenheid Probleem Mogelijke oplossing Witte strepen of een blauwe • De vrijgegeven hoeveelheid glansmiddel is te hoog. waas op glazen en servies- Zet de dosering van het glansmiddel op een lagere goed stand. - Page 34 14. MILIEUBESCHERMING Recycle de materialen met het symbool gemarkeerd met het symbool niet weg met het huishoudelijk afval. Breng het . Gooi de verpakking in een geschikte product naar het milieustation bij u in de verzamelcontainer om het te recyclen.
- Page 35 13. TECHNICAL INFORMATION................50 FOR PERFECT RESULTS Thank you for choosing this AEG product. We have created it to give you impeccable performance for many years, with innovative technologies that help make life simpler features you might not find on ordinary appliances. Please spend a few minutes reading to get the very best from it.
-
Page 36: Safety Information
SAFETY INFORMATION Before the installation and use of the appliance, carefully read the supplied instructions. The manufacturer is not responsible if an incorrect installation and use causes injuries and damages. Always keep the instructions with the appliance for future reference. -
Page 37: Safety Instructions
ENGLISH 1.2 Children and vulnerable people safety This appliance can be used by children aged from 8 • years and above and persons with reduced physical, sensory or mental capabilities or lack of experience and knowledge if they have been given supervision or instruction concerning use of the appliance in a safe way and understand the hazards involved. - Page 38 • The appliance can release hot steam if you open the door while a programme operates. • Do not put flammable products or items that are wet with flammable products in, near or on the appliance. 2.5 Service • Contact the Authorised Service Centre to repair the appliance.
-
Page 39: Product Description
ENGLISH 3. PRODUCT DESCRIPTION Worktop Air vent Top spray arm Rinse aid dispenser Upper spray arm Detergent dispenser Lower spray arm Lower basket Filters Upper basket Rating plate Salt container 4. CONTROL PANEL On/off button Indicators Delay button Display... -
Page 40: Programmes
Programme buttons 5. PROGRAMMES Programme Degree of soil Programme phases Options Type of load • Normal soil • Prewash • Multitab • Crockery and • Wash 50 °C cutlery • Rinses • Dry • All • Prewash • Multitab •... -
Page 41: Settings
ENGLISH Water Energy Duration Programme (kWh) (min) 10 - 12 0.7 - 0.8 60 - 70 1) The pressure and the temperature of the water, the variations of the mains supply, the options and the quantity of dishes can change the values. 5.2 Information for test info.test@dishwasher-production.com institutes... - Page 42 German de- French degrees mmol/l Clarke de- Water softener lev- grees (°dH) (°fH) grees 11 - 14 19 - 25 1.9 - 2.5 13 - 17 4 - 10 7 - 18 0.7 - 1.8 5 - 12 <4 <7...
-
Page 43: Options
ENGLISH 7. OPTIONS and detergent functions. They can also Desired options must be contain other cleaning or rinsing agents. activated every time before This option deactivates the release of you start a programme. salt and rinse aid from the respective It is not possible to activate containers. -
Page 44: Daily Use
5. Turn the cap of the salt container clockwise to close the salt container. Water and salt can come out from the salt container when you fill it. Risk of corrosion. CAUTION! To prevent it, after you fill Only use rinse aid... - Page 45 ENGLISH Starting a programme with delay start 1. Set a programme. 2. Press Delay again and again until the display shows the delay time you want to set (from 1 to 19 hours). The delay indicator comes on. 3. Close the appliance door to start the countdown.
-
Page 46: Hints And Tips
It you do not deactivate the appliance, after three minutes from the end of the programme: • All the indicators go off. • the display shows one horizontal status bar. This helps to decrease the energy consumption. Press one of the buttons, the display and the indicators come on again. -
Page 47: Care And Cleaning
ENGLISH 10.3 What to do if you want to • Put small items in the cutlery basket. • Put light items in the upper basket. stop using multi-tablets Make sure that the items do not move. Before you start to use separately •... -
Page 48: Troubleshooting
CAUTION! An incorrect position of the filters can cause bad washing results and damage to the appliance. 11.2 Cleaning the spray arms Do not remove the spray arms. If the holes in the spray arms are clogged, 2. Disassemble the filters. - Page 49 ENGLISH Problem and alarm code Possible solution You cannot activate the ap- • Make sure that the mains plug is connected to the pliance. mains socket. • Make sure that there is no damaged fuse in the fuse box. The programme does not •...
-
Page 50: Technical Information
Refer to "Hints and tips" for other possible causes. 13. TECHNICAL INFORMATION Dimensions Width / height / depth (mm) 600 / 850 / 610 Voltage (V) 220-240 Electrical connection Frequency (Hz) Water supply pressure Min. / max. bar (MPa) 0.5(0.05) - 8 (0.8) - Page 51 ENGLISH...
- Page 52 www.aeg.com/shop...