Table of Contents
Advertisement
Advertisement
Table of Contents

Related Manuals for Panasonic SC-AKX520


Summary of Contents for Panasonic SC-AKX520
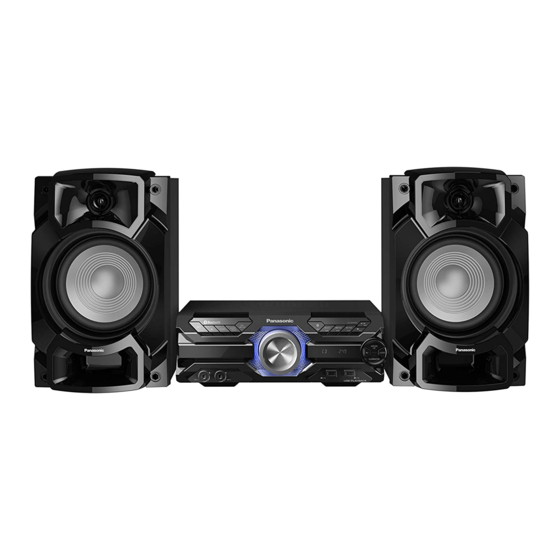
- Page 1 Operating Instructions CD Stereo System SC-AKX520 Model No. SC-AKX320 This illustration shows SC-AKX320. Thank you for purchasing this product. For optimum performance and safety, please read these instructions carefully. Please keep this manual for future reference. TQBJ2272...
-
Page 2: Safety Precautions
Safety precautions These operating instructions are applicable for models SC-AKX520 and SC-AKX320. [AKX520]: Indicate features applicable to SC-AKX520. [AKX320]: Indicate features applicable to SC-AKX320. WARNING! System SC-AKX520 SC-AKX320 Unit Main unit SA-AKX520 SA-AKX320 • To reduce the risk of fire, electric shock or product... -
Page 3: Table Of Contents
Table of contents Caution for AC mains lead Safety precautions ......2 (For the AC mains plug of three pins) Maintenance . -
Page 4: References
The Bluetooth ® (K1YZ02000013) trademarks owned by Bluetooth SIG, Inc. and any use of such marks by Panasonic Corporation is under license. Other trademarks and trade names are those of their respective owners. Note: Android and Google Play are trademarks of Google LLC. -
Page 5: Preparing The Remote Control
Preparing the remote control Placement of speakers The left and right speakers are the same. [AKX520] Use alkaline or manganese battery. [AKX320] Install the battery so that the poles (+ and –) align with those in the remote control. Use only the supplied speakers. You can cause damage to the system and decrease the sound quality if you use other speakers. -
Page 6: Making The Connections
Making the connections Connect the AC mains lead only after all the other connections have been made. Connect the AM loop antenna. Connect the FM indoor antenna. Stand the antenna up on its base until it clicks. Put the antenna where reception is best. Adhesive tape (not supplied) For the United Kingdom and Ireland... - Page 7 Connect the speakers. Connect the AC mains lead. Do not use any other AC mains leads except the [AKX520] supplied one. Attaching the ferrite core (For the AC mains plug of three pins) Pull on the tab to open. READ THE “Caution for AC mains lead” BEFORE Put the speaker cables onto CONNECTION.
-
Page 8: Overview Of Controls
Overview of controls Do the procedures with the remote control. You can also use the buttons on the main unit if they are the same. Standby/on switch [`], [1] View the content information Press to switch the unit from on to standby mode or Select or confirm the option vice versa. - Page 9 Open or close the disc tray Remote control sensor Distance: Within approximately 7 m Select MP3 album or track Angle: Approximately 10° up and 30° down, 30° left Press [ALBUM/TRACK] to select album or track. and right Browse tracks or albums Display panel Turn [VOLUME/MULTI CONTROL] to browse.
-
Page 10: Preparing Media
If prompted for a passkey, input “0000” or “1234”. The device connects with this system automatically after pairing is complete. The MAC address (example: 6C:5A:B5:B3:1D:0F) may be shown before “SC-AKX520” or “SC-AKX320” is shown. The name of the connected device is shown for a few seconds. -
Page 11: Media Playback
█ Disconnecting a device Media playback While a Bluetooth device is connected ® Press [PLAY MENU] repeatedly to select The following marks indicate the availability of the feature. “DISCONNECT?”. CD-R/RW in CD-DA format or with MP3 files. Press [R, T] to select “OK? YES” and then press USB device with MP3 files. - Page 12 █ Note on disc Play menu • This system can play CD-R/RW with CD-DA or MP3 format content. CD USB • Before playback, finalise the disc on the device it was recorded on. • Some CD-R/RW cannot be played because of the Press [PLAY MENU].
-
Page 13: Radio
█ Selecting a preset station Radio Press [PLAY MENU] repeatedly to select “TUNE MODE”. Preparation Or press [8] on the main unit to select “PRESET”. Press [SELECT <, >] repeatedly to select “FM” or “AM”. Continue with step 3. Press [R, T] to select “PRESET” and then press Manual tuning [OK]. -
Page 14: Sound Effects
Using the “Panasonic MAX Juke” app “SALSA”, “SAMBA”, “FOOTBALL”, You can download and install the free Android™ app “KARAOKE” [AKX520] or “FLAT”. “Panasonic MAX Juke” on Google Play™ for additional BASS/MID/ –4 to +4 features, such as to request song playback from multiple TREBLE devices simultaneously. -
Page 15: Using A Microphone
█ Changing the repeat setting Using a microphone Press [PLAY MENU] repeatedly to select “PLAYMODE”. [AKX520] Press [R, T] to select the setting and then press Preparation [OK]. Decrease the volume of the system to its minimum before you connect or disconnect a microphone. RANDOM REPEAT Repeat random playback. -
Page 16: Karaoke
Press [2/3] or [5/6] to select the setting Karaoke and then press [OK]. Or turn [VOLUME/MULTI CONTROL] to select the setting. [AKX520] Preparation VOCAL CANCEL “OFF”, 1 to 3, “L”, “R”, “L+R” Select the music source. When using stereo source not Note: formatted for Karaoke The Karaoke function is switched off when you switch off the... -
Page 17: Clock And Timers
Play timer Clock and timers (Except for Bluetooth and AUX source) ® You can set the timer to come on at a certain time to wake Setting the clock you up. Preparation This is a 24-hour clock. Set the clock. Press [SETUP] to select “CLOCK”. -
Page 18: External Equipment
® [AKX520] Software update Press [PLAY MENU] to select “AUX MODE”. Occasionally, Panasonic may release updated software Press [R, T] to select the mode and then press for this unit that may add or improve the way a feature [OK]. -
Page 19: Troubleshooting
® “SDEMO OFF” is shown. audio output to “SC-AKX520” or “SC-AKX320” manually. Read the operating instructions of the device for details. No operations can be done with the remote control. • Examine that the battery is installed correctly. - Page 20 • The system has not been used for 20 minutes and will switch off within a minute. To cancel, press any button. When other Panasonic equipment responds to the remote “DEVICE CONNECTED FULL” control of this system, change the remote control code for •...
-
Page 21: Specifications
█ Terminal section Specifications USB port USB standard USB 2.0 full speed █ General Media file format support MP3 (*.mp3) USB device file system FAT12, FAT16, FAT32 Power supply AC 220 V to 240 V, 50 Hz AUX IN Power consumption Audio input Pin jack (1 system) [AKX520]... - Page 22 Declaration of Conformity (DoC) Izjava o skladnosti (DoC) Hereby, “Panasonic Corporation” declares that this “Panasonic Corporation” v tem dokumentu izjavlja, da je product is in compliance with the essential requirements izdelek v skladu z bistvenimi zahtevami in drugimi and other relevant provisions of Directive 2014/53/EU.
- Page 23 Ελληνικά Norsk Δήλωση συμμόρφωσης (DoC) Samsvarserklæring (DoC) H “Panasonic Corporation” δηλώνει ότι το προϊόν αυτό “Panasonic Corporation” erklærer herved at dette είναι συμμορφωμένο προς τις βασικές απαιτήσεις και produktet samsvarer med de grunnleggende kravene og άλλες σχετικές διατάξεις της Οδηγίας 2014/53/EΕ.
- Page 24 Disposal of Old Equipment and Batteries Deklaracija o podobnosti (DoC) Only for European Union and countries with recycling systems Ovime „Panasonic Corporation” izjavljuje da ovaj proizvod udovoljava osnovnim zahtjevima i ostalim relevantnim These symbols on the products, packaging, odredbama Direktive 2014/53/EU.
- Page 25 Manufactured by: Panasonic Corporation Kadoma, Osaka, Japan Authorized Representative in Panasonic Marketing Europe GmbH Europe: Panasonic Testing Centre Winsbergring 15, 22525 Hamburg, Germany Panasonic Corporation Web Site: http://www.panasonic.com...