Table of Contents
Advertisement
Advertisement
Table of Contents

Related Manuals for Sony VAIO PCV-70


Summary of Contents for Sony VAIO PCV-70
- Page 2 NOTICE TO USERS © 19% Sony Electronics Inc. All rights reserved. This manual and the software described herein, in whole or in part, may not be reproduced, translated, or reduced to any machine-readable form withouf prior wriften approval. SONY ELECTRONICS INC. PROVIDES NO WARRANTY WITH REGARD TO...
- Page 3 Sony Service Center. Model Number: PCV-70, PCV-90 Serial Number:_______________________________________ WARNING □ To prevent fire or shock hazard, do not expose your Sony PC to rain or moisture. □ Never install modem or telephone wiring during a lightning storm. □...
-
Page 4: Table Of Contents
Setting Up Your Sony PC Unpacking Your PC.;................3 Choosing a Location for Your PC............4 Back Panel Overview................6 Connecting the Sony Multimedia Computer Display..... 7 Connecting a Display, Speakers, and a Microphone......8 Connecting the Optional Palmrest............9 Connecting the Keyboard and Mouse..........10 Connecting the Phone Line and Phone..........11... - Page 5 Using My Space................30 Changing VAIO Space Settings.............30 Using the Windows 95 Taskbar............ 33 Switching to Windows 95.............. 34 Shutting Down Your Sony PC............35 Introducing the Sony A/V Suite The A/V Wall...................38 Using the Mixer..................40 Using the CD Player................42 Playing an Audio CD..............
- Page 6 Using More A/V..................77 Getting Help Calling SOS..................... 80 Troubleshooting..................83 Using the Recovery CD.................87 Upgrading and Maintaining Your Sony PC Removing the Cover................90 Inserting an Add-in Board..............93 Adding Memory..................95 Replacing the Lithium Battery............. 97 Replacing the Cover................99 Computer Basics Using the Keyboard................
- Page 7 Contents Other Information Notes on Use..................109 On the Power Source..............109 On Disposal of the Lithium Battery..........110 On Handling..................Ill On Installation................111 On Moisture Condensation............112 On Upgrading the System............112 On Using the Hard Disk Drive........... 113 On Handling Diskettes..............113 On Handling CD-ROM Discs............113 On Cleaning CD-ROM Discs............114 Regulatory Information...............115...
- Page 8 Here are just some of the features your Sony PC has to offer. □ Exceptional performance: Your PC includes a fast Intel® Pentium® processor, an 8x CD-ROM drive, and a 28.8 Kbps DSVD (Digital Simultaneous Voice Data) modem.
-
Page 9: Welcome
This user guide offers a quick introduction and reference to your Sony PC. □ Setting Up Your Sony PC shows you how to connect the standard components of your system—generally in under 15 minutes. This section also explains how to connect additional components you may have purchased, such as a printer, a MIDI instrument, and a joystick. -
Page 10: Setting Up Your Sony Pc
~ Setting Up Your Sony PC Your Sony PC comes with all the software titles preinstalled on your hard disk drive. Just follow these simple steps to connect the cables and turn on the PC, and your Sony PC is ready to use. -
Page 11: Choosing A Location For Your Pc
Setting Up Your Sony PC Choosing a Location for Your PC Here are some things to consider when planning vour workspace: Stable work surface—Use a stable work surface large enough to support the computer, the display, and other equipment. _J Ventilation—Leave at least eight inches of space on the left and back sides of your PC to enable proper ventilation. - Page 12 Choosing a Location for Your PC Furniture and posture—Sit in a chair with good back support and armrests. Adjust the level of the chair so your feet are flat on the floor. A footrest may make you more comfortable. Sit in a relaxed, upright posture—avoid slouching forward or leaning far backward.
-
Page 13: Back Panel Overview
Setting Up Your Sony PC Back Panel Overview The back panel of your Sony PC contains the connectors where you plug in supplied and optional accessories. The icons on the back panel serve as a map to help you locate the connectors on your PC. -
Page 14: Connecting The Sony Multimedia Computer Display
Use the red symbol to locate the connector. Plug the red microphone cable into this connector. See the manual that came with your Sony Multimedia Computer Display for more information on setting up and using the display. -
Page 15: Connecting A Display, Speakers, And A Microphone
Sony PC's audio features. Note Make sure your speakers are designed for computer use. Contact your Sony dealer for information on purchasing Sony computer speakers. Follow these steps to connect your display,, speakers, and microphone. -
Page 16: Connecting The Optional Palmrest
Connecting the Optional Palmrest Connecting the Optional Palmrest Your Sony PC is equipped with an optional palmrest that you can attach to your keyboard. Follow these steps to connect the palmrest. Place the keyboard and palmrest upside down on a flat surface. -
Page 17: Connecting The Keyboard And Mouse
Setting Up Your Sony PC Connecting the Keyboard and Mouse Follow these steps to connect the keyboard and mouse. Use the purple symbol to locate the connector. Plug the iVijVl KEYBOARD purple keyboard cable into this connector. Use the blue-green CZB" symbol to locate the... -
Page 18: Connecting The Phone Line And Phone
LINE Note ^ Your Sony PC does not work with party lines, cannot be connected to a coin-operated telephone, and may not work with multiple phone lines or a private branch exchange (PBX). -
Page 19: Connecting The Power Cords
Setting Up Your Sony PC Connecting the Power Cords Your Sony PC is shipped with the voltage switch set to 115 volts. This is the correct setting for most homes and businesses in North America. If you use the PC in a location that requires 230 volts, change the setting to 230 volts by moving the switch up. -
Page 20: Connecting Additional Components
You can add functionality to your Sony PC by connecting a printer, joystick, or MIDI device. Connecting a Printer You can connect a printer to your Sony PC to print documents from your PC. Use the dark grey symbol to locate the connector. -
Page 21: Connecting A Joystick Or Midi Instrument
Setting Up Your Sony PC Connecting a Joystick or MIDI Instrument You can connect a joystick or MIDI instrument to your Sony PC. You can also purchase an adapter to connect additional devices. □ Use the dark grey ^ symbol to locate the connector. -
Page 22: Starting Your Sony Pc
Starting Your Sony PC Starting Your Sony PC After you connect all the cables and accessories to your Sony PC, you're ready to turn on the PC. Press the power switch on the display to turn on the power. Press the power switch on the upper-left panel of the PC to turn on the power. -
Page 23: Registering Windows 95
Setting Up Your Sony PC Registering Windows 95 The first time you turn on your Sony PC, you need to complete a few steps to register and configure the Windows 95 software that is already installed on your PC. You do not need to repeat these steps each time you turn on your computer. -
Page 24: Registering Your Pc
Complete the remaining forms by clicking the Next button each time you complete a form. Click the Register Now button to register your PC. The Sony PC automatically transfers your regisfration information using your built-in modem and a toll-free felephone number. -
Page 25: Accessing The Cd-Rom And Diskette Drives
Setting Up Your Sony PC Accessing the CD-ROM and Diskette Drives You need to open the front panel to access the CD-ROM and diskette drives. Follow these steps to open and close the front panel. Push in the lower front panel on your PC. - Page 26 Accessing the CD-ROM and Diskette Drives After you finish using the CD-ROM and diskette drive, slide the upper panel up until you hear the lower panel click into place.
-
Page 28: Getting Started With Vaio Space
Getting Started with VAIO Space What Is VAIO Space? Sony VAIO Space is a desktop environment you can use to: □ Launch applications □ Connect to online services □ Access the components in the Sony A/V Suite to watch videos,... -
Page 29: The Vaio Space Screen
Floor Description Area Here you can connect to online services, launch an Internet browser, go directly to the Sony World Wide Web site, and access Sony Online Support. Walls VAIO Space contains three walls: the Video Wall, the A/V Wall, and the Application Wall. -
Page 30: Exploring The Sky
The Sky contains two animated icons and the Net Space window, which appears when you click an empty part of the Sky. The Sony Online and SOS icons are available for you to use when they are spinning. If the icons are not currently moving, you need to close any open windows to make the icons available. -
Page 31: Using Sos
Getting Started with VAIO Space Using SOS The SOS icon connects you to Sony Online Support. You can use SOS to exchange information with a Sony customer service representative. For details on using SOS, see "Calling SOS" on page 80. -
Page 32: Exploring The Walls
The VAIO Space walls help you organize and access the software on your Sony PC. Although you can see all three walls at the same time, only the center wall is active. To activate another wall, just click the wall. -
Page 33: Adding And Removing Applications In Vaio Space
Getting Started with VAIO Space Adding and Removing Applications in VAIO Space If you purchase additional software, you can add icons to VAIO Space so that you can easily launch these applications. You can add software to any of the following areas within VAIO Space: □... - Page 34 Exploring the Walls Under Windows, change drives and folders, as necessary, to select the folder containing the application. Select the icon for the software you want to add. Note ^ You can launch the application to vcrifii your icot: selection by clicking the Test button.
- Page 35 Getting Started with VAIO Space To remove an application from VAIO Space Note The foUoiriii;;; procedure only rcnioivf the application from VAIO Space. To remove Introducing Microsoft the application and all its files from your hard disk, see the Windows 95 guide or the Windows 95 online help.
-
Page 36: Exploring The Floor
Runs the Welcome CD, where you can preview the applications preinstalled on your PC and learn about the technology your Sony PC has to offer. Volcóme I Lets you change your VAIO Space preferences. Displays on-screen help for VAIO Space. -
Page 37: Using My Space
Getting Started with VAIO Space Using My Space For quick access to the applications you use most often, place them in the My Space window. To add software to this window, see "Adding and Removing Applications in VAIO Space" on page 26. To launch an application from My Space Click the My Space icon to open the My Space window. - Page 38 VAIO Space applications at the mode same time. Default Browser Select the Internet browser to launch when you click the Sony Online icon. Dial-Up Networking Select the Internet Service Provider to use with connection Sony Online. Show 'Account Setup' View or bypass the Account Setup window.
- Page 39 Getting Started with VAIO Space Selecting Movies for the Video Wall You can add MPEG movie files to the Video Wall and remove the default files. To add movies Click fhe Setfings icon on the Floor. Click the Movies button. Under Windows, select the icon for the movie you want to add.
-
Page 40: Using The Windows 95 Taskbar
Exploring the Floor Using the Windows 95 Taskbar The Windows 95 taskbar contains the Start button and buttons representing each open application and folder. It offers a quick and easy way to switch between open applications. By default, the taskbar appears at the bottom of the screen, but you can move it to any edge of the screen. -
Page 41: Switching To Windows 95
Getting Started with VAIO Space » Switching to Windows 95 VAIO Space and Windows 95 run simultaneously, and it's easy to switch back and forth between them. If you don't plan to use VAIO Space for an extended period of time, you can close it and work only in Windows 95. To switch between Windows 95 and VAIO Space Click the Windows icon on the Floor. -
Page 42: Shutting Down Your Sony Pc
Exploring the Floor Shutting Down Your Sony PC When you're ready to turn off your PC, use the following procedure. Caution To iivoid the potential los^ of data, do not pre>^ the power fwiteh before you ahut down the PC. -
Page 44: Introducing The Sony A/V Suite
"home stereo component" interface offers you a familiar set of sound and video controls. You can access the Sony A/V Suite by clicking the A/V Wall in VAIO Space. You can also access the individual components from the Windows 95 desktop by opening the Start menu, pointing to Sony Folder, pointing to A/V Suite, and then clicking the player you want to use. -
Page 45: The A/V Wall
Introducing the Sony A/V Suite The A/V Wall In addition to including the Sony A/V Suite, the A/V Wall provides access to your phone and, through the More A/V button, access to additional A/V software titles. Each component is dedicated to a specific audio/video function. - Page 46 Launches the Phone application where you can use the built-in speakerphone, answering machine, and fax features. See the separate user guide for this application. Lists additional software titles that come with your Sony More A/V PC. You can also use this area to add other A/V software for quick access.
-
Page 47: Using The Mixer
Introducing the Sony A/V Suite Using the Mixer The Mixer enables you to control your Sony PC's sound sources for Windows multimedia and sound programs. The Mixer has individual contrcals for; □ Master (all sources) playback and recording Note ^ Use the Master setting to override the individual settings for the other players and devices. - Page 48 Using the Mixer To change the Mixer volume setting Click the Mixer on the A/V Wall. Drag the slider(s) to set the volume for the selected sound source. T M» ' MIX 1 Mc 1 "necoRO HMER MMLTER JEE] M'ii'lIjiJi 1 0«>...
-
Page 49: Using The Cd Player
Introducing the Sony A/V Suite Using the CD Player The CD Player plays regular audio CDs in your Sony PC's CD-ROM drive. It features the same type of functionality as an ordinary CD player (such as Next Track and Shuffle Play). You can also create playlists of your favorite songs for current and future listening sessions. - Page 50 other CD Player Functions Action Procedure Toggle the sound on and off Click MUTE. Stop play Click (Stop). Pause play Click (Pause). Go to the next track Click H (Next). Go to the beginning of the Click SWM.:1 (Previous). current track Rewind the current track Click and hold HWa (Rewind).
-
Page 51: Naming A Cd
Introducing the Sony A/V Suite Naming a CD Before you can create a playlist, you must name the CD. The CD Player stores this information and remembers it whenever you play the CD. To name a CD Click the CD Player on the A/V Wall. -
Page 52: Naming Cd Tracks
Using the CD Player Naming CD Tracks After you name a CD, you can name the tracks on it as well. The CD Player stores this information and remembers it whenever you play the CD. To name tracks on a CD Click the CD Player on the A/V Wall. -
Page 53: Creating Cd Playlists
Introducing the Sony A/V Suite Creating CD Playlists After you name a CD, you can create a playlist ot the tracks you want to play. You can customize the list to include only your favorite tracks or all tracks on the CD. The CD Player stores this information and remembers it whenever you play the CD. - Page 54 Using the CD Player Select the tracks you want to add to the playlist: Procedure Action Copy one track in the Double-click the track, or select the track and then Names list to the playlist click [ (Add Selection). Copy all tracks in the Click 1 (Add All Files).
-
Page 55: Removing Tracks From A Cd Playlist
Introducing the Sony A/V Suite Removing Tracks from a CD Playlist If you don't want to listen to specific tracks on a CD, you can remove them from the playlist. To remove a track from a CD playlist Click the CD Player on the A/V Wall. -
Page 56: Using The Wav Player
Using the WAV Player Using the WAV Player The WAV Player lets you record and play WAV sounds (such as keyboard clicks and your own voice). You can make playlists of your favorite sounds to play during current and future listening sessions. You can also use the WAV Player to edit sounds. - Page 57 Introducing the Sony A/V Suite Other WAV Player Functions Procedure Action Toggle the sound on Click MUTE. and off Stop play Click 0 (Stop). Pause play Click (Pause). 'Creating WAV Playlists" on Click PLAYLIST. See Create or update page 51.
-
Page 58: Creating Wav Playlists
Using the WAV Player Creating WAV Playlists You can create or customize a playlist of the WAV files you want to play (such as animal sounds or funny noises). You can add files one at a time, or you can add a group of files. To create and customize a WAV playlist Click the WAV Player on the A/V Wall. - Page 59 Introducing the Sony A/V Suite Select the WAV files you want to add to the playlist, changing drives and folders as necessary: Procedure Action Double-click the file, or select the file and then Copy one file in the Names list to the playlist click I B I (Add Selection).
-
Page 60: Playing A Wav Playlist
Using the WAV Player Playing a WAV Playlist If you have more than one WAV playlist, you must select which list you want to play. If you have only one playlist, just click | » | (Play) on the WAV Player. To play a WAV playlist Click the WAV Player on the A/V Wall. -
Page 61: Removing Files From A Wav Playlist
Introducing the Sony A/V Suite Removing Files from a WAV Playlist If you don't want to hear specific files in a WAV playlist, you can remove them from the list. To remove files from a WAV playlist Click the WAV Player on the A/V Wall. -
Page 62: Using Audioview
Using AudioView Using AuciioView^'^ AudioView enables you to edit WAV sounds using common editing functions, such as cut, copy, and paste. Other editing functions include sound mixing and changing playback volumes. You can record and edit new WAV sounds as well. Editing a WAV File You can edit a WAV file to remove dead (flat) spots and to rearrange and mix sounds. - Page 63 Introducing the Sony A/V Suite Click I > I (Play) to hear the sound. !^AudioView StNKDR WAV £1 £dl Xiartrforn« Qpbora ^ndowc -Ml a I ► I » ►>• I ^ r |g^' | 1^11 liMlgBl 1661 ji \ Select the segment you want to cut. See "Segment Selection Functions"...
- Page 64 Using AudioView Note ^ After select the segment, the displai/ highlights the segment. Note the numbers in the Rtinge Start and Range End marker boxes. These numbers can help’ you select the same segment again. For example, to select this segment End Point: Drag the mouse to here, then release.
- Page 65 Introducing the Sony A/V Suite To copy and paste data Click the WAV Player on the A/V Wall. Click the AUDIOVIEW button to display AudioView. If necessary, open the File menu and select Open to display the file you want to edit.
- Page 66 Using AudioView Other AudioView Edit Functions Procedure Action Stop play Click (Stop). Pause play Click (Pause). Rewind the current sound Click and hold | | (Rewind). Fast forward the current sound Click and hold | »■ j (Fast Forward). Adjust the volume Drag the WAV volume sliders on the WAV Player or the Mixer.
- Page 67 Introducing the Sony A/V Suite Other AudioView Functions—Edit and Transforms Menus Procedure Action Insert silence (dead or flat spot) Open the Edit menu and select Insert Silence. Open the Edit menu and select Load File into Copy a file to the Clipboard Clipboard.
-
Page 68: Recording A Wav File
Using AudioView Recording a WAV File You can make WAV recordings easily using the WAV Player or AudioView. Select an input source (such as Mic or CD) in the Mixer and set its record volume level. See "Using the Mixer" on page 40 for details. If you want to record from fhe CD-ROM drive or from an external source (such as a tape deck), find the selection you want to record. -
Page 69: Using The Midi Player
Introducing the Sony A/V Suite Using the MIDI Player The MIDI Player plays and records standard MIDI (.MID) music files. You can also make playlists of your favorite music to play during current and future listening sessions. Mure i m... - Page 70 Using the MIDI Player Other MIDI Player Functions Action Procedure Mute the sound Click MUTE. Stop play Click (Stop). Pause play Click (Pause). Click PLAYLIST. See "Creating MIDI Create or update a playlist Playlists" on page 64. Go to the next file in the playlist Click I »X 1 (Next).
-
Page 71: Creating Midi Playlists
Introducing the Sony AA/ Suite Creating MIDI Playlists You can create or customize a playlist of the MIDI files you wanf to play (such as files of an individual composer or files from your own recording sessions). You can add files one at a time, or you can add a group of files. - Page 72 Using the MIDI Player Select the MIDI files you want to add to the playlist, changing drives and folders, as necessary: Action Procedure Copy one file in the Double-click the file, or select the file, and then Names list to the playlist click I B I (Add Selection).
-
Page 73: Playing A Midi Playlist
Introducing the Sony A/V Suite Playing a MIDI Playlist If you have more than one MIDI playlist, you must select which list you want to play. If you have only one playlist, just click | >■ | (Play) on the MIDI Player. -
Page 74: Removing Files From A Midi Playlist
Using the MIDI Player Removing Files from a MIDI Playlist If you don't want to hear specific files in a MIDI playlist, you can remove them from the list. To remove files from a MIDI playlist Click the MIDI Player on the A/V Wall. Click the PLAYLIST button to display the MIDI Playlist dialog box. -
Page 75: Recording A Midi File
MIDI instrument. Before you record a MIDI file, you musf connect a MIDI instrument to the MIDI interface connector on the back panel of your Sony PC (see "Connecting a Joystick or MIDI Instrument" on page 14). Click the MIDI Player on the A/V Wall. -
Page 76: Using The Video File Player
Using the Video File Player The Video File Player plays AVI (.AVI) and MPEG (.MPG and .DAT) videos on your Sony PC. You can use it to make playlists of your favorite videos to play during current and future viewing sessions. You can view playlists in a small window or in a full screen as a screen saver. - Page 77 Introducing the Sony A/V Suite Select the video files you want to add to the playlist, changing drives and folders, as necessarv: Action Procedure Copy one file in the Double-click the file, or select the file and then Names list to the playlist click B I (Add Selection).
- Page 78 Using the Video File Player Other Video File Player Functions Action Procedure Change between full-screen, auto Click SCREEN. size, and user-size mode Stop full-screen play Click anywhere on the screen. Click MUTE. Mute the sound Stop play Click (Stop). Pause play I n I Click (Pause).
-
Page 79: Playing A Video Playlist
Introducing the Sony A/V Suite Playing a Video Playlist If you have more than one Video playlist, you must select which list you want to play. If you have only one playlist, just click |^»■ | (Play) on the Video File Player. -
Page 80: Removing Files From A Video Playlist
Using the Video File Player Removing Files from a Video Playlist If you don't want to view specific files in a Video playlist, you can remove them from the list. To remove files from a video playlist Click the Video File Player on the A/V Wall. Click the PLAYLIST button to display the Video Playlist dialog box. -
Page 81: Using The Video Cd Player
Introducing the Sony A/V Suite Using the Video CD Player The Video CD Player plays CDs in the Video CD format, such as Karaoke and enhanced CDs. To play a Video CD Click the Video CD Player on the A/V Wall to display the Video CD Player and the viewing screen. - Page 82 Using the Video CD Player Other Video CD Player Functions Action Procedure Select an option on the Click the numbered button that corre^onds video screen to your selection (for example, click ^ I select 1). Control an interactive sequence Click pn (Play)^ ^ (selection function) Mute the sound Click MUTE,...
- Page 83 Introducing the Sony A/V Suite Action Procedure Enable Karaoke mode for video Click CONFIGURE, and then select the CDs with Karaoke content Karaoke check box. Enable or disable the audio Click CONFIGURE, and then, under Audio, select the Disabled check box.
-
Page 84: Using More A/V
Using More A/V Using More A/V More A/V displays additional software titles that came with your Sony PC. You can add your own audio/video titles for quick access. For information on adding software to the More A/V area, see “Adding and Removing Applications in VAIO Space"... -
Page 86: Getting Help
□ The online System Reference Manual provides detailed information about the hardware in your Sony PC, as well as how to setup and upgrade your system. You can access the online System Reference ManilOt hom the Start menu. -
Page 87: Calling Sos
SOS. For this reason, it is recommended that you connect a regular telephone to the Sony PC as described in "Connecting the Phone Line and Phone" on page 11. You can then take the receiver off the hook to maintain the... - Page 88 Calling SOS To place a call to SOS Click the SOS icon in the VAIO Space Sky, or select SOS from the Sony Folder on the Start menu. ProMm DMCi^on •S'OS' In the SOS window, type your name, phone number, and a description of the problem.
- Page 89 Getting Help When the Remote Command Security dialog box appears, select an access level by clicking one of these options: Description Option Allows the CSR to fully interact with your PC. The CSR Full access can access all the files on your hard disk drive and can copy files to and from your PC to solve your problem.
-
Page 90: Troubleshooting
This section describes how to solve common problems you may encounter when using your PC. Many problems have simple solutions, so try these suggestions before you call Sony Online Support. For more advanced troubleshooting information, see the online System Reference Manual. - Page 91 My software program "locks up" or crashes □ Contact the software publisher or designated provider for technical support. See the About Your Sony PC guide for a complete list of phone numbers. My speakers have no sound □...
- Page 92 □ Check that the phone number the program is dialing is correct. □ Check that the software you are using is compatible with the Sony PC modem. (All preinstalled programs are compatible.) Call the software publisRer or Sony Online Support.
- Page 93 Getting Help My keyboard doesn't work □ Check that the keyboard is plugged into the connector. See KEYBOARD "Connecting the Keyboard and Mouse" on page 10 for details. I can't find the Windows 95 taskbar □ Use the mouse to point to the bottom of the screen below the VAIO Space Floor area.
-
Page 94: Using The Recovery Cd
If you have any cjuestions on using the Recovery CD, contact Sony Online Support (SOS). To use the Recovery CD Note ^ Your PC may include more than one Recovery CD. -
Page 96: Upgrading And Maintaining Your Sony Pc
This section also explains how to change the lithium battery. For more information on upgrading your Sony PC, see the online System Reference Manual. The procedures in this section assume that you are familiar with the... -
Page 97: Removing The Cover
Removing the Cover To insert an add-in board, add memory, or replace the lithium battery, you need to open your Sony PC. You must remov'e the panels in a specific order: the left side panel, the rear panel, and the I/O bracket. - Page 98 Removing the Cover To remove the rear panel Note ^ You do not need to remove the rear panel to replace the lithium battery. □ Push the tabs to unsnap and remove the rear panel.
- Page 99 Upgrading and Maintaining Your Sony PC To remove the I/O bracket Note ^ You do not need to remove the I/O bracket to add memory or replace the lithium battery. □ If you are installing or removing an add-in board, unscrew the...
-
Page 100: Inserting An Add-In Board
Caution Make sure you observe the proper safety precautions when you add boards to your Sony PC. See "Notes on Use" on page 109. To insert an add-in board Shut down your PC, turn off all peripheral devices, such as your printer, display, and speakers, and then unplug your PC. - Page 101 Upgrading and Maintaining Your Sony PC Install the add-in card by plugging it into the connector on the system board. Attach any internal cables that the board requires (see the manual for the add-in card). Replace the cover as described on page 99.
-
Page 102: Adding Memory
The memory options in Bank 0 and Bank 1 are interchangeable. Caution Make sure you observe the proper safety precautions when you add SIMMs to your Sony PC. See "Notes on Use" on page 109. To install memory Shut down your PC, turn off all peripheral devices, such as your printer, display, and speakers, and then unplug your PC. - Page 103 Upgrading and Maintaining Your Sony PC Hold the SIMM with the chips face up and align the SIMM over the SIMM socket as shown. Firmly insert the SIMM at an angle into the bottom edge of the SIMM socket. Press evenly against the edge of the SIMM as you raise it into the SIMM socket.
-
Page 104: Replacing The Lithium Battery
Replacing the Lithium Battery Replacing^he Lithium Battery After several years, when the lithium battery starts to weaken, the system settings stored in CMOS RAM, such as the date and time, may be wrong. When this occurs, you need to replace the lithium battery. To replace the lithium battery To run the Setup utility, press F3 for a few seconds while rebooting your PC, then press and hold FI to run the BIOS setup utility. - Page 105 Upgrading and Maintaining Your Sony PC Install the new battery with the plus (+) side up. WARNING A\Tlu’rc is danger of explosion if you replace the battery incorrectly. You must replace the battery only with a CR2032 type lithium battery. Discard used batteries according to the instructions on page 210.
-
Page 106: Replacing The Cover
Replacing the Cover Replacing the Cover Replace the panels in the following order: To replace the cover Replace the I/O bracket. Use the two screws to hold it in place. - Page 107 Upgrading and Maintaining Your Sony PC Replace the rear panel. Make sure the tabs snap into place.
- Page 108 Replacing the Cover .3 Replace the side panel.
-
Page 110: Computer Basics
Computer Basics Using the Keyboard Your keyboard is very similar to a typewriter's, but the keyboard has additional keys that perform specific computer-related tasks. Print Screen key Function keys Escape Correction keys Numeric keypad Navigation keys Description Numeric keypad Contains the keys found on a typical calculator. Use the numeric keypad to type numbers or to perform mathematical calculations such as addition and subtraction. - Page 111 Computer Basics Description The twelve function keys along the top of the keyboard Function keys are used to perform designated tasks. For example, in many applications, FI is the Help key. The task associated with each function key may vary from one application to the next.
-
Page 112: Using The Mouse
Using the Mouse Using the1\^ouse Using a mouse may be difficult at first, but after you become comfortable using it, you can save a lot of time. The following terms are commonly used to describe actions you perform with a mouse. Term Description Point... -
Page 113: Setting Up The Mouse For Left-Fiand Use
Computer Basics Setting Up the Mouse for Left-Hand Use You can control the mouse with your right or left hand. When you use the mouse with your left-hand, you may find it easier to reverse the button functions. When the functions are reversed, the right mouse button is used for normal clicking and dragging, and the left button is for displaying shorfcuf menus (right-clicking). -
Page 114: Using The Cd-Rom Drive
Using the CD-ROM Drive Using the1Zi)-ROM Drive To use the CD-ROM drive, you must open the front panel. See "Accessing the CD-ROM and Diskette Drives" on page 18 for details. To use the CD-ROM drive Press the Eject button on the front panel of the PC to open the CD-ROM drive. -
Page 115: Using The Diskette Drive
Computer Basics Using the Diskette Drive To use the diskette drive, you must open the front panel. See “Accessing the CD-ROM and Diskette Drives" on page 18 for details. Most diskettes contain a write-protect tab. The write-protect tab prevents accidental changes to a diskette. -
Page 116: Other Information
other Information Notes on Use On the Power Source □ Your PC operates on 100-120 V AC 50/ 60 Hz (for North American countries) or 220-240 V AC 50 Hz (for European countries). □ Be sure to set the voltage setting switch to the correct setting before turning on the power;... -
Page 117: On Disposal Of The Lithium Battery
A\The lithium battery may explode if mistreated. Do not disassemble it or dispose of it in fire. Replace the battery with a Sony CR2032 lithium battery. Using a type of battery other than a CR2032 may present a risk of fire or explosion. -
Page 118: On Handling
PC and then unplug it. You may want to have the PC checked by qualified personnel before operating it any further. On Installation □ Do not place your Sony PC in a location subject to; □ HSt sources, such as radiators or air ducts □ Direct sunlight □... -
Page 119: On Moisture Condensation
Your PC, keyboard, and mouse consist of high-precision electronic parts. Do not drop them or bump them against other objects. Your Sony PC will not work with party lines, cannot be connected to a coin-operated telephone, and may not work with multiple phone lines or a private branch exchange (PBX). -
Page 120: On Using The Hard Disk Drive
Electrostatic discharge (ESD) can damage disk drives, add-in cards, and other components. Do the procedures described in the “Upgrading and Maintaining Your Sony PC" section only at an ESD workstation. If such a station is not available, do not work in a carpeted area, and do not handle materials that produce or hold static electricity (cellophane wrappers, for example). -
Page 121: On Cleaning Cd-Rom Discs
other Information On Cleaning CD-ROM Discs □ Fingerprints and dust on the surface of a disc may cause read errors. Proper care of the disc is essential to maintain its reliability. Do not use solvents such as benzine, thinner, commercially available cleaners or anti-static spray, as they may cause damage to the disc. -
Page 122: Regulatory Information
Regulatory Information Regulatory Information This equipment has been tested and found to comply with the limits for a Class B digital device, pursuant to Part 15 of the Rules. These limits are designed to provide reasonable protection against harmful interference in a residential installation. This equipment generates, uses, and can radiate radio frequency energy and, if not installed and used in accordance with the instructions, may cause harmful interference to radio communications. -
Page 123: Fcc Part 68
This equipment cannot be used on telephone-company-provided coin service. Connection to Party Line Service is subject to state tariffs. Repair of the modem should be made only by a Sony Service Center or Sony authorized agent. For the Sony Service Center nearest you, call... -
Page 124: Telephone Consumer Protection Act Of 1991
Regulatory Information Telephone Consumer Protection Act of 1991 The Telephone Consumer Protection Act of 1991 makes it unlawful for any person to use a computer or other electronic device to send any message via a telephone facsimile machine unless such message clearly contains, in a margin at the top or bottom of each transmitfed page or on the first page of the transmission, the date and time it is sent and an identification of the business, other entity, or individual sending the... -
Page 126: Index
24, 25, 30 16-bit to 8-bit WAV conversions 60 problems with 84 moving between 33 A/V Suite See Sony A/V Suite organizing 21 A/V Wall (VAIO Space) 25, 37, 38 recovering 87 accessing online support 17, 24 attaching cables 6... - Page 127 CD tray 43, 76,107 controls 43 My Space window 30 creating playlists 43,46-47 Net Space window 24 labeling tracks 45 Sony VAIO Space 34 naming CDs 44 computer starting 42 adding functionality 13 CD Playlist Edit dialog box 44,45,46,48 adjusting voltage settings 12,109...
- Page 128 9 DELETE key 103 phone 11 deleting background noise 59 power cords 12,109 desktop 21 precautions 111 See also Sony VAIO Space CONTINUE button selecting startup 31 CD Player 43 dictionaries 25 MIDI Player 63 disconnecting power cords 110...
- Page 129 electrostatic discharge 89 nonstandard 8 e-mail support 79 online support 79 encyclopedias 25 regulatory information 115-117 enhanced CDs 74 removing panels 90 Esc key 104 replacing panels 99 European power settings 109 troubleshooting 83, 84, 86 Exit icon 29, 34 headphones Exit VAIO Space dialog box 34 caution for use 40...
- Page 130 5 launching applications 24,25,30 Mix Paste command 60 problems with 84 Mixer (A/V Suite) 40-41 launching Sony A/V Suite 37 controls 40 launching Sony VAIO Space 34 moving sliders 41 Load File Into Clipboard command 60 mixing sounds 40,55...
- Page 131 Sony Multimedia Computer online help Display See also troubleshooting multimedia reference materials 25 opening multimedia See Sony A/V Suite Add Movie window 32 multiple applications, moving among applications 24, 25, 30 problems with 84 music files See MIDI files AudioView window 55...
- Page 132 25 MIDI files 62, 64, 66 protecting your investment 12,17 videos 72 WAV files 49, 52, 53 PLAYLIST button quitting Sony VAIO Space 34 CD Player 43 MIDI Player 63 WAV Player 50 radio interference 111, 115 playlists 39...
- Page 133 84 Save Clipboard command 60 removing 28 saving data 108 software demos 69 saving MIDI files 68 Sony A/V Suite 3, 37 saving playlists components 38-39 CD Player 47 accessing 37 MIDI Player 65 exploring 40-78...
- Page 134 CD Player 42 options 79 MIDI Player 62 Sony PC online registration 17 More A/V 77 Sony Sales and Marketing Support 79 Video CD Player 74 Sony VAIO Space 21 Video File Player 69 adding icons 27, 32 WAV Player 49...
- Page 135 25, 86 warranty 17 User Interface, selecting 31 watching movies 31,32 WAV files adding to playlists 51 VAIO Space See Sony VAIO Space converting formats 60 VAIO Space Setting window 31 copying segments 58-60 ventilation 4, 111 copying to Clipboard 60...
- Page 137 Financial services may require prior arrangements with participating financial institutions. Some software titles are trial versions. Sony and VAIO are trademarks of Sony. The Intel Inside logo and Pentium are registered trademarks of Intel Corporation. Microsoft, Windows, and the Windows 95 logo are trademarks of Microsoft Corporation.
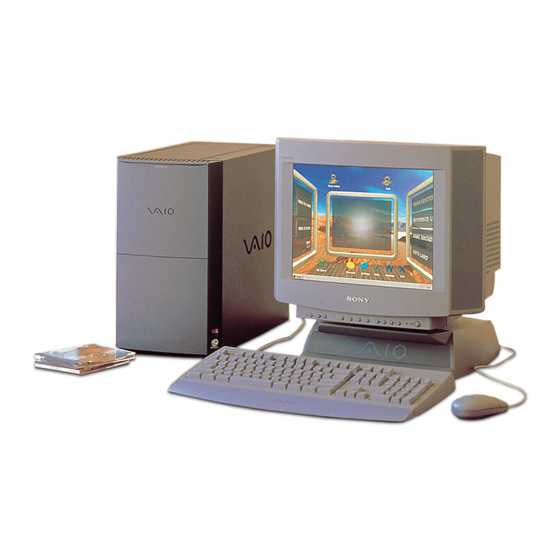
- Page 138 About the Contents of Your Sony PC Your Sony PC includes the following items: PC and Supplied Accessories...
- Page 139 Movie Maker shows you how to create movies with the 3D □ Movie Maker application. Wote ^ Your PC also includes a comprehensive hardware reference guide in the Sony PC Help Library on your hard disk drive. You can access this library from the Windows 95 Start menu. Other □...
- Page 140 About the Software on Your Sony PC Your Sony PC is ready to help you work, play, learn, and communicate as soon as you turn it on. This section gives you an overview of the activities you can perform with your software titles.
- Page 141 You can use these tools to create professional documents quickly and easily. For questions and technical assistance, call Sony Electronics at 888-4SONY-PC (888-476-6972), 7 days a week, 24 hours a day. Microsoft Money...
- Page 142 Yearbook Builder provides current online updates. This software features "Sony Tuned" MPEGl Digital Video. For questions and technical assistance, call Sony Electronics at 888-4SONY-PC (888-476-6972), 7 days a week, 24 hours a day. Compton's Interactive Encyclopedia™ (1996 edition) So/fKey® International Inc.
- Page 143 The material contained within The Family Doctor is for information only and should not replace the advice of your personal physician. This software features "Sony Tuned" MPEGl Digital Video. For questions and technical assistance, call Creative Multimedia at 900-438-8324 (charges appear on your phone bill), M - F, 8 Blockbuster Entertainment®...
- Page 144 Sony PC Help Library Sony Electronics Sony PC Help Library gives you access to online user guides and help files for the software on your Sony PC. For questions and technical assistance, call Sony Electronics at 888-4SONY-PC (888-476-6972), 7 days a week, 24 hours a day.
- Page 145 Microsoft Corporation This classic casino game is a Windows favorite. Test your card-sense and luck as you try to reach 21. For questions and technical assistance, call Sony Electronics at 888-4SONY-PC (888-476-6972), 7 days a week, 24 hours a day.
- Page 146 Microsoft Corporation Tetris is the international favorite from Russia. Maneuver the blocks into rows to win. For questions and technical assistance, call Sony Electronics at 888-4SONY-PC (888-476-6972), 7 days a week, 24 hours a day. JezzBall (Best of Microsoft Entertainment Pack) Microsoft Corporation Trap the balls and beat the clock in this arcade-style game.
- Page 147 In this modern version of cat and mouse, a rodent scurries through a maze to trap the cat and win the cheese. For questions and technical assistance, call Sony Electronics at 888-4SONY-PC (888-476-6972), 7 days a week, 24 hours a day.
- Page 148 (888-476-6972), 7 days a week, 24 hours a day. WAV Player Many of the sounds you hear on your Sony PC are WAV files. The WAV Player lets you play WAV files as well as create playlists of your favorite sounds and save the sequences to hear later.
- Page 149 About the Software on Your Sony PC Video CD Player The Video CD Player in your Sony PC enables you to play Video CDs. Use it alsc as a Karaoke player, to sing along with Karaoke CDs. Or watch music videos on enhanced CDs and access bonus information about your favorite musicians.
- Page 150 Netscape Navigator is the most widely used World Wide Web browser in the world. For questions and technical assistance, call Sony Electronics at 888-4SONY-PC (888-476-6972), 7 days a week, 24 hours a day. America Online® America Online America Online is an online service with an intuitive interface.
- Page 151 Use your mouse to travel between hyperlinked 3-D space objects. Share objects with multiple users. This version of CyberPassage is automatically invoked by Netscape Navigator when viewing VRML data. For questions and technical assistance, send e-mail to info@sm.sony.co.jp.
- Page 152 Internet and tune your PC, performing tasks such as disk optimization and error correction. In addition. Plus! provides 12 colorful desktop themes and the 3-D Pinball game. For questions and technical assistance, call Sony Electronics at 888-4SONY-PC (888-476-6972), 7 days a week, 24 hours a day.
- Page 153 32 MB EDO RAM, expandable to 128 R L2 Cache Memory 256 KB Pipeline Burst SRAM Video RAM 2 MB EDO Video RAM MPEG "Sony Tuned" MPEGl Digital Video supports full-screen playback Graphics 3-D acceleration Sound Capabilities 3-D SRS surround sound...
- Page 154 Service One-year on-site standard^ Limited Warranty One-year parts/labor standard* Power Requirements watts maximum Dimensions 9" (w) 14 7/8" (h) 18" (d) (226 x 376 x 455mm) Weight lbs. (10kg) Operating Temperature 50° F to 95° F (+10° C to 35° C) * USB ports are included to provide state-of-the-art technology.
- Page 155 Windows 95 activating 34 keyboard access 104 setting up 16 shutting down 35 taskbar 33 problems viewing 86 Windows icon 29, 34 word processing applications 25 Work Center 25 work surfaces 4 World Wide Web See Web sites _Zoom In button (AudioView) 59 Zoom Out button (AudioView) 59...