Table of Contents
Advertisement
Quick Links
Advertisement
Table of Contents

Related Manuals for Motorola MING

Summary of Contents for Motorola MING
- Page 1 MOTOMING™ A1200 MOTOMANUAL www.motorola.com...
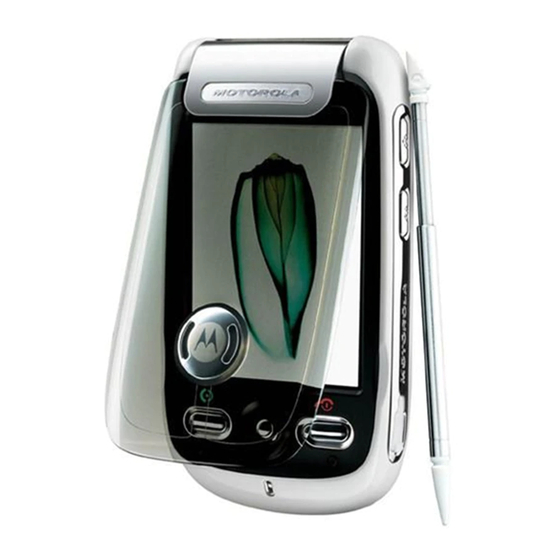
- Page 3 HELLOMOTO Introducing your new MOTOMING™ A1200 GSM wireless phone. Up Volume Key Down Volume Key Headset Jack Microphone Earpiece Smart Key Send Key Touchscreen Display Camera Key Voice Recognition Key 5-Way Navigation Joystick Power/End Key Mini-USB Port...
- Page 4 Up Volume Key Raise earpiece/speakerphone volume during a call, set alert profile in flip-closed display. Smart Key Open quick menu in flip-closed display. Down Volume Key Lower earpiece/speakerphone volume during a call, set alert profile in flip-closed display. Headset Jack Remove cover, insert stereo headset jack to listen to songs and video clips.
- Page 5 Stylus Camera Mode Switch Use with touchscreen display. Slide right to set normal picture mode, slide left to set macro mode (for close-up shots of business cards or small objects). Camera Key Activate camera and take photos. Camera Lens Mirror Aim camera lens for self-portraits.
- Page 6 Motorola reserves the right to change or modify any information or specifications without notice or obligation.
-
Page 7: Table Of Contents
contents Use and Care ..8 essentials ... . 9 about this guide ..9 SIM card... . 9 memory card . - Page 8 address book ..45 view contact list ..45 add new contact ..46 create group ..47 call or send message.
- Page 9 other features ..131 advanced calling ..131 setup ... . 133 call times & costs. . . 135 handsfree ..137 security.
-
Page 10: Use And Care
Use and Care Use and Care To care for your Motorola phone, please keep it away from: liquids of any kind Don’t expose your phone to water, rain, extreme humidity, sweat, or other moisture. extreme heat or cold Avoid temperatures below -10°C/14°F or above 45°C/113°F. -
Page 11: Essentials
Information included in the gray- edged pages at the back of this guide. about this guide This guide describes the basic features of your Motorola wireless phone. symbols This means a feature is network, SIM card, or subscription dependent and may not be available in all areas. - Page 12 Caution: Don’t bend or scratch your SIM card. Keep it away from static electricity, water, and dirt. Turn off your phone and remove the battery before you install or remove the SIM card. 1 Slide the battery door down and away from the camera lens to remove the door.
-
Page 13: Memory Card
memory card You can use an optional removable MicroSD memory card with your phone to store and retrieve multimedia content (such as photos, video clips, and music files). Caution: Don’t bend or scratch your memory card. Keep it away from static electricity, water, and dirt. - Page 14 Your MOTOMING™ A1200 phone supports most microSD memory cards. However, some cards may not function properly with your phone. For optimal performance, Motorola recommends that you use the following Motorola memory cards with your phone: part number capacity...
-
Page 15: Battery
battery battery installation Caution: Always turn off your phone before you remove the battery. 1 Slide the battery door down and lift it off of the phone. 2 Insert the battery under the tab at the top of the battery compartment. Push the battery up under the tab and lower it into the battery compartment. - Page 16 3 Slide the battery down toward the 4 Place the battery door on the phone and bottom of the battery compartment to slide it up to lock shut. lock it in place. essentials...
- Page 17 USB port on a computer. Both your phone and the computer must be turned on, and your computer must have the correct software drivers installed. Cables and software drivers are available in Motorola Original data kits, sold separately. essentials...
-
Page 18: Battery Tips
• Always use Motorola Original batteries and chargers. The warranty does not cover damage caused by non-Motorola batteries and/or chargers. • New batteries or batteries stored for a long time may take more time to charge. • When charging your battery, keep it near room temperature. -
Page 19: Turn It On & Off
turn it on & off Caution: On power up, the phone may prompt you to enter your SIM card PIN code to unlock the SIM card. If you enter an incorrect PIN code three times in a row, your SIM card is disabled and your display shows SIM Blocked. -
Page 20: Make A Call
make a call 1 Tap o in the top global navigation bar to open the phone keypad. 2 Tap the keypad keys to dial the phone number. 3 Tap Call or press the send key N to make the call. 4 When you are finished, tap End, close the flip, or press the end key O to end the call. -
Page 21: Your Phone Number
When the flip is open: Tap Answer to answer the call. Tip: If you prefer not to answer the call, you +1234567890 can tap Ignore to divert Answer the incoming call to your voicemail inbox. When you are finished, tap End, close the flip, or press the end key Oto end the call. -
Page 22: Basics
basics See page 1 for a basic phone diagram. display The home screen appears when you turn on the phone. Status Bar No Appointments Tap J to open the calendar. Tap C to 10-16-2008 set a ring alert profile. basics The home screen shows the next calendar event (if any) scheduled for the current day. -
Page 23: Global Navigation Bar
screen wallpaper image to return to the home screen display. global navigation bar Icons in the top global navigation bar give you easy access to your phone’s primary functions: < Application Launcher > Address Book Messages Phone Additionally, your phone shows a new message icon ! in the global navigation bar to notify you of a new message or a missed call. -
Page 24: Multimedia Applications
of the screen to see additional application icons. Tap an application icon to select it. Tip: You can set your phone to show applications in a text-based list rather than graphic icons. Tap é, then tap List View to change to list view. From list view, tap é, then tap Thumbnail View to reset the graphic icons. -
Page 25: Button Bar
button bar The button bar shows functions you can select in the active application. Typical buttons include: Menu Tap to open context é sensitive menu. Return Tap to return to ó previous screen. â Exit Tap to exit current application. status bar Tip: Tap the status bar to open the device status screen and see phone status... -
Page 26: Text Entry
Radio Service (GPRS) network connection. A darkened indicator shows that a GPRS connection is not available. 3 Bluetooth – Shows that Bluetooth® power is turned on. When Bluetooth power is on, your phone can make a wireless connection with a headset accessory or other external device. - Page 27 In a text entry window, tap the entry method drop-down menu and tap Handwriting to open the handwriting pad (shown at right). Tap a button on the handwriting pad to select English letters or numbers as the type of text you want to enter.
-
Page 28: Tap & Hold
function buttons Tap t with any text entry method to open the symbol pad, to enter a symbol at the cursor location. Tap r to lock or hide the symbol pad. To delete the character to the left of the cursor, tap w. -
Page 29: Volume
volume Press the volume keys • turn off an incoming call alert or event alert (flip open or closed) • change the earpiece or speakerphone volume during a call (flip open or closed) • change the speaker volume when playing a song or video clip (flip open or closed) When the flip is closed, press the volume keys to set your phone’s ring alert profile. -
Page 30: Smart Key
smart key The smart key gives you another way to do things. When you scroll to a menu item, you can press the smart key to select it (instead of pressing in the joystick s). When the phone flip is closed, you can press the smart key to open the quick menu and select items in the flip-closed display. -
Page 31: Return Unanswered Call
For more information about setting and using ring alert profiles, see page 35. return unanswered call Note: You must have a headset plugged in or paired with your phone to return a call when the flip is closed. Your phone keeps a record of your unanswered calls, and shows X Missed Calls in the flip-closed display. -
Page 32: Speakerphone
menu, then use the volume keys and smart key to scroll and select menu options. To exit the media player, select Exit in the controls menu. For more information about using the RealOne media player, see page 97. When the camera is active, press the camera key or select Capture in the active viewfinder to take a picture. -
Page 33: Speaker Verification
You can also change your SIM PIN or call barring passwords. To change a code or password, tap T Setup in the application launcher screen, tap Security, then tap Change Passwords to open the change passwords screen. If you forget your unlock code: At the Enter Unlock Code prompt, try entering 1234 or the last four digits of your phone number. -
Page 34: Lock & Unlock Phone
prompts you to speak your passphrase to confirm your identity. When speaker verification is activated, the phone prompts you to press the voice recognition key (see illustration on page 2) and speak your passphrase to unlock the phone each time you turn it on. If you forget your speaker verification passphrase: When prompted to speak your passphrase, tap Enter Unlock Code, enter your... -
Page 35: Share Information
To automatically lock your phone whenever you turn it off: Tap T Setup in the application launcher screen, tap Security, then set Phone Lock to Power On. To unlock your phone: When you see the Enter Unlock Code prompt, enter your unlock code to unlock the phone. -
Page 36: Send Data
send data 1 Locate the data you want to share (such as contact details, or a list of files in the file manager), tap é, then tap Share to select one or more items to share. Tap and hold an item to open a pop-up menu, then tap Share to see a list of share options. -
Page 37: Customize
customize profiles You can quickly change your phone’s ring alert profile to match your activity, environment, or personal requirements. Each profile uses a different set of sounds or vibrations for incoming calls and other events. The Silent profile silences your phone until you set another profile. -
Page 38: Wallpaper
Note: You can’t set an alert for the Silent profile, or change some settings for some profiles. 1 Tap T Setup in the application launcher screen, then tap Ringer Alert Style. 2 Tap a profile, then tap Edit to adjust alert settings to personalize the profile. -
Page 39: Color Scheme
color scheme Set the colors that your phone uses for buttons, highlights, and the status bar. Note: This feature changes the look and feel of the phone’s user interface, including the icons that you see in the top global navigation bar. -
Page 40: Flip Answer
a period of time. The backlight turns back on when you tap the screen or press any key. flip answer Set your phone to automatically answer calls when you open the flip. 1 Tap o in the global navigation bar to open the phone keypad. -
Page 41: Calls
calls To make and answer calls, see page 18. recent calls Your phone keeps lists of incoming and outgoing calls, even for calls that didn’t connect. The most recent calls are listed first. The oldest calls are deleted as new calls are added. -
Page 42: Redial
4 Tap Call to call its number, or tap é to perform the following operations: options Store Create an address book entry with the number stored in the number type field you specify. Send SMS Open a new text message with the number in the To field. -
Page 43: Hold Or Mute A Call
hold or mute a call To put all active calls on hold, tap Hold. Tap Hold again to resume the call. To turn off your phone’s microphone during a call, tap Mute. Tap Mute again to resume the call. call waiting When you’re on a call, you’ll hear an alert if you receive a second call. -
Page 44: Cancel Incoming Call
3 Tap Show ID, then tap On or Off to show or hide your caller ID for outgoing calls. 4 Tap ó to exit the phone setup menu. Tip: Select Network Controlled to let the network determine your caller ID status. cancel incoming call While the phone is ringing or vibrating, tap Ignore to cancel the incoming call. -
Page 45: International Calls
international calls Open the phone keypad, tap é, tap Insert, then select Insert + to insert your local international access code (indicated by +). Then, tap the keypad keys to dial the country code and phone number. Shortcut: Tap and hold the 0 key on the phone keypad to insert your international access code. -
Page 46: Dial Extension Or Voicemail Number
dial extension or voicemail number To direct dial an extension number or voicemail number, you can insert a pause character (P) in the dialing sequence. 1 Use the keypad key to dial the phone number. 2 When you need to insert a pause, tap é, tap Insert, then select Insert Pause to insert a P at the cursor location. -
Page 47: Address Book
address book You can store a contact list of names, phone numbers, and email addresses in your phone’s electronic address book. view contact list Tap > in the global navigation bar to open the address book. To change the way your contact list is shown, tap é, tap Setup, then tap the Default List Display drop-down menu to select List View or Thumbnail View. -
Page 48: Add New Contact
view and edit contact details 1 In the contact list, tap a contact name to see its details. 2 Tap Edit to edit the contact. Your phone shows complete contact details. 3 To edit contact information, tap the direct line in the field you want to edit. 4 When you are finished editing contact information, tap Done to store your changes and return to the contact list. -
Page 49: Create Group
5 To set a distinctive ring tone for the contact, tap the Ring Tone field and select Browse. Scroll to select the desired tone and tap OK. Your phone sounds the tone when you receive a call from this contact. 6 When you are finished entering information, tap Done to store the contact. -
Page 50: Search
stored for the contact (such as home, work, or fax). • Tap the message indicator a to the right of a phone number to send an SMS or MMS message to the number. • Tap the email address following the email indicator b to send an email message to the address. -
Page 51: Delete Contact
delete contact 1 Tap > in the global navigation bar to open the address book. 2 Tap é, then tap Delete Contacts. 3 Check the contact(s) you want to delete, then tap Delete. 4 Tap OK to confirm the deletion. storage location Contacts can be stored to phone memory or SIM card memory. -
Page 52: Categories
2 Tap é, then tap Copy to SIM/Phone. 3 Select Phone to SIM or SIM to Phone, then tap 4 Check the number(s) you want to copy. If you copy from the SIM card to phone memory, specify the number type. 5 Tap OK to copy the numbers to the new location. -
Page 53: Check Capacity
add members to a user category 1 Tap > in the global navigation bar to open the address book. 2 Tap the category button in the bottom button bar, then tap Edit Category. 3 Select the category, tap Add Members, then check the contacts you want to add to the category. -
Page 54: Share Contact
share contact You can share contact information with others by sending the data as a vCard to another phone, PC, or hand-held device. 1 Tap > in the global navigation bar to open the address book. 2 Tap the name of the contact you want to send. -
Page 55: Owner's Information
owner’s information You can store information about yourself in the address book. Then, if you lose your phone, the person who finds it can contact you to return the phone. 1 Tap > in the global navigation bar to open the address book. 2 Tap é, then tap Owner’s Information. -
Page 56: Messages
messages You can send and receive short text-based SMS messages, and multimedia MMS messages containing media objects, such as photos, pictures, animations, sounds, voice records, and video clips. Note: Your phone sends an SMS text message by default, unless you insert multimedia content or perform a function reserved for MMS multimedia messages. -
Page 57: Signature
The message center contains the following folders: Inbox – Stores SMS and MMS messages you have received. SIM Card – Contains SMS messages stored on your SIM card. You can move these messages to other folders. Drafts – Temporarily stores messages that you are still writing. -
Page 58: Send Text Message
send text message You can send an SMS short text message to other wireless phone users, and to email addresses. To compose and send an SMS message: 1 Tap ? in the global navigation bar to go to the message center. 2 Tap Compose. -
Page 59: Send Multimedia Message
options Send Receipt Request: Request a delivery Options report for the message. Expire After: Set the expiration time for an undelivered message. Delete Delete the message. send multimedia message A Multimedia Messaging Service (MMS) message contains one or more pages with text and embedded media objects (including photos, pictures, animations, sounds, voice records, and/or video clips). - Page 60 4 Tap a button in the media toolbar at the bottom of the screen to insert media objects on the page or attach files to the message. • Tap j to insert a picture, video, or new drawing on the page. •...
- Page 61 options Send To Send the message to your Blog personal Web log. Page Set the number of seconds each Duration page is shown. Preview Preview the MMS message. Show Show or hide the Cc, Bcc, and/or Subject header fields. Use Cc or Bcc to carbon-copy or blind-carbon-copy the message to additional recipients.
-
Page 62: Unsent Messages
unsent messages Outgoing messages that failed to send or have not yet been sent are stored in the outbox. On the message center screen, tap Outbox to see its contents. Messages in the outbox are sorted from newest to oldest. Tap a message to read it. - Page 63 Tap Read to read an SMS message, or download an MMS message to your phone. Tap Dismiss to close the message notification screen without reading the message. The message is stored in the inbox. To read the message later, tap !. Tap the message to see message details (sender, subject, time, and size).
-
Page 64: Read And Reply
or drafts folder to receive new messages. For more information, see page 139. read and reply Messages that you receive are stored in the inbox. On the message center screen, tap Inbox to see its contents. Messages in the inbox are sorted from newest to oldest. -
Page 65: Drafts
drafts Messages that you are still writing are stored in the drafts folder. On the message center screen, tap Drafts to see its contents. Tap a message to read it. You can edit the message while it is open, and then send it immediately. -
Page 66: Move Messages
4 To lock the folder to prevent unauthorized access, tap the check box e beside Protected by Lock Code? A check mark d indicates that the folder lock feature is activated. 5 Tap Done to save the folder. The personal folder is listed on the message center screen along with your other folders. -
Page 67: Set Up Message Inbox
check box beside All to select all messages. A check mark d indicates that the message is selected. 5 Tap OK to open the move to folder screen. 6 Tap the destination folder, then tap OK to move the messages. Tip: To quickly move a single message, tap and hold the message to open a pop-up menu, then select Move to Folder. - Page 68 MMS setup options Note: Actual field names and values may vary depending on the technologies available to your service provider. Some settings may not be available for all phone models. options Default Select an MMS network profile. Profile (See next section to edit profile settings or create a new network profile.) Expire After...
- Page 69 options Auto Retry Automatically attempt to re-send messages when delivery fails. MMS network profile setup You can edit an existing MMS network profile or create a new MMS network profile. 1 Tap ? in the global navigation bar to go to the message center.
-
Page 70: Browser Messages
options Network Select a network connection Profile profile to connect to the Internet. For more information, see page 95. browser messages Your network’s Web server can send you browser messages that you read in your micro-browser. Your phone shows the new message icon ! in the global navigation bar when you receive a new browser message. - Page 71 Note: You must set up your information services message inbox before you can receive information service messages. Usually, your service provider has already set up the information services message inbox for you. 1 Tap ? in the global navigation bar to go to the message center.
-
Page 72: Office Applications
office applications email You can send and receive email messages with your wireless phone. You must have an email account on a Microsoft® Exchange 2003 server to use MOTOSYNC with Exchange ActiveSync. Otherwise, you must have an email account with a POP3/IMAP-SMTP server on the Internet or your service provider’s network. -
Page 73: Send An Email Message
You may have additional folders in an email mailbox, such as Drafts, Sent Items, Trash, or personal folders that you create. Tip: Tap é, then tap Display to set a one-line or two-line display for each folder in the email mailbox. -
Page 74: Schedule A Meeting
5 Tap To to select contacts from your address book, or tap the direct line in the To field to enter an email address. 6 Tap Send to send the message. When composing an email message, you can tap é to perform various operations on the message prior to sending it. -
Page 75: Receive An Email Message
3 Tap the direct line in a field to enter meeting details. Pull down the scroll bar to see additional fields. 4 When you’re finished entering information, tap Send to send the meeting request and add the meeting to your calendar. - Page 76 create a personal folder The procedures for creating and using a personal folder are similar to the corresponding message center procedures. See page 63 for more information. set up the email inbox If the phone cannot locate your email mailbox, it opens the mailbox setup screen for you to configure your mailbox settings.
- Page 77 all outgoing email messages, tap the check box e beside Add signature to all outgoing messages. A check mark d indicates that automatic signature is activated. 5 Tap the signature field and enter your signature. 6 Tap OK to save your signature. 7 Tap Connections Setup, then select the type of connection desired and tap OK.
- Page 78 options Authentication Set Authentication to On if you need a user name and password to access your outgoing email server. Set Same as Receive if user name and password are the same as for your incoming email server. Otherwise, enter your outgoing email server User Name and Password, and confirm your password in the Reenter Password...
-
Page 79: Calendar
options Incoming Maximum size of an email Message message to be downloaded to Size Limit your phone. Keep on Select to save copies of your Server email messages on the remote server. (For POP3, prevents message deletion on remote server after message is downloaded to your phone. -
Page 80: Day View
Tap the date box to see the day’s events. Tap an event to see event details. week view Tap the Month button in the bottom button bar, then select Week to see the week view. Tap î or ì to go to the previous or next week. - Page 81 add new event Note: You must create an event to use the reminder alarm. 1 Tap J Calendar in the application launcher screen to open the calendar. 2 Tap the day to which you want to add an event. Your phone lists the day’s events. 3 Tap é, then tap New Event to open Create new event...
-
Page 82: Delete An Event
4 When you’re finished entering information, tap Send to send the meeting request and add the meeting to your calendar. Note: To use the email application to schedule a meeting, see page 72. edit an event 1 Tap the event to see event details. 2 Tap Edit to open the event editor. - Page 83 If you have more than one event set up for the same time, the phone shows each event in sequence. As you read and dismiss each event reminder, the next event is shown. change the calendar setup You can set the calendar’s default view (month, week, day), default day view (hour or event), weekly start day, daily start time, reminder snooze period, event storage period,...
-
Page 84: Tasks
4 Tap Bluetooth, then tap OK to exchange the data through a Bluetooth® wireless connection. Tap Message or Email, then tap OK to send the event data in an MMS or email message. 5 Complete the setup procedure for the transfer method you selected. -
Page 85: Notes
name to indicate that you’ve completed the task. Tap and hold on a task to open a pop-up menu from which you can Share, Edit, or Delete the task. To sort the task list, tap the sort order button in the bottom button bar. You can choose to see All Tasks, Unchecked tasks, Due Tasks, or Completed tasks. -
Page 86: Calculator
descriptions). Tap a folder to see its contents. Tap a document to open it in the viewer. You can scroll through a large document by dragging the stylus across the screen and “dragging” the document in the direction you want to move. To zoom in or out on a document, tap the center of the screen, release, then quickly tap and hold the screen and drag the stylus up or... -
Page 87: Alarm Clock
Tap the following keys to perform the described functions: functions Change the entry’s sign (positive/negative). Store the current number in memory. Show the stored number. Clear the stored number. alarm clock Your phone has an alarm clock with two separate alarms that you can set to alert you at the time(s) you specify. -
Page 88: File Manager
Tap Snooze to turn off the event reminder for a short period of time. The alarm sounds again when the snooze period expires. Tap Cancel to turn off the alarm. When you select Alarm When Power Off in the alarm clock setup screen, your phone turns itself on if necessary to alert you when the alarm expires. - Page 89 Preload Stores preloaded media files installed on your phone. Note: Your phone’s files and folders may differ from those listed above. edit files and folders Tap and hold a file or folder to open a pop-up menu to perform various operations on the file/folder.
- Page 90 create new folder 1 Tap 2 File Manager in the application launcher screen to open the file manager. 2 If necessary, tap the folder tree icon _ to select the location (phone or memory card) where you want to create the folder. 3 Tap é, then tap New Folder.
-
Page 91: Removable Memory Card
folder tree Tap the folder tree icon _ in the file manager screen to see the folder structure and organization of your phone, or a storage device connected to the phone. removable memory card You can use an optional removable MicroSD memory card with your phone to store and retrieve multimedia objects (such as photos, video clips, and music files). -
Page 92: Business Card Reader
options Delete Delete a memory card file or folder. More Search for a memory card file or folder. Tap Properties to see information about a file or folder. business card reader The business card reader application lets you use your phone’s camera to capture a business card image, then store the card’s information as a contact in the phone’s electronic address book. - Page 93 the Optical Character Recognition (OCR) viewfinder. Use the red border in the OCR viewfinder to vertically frame the business card you want to capture. Position the camera so that the card fills the frame without extending beyond the frame borders. The framing border and center indicator turn green when the business card is framed properly.
- Page 94 move the card image, tap and drag the image in the direction you want to move. To zoom in/out on the card image, tap é, then tap Zoom In or Zoom Out. On the card image, tap the small box to the left of an outlined text string to see its assigned category and content in the upper part of the screen.
-
Page 95: Media Applications
media applications browser The browser lets you access Web pages and Web-based applications on your phone. Contact your service provider to set up access, if necessary. start a browser session Tap / Browser in the application launcher screen to start the browser. If you are unable to establish a network connection with the browser, contact your service provider. -
Page 96: Download Files
options Home Go to the homepage of the current Browser profile. Bookmarks See a list of your bookmarks. Tap é to add a New bookmark, or Open, Edit, Delete, or Share the highlighted bookmark. History See a list of Web sites you have visited. -
Page 97: Close The Browser
You can purchase games, applications, and multimedia content for your phone. In most cases, you can download and preview content before you purchase it. After previewing the content, you can choose to discard it, or purchase it and install it on your phone. Note: •... - Page 98 3 Enter configuration settings as described in the following table. Tap the direct line in a field to enter the setting. Pull down the scroll bar to see additional fields. 4 When you are finished entering information, tap Save to store the profile. options Profile Name Enter the profile name.
-
Page 99: Realone Media Player
use browser profiles To select the active browser profile: 1 Tap / Browser in the application launcher screen to start the browser. 2 Tap é, then tap Setup to open the browser setup menu. 3 Tap Profiles, then tap the profile you want to use. -
Page 100: Play Media Files
play media files 1 Tap All Audio, All Videos, or another media category to see which files of that type are available on your phone. Tip: Tap ä and enter a keyword to search for a specific file by name. 2 Tap the check box e beside each file you want to play. -
Page 101: Playlist Options
create and use playlists To create a new playlist: 1 Select media files as described in the previous section. 2 Tap é, then tap Save as Playlist to create a new playlist with the selected files. 3 Enter a name for the playlist, then tap Save to save the new playlist. -
Page 102: Camera
options Delete Delete stored playlists. Deleting a playlist does not delete the media files stored on your phone. Use Bluetooth Use a Bluetooth® wireless connection to send the selected media file to another phone, PC, or hand-held device. media applications camera Your phone has a 2 megapixel camera that can take photos at up to 1200 x 1600 pixels... - Page 103 The active viewfinder image appears in the display. Press S up/down to zoom in/out. Press S left/right to decrease/ increase image Brightness 2 brightness. Capture Tap to open Tap to take photo camera menu. or record video. use the viewfinder Open the flip and point the camera lens at the photo subject.
-
Page 104: Take A Photo
take a photo Tap Capture to take a photo. Alternatively, you can press the camera key or press in the joystick s to take a photo. Tip: If the camera is in video mode, tap å to put the camera in photo mode. The mode indicator in the viewfinder changes to ã... -
Page 105: Record A Video Clip
4 Tap OK to set the folder as the new storage location. 5 Tap Save to save the new storage location. record a video clip Tap ã to put the camera in video mode. The mode indicator in the viewfinder changes to å... -
Page 106: Setup Options
effects You can adjust the size of your photo or video by tapping the appropriate icon in the viewfinder. Tap other icons to set lighting conditions or select a photo style (such as Black/White or Sepia tones). setup options Tap é, tap Setup, then tap H to open the photo setup menu. -
Page 107: Voice Recorder
voice recorder You can record personal messages and phone calls on your phone. Note: Recording of phone calls is subject to varying State and Federal laws regarding privacy and recording of phone conversations. Always obey the laws and regulations on the use of this feature. -
Page 108: Video Camera
recording date and time also appears when you play the voice record. change voice record storage location 1 Tap é, tap Setup, then tap the folder tree icon _ in the Location field. 2 Select a folder, then tap OK to set it as the new storage location. - Page 109 • Tap H to activate the camera, take a photo, and open it in the photo editor. • Tap J to crop a portion of the photo. Tap and drag the bounding box to outline the crop borders. Tap and drag a bounding box edge or corner to resize the bounding box.
-
Page 110: Fm Radio
FM radio You can use your phone to listen to FM radio stations when an optional Motorola Original™ standard headset or stereo headset is plugged into the phone’s headset jack. Note: You can’t listen to the FM radio over a Bluetooth wireless headset. -
Page 111: Use Preset Channels
use preset channels Tap U to assign a channel number to the current tuned station. Tap X or W to select the previous or next channel. adjust radio settings Tap the volume slider to adjust the radio volume. Alternatively, you can press the phone’s volume keys to adjust radio volume. -
Page 112: Extra Applications
extra applications voice commands You can use voice commands to make calls, open phone applications, and perform basic phone functions. The phone flip must be open to use voice commands. Note: You can use some voice commands with the flip closed, when a headset is plugged in or paired with your phone. - Page 113 1 Press and release the VR key. Your phone prompts you to say a command. 2 Say the name of an entry in your address book. Say “Dial Number” and speak the digits in the phone number. 3 Your phone prompts you to confirm that it correctly interpreted the voice command.
-
Page 114: Bluetooth® Wireless
To see a complete list of voice commands, tap T Setup, tap Voice Command, then tap Commands List. To perform a voice command: 1 Press and release the VR key. Your phone prompts you to say a command. 2 Say the command. Your phone opens the application or performs the command. -
Page 115: Use A Headset
Note: The use of wireless phones while driving may cause distraction. Discontinue a call if you can’t concentrate on driving. Additionally, the use of wireless devices and their accessories may be prohibited or restricted in certain areas. Always obey the laws and regulations on the use of these products. -
Page 116: Copy Files To Another Device
Auto-Bond Feature: You don’t have to enter a PIN code to bond your phone with Motorola accessories. For non-Motorola accessories, you must enter the correct PIN code to bond with the device. Note: When Bluetooth power is on, your phone can automatically pair with a handsfree device you have used before. -
Page 117: Receive Files From Another Device
receive files from another device Before you try to receive a file from another device, make sure your phone’s Bluetooth power is on (see page 113). Have the other device send the file to your phone. If your phone and the sending device don’t recognize each other, you must place your phone in discoverable mode so the sending device can locate it:... -
Page 118: Synchronize Phone Information
• SyncML (over-the-air connection with a SyncML server). • Tethered Sync (Bluetooth wireless connection or USB cable connection to a PC using the Motorola mobile PhoneTools software accessory product). Note: You should use only one of the above synchronization methods, to avoid generating... -
Page 119: Motosync With Exchange Activesync
MOTOSYNC with Exchange ActiveSync MOTOSYNC is a secure, always-up-to-date, over-the-air (OTA) synchronization capability that lets you synchronize your email, address book contacts, and phone calendar directly with a Microsoft Exchange 2003 server, allowing you to stay connected while out of the office. OTA synchronization is accomplished using your service provider’s network. - Page 120 get started Configuring your phone to connect to your server requires information from your IT department. If necessary, contact your system administrator to help you connect your phone to the server, or to provide you with the following information: • Confirm that your email is located on a Microsoft Exchange 2003 server, and verify that the Mobility option is enabled for your server account (this...
- Page 121 options Enable Select to sync your primary calendar calendar. sync Enable email Select to sync your primary sync email. Email sync Select Two-way sync to have type emails that you read or delete on your phone be marked as read or deleted on the server. Select Server to phone only to have emails that you read or delete on your phone not be shown...
- Page 122 options User Name Your Windows user name provided by your IT administrator. Domain Your Windows domain name for Name your Exchange 2003 server. Password Your Windows password. Re-enter Re-enter Windows password to Password screen for input errors. Use HTTPS Select if your IT administrator for security requires a secure server connection.
- Page 123 options Enable Auto Select to have your phone Sync automatically synchronize with the server. If you want to enable notification sync (push mail) or scheduled (time-based) sync, you must select this option. Do not select this option if you want to sync manually from within the email, contacts, calendar, or sync applications.
- Page 124 options In non-busy In non-busy times, you may not times, sync want or need to sync as often as during busy times. Select the automatic sync interval during non-busy times of the day from: Manually, When notified, Every 5 min, Every 10 min, Every 15 min, Every 30 min, Every hour, Every 2 hours, Every 4 hours, Every 24 hours.
- Page 125 your email, contacts list, and calendar on the Exchange 2003 server. Notes about using Auto Sync with the When notified (push mail) setting: • To enable push mail, you must enable Auto Sync, and select the When notified setting for your busy and/or non-busy times.
-
Page 126: Motosync With Syncml
Tip: Some errors can interfere with automatic synchronization. If you suspect that a scheduled automatic synchronization did not occur, you should try to manually synchronize your information. Successfully completing manual synchronization resets the automatic synchronization timer. Note: If your phone is configured to Auto Sync When notified, and the phone discovers that the server does not support SP2, the phone notifies you that “Sync server... - Page 127 configure MOTOSYNC for SyncML You must create an Internet sync partner to synchronize your data over a SyncML OTA connection. Tap R Sync in the application launcher screen, tap é, then tap OTA Sync Setup to configure your SyncML OTA connection settings as follows: options Data Paths: Select to provide additional URL...
- Page 128 options IP address of your proxy server. If necessary, get assistance from your service provider. Port Port number for connection to network provider’s proxy server. If necessary, get assistance from your service provider. Server The URL for your SyncML Name server (you may omit http://).
- Page 129 USB cable connection to transfer and synchronize data between your phone and a PC. Note: You may use Motorola mobile PhoneTools software to synchronize contacts, calendar, and task information between your phone and PC. See the mobile PhoneTools user’s guide for more information.
-
Page 130: Modem
The Motorola mobile PhoneTools software notifies you when data synchronization is complete. If synchronization is not successful, Motorola mobile PhoneTools notifies you that the synchronization attempt failed. Note: Due to a known Microsoft® Windows™ USB driver issue, a PC running... -
Page 131: Stk
When your phone shows Status: Ready, it’s ready to be used as a standard PC modem. send data call 1 Open the application (such as dial-up-networking) on your PC, and place the call through the application. You cannot dial data numbers on your phone’s keypad. -
Page 132: Time
service or feature. Tap the field and enter text in the usual way. For more information about the STK applications available on your SIM card, contact your service provider. time Your phone can show the current time and Local City: Beijing date for multiple cities around the world. -
Page 133: Other Features
other features advanced calling features conference call During a call: Tap keypad button à, tap keypad keys to dial next number, tap Call, when call connects tap Link to connect the two calls. Repeat to add additional parties to the call. transfer a call During a call: Tap é, tap Transfer, tap keypad keys to dial... - Page 134 (provided by the TTY manufacturer) to connect the TTY device to your phone through the headset jack. For the best connection, use a cable with a tapered plug similar to that on the Motorola headset CHYN4516B. other features—advanced calling features...
-
Page 135: Setup
Set the mode in which you want to use your phone’s USB port: Tap <, tap T Setup, tap USB Mode, then select Modem or Mass Storage. Motorola mobile PhoneTools software can automatically change your phone’s USB mode setting as needed. touchscreen calibration... - Page 136 features power management Your phone includes several features designed to help extend battery life. Tip: To conserve power, leave Bluetooth® power turned off when not in use. Tap <, tap T Setup, then tap Power Management. Select Battery Save to automatically adjust phone settings to maximize battery life.
-
Page 137: Call Times & Costs
features master clear Caution: Master clear erases all information you have entered (including address book and calendar entries) and content you have downloaded (including photos and sounds) stored in your phone’s memory. After you erase the information, you can’t recover it. Clear all settings and entries you made except SIM card information, erase downloaded pictures and sound files, and... - Page 138 features call times See call timers and cost trackers: Tap o, tap é, tap Setup, tap Call Meters. To reset the call timer, tap Clear Call Time. To reset the cost tracker, tap Clear Call Cost. in-call timer Show time or cost information during a call: Tap o, tap é, tap Setup, tap Call Meters, tap the Display pop-up menu, then select Timer,...
-
Page 139: Handsfree
features credit available (advice of charge option) See the amount of credit available: Tap o, tap é, tap Setup, tap Call Meters, tap Available Credit. handsfree Note: The use of wireless phones while driving may cause distraction. Discontinue a call if you can’t concentrate on driving. Additionally, the use of wireless devices and their accessories may be prohibited or restricted in certain areas. -
Page 140: Security
security features lock/unlock SIM card Your Personal Identification Number (PIN) code protects the information stored on your SIM card. When the SIM card is locked, you must enter your SIM card PIN code to unlock the SIM card each time you turn on the phone or insert the SIM card in the phone. -
Page 141: Memory Management
memory management When your phone’s memory is full or nearly full, the phone shows a reminder message. Use the following procedures to check or free some memory space on your phone. user memory Files received in MMS messages, email data, file manager files, and browser files are stored in your phone’s user memory. - Page 142 3 Delete unwanted items from Contacts, Message Contents, Email, Tasks, and/or Calendar. Notes: • Use the Motorola mobile PhoneTools software accessory product to back up your PIM/User Database. • Caution: Before using the Master Clear feature, read the notes and cautions...
- Page 143 Alternatively, you can turn the phone off and back on to close all applications. Tip: To manually check system memory status, tap <, tap é, then tap Task Manager. other features—memory management...
-
Page 144: Service And Repairs
If you have questions or need assistance, we're here to help. Go to www.motorola.com/support/ming, where you can select from a number of customer care options. You can also contact the MOTOMING™ A1200 Customer Support Center at 1-800-520-6421, or 1-888-390-6456 (TTY/TDD United States for hearing impaired). -
Page 145: Sar Data
Specific Absorption Rate Data This model wireless phone meets the SAR Data government’s requirements for exposure to radio waves. Your wireless phone is a radio transmitter and receiver. It is designed and manufactured not to exceed limits for exposure to radio frequency (RF) energy set by the Federal Communications Commission (FCC) of the U.S. - Page 146 The standard incorporates a substantial margin of safety to give additional protection for the public and to account for any variations in measurements. 2. The SAR information includes the Motorola testing protocol, assessment procedure, and measurement uncertainty range for this product.
-
Page 147: Eu Conformance
European Union Directives Conformance Statement Hereby, Motorola declares that this product is in EU Conformance compliance with: • The essential requirements and other relevant provisions of Directive 1999/5/EC • All other relevant EU Directives 0168 The above gives an example of a typical Product Approval Number. -
Page 148: Gnu License
For instructions on how to obtain a copy of any source code being GNU License made publicly available by Motorola related to software used in this Motorola mobile device, which may be subject to GNU’s General Public License, please send an email to ezxgpl@motorola.com. - Page 149 Important Safety and Legal Information...
-
Page 150: Safety Information
Your Motorola mobile device is designed to comply with local regulatory requirements in your country concerning exposure of human beings to RF energy. - Page 151 If you do not use a body-worn accessory supplied or approved by Motorola, keep the mobile device and its antenna at least 2.5 centimeters (1 inch) from your body when transmitting. When using any data feature of the mobile device, with or without an accessory cable, position the mobile device and its antenna at least 2.5 centimeters (1 inch) from your body.
-
Page 152: Other Medical Devices
If your mobile device or battery has been submerged in water, punctured, or subjected to a severe fall, do not use it until you take it to a Motorola Authorized Service Center. Do not attempt to dry it with an external heat source, such as a microwave oven. -
Page 153: Batteries And Chargers
Be careful when handling a charged battery, particularly when placing it inside a pocket, purse, or other container with metal objects. Use only Motorola Original batteries and chargers. Caution: To avoid risk of personal injury, do not dispose of your battery in a fire. -
Page 154: Caution About High Volume Usage
Seizures/Blackouts Some people may be susceptible to epileptic seizures or blackouts when exposed to flashing lights, such as when playing video games. These may occur even if a person has never had a previous seizure or blackout. If you have experienced seizures or blackouts, or if you have a family history of such occurrences, please consult with your physician before playing video games or enabling a flashing-lights feature (if available) on your mobile device. -
Page 155: Industry Canada Notice
Industry Canada Notice to Users Operation is subject to the following two conditions: (1) This Industry Canada Notice device may not cause interference and (2) This device must accept any interference, including interference that may cause undesired operation of the device. See RSS-GEN 7.1.5. Industry Canada Notice... -
Page 156: Fcc Notice
FCC Notice To Users Motorola has not approved any changes or modifications to this FCC Notice device by the user. Any changes or modifications could void the user’s authority to operate the equipment. See 47 CFR Sec. 15.21. This device complies with part 15 of the FCC Rules. Operation is... -
Page 157: Warranty
Canada What Does this Warranty Cover? Warranty Subject to the exclusions contained below, Motorola, Inc. warrants its telephones, pagers, messaging devices, and consumer and professional two-way radios (excluding commercial, government or industrial radios) that operate via Family Radio Service or General Mobile Radio Service, Motorola-branded or certified accessories sold for use with these Products (“Accessories”) and... - Page 158 (c) use of the Products or Accessories for commercial purposes or subjecting the Product or Accessory to abnormal usage or conditions; or (d) other acts which are not the fault of Motorola, are excluded from coverage. Warranty Use of Non-Motorola Products and Accessories. Defects or...
-
Page 159: Other Information
This warranty extends only to the first consumer purchaser, and is not transferable. What Will Motorola Do? Motorola, at its option, will at no charge repair, replace or refund the purchase price of any Products, Accessories or Software that does not conform to this warranty. We may use functionally equivalent reconditioned/refurbished/pre-owned or new Products, Accessories or parts. -
Page 160: What Other Limitations Are There
Motorola certain exclusive rights for copyrighted Motorola software such as the exclusive rights to reproduce and distribute copies of the Motorola software. Motorola software may only be copied into, used in, and redistributed with, the Products associated with such Motorola software. No other use, including... -
Page 161: Hearing Aids
Hearing Aid Compatibility with Mobile Phones Some Motorola phones are measured for compatibility with Hearing Aids hearing aids. If the box for your particular model has “Rated for Hearing Aids” printed on it, the following explanation applies. When some mobile phones are used near some hearing devices (hearing aids and cochlear implants), users may detect a buzzing, humming, or whining noise. -
Page 162: Who Information
Motosupport/source/registration.asp Product registration is an important step toward enjoying your new Motorola product. Registering helps us facilitate warranty service, and permits us to contact you should your product require an update or other service. Registration is for U.S. residents only and is not required for warranty coverage. -
Page 163: Export Law
Program for Used Wireless Devices, please visit us at: or re-exportation of this product to certain destinations. For further information contact the U.S. Department of Commerce or the Canadian Department of Foreign Affairs and International Trade. recycling.motorola.young-america.com/ index.html Export Law... -
Page 164: Perchlorate Label
California Perchlorate Label Some mobile phones use an internal, permanent backup battery on Perchlorate Label the printed circuit board that may contain very small amounts of perchlorate. In such cases, California law requires the following label: “Perchlorate Material – special handling may apply. See www.dtsc.ca.gov/hazardouswaste/ perchlorate.”... -
Page 165: Driving Safety
If you choose to use your mobile device while driving, remember the following tips: • Get to know your Motorola mobile device and its features such as speed dial and redial. If available, these features help you to place your call without taking your attention off the road. - Page 166 • Use your mobile device to call for help. Dial 911 or other local emergency number in the case of fire, traffic accident, or medical emergencies.* • Use your mobile device to help others in emergencies. If you see an auto accident, crime in progress, or other serious emergency where lives are in danger, call 911 or other local emergency number, as you would want others to do for you.*...
-
Page 167: Index
index accessories 9, 112, 137 address book 45 airplane mode 17 alarm clock 85 alert set 28, 35 turn off 27 answer a call 18, 38 antenna, turning on/off 17 application launcher 21 appointments. See calendar battery 13, 15 battery indicator 24 battery life, extend 16, 134 Bluetooth indicator 24 Bluetooth wireless 112... - Page 168 color scheme 37 conference call 131 costs, track 136 credit information 137 customer support 142 data, sharing 33 dial a phone number 18, 132 dialed calls 39 digit dial (voice) 110 direct dial 44 display 20, 37 earpiece 1 earpiece volume 27 email 70 email address 46 emergency number 42...
- Page 169 joystick 1, 27 language 133 linking. See Bluetooth wireless lock phone 32 SIM card 138 Low Battery message 24 make a call 18 master clear 135 master reset 134 media player 97 media player indicator 24 memory card 11 memory card indicator 24 memory management 139 menu 29 message...
- Page 170 PIM/user database memory PIN code 17, 31, 138, 139 PIN2 code 31 power key 1, 17 power management 134 printing 115 profiles 28, 35 quick card 58, 61 quick menu 29 radio 108 RealOne indicator 24 RealOne media player 97 received calls 39 recent calls 39 recorder 105, 106...
- Page 171 time 130 timers 136 touchscreen calibrate 133 input settings 26 transfer a call 131 TTY device 132 TTY indicator 24 turbo dial 43 turn on/off 17 unblock the SIM card 138 unlock phone 17 , 31, 32 SIM card 138 unlock code 30, 32 USB mode, set 133 user memory 139...
- Page 172 index...