Table of Contents
Advertisement
Quick Links
Advertisement
Table of Contents

Related Manuals for NEC e121


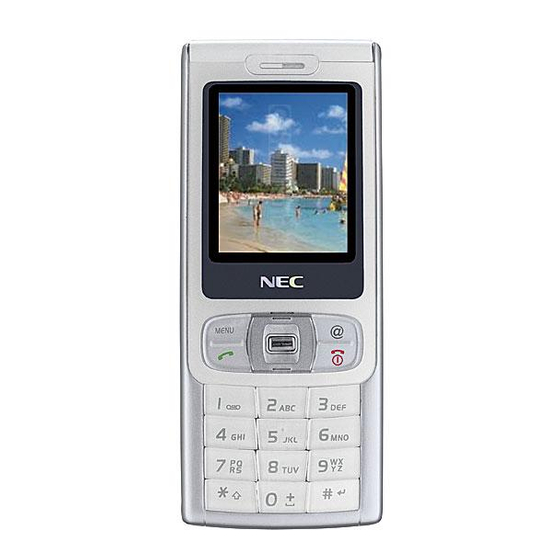
Summary of Contents for NEC e121
- Page 1 Important Information Safety And Precautions Before You Start Getting Started Basic Calls and Phone Use Call Options Personalizing Settings Text Entry Message WAP Service Camera My data Phonebook Java™ Accessory Index...
-
Page 2: Table Of Contents
Read this information before using your phone ... 5 Safety And Precautions Emergency services ... 6 General care ... 6 Aircraft safety ... 6 Hospital safety ... 6 General safety ... 6 Road safety ... 7 Vehicles equipped with an air bag ... 7 Third party equipment ... - Page 3 Voice volume ... 29 Answer options ... 29 Minute reminder ... 29 Auto key lock ... 30 ALS setup ... 30 Time/date ... 30 FAK setting ... 31 Language ... 31 Phone modes ... 32 Power on greetings/animations ... 34 Wallpaper ...
- Page 4 Calling phone numbers from phonebook ... 69 Editing phonebook entries ... 70 Java™ Java™ ... 72 Folders options menu ... 73 Playing games ... 73 Accessory Camera ... 75 Scheduler ... 75 ToDo list ... 76 Notepad ... 77 Alarm clock ... 78 Auto off ...
-
Page 5: Important Information
Read this information before using your phone Conditions of Use Operation of this NEC mobile phone is subject to the following two conditions; (1) this device may cause harmful interference, and (2) this device must accept any interference received, including interference that may cause undesired operation. -
Page 6: Safety And Precautions
Safety And Precautions Emergency services To make an emergency call in any country: • Press 112, the worldwide emergency number. • Ask the operator for the service which you require: Police, Ambulance, Fire Brigade, Coastguard or Mountain Rescue Services. Give your location and, if possible, remain stationary to maintain phone contact. -
Page 7: Road Safety
The use of third party equipment, cables or accessories, not manufactured or authorised by NEC, may invalidate the warranty of your cellphone and also adversely affect the phone's operation. For example use only the NEC mains cable supplied with the AC charger. - Page 8 98809472.X and 96196739.0; Mexico Pat. No. 208141; Russian Federation Pat. No. 2206118; and additional patents are pending worldwide" • OPENWAVE is a registered trademark of Openwave Systems Inc. • JBed, Copyright 2000-2004 Esmertec, AG. • Java and all Java-based trademarks and logos are trademarks or registered trademarks of Sun Microsystems, Inc.
-
Page 9: Before You Start
Before You Start Cellphone system structure Every time you use your phone, there are several components involved for the phone to operate successfully and to process a call: The people that make your phone All the features described in this user manual are supported by your phone. However, for all these features to work, you must have a valid SIM card (supplied by your service provider) that also supports these features. -
Page 10: Parts And Functions
Parts and functions Strap holder Left Softkey Call key Alphanumeric Keys The phone supports a number of languages and the keyboard symbols have been chosen for world-wide operation. Display information LCD graphic display area This area contains the greetings graphic on power up, status graphics, as well as information when searching for networks and making calls. -
Page 11: Key Functions
Key functions The following describes the key functions of the navigation keys and left/right Softkeys and other keys of your phone: navigation key: Press to scroll left or move the cursor to the left of the screen. Also serves as a shortcut key to standby screen. -
Page 12: Keypad Shortcuts
The different functions and settings of your phone can be accessed by selecting • Main menu screens A screen represents a category or a particular function. To access each main menu function, press the settings screen is displayed, use the to confirm. -
Page 13: Main Phone Features
• Press and hold to call the voice mail centre. • Press and hold to lock/unlock the keypad. • Press and hold to access the ALS setup • Press and hold number keys to access already set FAK (fast access key) functions. For Main phone features The GSM/GPRS phone can be used in almost any part of the world with the Tri-band (GSM 900/1800/1900 bands) features. -
Page 14: Displayed Icons For Lcd
Displayed icons for LCD 4 17 4 16 Indicates the battery level. Appears when charging. Indicates the battery charging status (error, stopped). New message on server SIM is full Mailbox is full Unread message MMS over CSD on server MMS over GPRS on server (red) New voice messages in voice mail (No ALS or ALS1) -
Page 15: Overview Of Menu Function
Overview of menu function Standby screen Main menu 2nd Level menu Settings Phone Phone modes Display Calls Security Network T9 input Reset settings My data Photos Pictures Sounds Record voice Memory status To access each main menu function, press Main menu screen from the standby screen and use the scroll through the main menu functions. -
Page 16: Getting Started
• Fully charged battery Service activation Before you can use your new NEC phone, the service must be activated by your service provider. Please contact your local service provider regarding phone activation. Voice mail messaging and text messaging Voice mail messaging and text messaging services, when available, are provided by your service provider. Before you can receive voice or text messages with your phone, you must subscribe to these service options. -
Page 17: Sim Card
SIM card Before using your phone, you must sign-up/register with a wireless network service provider to receive a personal SIM (Subscriber Identity Module). The SIM card contains a computer chip that keeps track of your phone number, the services included in your subscription, and your SIM phonebook information. -
Page 18: Preparing The Battery
Preparing the battery Using any battery pack or AC adapter not specified by NEC with this phone may be dangerous and may invalidate any warranty and approval given to the phone. Do not leave the charger connected to the power supply when it is not in use. -
Page 19: Checking The Battery
The phone is designed to be charged with NEC equipment listed with the specifications of your phone. C(41F) or above 35 C(95F). -
Page 20: Powering On The Phone
Make sure the phone is switched off. Some settings, stored numbers, and messages may be lost if the battery is removed while the power is on. 1 Press down the slit of the rear cover. 2 While pressing down the rear cover, slide the rear cover about 3 mm in the direction indicated by the arrow. 3 Remove the rear cover. -
Page 21: Basic Calls And Phone Use
Basic Calls and Phone Use You can make a call in the same way as a normal push-button phone. Press Making an emergency call You may make an emergency call when your SIM card is not inserted in your phone. Simply power on your phone and dial the emergency number of your local region. -
Page 22: Using Handsfree
Using handsfree Insert the handsfree to the charger connector/earphone jack at the side of the phone. When there is an incoming call: • Under with Car mode Auto answer • Under manual answering mode, press Receiving calls When you receive a call: •... -
Page 23: Placing A Call On Hold
Placing a call on hold You can place a received or dialed call on hold by pressing Making a second call Dial the second call while on the first call. This will put the first call on hold. • To toggle between the first and second call, select •... -
Page 24: International Dialling Service
With activated, your phone will redial a number up to 10 times if the first attempt is not successful. For the procedures to activate Auto redial , see “Auto redial” on page 37. redial When a dialed number cannot be connected, a tone is heard and an alert message will be shown on the display. The phone returns to the standby screen and the number will be automatically dialed again after a short delay. -
Page 25: Call Features
Call features Fast dial Fast dials can be activated in the Abbreviated Dialing Numbers by entering a number between 1 to 255 (depending on your SIM card) and pressing #. The phone details that correspond to the record number will be displayed. Press Voice mail Most service providers offer this external voice mail service to their subscribers. -
Page 26: Keylock/Auto Key Lock
Keylock/Auto key lock To lock/unlock the key pad, press and hold the . Press Left Softkey to activate the function and the phone locks the keypad when the standby screen is displayed for 30 seconds. lock You can make an emergency call even if the keypads are locked. For details, see “Auto key lock”... -
Page 27: Call Options
Call Options From the main menu, select Phonebook A quick way to view Dialed call, Missed calls and Received calls list from the standby screen is to press respective lists using the If you miss a call, you can check it by pressing Right Softkey from the standby screen when there is a telephone-shaped icon displayed in the Softkey area. -
Page 28: Time/Charge
Time/charge screen will display the duration and costs of the different types of calls made from your phone. Time/charge Time/charge service is SIM card dependent. From the main menu, select Phonebook • Use the navigation keys to highlight and press voice calls Total incoming Total outgoing... -
Page 29: Personalizing Settings
Personalizing Settings Voice volume To adjust the volume during a call, use the When you are not making any calls, use the following procedure: From the main menu, select > Settings • Use the navigation key to increase, or use the •... -
Page 30: Auto Key Lock
Use the navigation keys or press the field to set a for the reminder. Press Timer Auto key lock You can lock your keypad keys by activating From the main menu, select > Settings indicates that the function has been activated. If your key pad is not used for 30 seconds, the phone automatically locks the key pad. You can unlock the keys by pressing and holding # from the standby screen. -
Page 31: Fak Setting
• After editing, press the Left Softkey Set time format From the main menu, select > Settings • Use the navigation keys to highlight button. The phone returns to the Time / date Set date format From the main menu, select >... -
Page 32: Phone Modes
Phone modes You can set your phone to operate in any one of four modes in the • Normal mode • Meeting mode • Pocket mode • Car mode If the selected mode is Car mode, the backlight will always be turned on. This will accelerate the battery consumption. Phone mode selection From the main menu, select >... - Page 33 Use the navigation keys to highlight the phone mode you wish to change from the following: • Normal mode • Meeting mode • Pocket mode • Car mode Press Left Softkey to display the Options to change the phone mode’s settings, then press Change settings changes: Ringer setting...
-
Page 34: Power On Greetings/Animations
• Press Right Softkey to accept the changes and return to the previous Vibrator To change the settings, highlight Vibrator pears). Earphone To change the settings, select Earphone Illumination To change the illumination settings, select illuminate Key & LCD • Use the navigation keys to highlight your desired setting and press With the illumination always on, the battery consumption will be accelerated. -
Page 35: Color Style
• From the main menu, select Settings • Use the navigation keys to highlight either • In the display screen, select Set wallpaper the background display off (a blank screen will be displayed at standby mode). • With the folder displayed, highlight your desired wallpaper from the list. Press Photos Pictures key to return to the standby screen. -
Page 36: Calls
suitable contrast level. • Press Left Softkey to save any contrast changes, or press Calls The Calls screen allows you to activate Call diversion From the main menu, select > Settings Call diversion You may preset your phone to divert incoming calls to a specified phone number for the following conditions: •... -
Page 37: Call Waiting
• To disable call divert for the selected condition, highlight There will be a short delay while the network sends the divert status of your phone. Status check and cancellation of all call diverts allows you to check the current divert status for all the different conditions. Status check •... -
Page 38: Security
Security The security settings protects your phone from improper and unauthorized use. These confidential numbers should be kept in a safe place for future access, if required. You may be required to enter one of the following security codes as shown below. When the phone prompts you for one of these codes, use the keypad to enter the appropriate number and press •... -
Page 39: Phone Lock
Phone lock menu allows you to lock your SIM card from unauthorized usage. If Phone lock correct PIN code is entered. To enable/disable • From the main menu, select Settings • Highlight and press Left Softkey Phone lock been activated. You will have to key in a The default setting of the Phone code is “0000”. -
Page 40: Network
Status check To check the status of calls barring for all the different types of calls, select menu. After a short pause, the network transmits and displays all the ring status previously set. Cancel all To cancel all barrings previously set, select service provider will be needed for this function. -
Page 41: T9 Input
with Left Softkey to display the • navigation keys to highlight the net operator you wish to add to your list and press The phone returns to the Network • To delete a network from the list, select press Left Softkey again to display the Before editing your pref. -
Page 42: Text Entry
Text Entry This section describes how you can enter text (letters, numbers and symbols). The same method of text entry can be used in all of the phone’s editing display. Mode change In the text entry screen, pressing key can change the text entry mode in the normal text input or when T9 key will toggle T9 input On/Off. -
Page 43: T9 Language
and return to the screen Edit Text formats, cannot be applied simultaneously to your messages. Italic Bold Predefined text You may add a predefined text into your message editing screen. Select of texts and press Left Softkey to open the Insert number You may attach a phone number to the message that you are editing and send it. -
Page 44: Normal Text Input
• navigation key: To move the cursor around and each of the words keyed will be highlighted. • key: To toggle the different modes of text entry. • # key: To activate the symbol list; Press and hold to toggle T9 Normal text input Normal text input (abc/Abc/ABC) •... -
Page 45: Message
Message From the main menu, select . Using this function, you can send and receive text messages with attached sound, image files, etc. Message Alternatively, you can press navigation key to access the The following folders in the menu have the following functions: Message •... -
Page 46: Message Display Screen Options Menu
received MMS. (available for • Display the Forward Edit • Display the message in the Edit • Delete the highlighted message Delete • Delete all the messages in the current folder. Delete all To select an option, highlight the option and press Message display screen options menu When a received message ( Inbox... -
Page 47: Receiving And Reading A Message
• Display the Send Send • Save the edited MMS in the Store • Delete the inserted text/image/voice from the slide. Delete object • Display details of the View details • Edit the timing ( Page timing Slide timer • Delete a selected slide from the MMS. -
Page 48: Creating And Sending A Message
To read a message • Select from the main menu or press Message • Press Left Softkey to display the message list of the highlighted mailbox ( • Highlight the message to be read and press Please review message only after the whole series of SMS/MMS has been received by your phone. When the phone has not finished receiving the long message, there will be a popup notification that the message is incomplete and it cannot be viewed. - Page 49 • To send the MMS to an E-mail address in the phonebook, press phonebook entries will be displayed, highlight the phonebook entry you wish to send the MMS to, then press • Enter the Subject • To send, press Left Softkey to display the Options menu, then highlight will be saved in the Outbox...
-
Page 50: Predefined Text
Predefined text • From the main menu, select Message • Highlight the desired message and press • Highlight and press Left Softkey Select or just the message. and save Save Once you edit the predefined texts, you cannot return them to the default setting even by the reset setting function. Message settings The following describes the setting items for SMS/EMS settings, MMS settings and Cell broadcast settings: SMS/EMS settings... - Page 51 • Use the navigation keys to highlight is activated. Direct reply SMS via GPRS • Use the navigation keys to highlight that this function is activated. MMS setting - Send options • Select from the main menu or press Message •...
-
Page 52: Memory Status
• When is set: Auto defer Memory status The available memory and the used-up memory will be displayed. • With the standby screen displayed, press • Select to display the SMS memory status of the phone and the SIM, MMS memory status. Memory status Cell broadcast •... - Page 53 desired language to add to the list and press Left Softkey to confirm selection. The phone returns to the display menu. Cell broadcast...
-
Page 54: Wap Service
• Java™ application NEC WAP site Your phone can now access the NEC WAP website at www.necmobile.com You can select and download the desired content from the wide variety available. Further information For more details, visit www.necmobile.com on your PC, or your phone. -
Page 55: Profile Setting
To choose another connection from the list of network service providers, use the and press Left Softkey for the Options menu. Select Profile setting From the menu, press Left Softkey Connectivity To edit the profile settings, press Left Softkey options and press Left Softkey to edit the respective details: Server address... -
Page 56: Logging On To Wap Site
• Password Press Left Softkey to save all changes made. To cancel the change, press GPRS (General Packet Radio Service) settings GPRS is a method for faster data transmitting in the mobile network. If the network has sufficient capacity, you will be able to get connected to the Internet almost permanently. The network operator will only charge the actual data transmission time. -
Page 57: Wap Push
The functions of the softkey will vary according to the type of WAP service page loaded. End connection To end the connection, press WAP push From the main menu, select > Browser • Highlight and press Left Softkey Switch on •... -
Page 58: Camera
Camera The integrated digital camera in the phone allows you to take photos and send them out via the Multimedia Messaging Service (MMS). The photos will be stored in JPG format in the phone, and can be viewed by most picture viewing programs. Taking a picture To take and save a picture inside your phone, use the following procedure: •... -
Page 59: Camera (Before Taking A Picture)
Camera (before taking a picture) Images shot in your phone cannot be used in ways that infringe copyright laws without the consent of the copyright holder, unless intended only for personal use. Note that some restrictions apply to the photographing of stage performances, entertainments and exhibits, even when intended purely for personal use. -
Page 60: Camera Options Menu (After Saving A Picture)
Image quality • Highlight and press the Image quality . Use the navigation keys to highlight and select the quality by pressing Economy • ' quality photo implies that the photos taken will be of better quality. However, the total number of pictures that can be taken will be Fine reduced. -
Page 61: My Data
My data You can use this menu function to manage all the pictures and sounds saved in the phone. You can playback sound, ringtones or display pictures/ wallpapers downloaded from the Internet, or photos captured with the built-in camera function. From the main menu, select My data You can also get to My data display screen by pressing... -
Page 62: Sounds
the picture and press Left Softkey to save the changes made. You can only input "0-9", "a-z", "A-Z" and "_" for filenames. Changing of text entry mode is not available in this menu. Delete (not for preset wallpaper) This option allows you to delete the highlighted photo/picture file. Highlight tion message appears, press Left Softkey Delete all (not for preset wallpaper) -
Page 63: Record Voice
• Friends, Colleagues, Family, Biz partner, and VIP Highlight the type of call you want to set the ringtone and press Rename (for downloaded ringtone/melody) You can use the function to edit the file name for the selected ringtone/melody. Highlight Rename new name for the ringtone/melody and press Delete (for downloaded ringtone/melody) -
Page 64: Memory Status
Rename Highlight and press Left Softkey Rename Delete Highlight and press Left Softkey Delete Delete all Highlight and press Left Softkey Delete All Info Highlight and press Left Softkey Info Memory status This feature allows you to check the memory space in your phone. •... -
Page 65: Phonebook
Phonebook Lists Your phone can store up to 8 different phonebooks: • Complete (a list of all the numbers stored in the other phonebooks (Phone, SIM, FDN) except SDN numbers) • Personal directories (ADN) in SIM • Personal directories (ADN) in your phone memory (Phone) •... - Page 66 The numbers stored in the SDN phonebook are supplied, ready to use, and installed by your service provider. The SDN phonebook contains numbers and services that cannot be edited by you. You will not be able to see the number that is dialed as only the associated text title will be shown.
-
Page 67: Own Number
• Highlight field. Use the Record No. • Press the Left Softkey to save the changes made. You cannot save a record unless phonebook list. Phone You can set up the following information in the phonebook (Phone): • Name. • Home number •... - Page 68 • Select from the Options menu. Edit • Highlight field, then enter the number. Own number • Highlight field, then key in the name. Name • Press Left Softkey to save and return to • To delete a saved entry, highlight the entry from and press Left Softkey to confirm the deletion.
-
Page 69: Calling Phone Numbers From Phonebook
• Use the navigation keys to scroll through the list of ringtones/melodies and press ringtone/melody for the group. The phone returns to the Change a group image To change the group image, use the following procedure: • With the list screen displayed, use the Groups Options menu. -
Page 70: Editing Phonebook Entries
with or twice to jump to names beginning with K). • To jump to a name beginning with specific letters, press the corresponding number keys for the first few letters of the desired name. The cursor is positioned on the right of the title bar in the phonebook list. This allows you to enter the characters to perform a search for the contact you wish to recall. - Page 71 When copying/moving a phonebook record in the phonebook (Phone) with more than one phone number in one record, the Phone number screen is displayed to choose which number you wish to copy/move. Sending an SMS/MMS from the phonebook You can send an SMS or MMS message to the phone number stored in the phonebook. •...
-
Page 72: Java
™ Java ™ You can download Java from WAP sites and etc. and run these in your phone. The downloaded Java When you have downloaded a Java ™ the Java application screen. When you display the Java™ applications list screen for the first time after downloading a program(s), it may take a while for your phone to verify the program(s). -
Page 73: Folders Options Menu
• Highlight and press Left Softkey About Exit • Highlight and press Left Softkey Exit Folders options menu After you highlight a folder, press Left Softkey If there is a folder or file inside the folder, you cannot delete the folder until it is emptied. Open •... - Page 74 • From the menu screen, use the navigation keys to highlight the desired application/software and press Left Softkey Java™ display the Options menu. ™ • Highlight and press Left Softkey to activate the selected Java application/software. Launch ™ ™ You can also press Right Softkey to launch the highlighted Java application/software on the Java...
-
Page 75: Accessory
Accessory From the main menu, select Accessory • Camera (See “Camera” on page 58 for details.) • Organizer (Scheduler, ToDo list, Notepad) • Clock (Alarm clock, Auto off, Auto on, Countdown, Stopwatch) • Calculator (Calculator, Currency conv.) • Composer • Voice memo (Record, Play, Data rate) Camera For details on the camera function, please refer to “Camera”... -
Page 76: Todo List
• Edit the Start date Start time End date • Press Left Softkey to save agenda settings and return to the If you miss an appointment alarm, you can check it by pressing icon displayed in the Softkey area. Options menu for existing agenda menu is displayed when an existing agenda is selected and Options •... -
Page 77: Notepad
Activate Deactivate • navigation key to move down to the appointment: Once Daily Weekly • If you choose , you can toggle On/Off, the required day(s) of the week by highlighting and pressing Weekly • Edit the Start date Start time End date •... -
Page 78: Alarm Clock
• Edit: Display an editing screen for the highlighted text note. • Add new: Display a new entry screen. • Delete: Delete the highlighted text note. • Delete all: Delete all the existing text notes. • Send: Send the note via SMS to a recipient (you may select a phone number from the phonebook list or enter a recipient’s number). •... -
Page 79: Auto Off
Once you set the time, the alarm will ring every day(s) of the week you have set until you deactivate the settings. If you miss an alarm, you can check it by pressing Right Softkey from the standby screen when there is a clock-shaped icon displayed in the Softkey area. -
Page 80: Calculator
• To reset all time counters, press Left Calculator You can perform addition, subtraction, multiplication and division of numbers with the calculator function. You can enter up to 8 digits. The calculator can display a result of up to 9 digits, with a maximum of 6 decimal places. If a calculation results in a number exceeding the maximum, “Over range”... -
Page 81: Currency Converter
To delete a digit, press Right Softkey. Deleting all digits • To delete all digits input, press and hold Currency converter From the main menu, select Accessory using this function: Rate setting From the display screen, select Currency conv. enter a decimal point. Press Left Softkey Rate compute From the... -
Page 82: Data Rate
From the main menu, select Accessory Record • Select . A message shows: Record • Press Right Softkey to start recording. To pause, press • Press Left Softkey to stop the recording. • To play and listen to the recording, press •... -
Page 83: Index
Index Calls ... 36 Camera Accepting a Call ...22 Accessory ...75 ADN ...65 Agenda ...75 Alarm clock ...78 Alternate Line Service (ALS) ..30 Any key answer ...29 Auto answer ...34 Auto key lock ...30 Auto network ...40 Cell broadcast ... 52 Auto off ...79 Auto on ...79 Auto redial ...37... - Page 84 Notepad ... 77 Roaming ...39 Numeric input ... 44 Scheduler ...75 Outbox ... 45 Scratchpad number Screen Saver ...26 Password ... 16 SDN ...66 Personalizing Settings ... 29 Security settings ...38 Phone lock ... 39 Sending an SMS/MMS from the Phone mode phonebook ...71 Car ...