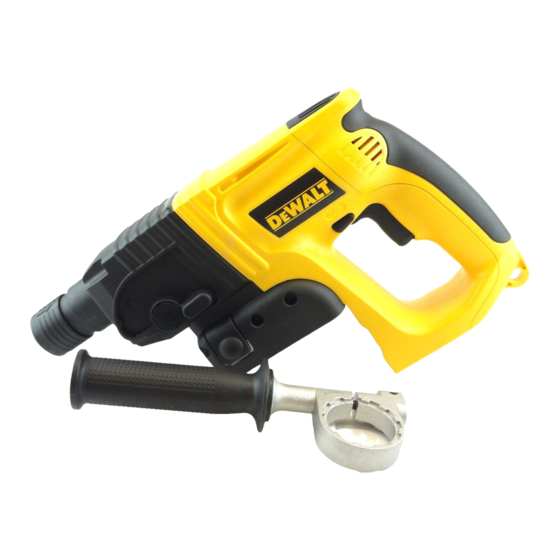
DeWalt DW005 Instruction Manual
24 volt 7/8" cordless rotary hammer with chipping feature
Hide thumbs
Also See for DW005:
- Instruction manual (38 pages) ,
- Manual (116 pages) ,
- User manual (14 pages)
Table of Contents
Advertisement
Available languages
Available languages
Quick Links
Advertisement
Table of Contents

Related Manuals for DeWalt DW005


Summary of Contents for DeWalt DW005
- Page 2 WALT Industrial Tool Co., 701 East Joppa Road, Baltimore, MD 21286 (AUG03-CD-1) Form No. 578992-02 Printed in U.S.A. Copyright © 2003 The following are trademarks for one or more D WALT power tools: the yellow and black color scheme; the “D” shaped air intake grill; the array of pyramids on the handgrip;...
- Page 3 Questions? See us in the World Wide Web at www.dewalt.com INSTRUCTIVO DE OPERACIÓN, CENTROS DE SERVICIO Y PÓLIZA INSTRUCTION MANUAL DE GARANTÍA. ADVERTENCIA: LÉASE ESTE INSTRUCTIVO ANTES DE USAR EL PRODUCTO. GUIDE D'UTILISATION MANUAL DE INSTRUCCIONES DW005 24 Volt 7/8" Cordless Rotary Hammer with Chipping Feature Perceuse à...
-
Page 4: General Safety Rules - For All Battery Operated Tools
General Safety Rules – For All Battery • Avoid accidental starting. Be sure switch is in the locked or off Operated Tools position before inserting battery pack. Carrying tools with your finger on the switch or inserting the battery pack into a tool with WARNING! Read and understand all instructions. -
Page 5: Important Safety Instructions For Battery Chargers
• These chargers are not intended for any uses other than charging to bind and are easier to control. DeWalt rechargeable batteries. Any other uses may result in risk of • Check for misalignment or binding of moving parts, breakage fire, electric shock or electrocution. -
Page 6: Important Safety Instructions For Battery Packs
• To reduce risk of electric shock, unplug charger from outlet before • Charge the battery packs only in D WALT chargers. attempting any cleaning. Removing the battery pack will not reduce • DO NOT probe pack with conductive objects. this risk. -
Page 7: Charging Procedure
Charging Procedure 4. Once the Automatic Tune-Up™ Mode is complete the charger will transition to a maintenance charge; no indicator light shows the 1. Plug the charger into an appropriate outlet. completion of the Automatic Tune-Up™ Mode. 2. Insert the battery pack into the charger. The red (charging) light will blink continuously indicating that the charging process has started. - Page 8 Installing and Removing the Battery Pack buildup of metallic particles should be kept away from charger cavities. Always unplug the charger from the power supply when NOTE: Make sure your battery pack is fully charged. To install the there is no battery pack in the cavity. Unplug charger before battery pack into the tool handle, align the base of the tool with the attempting to clean.
- Page 9 as generators or sources that convert DC to AC, the chargers may • Do not abuse the cord. Never use the cord to carry the tools or temporarily suspend operation, flashing the red light with two fast pull the plug from an outlet. Keep cord away from heat, oil, sharp blinks followed by a pause.
- Page 10 The RBRC™ Seal frequent rest periods. • Wear gloves when operating tool or changing bits. Bits may The RBRC™ (Rechargeable Battery Recycling Corpor get extremely hot during operation. Small bits of broken material ation) Seal on the nickel-cadmium battery (or battery may damage bare hand.
-
Page 11: Variable Speed Switch
Do not allow dust to get into your mouth, eyes or lay on the skin. Variable Speed Switch Wear protective clothing whenever possible. To turn the tool on, squeeze the trigger switch (B). To turn the tool off, • The label on your tool may include the following symbols. release the trigger switch. -
Page 12: Operation
Operation the proper drilling rate. Use a cutting lubricant when drilling metals. The exceptions are cast iron and brass which should be drilled dry. DRILLING NOTE: Large (5/16" to 1/2") holes in steel can be made easier if a 1. Always lock the trigger switch and remove the battery when pilot hole (5/32"... - Page 13 WALT Industrial Tool Co., 701 East Joppa Road, Baltimore, MD FREE WARNING LABEL REPLACEMENT: If your warning labels 21286 or call 1-800-4 D Walt (433-9258). become illegible or are missing, call 1-800-4-DEWALT for a free replacement. MAXIMUM RECOMMENDED CAPACITIES DW005 R.P.M.
- Page 14 SI VOUS AVEZ DES QUESTIONS OU VOULEZ NOUS FAIRE PART • N’utiliser l’outil à piles qu’avec le bloc-piles désigné, car DE VOS COMMENTAIRES CONCERNANT CET OUTIL OU TOUT l’utilisation d’un autre type de piles peut entraîner un risque AUTRE OUTIL D WALT, COMPOSEZ SANS FRAIS LE : d’incendie.
-
Page 15: Entretien
Ne pas forcer l’outil ni l’utiliser pour des travaux autres que ENTRETIEN • ceux pour lesquels il a été conçu. Pour obtenir de meilleurs • L’outil doit être entretenu ou réparé par le personnel qualifié résultats et prévenir les risques de blessure, laisser l’outil couper seulement;... - Page 16 • Sauf nécessité absolue, ne jamais utiliser de cordon de rallonge. • Le chargeur est conçu pour fonctionner sur une alimentation L’utilisation d’un cordon de rallonge non conforme présente des domestique standard (120 volts). Ne pas essayer de s’en servir risques d’incendies et de secousses électriques.
- Page 17 • NOTE : Relire et respecter toutes les notes importantes relatives Chargement au chargement qu’on retrouve dans le présent guide. Le chargeur est conçu pour utiliser une alimentation domestique • NOTE : Les piles de l’ensemble renferment du nickel-cadmium. Le standard de 120 volts c.a., 60 Hz.
- Page 18 1. La lumière rouge clignotera sans interruption indiquant que le Éventez le refroidissement cycle d'une heure de charge a commencé. Ce chargeur est muni d’un ventilateur interne qui refroidit rapidement 2. Quand le cycle d'une heure de charge est complet, la lumière restera les bloc-piles DW0242 de D WALT.
- Page 19 3. Si le bloc-piles ne se charge pas normalement, il faut : (1) vérifier Indicateurs de chargement l’alimentation de la prise en y enfichant une lampe ou un appareil, TEMPORISATION POUR ENSEMBLE DE PILES CHAUD (2) s’assurer que la prise ne soit pas raccordée à un interrupteur qui OU FROID coupe le courant lorsqu’on ferme les lumières, (3) placer le Lorsque le chargeur détecte un ensemble de piles trop chaud ou trop...
- Page 20 dans un seul sens; on doit l’inverser si dernier en laissant le doigt sur l’interrupteur ni le brancher lorsque incapable l’enfoncer l’interrupteur est en position marche, car cela pourrait causer un complètement. Si la fiche ne s’adapte accident. toujours pas, on doit demander à un •...