
Related Manuals for Haier GE GFD14ESSNWW


Summary of Contents for Haier GE GFD14ESSNWW
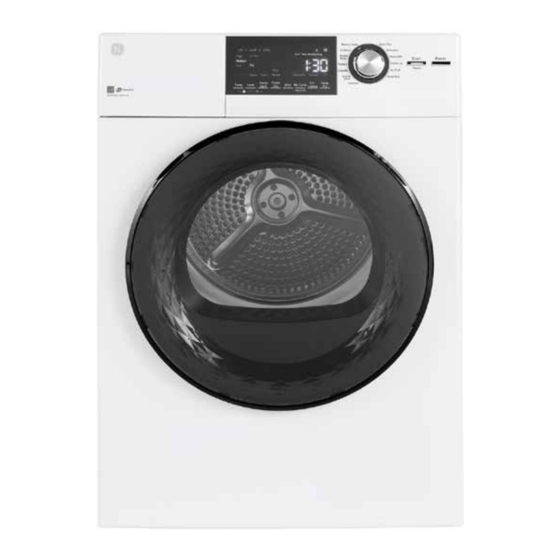
- Page 1 Technical Service Guide August 2019 24 Inch Vented Dryer GFD14ESSNWW 31-9309 Rev. 1 ~ 6/24/20...
-
Page 2: Safety Information
5. Locate the Warranty page. GE Appliances, a Haier Company Copyright © 2019 All rights reserved. This service guide may not be reproduced in whole or in part in any form without written permission from GE Appliances, a Haier Company. – 2 –... -
Page 3: Table Of Contents
Table of Contents Safety Information ........................2 Warranty ............................2 Table of Contents ..........................3 Safety Requirements ........................5 Nomenclature ..........................6 Specifications ..........................7 Control Features ...........................8 Quick Start ..........................8 Dryer Features ........................8 Loading ............................14 Fabric Care Labels .......................14 Sorting and Loading Hints ....................14 Drying Rack ..........................14 Care and Cleaning ........................15 Interior ..........................15 Exterior ..........................15... - Page 4 Top View ..........................23 Rear View ..........................24 Main Board Connections ......................25 User Interface Board Connections ....................26 Capacitive Touch Board Connections ...................27 Dryer Components ........................28 Control Panel and Front RJ45 Access ..................28 Top Cover ..........................28 User Interface Board ......................29 Front Panel ...........................30 Door Switch ..........................31 Door Latch ..........................32 Drum Lamp ...........................32...
-
Page 5: Safety Requirements
Safety Requirements GE Factory Service Employees are required to use safety glasses with side shields, safety gloves and steel toe shoes for all repairs. Prescription Safety Glasses Brazing Glasses Safety Glasses must be ANSI Z87.1-2003 compliant Plano Type Safety Glasses Cut Resistant Sleeve(s) Electrically Rated Glove and Dyneema®Cut Resistant... -
Page 6: Nomenclature
Nomenclature Model Number G F D 1 4 E S S N 0 W W Brand Color Series G: GE WW: White Engineering Revision Alpha or Numeric Configuration Fuel/Voltage F: Front Load E: Electric Model Year G: Gas N: 2019 P: Propane Partner Type Platform... -
Page 7: Specifications
Specifications Inlet Thermistor Resistance Component Approx. Resistance K OHMS TEMP. °F TEMP. °C Motor (CW) 25.3 ± 7% 11.66 - 12.58 Motor (CCW) 25.1 ± 7% 24.78 - 27.15 Heater 1 (1600W) 34.3 ± 3% 57.30 - 63.85 Heater 2 (700W) 75.8 ±... -
Page 8: Control Features
Control Features Quick Start 1. Loosely add items, and close the door. NOTE: The dryer will not start with the door open. Power 2. If the screen is dark, press the Power button to “wake up” the display. 3. Select a dry cycle. (Defaults are set for each dry cycle. These default settings can be changed. - Page 9 Dryer Features - Continued Power Press Power to “wake up” the display. If the display is active, press Power again to turn the dryer off. NOTE: Pressing Power does not disconnect the appliance from the power supply. Dry Cycles The dry cycle controls the cycle time for the drying process. The chart below will help match the dry setting with the loads.
- Page 10 Dryer Features - Continued Temp The temperature of the dry cycle can be changed to the following: High For regular to heavy cottons. Medium For synthetics, blends and items labeled Permanent Press. For delicates, synthetics and items labeled Tumble Dry Low. No Heat This option may only be used with Air Fluff and Timed Dry, in which items are tumbled without heat.
- Page 11 Dryer Features - Continued eDry (on some models) Reduces total energy consumption of specific dryer cycles by adjusting certain heat settings. NOTE: Cycle times will change when eDry is selected. ® Energy Star models are tested on Cottons cycle with default settings to determine energy use of this dryer.
- Page 12 Dryer Features - Continued Delay Dry Use Delay Dry to delay the start of the dryer. 1. Choose a dry cycle and any options. 2. Press Delay Dry. Time can be delayed in 1 hour increments, using the Delay Dry button.
- Page 13 Dryer Features - Continued Display and Status Lights The display shows the approximate time remaining until the end of the cycle. In addition, this display will show the dryer status: Status DAMP COOL Controls locked on. End of cycle signal on. Clean Filter Time to clean the filter.
-
Page 14: Loading
Loading Always follow the fabric manufacturer’s care label when laundering. Fabric Care Labels Fabric care label “symbols” that affect the clothing to be laundered: Tumble Tumble Do not dry Do not dry Normal Permanent Press/ Gentle/ Do not tumble dry Normal Permanent Press/ Gentle/... -
Page 15: Care And Cleaning
Care and Cleaning Interior The interior of the appliance and exhaust duct should be cleaned once a year by qualified service personnel. • The Exhaust Duct: Inspect and clean the exhaust ducting at least once a year to prevent clogging. A partially clogged exhaust can lengthen the drying time. -
Page 16: Drum Lamp
Drum Lamp NOTE: The drum lamp is not consumer replaceable on models where there is a domed cover over an LED bulb. If this light should ever stop working, call for service. For models that have a flat cover over the bulb secured by a screw: •... -
Page 17: Stacking Instructions
Stacking Instructions The GE Appliances 24-Inch Dryer is designed KIT CONTENTS to be placed on top (stacking) of certain 24-Inch (GE APPLIANCES KIT #: GFA24KITL) washers. Washer models that currently qualify Screws (2) Long for stacking are: For dryer • GFW148 attachment NOTE: If planning to stack the washer and dryer, Bracket-... -
Page 18: Install Bracket To Washer
Install Bracket to Washer Install Dryer and Bracket on Dryer 1. Remove the washer top cap screw from the WARNING: rear left. Align the left bracket holes with the Disconnect power before installing. Failure to do top cap screw hole on the rear left of the unit so could result in serious injury or death. -
Page 19: Finalize The Installation
Finalize the Installation CAUTION Do not push on the dryer once installed to the top of the washer. Pushing on the dryer may result in pinched fingers. 1. Refer to the washer Installation Instructions to complete the washer installation. 2. Refer to the dryer Installation Instructions to complete the dryer installation. -
Page 20: Airflow
Airflow Airflow and Seals Proper air flow through the dryer is essential for normal operation of the temperature control and safety systems. Air is PULLED into the cabinet from rear, (1) and drawn across the heaters located behind the drum (2, 3). This hot air is PULLED through the drum rear (4), across the clothes load (5), through the lint trap (6), and down the trap duct into the blower (7). -
Page 21: Drum And Drive Motor
Drum and Drive Motor The drive motor spins at 1650 RPM and drives both fan and drive belt. The drum rotates at 50 ± 2 RPM. The drum is spun clockwise by a pulley attached to the drum motor shaft. –... -
Page 22: Component Locator Views
Component Locator Views Front View Top and Front Panel Removed LED Drum Light Location Sensor Rod Connectors Drum Roller Shaft Nuts – 22 –... -
Page 23: Top View
Top View Rear Outlet Rear Outlet Terminal Block Fuse Main Board LED Drum Light Front RJ45 Connector – 23 –... -
Page 24: Rear View
Rear View – 24 –... -
Page 25: Main Board Connections
Main Board Connections K5 Relay L2, Motor K3 Relay L1, Heater 1 K4 Relay L1, Heater 2 L1, Motor CW, Motor CCW Outlet Thermistor, Inlet Thermistor DC Voltage to User Interface (UI), Comm to UI, Humidity Sensor Not Used L2, Neutral –... -
Page 26: User Interface Board Connections
User Interface Board Connections Capacitive Touch Board DC Voltage and Comm Harness (Comes Attached to User Interface/UI Board) Drum Lamp RJ45 RJ45 CON 1 DC Voltage in from Main Board, Temperature Protect Circuit – 26 –... -
Page 27: Capacitive Touch Board Connections
Capacitive Touch Board Connections CON1 CON 1 DC Voltage Comm in from User Interface (UI) Board – 27 –... -
Page 28: Dryer Components
Dryer Components Warning: Sharp edges may be exposed when 3. Remove the four Phillips-head screws that servicing the dryer. Use caution to avoid injury. attach the top of the control panel to the side Wear Kevlar gloves or equivalent protection. panels. -
Page 29: Top Cover
4. Disconnect the control panel touch board Top Cover connection. Removal of the control panel provides access to three Phillips-head screws located at the front edge of the top cover. After removal of the screws, the cover can then be slid forward approximately 1/4-inch, and then lifted to disengage it from the cabinet. -
Page 30: Front Panel
NOTE: Remove the door assembly first. Makes it Front Panel easier to remove the front panel. Removal of the front panel provides access to 5. Remove the door and hinge assembly. the sensor rods connection, and the drum lamp socket connection. The door switch is attached 6. -
Page 31: Door Switch
4. Pull the switch from the front panel and Door Switch disconnect the harness from the switch. The door switch is fastened to the front panel by two locking tabs. The control panel, top panel and control panel mounting bracket needs to be removed before the switch can be removed. -
Page 32: Door Latch
Door Latch Drum Lamp The door latch is fastened to the front panel by The drum lamp assembly consists of a LED that two locking tabs. The top panel, side panel and comes with its own harness attached. It has a front panel needs to be removed before the latch built in light shield. -
Page 33: Outlet Thermistor (Ntc1)
3. Press the tabs on the sides of LED light to Outlet Thermistor Removal remove it from the drum light cover to replace 1. Remove the front panel (see Front Panel the LED. in the Dryer Components section of this 4. -
Page 34: Sensor Rods
Sensor Rod Removal Sensor Rods 1. Remove the front panel to access the sensor The sensor rods consist of two sensors attached rods and harness (see Front Panel Removal to a plastic housing on the inside of the drum under Front Panel in the Dryer Components support. -
Page 35: Heater Access Panel
Heater Access Panel It is necessary to remove the heater access panel to access the heater assembly, inlet thermistor and manual reset thermostat. The cover is attached to the back of the cabinet with seventeen Phillips-head screws. This includes the four screws that secures the ground strap cover. -
Page 36: Heater Assembly
Heater Assembly Removal Heater Assembly 1. Remove back heater access panel (see The heater assembly is located on the back of Heater Access Panel in this section of this the cabinet. It consists of two ribbon elements service guide). fastened to a single housing, thermistor, inlet and high limit thermostats. -
Page 37: Inlet Thermistor (Ntc2)
Inlet Thermistor (NTC2) Inlet Thermostat The inlet thermistor is attached to the top of the The inlet thermostat is attached to the top of the heater assembly (on the right as viewed from heater assembly (on the right, as viewed from the back of the dryer). -
Page 38: Rear Power Outlet
2. Remove and disconnect the fuse harness Rear Power Outlet connector. The rear power outlet is used for supplying power to the washer. This is a 120 VAC power supply. 3. Disconnect the other end of the fuse harness from the outlet. This fuse link is separate from the main harness The outlet utilizes an in-line fuse to prevent and is an orderable part. -
Page 39: Front Drum Support
2. Remove the front drum support by removing Front Drum Support the 5 Philips head screws and disconnecting the harness from the clips. The drum support holds the front of the drum in place utilizing two roller wheels and shaft. If the 3. -
Page 40: Drum Belt
3. Once the front drum support is removed, Drum Belt reach in from the front. With both hands around the blower housing on both sides, The drum belt extends from the idler pulley to disconnect the belt by lifting upwards on the around the perimeter of the dryer drum. -
Page 41: Motor Drive Belt
NOTE: Ensure to note the position of the idler Drum and Rear Drum Bearing pulley spring. The rear drum bearing consists of a bearing support mounted to the drum and the bearing. Motor Drive Belt Drum Bearing Removal 1. Remove control panel, control panel mounting The motor drive belt extends from the motor bracket, top cover, front panel, front drum pulley to around the perimeter of the idler pulley. -
Page 42: Motor Assembly
4. While holding the motor shaft by the pulleys Motor Assembly stationary with pliers, use a 10-mm socket to loosen the nut securing the blower to the The motor is a 240 VAC motor and utilizes a motor shaft. start capacitor and internal automatic reset overload. -
Page 43: Main Harness
5. Remove the four 8-mm motor bracket clamp Main Harness mounting bolts and remove motor from motor bracket. The main harness is available for replacement, if necessary. Take note of the tension spring mounting location. NOTE: The sensor rods, sensors, float switch, and heater have their own harness with connectors. -
Page 44: Diagnostics And Service Information
Diagnostics and Service Information The dryer control has a Service Mode test that can be utilized by the service technician in order to test critical components and to access fault codes. This test mode will help the service technician to quickly identify failed or improperly operating dryer components. -
Page 45: Service Mode Test
Service Mode Test Service Mode Test Sequence Press Start/ Seven Segment Display (SSD) will flash software Pause version number "UI": Lasts for 1 second; “number”: Lasts for 2 seconds; then loops. Software Version Press/Hold Start/ Seven Segment Display (SSD) will flash main board Pause software version number. -
Page 46: Fault Codes
Fault Codes Fault Description Trigger Condition Action Code No Fault • There are no faults to display. Inlet Thermistor When the inlet thermistor • Check Resistance, connector and readings exceed the minimum wiring. Short threshold (0.2V) for 5 minutes, • Replace thermistor if necessary. an inlet thermistor fault is set. - Page 47 Fault Description Trigger Condition Action Code Heating Fault Within 15 minutes of • Check both heaters 1 and 2 and input the heating process, the voltage. temperature rise has not • Check harness and connector. reached 122°F (50°C) and • Replace main board in necessary.
-
Page 48: Wiring Diagram
Wiring Diagram – 48 –... -
Page 49: Index
Index Airflow 20 Negative Temperature Coefficient 37 Nomenclature 6 Control Features 8 Control Panel 28, 29, 30 Order replacement bulb 16 Control Panel Removal 28 Outlet Fuse 23, 38 Outlet Thermistor (NTC1) 33, 47 Outlet Thermistor Removal 33 Door Latch 32, 46 Door Latch Removal 32 Door Switch Removal 31, 32 Rear Drum Bearing 41...