Nokia N90 User Manual
Nokia n90: user guide
Hide thumbs
Also See for N90:
- Manual (258 pages) ,
- User manual (132 pages) ,
- Additional applications (33 pages)
Table of Contents
Advertisement
Quick Links
Advertisement
Table of Contents

Related Manuals for Nokia N90


Summary of Contents for Nokia N90
- Page 2 Nokia N90 User Guide 9240833 ISSUE 2 EN...
- Page 3 Under no circumstances shall Nokia be responsible for any loss of data or income or any special, incidental, consequential or indirect damages howsoever caused.
-
Page 4: Table Of Contents
Register your phone ...4 Copyright protection...4 Updates...4 Find information about your device ...5 Contact your service provider ...5 Nokia support and contact information...5 Your Nokia N90 ... 6 Modes...6 Fold open mode ...6 Fold closed mode...6 Imaging mode ...7 Camera mode ...7 Essential indicators ...8... - Page 5 Answer or decline a call... 22 Answer or decline a video call... 22 Call waiting ... 23 Options during a voice call... 23 Options during a video call ... 24 Log... 24 Recent calls ... 24 Call timers ... 24 Packet data ...
- Page 6 Calendar ... 53 Create calendar entries ... 53 Set a calendar alarm ... 54 Calendar views... 54 Remove calendar entries ... 54 Calendar settings ... 54 Messaging ... 55 Write text... 56 Traditional text input ... 56 Predictive text input—Predictive text... 56 Copy text to clipboard ...
- Page 7 Office...76 Calculator... 76 Calculate percentages ... 76 Converter... 76 Set base currency and exchange rates ... 76 To-do ... 77 Create a task list... 77 Notes ... 77 Recorder... 77 Connectivity...78 Bluetooth connection ... 78 Bluetooth connection settings... 78 Send data using a Bluetooth connection... 79 Pair devices ...
- Page 8 Install applications and software ...102 Remove applications and software...103 Application settings...103 Activation keys—handle copyright-protected files...104 Troubleshooting...105 Q&A ... 105 Battery information... 108 Charging and discharging ... 108 Nokia battery authentication guidelines ... 108 Care and maintenance...110 Additional safety information ... 111...
- Page 9 NOTES...
-
Page 10: For Your Safety
For your safety Read these simple guidelines. Not following them may be dangerous or illegal. Read the complete user guide for further information. SWITCH ON SAFELY Do not switch the phone on when wireless phone use is prohibited or when it may cause interference or danger. ROAD SAFETY COMES FIRST Obey all local laws. -
Page 11: Network Services
EMERGENCY CALLS Ensure the phone is switched on and in service. The keypad is active only in the Fold open mode. Press the end key as many times as needed to clear the display and return to the start screen. Enter the emergency number, then press the call key. -
Page 12: And Chargers
The battery intended for use with this device is BL-5B. Warning: Use only batteries, chargers, and enhancements approved by Nokia for use with this particular model. The use of any other types may invalidate any approval or warranty and may be dangerous. -
Page 13: Welcome
Welcome Congratulations on your purchase of the Nokia N90 mobile device. Your device provides many functions that are practical for daily use, such as a calendar, a clock, an alarm clock, and messaging. You can personalize your device with ringing tones and themes. -
Page 14: Find Information About Your Device
On the Web site, you can get information on the use of Nokia products and services. If you need to contact customer service, check the list of local Nokia Care contact centers at www.nokia.com/customerservice. For maintenance services, check your nearest Nokia Care... -
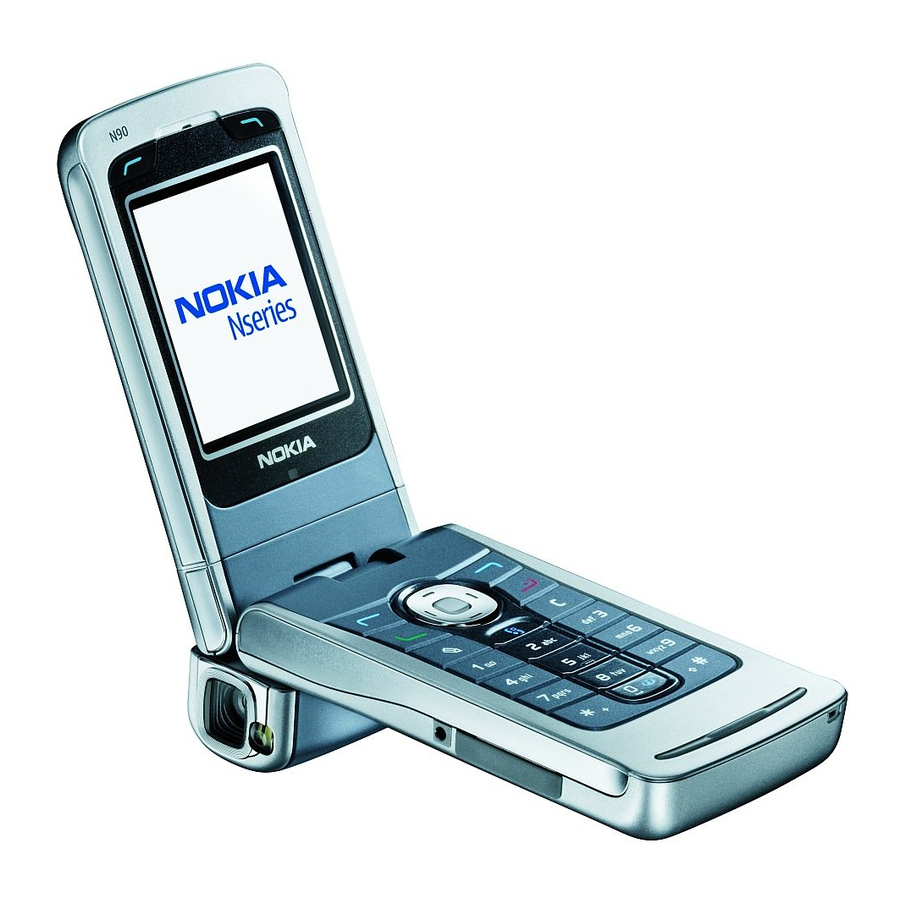
Page 15: Your Nokia N90
Your Nokia N90 Model number: Nokia N90-1 Hereinafter referred to as Nokia N90. Modes Your device has four mechanical modes that support different use situations: Fold closed, Fold open for using the device, Imaging for recording video and taking pictures, and Camera for taking pictures. -
Page 16: Imaging Mode
other types of messages, open the fold, and view the message on the main display. Incoming calls are indicated by their normal tone and a note. To answer a call and use the handset, open the fold. To answer a call and use the loudspeaker, select Answer. -
Page 17: Essential Indicators
Antenna Your device has an internal antenna. Note: As with any other radio transmitting device, do not touch the antenna unnecessarily when the device is switched on. Contact with the antenna affects call quality and may cause the device to operate at a higher power level than otherwise needed. -
Page 18: Attach The Wrist Strap
See “Data and settings‚" p. 61. For more information on the availability of the settings, contact your network operator, service provider, nearest authorized Nokia dealer, or visit the support area on the Nokia website, www.nokia.com/support. Nokia support on the Web Check www.nokia.com/support... -
Page 19: Clock
To open help from the main menu, select Select the desired application to view a list of help topics. To search for help topics using keywords, select Search by keyword. When you are reading a help topic, to view other related topics, press Clock Press... -
Page 20: Volume And Loudspeaker Control
To add cities to the list, select Options the first letters of the city name. The search field appears automatically, and the matching cities are displayed. Select a city. You can add a maximum of 15 cities to the list. To set your current city, scroll to a city, and select Options >... -
Page 21: View Memory Consumption
Options which to search, and enter a search text that matches the file name. Tip! You can use Nokia Phone Browser available in Nokia PC Suite to view the different memories in your phone. See the CD-ROM if supplied. View memory consumption... -
Page 22: Memory Card Tool
Memory card tool Note: This device uses a Reduced Size Dual Voltage (1.8/3V) MultiMediaCard (RS-MMC). To ensure interoperability, use only dual voltage RS-MMCs. Check the compatibility of an RS-MMC with its manufacturer or provider. Use only compatible Reduced-Size Multimedia cards (RS-MMC) with this device. -
Page 23: Useful Shortcuts
Useful shortcuts Use shortcuts to quickly get the most from your device. Refer to the relevant sections in this user guide for further details of the functions. Shortcuts when taking pictures • To zoom in and out, press the joystick up and down. •... - Page 24 For further shortcuts available in the standby mode, see “Active standby mode‚" p. 29. Keypad lock (keyguard) • To lock: In the standby mode, press • To unlock: Press , then • To lock the keypad in the Fold closed mode, press and select Lock keys.
-
Page 25: Make Calls
Make calls Voice calls Tip! To increase or decrease the volume during a call, press . If you have set the volume to Mute, you cannot adjust the volume with the scroll key. To adjust the volume, select Unmute, and then press 1 In the standby mode, enter the phone number, including the area code. -
Page 26: Speed Dial A Phone Number
3 When the new call is answered, to join the first participant in the conference call, select Options To add a new person to the call, repeat step 2, and select Options > Conference > Add to Your device supports conference calls between a maximum of six participants, including yourself. -
Page 27: Video Calls
2 A short tone is played, and clearly the name or nickname that is saved on the contact card. 3 The device plays a synthesized voice tag for the recognized contact in the selected device language, and displays the name and number. After a timeout of 1.5 seconds, the device dials the number. -
Page 28: Video Sharing
To use • Ensure that Nokia N90. • Ensure that your device is set up for person-to-person connections. See “Settings‚" p. 20. to send live video or a video clip from... -
Page 29: Settings
• Ensure you have an active UMTS connection and are within UMTS network coverage. See “Settings‚" p. 20. If you start the sharing session while you are within UMTS network coverage and a hand over to GSM occurs, the sharing session is discontinued, but your voice call continues. -
Page 30: Accept An Invitation
2 The phone sends the invitation to the SIP address you have added to the contact card of the recipient. If the recipient has several SIP addresses in the contact card, select the SIP address to which you want to send the invitation, and Select to send the invitation. -
Page 31: Answer Or Decline A Call
When you receive an invitation, you can select: • Accept to begin the sharing session. If the sender wants to share live video, activate the Imaging mode. • Reject to decline the invitation. The sender receives a message that you declined the invitation. You can also press the End key to decline the sharing session and disconnect the voice call. -
Page 32: Call Waiting
To replace the grey screen with a still image, see “Call settings”, Image in video call, p. 93. Tip! To send video of yourself, in the Imaging mode turn the camera unit so that the lens is facing you. If you activate the Fold open mode during a video call, sending your own video image stops because the camera is not active. -
Page 33: Options During A Video Call
Options during a video call Select Options during a video call for the following options: Enable Disable (audio in the Fold open mode; video, audio, or both in the Imaging mode), headset with Bluetooth connectivity is attached), loudsp., or Activate handsfree a headset with Bluetooth connectivity is attached), active call,... -
Page 34: Monitor All Communication Events
Monitor all communication events Icons in Log: Incoming Outgoing Missed communication events To monitor all voice and video calls, text messages, or data connections registered by the device, press , select > Log, and press open the general log. For each communication event, you can see the sender or recipient name, phone... -
Page 35: Personalize Your Device
Personalize your device Your service provider may have requested that certain features be disabled or not activated in your device. If so, they will not appear on your device menu. Your device may also have been specially configured for your network provider. -
Page 36: Profiles-Set Tones
Profiles—Set tones To set and customize the ringing tones, message alert tones, and other tones for different events, environments, or caller groups, press , and select Tools > Profiles. If the currently selected profile is other than Normal, the profile name is shown at the top of the display in the standby mode. -
Page 37: Transfer Content From Another Device
When it has finished the search, select your other phone from the list. 3 You are asked to enter a code on your Nokia N90. Enter a code (1-16 digits), and select OK. Enter the same code on the other phone, and select OK. -
Page 38: Active Standby Mode
See also “Cover display settings‚" p. 101. To open a browser connection and download more themes, select Theme downloads. To activate a theme, scroll to it, and select To preview a theme, scroll to it, and select Options > Preview. To edit themes, scroll to a theme, and select to change the following options: •... -
Page 39: Contacts
You can restore the information, such as contacts, to the phone later. See “Memory card tool‚" p. 13. You can also use Nokia PC Suite to back up your contacts to a compatible PC. See the CD-ROM, if supplied in the sales package. -
Page 40: Default Numbers And Addresses
Only the contact card fields supported by your SIM card are copied. Tip! You can synchronize your contacts to a compatible PC with Nokia PC Suite. See the CD-ROM, if supplied in the sales package. SIM directory and other SIM services For availability and information on using SIM card services, contact your SIM card vendor. -
Page 41: Add Ringing Tones For Contacts
To restrict calls from your phone to selected phone numbers, select Options > Activ. fixed to the fixed dialling list, select You need the PIN2 code for these functions. When you use Fixed dialing, packet data connections are not possible, except when sending text messages over a packet data connection. -
Page 42: Camera And Gallery
Camera and Gallery Camera The Nokia N90 device supports an image capture resolution of 1600 x 1200 pixels. The image resolution in these materials may appear different. To activate the camera, activate the Imaging mode. See “Imaging mode‚" p. 7. - Page 43 To take a picture, press the capture key. Do not move the device before the image is saved. The image is saved automatically in the Images & video See “Gallery‚" p. 45. Tip! You can also take pictures conveniently in the Camera mode.
- Page 44 • To make lighting and color adjustments before taking a picture, press the joystick, or select setup > Scene, Flash, White balance, color tone. See “Setup settings—Adjust color and lighting‚" p. 36. • The quality of a zoomed picture is lower than that of a nonzoomed picture.
- Page 45 Flashlight Keep a safe distance when using the flash. Do not use the flash on people or animals at close range. Do not cover the flash while taking a picture. The camera has an LED flashlight for low light conditions. The following flashlight modes are available: Red eye redu.
- Page 46 Image scenes Automatic ) (default)—Use this scene in all conditions. Close-up mode )—Use this scene for close up photography. Night )—Use this scene in low light conditions. Sports )—Use this scene to take pictures of fast moving objects. Note that when you use this scene, the resolution of the images is reduced from 1600x1200 to 800x600.
-
Page 47: Take Pictures In The Camera Mode
Take pictures in the Camera mode The camera in the Camera mode can be activated and used also during an active call. To activate the Camera mode, turn the camera unit in the Fold closed mode. See “Camera mode‚" p. 7. The active keypad lock is deactivated, and the viewfinder appears on... -
Page 48: Edit Images
• The joystick indicator ( ) (8) indicates that the Options menu is available. Press the joystick to open Options menu. To close the camera in the Camera mode, return to the Fold closed mode by turning the camera unit. See “Fold closed mode‚"... -
Page 49: Tips On Taking Good Photographs
To add clip art to an image, select Clip-art. Select the item you want to add from the list, and press the joystick. To move, rotate, and change the size of the item, select Options > Move, Resize, or Rotate. To add text to an image, select Text. -
Page 50: Record Videos
also use the flashlight to add more lighting to shadows. See “Flashlight‚" p. 36. • Sidelit subject. Strong side light gives a dramatic effect but may be too harsh, resulting in too much contrast. • Light source in front of the subject. Harsh sunlight may cause the subjects to squint their eyes. - Page 51 • The microphone indicator (4) shows that the microphone is muted. • The file format indicator (5) indicates the format of the video clip according to the selected video quality. • The video quality indicator (6) shows the selected video clip quality.
-
Page 52: Edit Video Clips
To send the video clip through MMS, or send it through video sharing, select Sharing (QCIF resolution, file format .3gp). See “Video sharing‚" p. 19. The video clip is limited to 300 kB (approximately 20 seconds in duration) so that it can be conveniently sent as a multimedia message to a compatible device. - Page 53 To modify the video, select from the following options: Edit video clip: Cut—Trims the video clip in the Cut video clip view. Add color effect—Inserts a color effect on the video clip. Use slow motion—Slows the speed of the video clip. Mute sound/Unmute sound—Mutes or unmutes the original video clip sound.
-
Page 54: Gallery
Tip! To take a snapshot of a video clip, select Options > Take snapshot in the thumbnail Preview view or in the Cut video clip view. To cut a video or sound clip, move to the preferred timeline and select Options >... -
Page 55: View Images And Video Clips
See “Albums‚" p. 47. Tip! You can transfer images from your device to a compatible PC with Nokia Phone Browser available in Nokia PC Suite. See the CD-ROM if supplied with your device. Press to open a file. Videos, music, and sound clips open in RealPlayer. -
Page 56: Albums
Options when viewing an image are Send, Add to album, Set as wallpaper, contact, Print, Edit, Delete, Rename, details, Add to 'Go to', Help, and Exit. To print your images on a printer connected to your device, or to store them on your MMC for later printing with a compatible device, select Options >... -
Page 57: Imaging
Imaging Image print You can print images with Image print print option in the gallery, camera, image editor, image viewer, or the active standby mode. Image print to print your images using a data cable, a Bluetooth connection, or your memory card. You can only print images which are in .jpg format. -
Page 58: Realplayer
Tip! You can transfer music files from your device to your memory card with Nokia Audio Manager available in Nokia PC Suite. See the CD-ROM if supplied with your device. Play video or sound clips Warning: Listen to music at a moderate level. -
Page 59: Create A Track List
Create a track list To create a track list of the music tracks on your phone memory, or on the memory card: 1 Select Options > New track 2 Select the memory from which you want to select the music tracks. 3 Enter a name for the track list. -
Page 60: Movie Director
Proxy settings: • proxy—To use a proxy server, select Yes. • Proxy serv. address—Enter the IP address of the proxy server. • Proxy port number—Enter the port number of the proxy server. Glossary: Proxy servers are intermediate servers between media servers and their users. Some service providers use them to provide additional security or speed up access to browser pages that contain sound or video clips. -
Page 61: Create A Custom Muvee
Create a custom muvee 1 In the Movie Director main view, select 2 Select the clips you want to include in your muvee in Video, Image, Style, or Music. After you have selected video clips and images, to define the order in which the files are played in the muvee, select Options >... -
Page 62: Calendar
Calendar Shortcut: Press any key ( — view. A meeting entry opens, and the characters you enter are added to the Subject Tip! Regularly back up the phone information to the memory card. You can restore the information, such as calendar entries, to the phone later. See “Memory card tool‚"... -
Page 63: Set A Calendar Alarm
Tip! You can move calendar and to-do data from many different Nokia phones to your phone or synchronize your calendar and to-do to a compatible PC using Nokia PC Suite. See the CD-ROM if supplied. Set a calendar alarm You can set an alarm to remind you of meetings and anniversaries. -
Page 64: Messaging
Messaging Press , and select Messaging. In Messaging, you can create, send, receive, view, edit, and organize text messages, multimedia messages, e-mail messages, and special text messages containing data. You can also receive messages and data through a Bluetooth connection, receive Web service messages, cell broadcast messages, and send service commands. -
Page 65: Write Text
your service provider. For available topics and relevant topic numbers, contact your service provider. In the main view of Messaging, select Options the main view you can see the status of a topic, a topic number, name, and whether it has been flagged ( for follow-up. - Page 66 2 To write the desired word, press the keys — . Press each key only once for one letter. For example, to write ‘Nokia’ when the English dictionary is selected, press for k, for i, and for a.
-
Page 67: Copy Text To Clipboard
Press , select Predictive one of the following options: Matches—To view a list of words that correspond to your key presses. Insert word—To add a word to the dictionary by using traditional text input. When the dictionary becomes full, a new word replaces the oldest added word. - Page 68 Before you can create a multimedia message or write an e-mail, you must have the correct connection settings in place. See “Receive MMS and e-mail settings‚" p. 60. and “E-mail‚" p. 67. The wireless network may limit the size of MMS messages. If the inserted picture exceeds this limit, the device may make it smaller so that it can be sent by MMS.
-
Page 69: Receive Mms And E-Mail Settings
use accents or other marks, and characters from some language options like Chinese, take up more space limiting the number of characters that can be sent in a single message. In the navigation bar, you can see the message length indicator counting backwards. For example, 10 (2) means that you can still add 10 characters for the text to be sent as two messages. -
Page 70: Inbox-Receive Messages
Inbox—receive messages Inbox icons: —unread messages in Inbox; text message; —unread multimedia message; received through a Bluetooth connection. When you receive a message, and the text message are shown in the standby mode. Select open the message. To open a message in Inbox, scroll to it, and press Multimedia messages Important: Exercise caution when opening... -
Page 71: Web Service Messages
Calendar entry—To save the invitation, select Save to Calendar. message—To save the bookmark to the bookmarks list in Web, select Options > message contains both access point settings and bookmarks, to save the data, select E-mail notification—Tells you how many new e-mails you have in your remote mailbox. -
Page 72: Retrieve E-Mail Messages
Retrieve e-mail messages If you are offline, select Options > Connect connection to a remote mailbox. Important: Exercise caution when opening messages. E-mail messages may contain malicious software or otherwise be harmful to your device or PC. 1 When you have an open connection to a remote mailbox, select Options >... -
Page 73: Delete E-Mail Messages
Delete e-mail messages To delete the contents of an e-mail message from the phone while still retaining it in the remote mailbox, select Delete. In Delete msg. from:, select The phone mirrors the e-mail headings in the remote mailbox. Although you delete the message content, the e-mail heading stays in your phone. -
Page 74: View Messages On A Sim Card
Status of the messages in Outbox are: Sending—A connection is being made and the message is being sent. Waiting/Queued—The message will be sent when previous messages of a similar type have been sent. Resend at %U (time)—The phone will try to send the message again after a time-out period. -
Page 75: Multimedia Messages
Message sent as—Change this option only if you are sure that your message centre is able to convert text messages into these other formats. Contact your network operator. Preferred connection—You can send text messages through the normal GSM network or through packet data, if supported by the network. -
Page 76: E-Mail
Allow anon. messages—Select if you want to reject messages from an anonymous sender. Receive adverts—Define whether you want to receive multimedia message advertisements. Receive report )—Select if you want the status of the sent message to be shown in the log. Receiving a delivery report of a multimedia message that has been sent to an e-mail address might not be possible. - Page 77 Incoming mail server (Must be address or host name of the mail server that receives your e-mail. Mailbox type:—Defines the e-mail protocol that your remote mailbox service provider recommends. The options POP3 and IMAP4. This setting can be selected only once and cannot be changed if you have saved or exited from the mailbox settings.
-
Page 78: Web Service Messages
Web service messages Select Messaging > Options > Settings Choose whether you want to receive service messages. If you want to set the phone to automatically activate the browser and start a network connection to retrieve content when the phone receives a service message, select messages >... -
Page 79: Web
Various service providers maintain pages specifically designed for mobile devices. To access these pages, press , and select Web. These pages use the wireless markup language (WML), extensible hypertext markup language (XHTML), or hypertext markup language (HTML). Check the availability of services, pricing, and tariffs with your network operator or service provider. -
Page 80: Bookmarks View
Details, Settings, Help, and Exit. Your device may have some bookmarks loaded for sites not affiliated with Nokia. Nokia does not warrant or endorse these sites. If you choose to access them, you should take the same precautions, for security or content, as you would with any Internet site. -
Page 81: Connection Security
Connection security If the security indicator is displayed during a connection, the data transmission between the device and the Internet gateway or server is encrypted. The security icon does not indicate that the data transmission between the gateway and the content server (or place where the requested resource is stored) is secure. -
Page 82: View Saved Pages
To save a page while browsing, select Options options > Save page. You can save pages either to the phone memory or on a memory card, and browse them when offline. To access the pages later, press bookmarks view to open the Saved pages To enter a new URL address, select Options... -
Page 83: End A Connection
Important: Only install and use applications and other software from sources that offer adequate security and protection against harmful software. 1 To download the item, scroll to the link, and press 2 Select the appropriate option to purchase the item, for example, ’Buy’. - Page 84 Search page—To define a Web page that is downloaded when you select Navigation options > in the bookmarks view, or when browsing. Volume—If you want the browser to play sounds embedded on Web pages, select a volume level. Rendering—If you want the page layout shown as accurately as possible when in Small screen mode, select...
-
Page 85: Office
Office Calculator To add, substract, multiply, divide, calculate square roots and percentages, press , and select Note: This calculator has limited accuracy and is designed for simple calculations. To save a number in the memory (indicated by M), select Options >... -
Page 86: To-Do
of the base currency is always 1. The base currency determines the conversion rates of the other currencies. 1 Select Converter > Options > Currency currencies opens, and you can see the current base currency at the top. Tip! To rename a currency, go to the currency rates view, scroll to the currency, and select Options >... -
Page 87: Connectivity
Exchange Profile, Object Push Profile, File Transfer Profile, Basic Imaging Profile, and Human Interface Device Profile. To ensure interoperability between other devices supporting Bluetooth technology, use Nokia approved enhancements for this model. Check with the manufacturers of other devices to determine their compatibility with this device. -
Page 88: Send Data Using A Bluetooth Connection
Select from the following: Bluetooth—Set to or Off. To connect wirelessly to another compatible device, first set Bluetooth On, and then establish a connection. My phone's visibility—To allow your device to be found by other devices with Bluetooth technology, select all. -
Page 89: Pair Devices
4 If the other device requires pairing before data can be transmitted, a tone sounds, and you are asked to enter a passcode. See “Pair devices‚" p. 80. 5 When the connection has been established, data is shown. Sent folder in Messaging using a Bluetooth connection. -
Page 90: Receive Data Using A Bluetooth Connection
For further information on how to install Nokia PC Suite (compatible with Windows 2000 and Windows XP), see the User Guide for Nokia PC Suite and the Nokia PC Suite help in the ‘Install’ section on the CD-ROM. CD-ROM The CD-ROM should launch after you have inserted it into the CD-ROM drive of a compatible PC. -
Page 91: View Data Connection Details
• Open data connections: data calls ( data connections ( ) or ( ). • The status of each connection • The amount of data uploaded and downloaded for each connection (shown for packet data connections only) • The duration of each connection (shown for data calls only) Note: The actual time invoiced for calls by your service provider may vary, depending on network... -
Page 92: Create A New Synchronization Profile
The synchronization application uses SyncML technology for synchronization. For information on SyncML compatibility, contact the supplier of the calendar or address book application you want to synchronize your phone data with. You may receive syncronization settings in a special text message. -
Page 93: Synchronize Data
• In Remote database, enter a correct path to the remote calendar, address book, or notes database on the server. • Select synchronization synchronization), To server 3 Select Back to save the settings and return to the main view. Synchronize data In the Sync main view, you can see the different... - Page 94 Access point—Select an access point to be used when connecting to the server. Host address—Enter the URL address of the server. Port—Enter the port number of the server. User name and Password—Enter your user name and password. Allow configuration—To receive configuration settings from the server, select Yes.
-
Page 95: My Own
My own Go to—add shortcuts Default shortcuts: Opens Calendar Opens Inbox Opens Notes To store shortcuts (links to your favorite images, notes, bookmarks, and so on), press to. Shortcuts are added only from the individual applications, for example, Gallery. Not all applications have this function. -
Page 96: Receive Im Settings
Note: Check the availability of chat services, pricing, and tariffs with your network operator and/or service provider. Service providers will also give you instructions on how to use their services. Receive IM settings You must save the settings to access the service that you want to use. -
Page 97: Join And Leave An Im Group
To search for users, in the IM contacts New IM contact > Search from User's name, User Phone Join and leave an IM group To join an IM group that you have saved, scroll to the group, and press To join an IM group not on the list, but for which you know the group ID, select Options group ID, and press... -
Page 98: View And Start Conversations
To view the recorded chats, in the main view, select Recorded chats, select the conversation, and press View and start conversations Go to the Conversations view to see a list of the individual conversation participants that you have an ongoing conversation with. -
Page 99: Manage Im Groups
To move a contact from a list on the server to the retrieved list, select Options > New IM contact other list. To change the chat contact list, select contact list. Select from the following options: Open conversation—To start a new conversation or continue an ongoing conversation with the contact. -
Page 100: Chat Server Settings
Group name, Group topic, and Welcome details that the participants see when they join the group. Group size—To define the maximum number of members allowed to join the group. Allow search—To define if others can find the chat group by searching. Editing rights—To define the chat group participants to whom you want to give rights to invite contacts to join the... -
Page 101: Tools
Tools Settings To change settings, press Scroll to a setting group, and press a setting you want to change, and press Phone settings General Phone language—Changing the language of the display texts in your phone also affects the format used for date and time and the separators used, for example, in calculations. -
Page 102: Call Settings
Active standby apps.—To select the application shortcuts you want to appear in the active standby. This setting is only available if Active standby is on. You can also assign keypad shortcuts for the different presses of the scroll key, by selecting an application from the list. -
Page 103: Connection Settings
Anykey answer—Select On, and you can answer an incoming call by briefly pressing any keypad key, except , and Line in use )—This setting is shown only if the SIM card supports two subscriber numbers, that is, two phone lines. Select which phone line you want to use for making calls and sending text messages. - Page 104 GSM network, multiple packet data connections are active. GSM network, packet data connection is on hold. (This can happen during a voice call, for example.) UMTS network, packet data is available in the network. UMTS network, packet data connection is active, data is being transferred.
-
Page 105: Date And Time
Internet service provider to obtain these addresses. Glossary: The domain name service (DNS) is an Internet service that translates domain names such as www.nokia.com into IP addresses like 192.100.124.195. Proxy serv. address—Define the address for the proxy server. Proxy port number—Enter the proxy port number. - Page 106 be allowed by some SIM cards. See “Glossary of PIN and lock codes‚" p. 97. code, PIN2 code, and Lock code—You can change the lock code, PIN code, and PIN2 code. These codes can only include the numbers from 0 to 9. See “Glossary of PIN and lock codes‚"...
-
Page 107: Certificate Management
The factory setting for the lock code is 12345. To avoid unauthorized use of your phone, change the lock code. Keep the new code secret and in a safe place separate from your phone. Personal unblocking key (PUK) code and PUK2 code—These codes (8 digits) are required to change a blocked PIN code or PIN2 code, respectively. -
Page 108: Call Forwarding
To check certificate details, scroll to a certificate, and select Options > Certificate details. When you open certificate details, the validity of the certificate is checked, and one of the following notes may be displayed: • Certificate not trusted—You have not set any application to use the certificate. -
Page 109: Call Restriction
Call restriction Call restriction allows you to restrict the calls that you make or receive with the phone. To change the settings, you need the barring password from your service provider. Select the desired barring option, and set it on (Activate) or off (Cancel), or check whether the option is active (Check status). -
Page 110: Cover Display Settings
Select Headset, Loopset, or Bluetooth following options are available: Default profile—To set the profile that you want activated each time you connect a certain enhancement to your phone. See “Profiles—Set tones‚" p. 27. Automatic answer—To set the phone to answer an incoming call automatically after 5 seconds. -
Page 111: Install Applications And Software
Bluetooth connection. You can use Nokia Application Installer in Nokia PC Suite to install an application to your phone or a memory card. If you use Microsoft Windows Explorer to transfer a file, save the file to a memory card (local disk). -
Page 112: Remove Applications And Software
1 Open Manager, and scroll to an installation file. Alternatively, search the phone memory or the memory card in File mgr., or open a message in Inbox that contains an installation file. Select the application, and press the installation. Tip! While browsing, you can download an installation file and install it without closing the connection. -
Page 113: Activation Keys-Handle Copyright-Protected Files
Some Java applications may require a phone call, a message to be sent, or a network connection to a specific access point for downloading extra data or components. In the Manager main view, scroll to an application, and select Options >... -
Page 114: Troubleshooting
Troubleshooting Q&A Bluetooth connectivity Q: Why can’t I find my friend’s device? A: Check that both devices have activated Bluetooth connectivity. Check that the distance between the two devices is not over 10 metres and that there are no walls or other obstructions between the devices. - Page 115 PC connectivity Q: Why do I have problems in connecting the phone to my PC? A: Make sure that Nokia PC Suite is installed and running on your PC. See the User Guide for Nokia PC Suite on the CD-ROM. If Nokia PC Suite is installed and running, you can use Nokia Get connected wizard available in Nokia PC Suite to connect to your PC.
- Page 116 Q: How can I save my data before deleting it? A: Save your data using one of the following methods: • Use Nokia PC Suite to make a back up copy of all data to a compatible computer. • Send images to your e-mail address, and then save the images to your computer.
-
Page 117: Battery Information
Do not dispose as household waste. Nokia battery authentication guidelines Always use original Nokia batteries for your safety. To check that you are getting an original Nokia battery, purchase it from an authorized Nokia dealer, look for the Nokia Original... -
Page 118: Authenticate Hologram
What if your battery is not authentic? If you cannot confirm that your Nokia battery with the hologram on the label is an authentic Nokia battery, please do not use the battery. Take it to the nearest authorized Nokia service point or dealer for assistance. The use of a battery that... -
Page 119: Care And Maintenance
Care and maintenance Your device is a product of superior design and craftsmanship and should be treated with care. The suggestions below will help you protect your warranty coverage. • Keep the device dry. Precipitation, humidity, and all types of liquids or moisture can contain minerals that will corrode electronic circuits. -
Page 120: Additional Safety Information
Additional safety information Your device and its enhancements may contain small parts. Keep them out of the reach of small children. Operating environment Remember to follow any special regulations in force in any area, and always switch off your device when its use is prohibited or when it may cause interference or danger. - Page 121 Vehicles RF signals may affect improperly installed or inadequately shielded electronic systems in motor vehicles such as electronic fuel injection systems, electronic antiskid (antilock) braking systems, electronic speed control systems, and air bag systems. For more information, check with the manufacturer, or its representative, of your vehicle or any equipment that has been added.
- Page 122 Imaging mode, because the keypad is not active. To make an emergency call, activate the Fold open mode. Certification information (SAR) THE NOKIA N90 DEVICE MEETS INTERNATIONAL GUIDELINES FOR EXPOSURE TO RADIO WAVES This mobile device meets guidelines for exposure to radio waves.
- Page 123 Technical Information Feature Weight Size Frequency range Transmitter output power Battery voltage Operating temperature Specification 6.1 oz (173 g) with BL-5B Li-Ion Battery Size Volume: 7.69 in (126 cm Length: 4.42 in (112.31 mm) Width: 2.05 in (51.98 mm) Thickness: 0.96 in (24.45 mm) GSM 900 880–915 MHz (TX) 925–960 MHz (RX)
- Page 124 Index Numerics 1-touch dialing access points settings 95 activation keys adding text alarms alarm clock 10 calendar 54 applications installing 102 Java 102 backing up Bluetooth connecting two devices, pairing 80 device address 80 factory set passcode 80 headset 100 pairing 80 passcode, glossary explanation 80 security 79...
- Page 125 codes lock code PIN code 97 PIN2 code 97 security code 97 computer connections conference call connection settings contact cards inserting pictures 30 sending 31 storing touch tones 23 copying contacts between the SIM card and device memory 31 text 58 copyright protection see activation keys cutting text...
- Page 126 Java See applications lock code erasing contents 25 filtering 25 log duration loopset settings loudspeaker mailbox automatic retrieving 63 media files fast forward 49 file formats 49 mute sound 49 rewind 49 memory clearing memory 24 viewing memory consumption 12 memory card memory card adapter see the Quick Start Guide, reduced-...
- Page 127 service commands settings access codes 96 access points 95 Bluetooth connection 78 calendar 54 call forwarding 99 call restrictions 100 certificates 98 configuring 9 cover display 101 data connections 94 date and time 96 display 93 headset 100 IM 87, 91 language 92 lock code 97 loopset 100...
- Page 128 NOTES...
- Page 129 Nokia N90 User Guide 9240833...