Table of Contents
Advertisement
Available languages
Available languages
Quick Links
WP71-265WT
Air Conditioner
EN
Klimatizační Zařízení
CZ
Klimaanlæg
DA
Ilmastointilaite
FI
Climatiseur
FR
Klímaberendezés
HU
Condizionatore D'aria
IT
Klimaanlegg
NO
Klimatyzator
PL
Aparat De Climatizare
RO
Klimatizácia
SK
Luftkonditionering
SV
Klimageräte
DE
User Manual
Návod K Použití
Brugsvejledning
Käyttöohje
Manuel D'utilisation
Használati utasítás
Manuale Per L'utente
Bruksanvisning
Instrukcja obsługi
Manualul Utilizatorului
Návod na Použitie
Bruksanvisning
Benutzerhandbuch
2
24
46
68
90
114
138
162
184
208
232
254
276
Advertisement
Table of Contents

Related Manuals for Electrolux WP71-265WT


Summary of Contents for Electrolux WP71-265WT
- Page 1 WP71-265WT Air Conditioner User Manual Klimatizační Zařízení Návod K Použití Klimaanlæg Brugsvejledning Ilmastointilaite Käyttöohje Climatiseur Manuel D’utilisation Klímaberendezés Használati utasítás Condizionatore D’aria Manuale Per L’utente Klimaanlegg Bruksanvisning Klimatyzator Instrukcja obsługi Aparat De Climatizare Manualul Utilizatorului Klimatizácia Návod na Použitie Luftkonditionering Bruksanvisning Klimageräte...
-
Page 2: Table Of Contents
Welcome to Electrolux. Visit our website to: et usage ad ice brochures trouble shooter ser ice in ormation www.electrolux.com/webselfservice... -
Page 3: Safety Information
ENGLISH SAFETY INFORMATION WARNING! his a liance can be used b children aged rom ears and abo e and ersons ith reduced h sical sensor or mental ca abilities or lac erience and no ledge i the ha e been given supervision or instruction concerning use of the appliance in a safe way and understand the hazards involved. - Page 4 1.1 Important notes o not o erate unit ithout the air lter o not o erate unit near an heat source or o en re 3. Do not expose the unit to direct sunlight. 4. Always store or move the unit in an upright position.
- Page 5 ENGLISH the power supply cord can result in damage to the unit and cause electrical shock. the su l cord is damaged it must be re laced b the manu acturer or its ser ice agent or a similarl uali ed erson in order to a oid a hazard se onl the manu acturer s eci ed power cord for replacement.
-
Page 6: Safety Instruction
To ensure proper drainage, the drainage hose must ha e no in s and must not be ele ated during dehumidi catioin mode not the drained ater may spill out into the room. The temperature around the drainage hose must not... - Page 7 ENGLISH his air conditioner blo s the arm air Any person who is involved with generated b the unit outside the room or ing on or brea ing into a re rigerant via the exhaust hose while in cool mode. circuit should hold a current valid In the mean time, the same amount certi cate rom an industr accredited...
- Page 8 Warning Meaning Plug in power plug properly Otherwise, it may cause electric shock or re due to e cess heat generation o not o erate or sto the unit b t ma cause electric shoc or re due inserting or pulling out Die power plug...
- Page 9 ENGLISH CAUTION! Caution Meaning hen the air lter is to be remo ed It may cause an injury do not touch the metal parts of the unit Do not clean the air conditioner with Water may enter the unit and degrade the water insulation.
-
Page 10: Unit Description
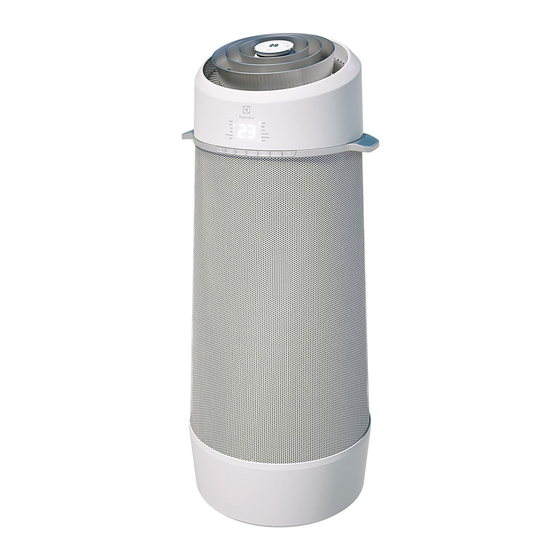
10 www.electrolux.com 3. UNIT DESCRIPTION Fig. 1 Room air discharge arr ing handle both sides Control panel Filter Room air inlet Exhaust air outlet Castor Drain outlet Remote control Bottom tray drain outlet 4. ACCESSORIES INCLUDED PARTS PARTS NAME: QUANTITY:... -
Page 11: Installation Instructions
ENGLISH 5. INSTALLATION INSTRUCTIONS 5.1 Exhausting hot air In the COOLING Mode the appliance must be laced close to a indo or opening so that the warm exhaust air can be ducted outside irst osition unit on a at oor and ma e sure there s a minimum of 30cm clearance around the unit, and is within the vicinity of a single circuit outlet power source. - Page 12 12 www.electrolux.com 2. Place the window slider kit on the 3. Press bac the loc ing le er to window. Adjust the length of the the length of the window slider kit, window slider kit according to the then close the window and pinch...
-
Page 13: Air Conditioner Features
ENGLISH 6. AIR CONDITIONER FEATURES 6.1 CONTROL PANEL Displays temperature Decrease temperature Sets mode ilter reset button hold secs to reset urns unit on or o Sets fan speed Increase temperature i button 6.2 Remote Control 2. Use a coin or something like that to rotate the bac co er anti cloc to o en it Press to select modes... -
Page 14: Operating Instructions
14 www.electrolux.com o not use batteries other than the e s eci ed o not use old batteries ith ne ones. o not dis ose o batteries in re Batteries may explode or leak. 6. he cells shall be dis osed o... - Page 15 If the display reads “A5”, the room e ect temperature sensor has failed. Contact 4. Connected drain hose. See Drainage your Authorized Electrolux Service Centre. section. Auto mode Always have the exhaust hose attached If the display reads “E5”, the evaporator in this mode.
- Page 16 16 www.electrolux.com 7.3 Drainage 7.4 Operation Tips During the Heat and dry mode, you need Now that you have mastered the to connect the drain hose to the drain operating procedure, here are more outlet in the bac o the unit to drain the features in your control that you should condensate from the unit.
-
Page 17: Care & Cleaning
ENGLISH 8. CARE & CLEANING Clean your air conditioner regularly to he cabinet and ront ma be dusted ith keep it looking new. an oil-free cloth or washed with a cloth dampened in a solution of warm water 8.1 ir lter cleaning and mild liquid dishwashing detergent. -
Page 18: Additional Information
18 www.electrolux.com set to Fan mode. Then, set Doors, windows, registers, etc. open - temperature to a higher setting. cool air escapes. Close doors, windows, registers, etc. haust duct not connected or bloc ed See 5.1 Exhausting hot air Section. - Page 19 ENGLISH 5. Presence o re e tinguisher – If an indirect refrigerating circuit is an hot or is to be conducted on being used the secondar circuit the refrigeration equipment or any shall be chec ed or the resence associated arts a ro riate re of refrigerant;...
- Page 20 20 www.electrolux.com 2. Particular attention shall be aid to the Leak detection methods ollo ing to ensure that b or ing on The following leak detection methods electrical components, the casing is are deemed acce table or s stems not altered in such a way that the level...
- Page 21 ENGLISH s stem ith and continuing to ll 1. Become familiar with the equipment until the working pressure is achieved, and its operation. then enting to atmos here and nall 2. Isolate system electrically. pulling down to a vacuum. This process 3.
- Page 22 22 www.electrolux.com Recovery WARNING! When removing refrigerant from Do not use means to accelerate the a system, either for servicing or defrosting process or to clean, other decommissioning, it is recommended than those recommended b the good practice that all refrigerants are manufacturer.
-
Page 23: Environmental Concerns
ENGLISH 11. ENVIRONMENTAL CONCERNS ec cle the materials ith the s mbol appliances. Do not dispose appliances Put the ac aging in a licable mar ed ith the s mbol with the household waste. Return the product containers to recycle it. Help protect the to your local recycling facility or contact environment and human health and to recycle waste of electrical and electronic... - Page 24 24 www.electrolux.com OBSAH 1. B ZP ..............25 2. B ZP ................28 3. P P .................... 32 ................ 32 5. POKYNY K INSTALACI ................... 33 ..........35 7. P ..................36 ..................39 ................39 ................40 11. P Z ........
- Page 25 ČESKY B ZP VAROVÁNÍ! ento s otřebič smí ouží at d ti star í osmi let nebo osob se snížen mi zic mi sm slo mi nebo du e ními scho nostmi nebo osob bez atřičn ch z u eností a znalostí ouze o ud ta činí...
- Page 26 26 www.electrolux.com ležité oznám eza íne te zařízení bez zducho ého ltru Zařízení ne ro ozu te blíz osti zdro e te la nebo ote řeného ohn e sta u te zařízení římému slunečnímu s itu Zařízení žd s ladu te nebo ře ra u te e s islé...
- Page 27 ČESKY Zatlačte na á ecí zástrč u e n do zásu a u ist te se že není u oln ná etahe te nede ormu e či neu ra u te na á ecí abel nebo e nenořte do od ažení...
- Page 28 28 www.electrolux.com Při aždém řesunutí limatizačního zařízení b se m lo ro ést eho u t ní iz strán a Po ud nádrži zb á a á oli oda m že se b hem řesou ání lít Pro s rá né...
- Page 29 ČESKY režimu od lhčo ání te lo a te lota a á oli osoba terá ro ádí nebo se místnosti se z zduch bude častní rací na rozebírání chladicího u o án z ot oru ou t ní zduchu o ruhu b m la b t držitelem latného edná...
- Page 30 30 www.electrolux.com Upozornění Význam Zasu te zástrč u s rá n do zásu ina b mohlo do ít razu ele tric m roudem nebo ožáru z d nadm rné t orb te la Zařízení neza íne te nebo ne íne te ohlo b do ít...
- Page 31 ČESKY POZOR! Pozor Význam estliže e nutné odstranit zducho ohli b ste se oranit nedot e te se o o ch částí ednot Klimatizační zařízení nem te odou oda b mohla natéct do zařízení a o odit izolaci ohlo b do ít razu ele tric m roudem ří...
- Page 32 32 www.electrolux.com 3. P P Obr. 1 ou t ní o o o ého zduchu Přená ecí držadlo na obou stranách ládací anel Filtr t or nasá ání o o o ého zduchu t or ou t ní zduchu Koleč o Výpust...
- Page 33 ČESKY 5. POKYNY K INSTALACI ou t ní hor ého zduchu režimu e nutné s otřebič umístit oblíž o na ab mohl b t ou t n hor zduch od ád n en e r e umíst te zařízení na ro nou lochou odlahu a u ist te se že e olem n minimáln...
- Page 34 34 www.electrolux.com enní zasou ací sadu nainstalu te na 3. Zatlačte z t za i o ací áč u čímž o no ra te dél u o enní zasou ací za istíte dél u o enní zasou ací sad odle o na obráze...
- Page 35 ČESKY 6.1 OVLÁDACÍ PANEL Zobrazu e te lotu nížit te lotu asta u e režim lačít o reseto ání ltru održte se und reseto ání Za íná a íná zařízení asta u e otáč entilátoru tlačít o sít it te lotu 6.2 ál o é...
- Page 36 36 www.electrolux.com e ouží e te iné než určené t baterií e ouží e te staré baterie s olu s novými. 5. Baterie neháze te do ohn Baterie mohou e lodo at nebo u olnit s obsah 6. Baterio é člán řádn zli idu te...
- Page 37 ČESKY ežim od lhčo ání tomto režimu nemusíte oužít ada tér odul i lze nout současn m hadice ou t ného zduchu održením tlačíte onnect a nutné ou t t z ondenzo anou odu na tři se und to n m is nutím iz část ou t ní...
- Page 38 38 www.electrolux.com 7.3 Odtok 7.4 Pro ozní rad B hem režimu to ení a od lhčo ání ní ste z ládli ro ozní ostu e za otřebí ři o it ou t cí hadici a dal í činnosti teré m žete usti na zadní...
- Page 39 ČESKY a e limatizační zařízení ra ideln razu ele tric m roudem nebo rizi u ožáru čist te ab ste ucho ali eho no zhled ří a řední část lze zba it rachu 8.1 i t ní zducho ého ltru omocí...
- Page 40 40 www.electrolux.com e lota e nasta ena říli níz o sou ote řené d eře o na trací ro noční chlazení K odmrazení i ře a od uni á chladn zduch cí nasta te režim entilace Poté eře o na i ře a od za řete...
- Page 41 ČESKY hodné oužití s hořla mi chladi Po ud ouží áte ne řím chladicí na ř ne is ří e hodn ut sn né a o ruh tento se undární o ruh e ina zabez ečené nutné z ontrolo at na řítomnost chladiva;...
- Page 42 42 www.electrolux.com 2. Z lá tní ozornost nu te Způsoby detekce netěsností následu ícímu ab ste za istili že rací ásledu ící z sob dete ce net sností na ele tric ch součástech nedo de se o ažu í za ři atelné ro s stém e zm nám na s říni zařízení...
- Page 43 ČESKY dusí u a eho dal ím na ln ním do ud eznamte se se zařízením a eho nedosáhnete ro ozního tla u oté chodem. us te do o zdu í a na onec stém ele tric odizolu te odčer e te na a uum ento ostu 3.
- Page 44 44 www.electrolux.com Odčerpání mazi u Před rácením om resoru doda atel m ro e te ostu Při odstra o ání chladi a ze s stému u t ní K ur chlení tohoto ostu u b hem ser isu či ři řazo ání...
- Page 45 ČESKY...