Panasonic Lumix DMC-LX5 Basic Operating Instructions Manual
Panasonic lumix dmc-lx5: user guide
Hide thumbs
Also See for Lumix DMC-LX5:
- Basic operating instructions manual (294 pages) ,
- Operating instructions manual (236 pages) ,
- Basic operating instructions manual (38 pages)
Table of Contents
Advertisement
Quick Links
- 1 Standard Accessories
- 2 Names of the Components
- 3 Charging the Battery
- 4 About the Built-In Memory/The Card
- 5 Setting the Menu
- 6 Taking Pictures with Your Favorite Settings (³: Program Ae Mode)
- 7 Taking Pictures Using the Automatic Function (Ñ: Intelligent Auto Mode)
- 8 Taking Pictures by Setting the Exposure Manually
- Download this manual
See also:
Basic Operating Instructions Manual
Before connecting, operating or adjusting this product,
For USA and Puerto Rico assistance, please call: 1-800-211-PANA(7262) or,
contact us via the web at: http://www.panasonic.com/contactinfo
P
Basic Operating Instructions
please read the instructions completely.
Please also refer to the Operating
Instructions (PDF format)
contained on the CD-ROM
(supplied).
You can learn about advanced operation methods
and check the Troubleshooting.
Digital Camera
DMC-LX5
Model No.
VQT2W83
Advertisement
Table of Contents

Related Manuals for Panasonic Lumix DMC-LX5


Summary of Contents for Panasonic Lumix DMC-LX5
-
Page 1: Basic Operating Instructions
(supplied). You can learn about advanced operation methods and check the Troubleshooting. For USA and Puerto Rico assistance, please call: 1-800-211-PANA(7262) or, contact us via the web at: http://www.panasonic.com/contactinfo Basic Operating Instructions Model No. please read the instructions completely. Digital Camera... - Page 2 Camera information source. Please note that the actual controls and components, menu items, etc. of your Digital Camera may look somewhat different from those shown in the illustrations in these Operating Instructions.
-
Page 3: Information For Your Safety
• DO NOT REMOVE THE COVER (OR BACK); THERE ARE NO USER SERVICEABLE PARTS INSIDE. REFER SERVICING TO QUALIFIED SERVICE PERSONNEL. THE SOCKET OUTLET SHALL BE INSTALLED NEAR THE EQUIPMENT AND SHALL BE EASILY ACCESSIBLE. ∫ Product identification marking Product Digital camera Battery charger Location Bottom Bottom (ENG) VQT2W83... - Page 4 Trade Name: Panasonic Model No.: DMC-LX5 Responsible party: Panasonic Corporation of North America One Panasonic Way, Secaucus, NJ 07094 Support Contact: Panasonic Consumer Electronics Company 1-800-211-PANA (7262) This device complies with Part 15 of the FCC Rules. Operation is subject...
- Page 5 ∫ About the battery pack CAUTION Battery pack (Lithium ion battery pack) • Use the specified unit to recharge the battery pack. • Do not use the battery pack with equipment other than the specified unit. • Do not get dirt, sand, liquids, or other foreign matter on the terminals. •...
-
Page 6: Cautions For Use
• Do not use any other AV cables except the supplied one. • Do not use any other USB connection cables except the supplied one. • Always use a genuine Panasonic HDMI mini cable (RP-CDHM15, RP-CDHM30; optional). Part numbers: RP-CDHM15 (1.5 m) (5 feet), RP-CDHM30 (3.0 m) (10 feet) Keep this unit as far away as possible from electromagnetic equipment (such as microwave ovens, TVs, video games etc.). - Page 7 -If you see this symbol- Information on Disposal in other Countries outside the European Union This symbol is only valid in the European Union. If you wish to discard this product, please contact your local authorities or dealer and ask for the correct method of disposal.
-
Page 8: Table Of Contents
Playing Back Pictures ([NORMAL PLAY]) ... 31 Deleting Pictures ... 31 Reading the Operating Instructions (PDF format)... 32 Specifications ... 34 Digital Camera Accessory System... 37 Digital Camera Accessory Order Form ... 39 Limited Warranty (ONLY FOR U.S.A. AND PUERTO RICO) ... 40 VQT2W83 (ENG) -
Page 9: Standard Accessories
• For information about optional accessories, refer to the ” Accessory System • If any accessories are lost, customers should contact Panasonic’s parts department at 1 800 833-9626 for further information about obtaining replacement parts. “ Names of the Components “... - Page 10 DMW-BCJ13PP K1HA08CD0028 VFC4324 VFC4366 VQT2W83 (ENG) DE-A81B VGQ0N97 : VGK3662 : VGK3696 K1HA08AD0002 VFF0671 : VYF3361 : VYF3376 VYF3287...
-
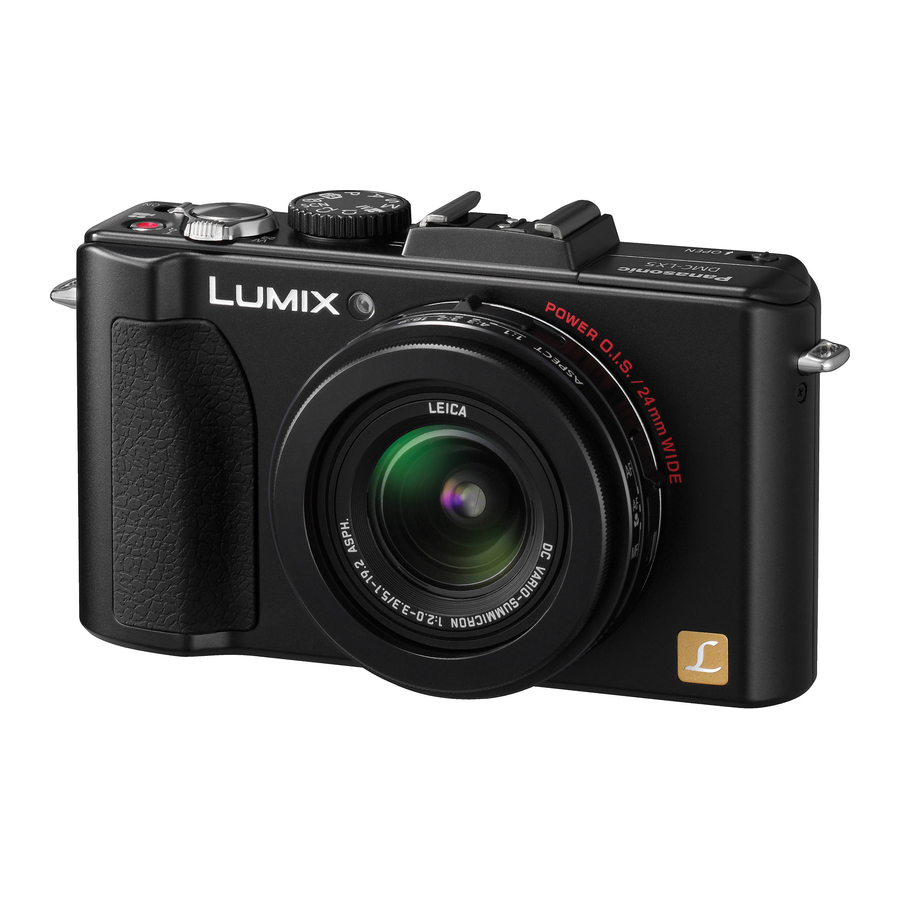
Page 11: Names Of The Components
Names of the Components Lens Self-timer indicator AF Assist Lamp Flash Shoulder strap eyelet Focus selector switch LCD monitor [AF/AE LOCK] button Playback button Status indicator 10 [MENU/SET] button [DISPLAY] button 12 [Q.MENU]/Delete button 13 Rear dial Rear dial is described as follows in these operating instructions. e.g.: Rotating left or right e.g.: Pressing the rear dial (ENG) VQT2W83... - Page 12 14 Cursor buttons 3/[FOCUS] button 4/Function button Assign Menu to 4 button. It is convenient to register a Menu that is used often. [FILM MODE]/[QUALITY]/[METERING MODE]/[WHITE BALANCE]/ [AF MODE]/[I.EXPOSURE]/[GUIDE LINE]/[ [REMAINING DISP.]/[FLASH]/[AUTO BRACKET]/[ASPECT BRACKET] 2/Self-timer button 1/ISO In these operating instructions, the cursor buttons are described as shown in the figure below or described with 3/4/2/1.
- Page 13 Panasonic DC coupler (DMW-DCC7; optional) and AC adaptor (DMW-AC5PP; optional) are used. • Always use a genuine Panasonic AC adaptor (DMW-AC5PP; optional). • We recommend you use a battery with sufficient battery power or the AC adaptor when recording motion pictures.
-
Page 14: Charging The Battery
The camera has a function for distinguishing batteries which can be used safely. The dedicated battery (DMW-BCJ13PP) supports this function. The only batteries suitable for use with this unit are genuine Panasonic products and batteries manufactured by other companies and certified by Panasonic. - Page 15 Attach the battery paying attention to the direction of the battery. Connect the charger to the electrical outlet. • Disconnect the charger from the electrical socket and detach the battery after charging is completed. ∫ About the [CHARGE] indicator The [CHARGE] indicator turns on: The [CHARGE] indicator A is turned on and charging will start.
-
Page 16: Recording Still Pictures
CIPA is an abbreviation of [Camera & Imaging Products Association]. Temperature: 23 oC (73.4 oF)/Humidity: 50%RH when LCD monitor is on. • • Using a Panasonic SD Memory Card (32 MB). • Using the supplied battery. • Starting recording 30 seconds after the camera is turned on. (When the Optical Image Stabilizer function is set to [AUTO].) -
Page 17: About The Built-In Memory/The Card
“Class 6” or higher when recording motion pictures in [MOTION JPEG]. ¢ SD Speed Class is the speed standard regarding continuous writing. • Please confirm the latest information on the following website. http://panasonic.jp/support/global/cs/dsc/ (This Site is English only.) Note •... -
Page 18: Inserting And Removing The Card (Optional)/The Battery
(optional)/the Battery • Check that this unit is turned off. • Close the flash. • We recommend using a Panasonic card. Slide the release lever in the direction of the arrow and open the card/battery door. • Always use genuine Panasonic batteries (DMW-BCJ13PP). -
Page 19: Setting Date/Time (Clock Set)
Setting Date/Time (Clock Set) • The clock is not set when the camera is shipped. Turn the camera on. A [MENU/SET] button B Cursor buttons Press [MENU/SET]. Press 2/1 to select the items (year, month, day, hour, minute, display sequence or time display format), and press 3/4 to set. -
Page 20: Setting The Menu
Setting the Menu This section describes how to select the [REC] Mode menu settings, and the same setting can be used for the [MOTION PICTURE] Mode menu, [PLAYBACK] Mode menu and [SETUP] menu as well. Example: Setting [AF MODE] from [Ø] to [š] in the Program AE Mode Press [MENU/SET] to display the menu. -
Page 21: Selecting The [Rec] Mode
Mode switching Selecting the [REC] Mode Turn the camera on. A Mode dial • The status indicator 2 lights when you turn this unit on 1. (It turns off after about 1 second.) Switching the mode by rotating the mode dial. - Page 22 ∫ Advanced Aperture-Priority AE Mode The shutter speed is automatically determined by the aperture value you set. Shutter-Priority AE Mode The aperture value is automatically determined by the shutter speed you set. Manual Exposure Mode The exposure is adjusted by the aperture value and the shutter speed which are manually adjusted.
-
Page 23: Taking Pictures With Your Favorite Settings (³: Program Ae Mode)
³ [REC] Mode: Taking pictures with your favorite settings ³ : Program AE Mode) The camera automatically sets the shutter speed and the aperture value according to the brightness of the subject. You can take pictures with greater freedom by changing various settings in the [REC] menu. -
Page 24: Program Shift
In Program AE Mode, you can change the preset aperture value and shutter speed without changing the exposure. This is called Program Shift. You can make the background appear blurred by decreasing the aperture value or record a moving subject more dynamically by slowing the shutter speed when taking a picture in Program AE Mode. -
Page 25: Taking Pictures Using The Automatic Function (Ñ: Intelligent Auto Mode)
ñ [REC] Mode: Taking Pictures Using the Automatic Function ñ The camera will set the most appropriate settings to match the subject and the recording conditions so we recommend this mode for beginners or those who want to leave the settings to the camera and take pictures easily. Set the mode dial to [ñ]. -
Page 26: Scene Detection
When the camera identifies the optimum scene, the icon of the scene concerned is displayed in blue for 2 seconds, after which its color changes to the usual red. > ¦ [i-PORTRAIT] [i-SCENERY] [i-MACRO] [i-NIGHT PORTRAIT] [i-NIGHT SCENERY] [i-SUNSET] [i-BABY] •... -
Page 27: Compensating The Exposure
[REC] Mode: Compensating the Exposure Use this function when you cannot achieve appropriate exposure due to the difference in brightness between the subject and the background. Look at the following examples. Press the rear dial to select [È], and then rotate the rear dial to compensate the exposure. -
Page 28: Taking Pictures By Specifying The Aperture/Shutter Speed
[REC] Mode: Taking pictures by specifying the aperture/shutter speed Set the aperture value to a higher number when you want a sharp focus background. Set the aperture value to a lower number when you want a soft focus background. Set the mode dial to [ Rotate the rear dial to set the aperture value. -
Page 29: Taking Pictures By Setting The Exposure Manually
[REC] Mode: Taking pictures by setting the exposure manually Determine the exposure by manually setting the aperture value and the shutter speed. Set the mode dial to [ • The Manual Exposure Assistance Rotate the rear dial to set the aperture and shutter speed. -
Page 30: Recording Motion Picture
[REC] Mode: Recording Motion Picture This can record high definition motion pictures compatible with the AVCHD format or motion pictures recorded in Motion JPEG. Audio will be recorded in monaural. Switching the mode by rotating the Mode dial. Start recording by pressing the motion picture button. -
Page 31: Playing Back Pictures ([Normal Play])
[PLAYBACK] Mode: Playing Back Pictures Press [(]. Press 2/1 to select the picture. After selecting the motion picture, press 3 • to start playback. [PLAYBACK] Mode: Deleting Pictures Once deleted, pictures cannot be recovered. • Pictures on the built-in memory or the card that are being played back will be deleted. -
Page 32: Reading The Operating Instructions (Pdf Format)
Reading the Operating Instructions (PDF format) • You have practised the basic operations introduced in these operating instructions and want to progress to advanced operations. • You want to check the Troubleshooting. In these kinds of situations refer to Operating Instructions (PDF format) contained on the CD-ROM (supplied). - Page 33 OS from the following Web Site. http://get.adobe.com/reader/otherversions ∫ To uninstall the Operating Instructions (PDF format) Delete the PDF file from the “Program Files\Panasonic\Lumix\” folder. • When the contents in the Program Files folder cannot be displayed, click the [Show the contents of this folder] to display them.
-
Page 34: Specifications
Specifications Digital Camera: Power Source: Power Consumption: Camera effective pixels: Image sensor: Lens: Digital zoom: Extended optical zoom: Focus range: Shutter system: Burst recording Burst speed: Number of recordable pictures: Hi-speed burst Burst speed: Number of recordable pictures: Minimum illuminance:... - Page 35 Shutter speed: Exposure (AE): Metering mode: LCD monitor: Flash: Microphone: Speaker: Recording media: Recording file format Still Picture: Motion pictures with audio: Interface Digital: Analog video/ audio: Terminal [AV OUT/DIGITAL]: Dedicated jack (8 pin) [HDMI]: Dimensions: Mass (weight): Operating temperature: Operating humidity: 10%RH to 80%RH Language select: 60 seconds to 1/4000th of a second...
- Page 36 Battery Charger (Panasonic DE-A81B): Input: Output: Equipment mobility: Battery Pack (lithium-ion) (Panasonic DMW-BCJ13PP): Voltage/capacity: VQT2W83 (ENG) Information for your safety 110 V to 240 V, 50/60 Hz, 0.2 A 4.2 V, 0.65 A Movable Information for your safety 3.6 V/1250 mAh...
-
Page 37: Digital Camera Accessory System
Digital Camera Accessory System Accessory# DMW-BCJ13PP DMW-AC5PP DMW-DCC7 RP-CDHM15 RP-CDHM30 DMW-FL220 DMW-FL360 DMW-FL500 DMW-LVF1 DMW-VF1 DMW-LA6 DMW-LWA52 : DMW-LMC52 : DMW-LND52 : DMW-LPL52 Figure Battery Pack AC Adaptor DC Coupler HDMI mini Cable Flash External Live Viewfinder External Viewfinder Lens Adapter... - Page 38 RP-SDR02GU1A Product numbers correct as of July 2010. These may be subject to change. ¢1 The AC Adaptor (optional) can only be used with the designated Panasonic DC Coupler (optional). The AC adaptor (optional) cannot be used by itself. ¢2 The lens adaptor (optional) is necessary to attach a wide conversion lens or filter.
-
Page 39: Digital Camera Accessory Order Form
City TO OBTAIN ANY OF OUR DIGITAL CAMERA ACCESSORIES YOU CAN DO ANY OF CALL PANASONIC’S ACCESSORY ORDER LINE AT 1-800-332-5368 MAIL THIS ORDER TO: PANASONIC SERVICE AND TECHNOLOGY COMPANY Price Each Your State & Local Sales Tax Shipping & Handling... -
Page 40: Limited Warranty (Only For U.s.a. And Puerto Rico)
Limited Warranty Coverage (For USA and Puerto Rico Only) If your product does not work properly because of a defect in materials or workmanship, Panasonic Consumer Electronics Company (referred to as “the warrantor”) will, for the length of the period indicated on the chart below, which starts with the date of original purchase (“warranty period”), at its option either (a) - Page 41 Mail-In Service For assistance in the U.S.A. and Puerto Rico in obtaining repairs, please ship the product prepaid to: Panasonic Exchange Center 4900 George McVay Drive Suite B McAllen, TX 78503 panacare us.panasonic.com When shipping the unit, carefully pack, include all accessories, and send it prepaid, adequately insured and preferably in the original carton.
- Page 42 THERE ARE NO EXPRESS WARRANTIES EXCEPT AS LISTED UNDER “LIMITED WARRANTY COVERAGE”. THE WARRANTOR IS NOT LIABLE FOR INCIDENTAL OR CONSEQUENTIAL DAMAGES RESULTING FROM THE USE OF THIS PRODUCT, OR ARISING OUT OF ANY BREACH OF THIS WARRANTY. (As examples, this excludes damages for lost time, travel to and from the servicer, loss of or damage to media or images, data or other memory or recorded content.
- Page 43 Monday-Friday 9am-9pm, Saturday-Sunday 10am-7pm EST For hearing or speech impaired TTY users, TTY: 1-877-833-8855 Accessory Purchases (United States and Puerto Rico) Purchase Parts, Accessories and Instruction Books online for all Panasonic Products by visiting our Web Site at: http://www.pstc.panasonic.com Or, send your request by E-mail to: npcparts@us.panasonic.com...
- Page 44 HDMI Licensing LLC in the United States and other countries. • VIERA Link™ is a trademark of Panasonic Corporation. • EZ Sync™ is a trademark of Panasonic Corporation. • HDAVI Control™ is a trademark of Panasonic Corporation.