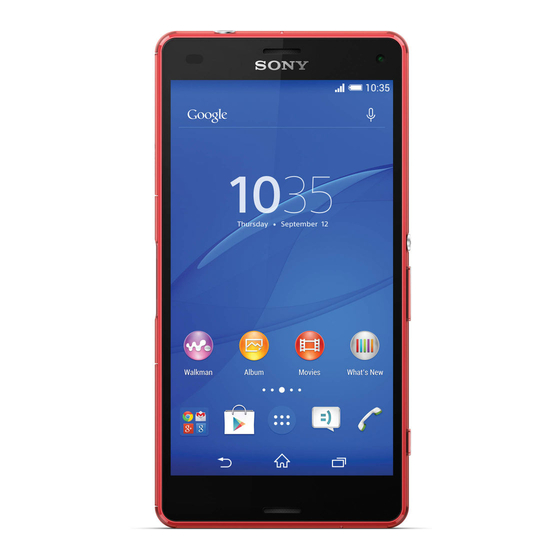
Sony Xperia Z3 Compact Test Instructions
Hide thumbs
Also See for Xperia Z3 Compact:
- User manual (121 pages) ,
- Troubleshooting manual (59 pages) ,
- Working instructions (46 pages)

Related Manuals for Sony Xperia Z3 Compact


Summary of Contents for Sony Xperia Z3 Compact
- Page 1 Test Instructions - mechanical - Xperia Z3 Compact D5803 & D5833 1291-4298 Rev 1 ” Sony Mobile Communications AB – Company Internal...
-
Page 2: Table Of Contents
2.2.25 Total call time..................... 19 2.2.26 Storage ....................... 19 2.2.27 Security ...................... 20 2.2.28 FM Radio ....................20 2.2.29 Verify certificates..................21 2.2.30 TV-Out Test ....................21 2.3 Manual Tests ..................23 1291-4298 Rev 1 ” Sony Mobile Communications AB – Company Internal 2(29) - Page 3 Charging (Charger or Computer) ............. 25 2.3.5 Battery Test....................27 2.3.6 Network Test ....................28 Revision History ................29 For general information about test procedures, refer to 1220-1333: Generic Repair Manual – mechanical 1291-4298 Rev 1 ” Sony Mobile Communications AB – Company Internal 3(29)
-
Page 4: Pre-Test Preparation
Fix it in place with the red Generic Clamp. Connect phone according to 1269-3536 Water Resistant Test for PC - mechanical in the including document Test Instruction WRT. 1291-4298 Rev 1 ” Sony Mobile Communications AB – Company Internal 4(29) -
Page 5: Hardware
The 1st indicator is located as shown in the Memory card slot beneath Memory card connector The 2nd indicator is located in SIM card slot to the right of the SIM card connector. 1291-4298 Rev 1 ” Sony Mobile Communications AB – Company Internal 5(29) -
Page 6: Test Enablers
17. GPS antenna area 18. NFC area 19. Magnetic connector (to dock) 20. Nano SIM card slot. A. Back key B. Home key C. Task key D. Menu key 1291-4298 Rev 1 ” Sony Mobile Communications AB – Company Internal 6(29) -
Page 7: Software
(see “Service Types” and “Aspects of large files”) In Swap flow, when change a phone from Customer A to Customer B, always use the service Customization script. 1291-4298 Rev 1 ” Sony Mobile Communications AB – Company Internal 7(29) -
Page 8: Tests
For more information, refer to 1220-1333: Generic Repair Manual - mechanical The following pictures will show a simplified basic phone for a general visualization of the service tests! 1291-4298 Rev 1 ” Sony Mobile Communications AB – Company Internal 8(29) -
Page 9: Service Tests
Make sure that there are no missing segments and that the colors and contrast are OK. Press the Back key to return to the Service Test Menu. 1291-4298 Rev 1 ” Sony Mobile Communications AB – Company Internal 9(29) -
Page 10: Led/Illumination
Press Volume up/Volume down key to adjust speaker volume. Press Back key to return to Service Test Menu. 1291-4298 Rev 1 ” Sony Mobile Communications AB – Company Internal 10(29) -
Page 11: Earphone
Step 2: Check the quality by listening to the recording from the speaker during the ‘Playing recorded sound’ phase at maximum volume. Press the Back key to return to the Service Test Menu. 1291-4298 Rev 1 ” Sony Mobile Communications AB – Company Internal 11(29) -
Page 12: Secondary Microphone
Press the Menu key or side keys to start the vibrator test. It is possible to modify the duration of this test. Press the Back key to return to the Service Test Menu. 1291-4298 Rev 1 ” Sony Mobile Communications AB – Company Internal 12(29) -
Page 13: Camera
2.2.12 Flash LED Check the Flash LED at the back side of phone whether it’s turned on. Press Back key to return to Service Test Menu. Only symbolic view 1291-4298 Rev 1 ” Sony Mobile Communications AB – Company Internal 13(29) -
Page 14: Antenna Rx Diversity
Step 5: Check the Pairing PIN code on both Target Bluetooth Device and unit, press Pair on both, when succeeded, it shows “Test Complete”. Press Back key to return to Service Test Menu. Only symbolic view 1291-4298 Rev 1 ” Sony Mobile Communications AB – Company Internal 14(29) -
Page 15: Wlan
Enter the GPS Location Test and wait for the GPS location data. Press the Back key to return to the Service Test Menu. For GPS testing, refer to 1220-1333: Generic Repair Manual – mechanical 1291-4298 Rev 1 ” Sony Mobile Communications AB – Company Internal 15(29) -
Page 16: Compass
Front picture. LEFT SIDE Front VIEW BOTTOM VIEW Press the Back key to return to the Service Test Menu. 1291-4298 Rev 1 ” Sony Mobile Communications AB – Company Internal 16(29) -
Page 17: Gyroscope
The Ambient light sensor is placed next to the Secondary Camera. Press the Back key to return to the Service Test Menu. 1291-4298 Rev 1 ” Sony Mobile Communications AB – Company Internal 17(29) -
Page 18: Proximity Switch
0.2 to 0.3 Millibar. The value shouldn’t be static. Press the Back key to return to the Service Test Menu. 1291-4298 Rev 1 ” Sony Mobile Communications AB – Company Internal 18(29) -
Page 19: Real Time Clock
- External Storage (SD Card) is ‘Inserted/Mounted’ as shown on the screen. - The USB Host Mass Storage is ‘Inserted/Mounted’ as shown on the screen. Press the Back key to return to the Service Test Menu. 1291-4298 Rev 1 ” Sony Mobile Communications AB – Company Internal 19(29) -
Page 20: Security
Connect a headset and then set your local radio station in Verify that the reception and sound quality is normal. Press the Back key to return to the Service Test Menu. 1291-4298 Rev 1 ” Sony Mobile Communications AB – Company Internal 20(29) -
Page 21: Verify Certificates
TV-Out Off Micro USB Cable Step 1: Attach cable between phone and TV-Out as shown (Charger/PC) in picture; Only symbolic view MHL TV Out is turned on after connection. 1291-4298 Rev 1 ” Sony Mobile Communications AB – Company Internal 21(29) - Page 22 Only symbolic view Step3: Press ‘Gray ramp pattern’ to do the same test as the ‘Play video’. Press the Back key to return to the Service Test Menu. 1291-4298 Rev 1 ” Sony Mobile Communications AB – Company Internal 22(29)
-
Page 23: Manual Tests
Connect a USB cable from a computer to the started phone. x Verify that Data Communication works by transferring a file from Computer to phone x Erase the file Only symbolic view 1291-4298 Rev 1 ” Sony Mobile Communications AB – Company Internal 23(29) -
Page 24: Audio Jack Test
Noise cancelling... and go to noise cancelling settings. When you switch off it, a faint white noise in the Headset should disappear. Remove the Sony Noise canceling headset and press task key and chose the Service test again. Sony Ericsson SONY Connect a Sony CTIA headset (with microphone). -
Page 25: Charging (Charger Or Computer)
Red: Battery level is between 1% and 10%; x Orange: Battery level is between 11% and 89%; x Green: Battery is between 90% and 100%; 1291-4298 Rev 1 ” Sony Mobile Communications AB – Company Internal 25(29) - Page 26 If no vibration is detected, the battery might be discharged. Force Power down (Press OFF button until vibrates three times then release the button) The picture in above flow chart is only symbolic view. 1291-4298 Rev 1 ” Sony Mobile Communications AB – Company Internal 26(29)
-
Page 27: Battery Test
Title: Sony Mobile Battery test Application 1266-2711. Unzip this file, where you find the application, installation and user guide content. After the test the Sony Mobile Battery test.apk shall be removed by tap “Uninstall” “OK” in the application. Error messages are described in the user guide for the Sony Mobile Battery test. -
Page 28: Network Test
Step 6: End the call and check that the elapsed time is displayed and that the termination is done properly. Only symbolic view 1291-4298 Rev 1 ” Sony Mobile Communications AB – Company Internal 28(29) -
Page 29: Revision History
Test Instructions (mech) Revision History Rev. Date Changes / Comments 2014-09-12 Initial Release 1291-4298 Rev 1 ” Sony Mobile Communications AB – Company Internal 29(29)