
Related Manuals for Sharp LC-40LE531E


Summary of Contents for Sharp LC-40LE531E
- Page 1 LC-40LE531E LCD COLOUR TELEVISION OPERATION MANUAL SHARP ELECTRONICS (UK) Limited 4 Furzeground Way, Stockley Park Uxbridge, UB11 1EZ, UK...
-
Page 2: Table Of Contents
Contents Features ..............4 Programme Selection (Direct Access) ..17 Dear SHARP customer ........... 4 Viewing Electronic Programme Guide (EPG) ..17 Introduction ............. 4 Recording via EPG Screen ....... 18 Preparation ............. 4 Programme Options.......... 18 Important safety precautions ........5 First Time Installation.......... - Page 3 Recording Con guration ........33 Con guring Date/Time Settings ......33 Con guring Source Settings ......... 34 Con guring Other Settings ........34 Operation ............34 Other Features ............. 35 Teletext ..............35 Tips ............... 36 Appendix A: PC Input Typical Display Modes ..37 Appendix B: AV and HDMI Signal Compatibility (Input Signal Types) ..........
- Page 4 SPECIAL NOTE FOR USERS IN THE U.K. The mains lead of this product is tted with a non-rewireable (moulded) plug incorporating a 5A fuse. Should the fuse need to be replaced, a BSI or ASTA approved BS 1362 fuse marked and of the same rating as above, which is also indicated on the pin face of the plug, must be used.
-
Page 5: Features
The examples used throughout this manual are based on the LC-32LE511E model. Dear SHARP customer Thank you for your purchase of the SHARP LCD colour TV product. To ensure safety and many years of trouble-free operation of your product, please read Important safety precautions carefully before using this product. -
Page 6: Important Safety Precautions
Important safety precautions • Cleaning—Unplug the AC cord from the AC outlet before cleaning the product. Use a damp cloth to clean the product. Do not use liquid cleaners or aerosol cleaners. • Use a soft damp cloth to gently wipe the panel when it is dirty. To protect the panel, do not use a chemical cloth to clean it. -
Page 7: Safety Precautions
Safety Precautions Lightning In case of storm and lightning or when Please read the following recommended safety going on holiday, disconnect the power precautions carefully for your safety. cord from the wall outlet. Power Source Replacement Parts The TV set should be operated only from a 220-240 When replacement parts are required, make sure that V AC, 50 Hz outlet. -
Page 8: Headphone Volume
The Standby / On button doesn´t separate this Headphone Volume device completely from mains. Moreover the device Excessive sound pressure from earphones consumes power in the standby operation. In order to and headphones can cause hearing loss. separate the device completely from mains, the mains plug has to be pulled from the mains socket. -
Page 9: Package Contents
Package Contents Batteries: 2 X AAA Instruction Book Remote Control 1 X Audio & Video Connection Cable LCD TV Note: You should check the accessories after purchasing. Make sure that each accessory is included. As the manufacturer’s speci cation supports communication on cable lengths shall be smaller than 3m. -
Page 10: Environmental Information
Environmental Information • This television is designed to consume less energy to save environment. You not only help to save the environment but also you can save money by reducing electricity bills thanks to the energy ef ciency feauture of this TV. To reduce energy consumption, you should take the following steps: •... -
Page 11: Remote Control Buttons
Remote Control Buttons Standby Image size Sleep Timer Mono/Stereo - Dual I-II / Currrent Language (*) (in DVB channels) / Play preview (in Media Browser mode) Favourite Mode Selection (in DVB channels) Numeric buttons Electronic programme guide(in DVB channels) No function Media Browser Navigation buttons (Up/Down/Left/Right) No function... -
Page 12: Lcd Tv And Operating Buttons
LCD TV and Operating Buttons FRONT and REAR VIEW Control buttons VIEW Control Buttons Standby/On button TV/AV button Programme Up/Down buttons Volume Up/Down buttons Standby-LED The Power-switch is used for turning the TV “Off” or into “Standby-Mode” Note: Press “ ”... -
Page 13: Viewing The Connections - Side Connectors
PC/YPbPr Audio Inputs are used for connecting audio signals of a PC or a device that connects to the TV via YPbPr. Connect the PC audio cable between the AUDIO INPUTS on the TV and audio output of your PC to enable PC audio. Connect the audio cable between AUDIO INPUTS on the TV and audio outputs of your device to enable component audio. -
Page 14: Power Connection
USB Disk Connection Power Connection • Plug your USB device to the USB input of the TV. IMPORTANT: The TV set is designed to operate on Note: Plug or unplug your USB disk while the TV is 220-240V AC, 50 Hz socket. switched off. -
Page 15: Side Hdmi Connection (Hdmi 4)
• For more information on recording programmes, Side HDMI Connection (HDMI 4) see sections “Instant Recording”, “Timeshifting”, The side HDMI is convenient connection for external “Electronic Programme Guide”, “Recordings Library” HDMI devices, use an appropriate HDMI cable and or “Recording Timers” in the following parts. ensure both the TV and external device are switched •... -
Page 16: Connecting To A Dvd Player
Connecting to a DVD Player Using Side AV Connectors If you want to connect a DVD player to your LCD You can connect a range of optional equipment to your TV, you can use connectors of the TV set. DVD LED TV using side connectors of the TV. -
Page 17: Remote Control Handset
To Switch the TV Off Remote Control Handset • Switch the “ ” button bottom right edge under the • Remove the battery cover located on the back of the remote control by gently pulling backwards from screen to position 2 as illustrated, to isolate the the indicated part. -
Page 18: Input Selection
Programme Selection (Previous or Next Input Selection Programme) Once you have connected external systems to your • Press “ ” button to select the previous TV, you can switch to different input sources. Press programme. “SOURCE” button on your remote control consecutively •... -
Page 19: Recording Via Epg Screen
Numeric buttons (Jump): Jumps to the preferred (RECORD): the TV will start to record the channel directly via numeric buttons. selected progamme. You can press again to stop the recording. OK (Options): views/records or sets timer for future programs. Text (Search): Displays “Guide Search” menu. SUBTTL: Press SUBTITLE button to view Select Genre menu. -
Page 20: First Time Installation
• To cancel an already set recording, highlight that programme and press the OK button and select the option “Delete Rec. Timer”. The recording will be cancelled. Note: You cannot switch to any other channel or source while there is an active recording on the current channel. -
Page 21: Auto Tuning
Note: You can press “MENU” button to cancel. • Press OK button to quit channel list and watch TV. IMPORTANT! If you are located at a TV regional border or are able Auto Tuning to receive broadcasts from more than one transmitter HINT: Auto tuning feature will help you to retune the TV the “Choose Region”... -
Page 22: Manual Tuning
Analog Fine Tune Manual Tuning • Select Analog Fine Tune from the Installation menu HINT: This feature can be used for direct broadcast by using “ ” or “ ” and OK buttons. Analog Fine entry. Tune screen will be displayed. Analog Fine Tune Select Manual Channel Scan from the Installation feature will not be available if there are no analog menu by using “... -
Page 23: Moving A Channel
Select Edit Channel List to manage all stored • When nished, press OK button to save. Press channels. Use “ ” or “ ” and OK buttons to select “MENU” to cancel. Edit Channel List. Locking a Channel You can press GREEN button to tag/untag all Operating the Channel List channels;... -
Page 24: Managing Stations: Favourites
Managing Stations: Favourites On-Screen Information You can create a list of favourite programmes. You can press “INFO” button to display on-screen information. Details of the station and current • Press “ MENU” button to view main menu. Select programme will be displayed on the information Channel List item by using “... -
Page 25: Viewing Videos Via Usb
When you have selected the desired media type Rewind ( button): Goes backward. Videos, Photos or Music the USB device will be Forward ( button): Goes forward. scanned for all matching media, this may take several Subtitle/Audio (LANG. button): Sets subtitle/ minutes depending on the device size and number of Audio. -
Page 26: Slideshow Options
Slideshow Options FAV: Sorts les by Title, Artist or Album. INFO: Changes lter options. Loop/Shuf e (BLUE button): Press once to disable Loop. Press again to disable both Loop and Shuf e. Press once more to enable only Shuf e. Press again Pause ( button) : Pauses the slideshow. -
Page 27: Instant Recording
• Use (PREVIOUS/NEXT) buttons to move Select Yes by using “ ” or “ ” / OK buttons to cancel forward or backward on timeshift playback. When instant recording. the timeshift is reached, timeshifting mode will be Note: Switching to a different broadcast or source; quitted and you will switch back to watching normal and viewing Media Browser are not available during broadcast. -
Page 28: Changing Image Size: Picture Formats
Slow Forward Note: You can shift the screen up or down by pressing “ ” / “ ” buttons while picture zoom is selected as If you press (PAUSE) button while watching Panoromic, 14:9 Zoom, Cinema or Subtitle. recorded programmes, slow forward feature will be available. -
Page 29: Con Guring Picture Settings
Cinema Power Save Mode Use “ ” or “ ” button to select Power Save Mode. This zooms up the wide picture (16:9 aspect ratio) to Press “ ” or “ ” button to set Power Save Mode the full screen. as Eco, Picture Off and Disabled. -
Page 30: Pc Picture Settings
Film mode: Films are recorded at a different number of Con guring Sound Settings frames per second to normal television programmes. Sound settings can be con gured according to your Press “ ” or “ ” button to select Film Mode. Press personal preferences. -
Page 31: Con Guring Your Tv's Settings
Balance: This setting is used for emphasizing left or Other Settings: Displays other setting options of right speaker balance. the TV set. Headphone: Sets headphone volume. Using a Conditional Access Sound Mode: You can select Mono, Stereo, Dual I Module or Dual II mode, only if the selected channel supports IMPORTANT: Insert or remove the CI module only that mode. -
Page 32: Con Guring Language Preferences
Language Settings Con guring Language Preferences You can operate the TV’s language settings using this menu. Press “MENU” button and select the Settings icon by using “ ” or “ ” button. Press OK button to view Settings menu. Use “ ” or “ ” button to highlight Language and press OK to continue: In the Settings menu, highlight the Language Settings item by pressing “... -
Page 33: Parental Settings Menu Operation (*)
To display parental lock menu options, PIN number Timers should be entered. Factory default PIN number is To view Timers menu, press MENU button and select 0000. After coding the correct PIN number, parental Settings icon by using “ ” or “ ” button. Press OK settings menu will be displayed: button to view Settings menu. -
Page 34: Deleting A Timer
• Press GREEN button. Edit Timer menu screen will • If you want to delete all les on the connected USB be displayed. hard disk drive or memory stick, you can use Format Disk option. • When nished with editing, press GREEN button to save. -
Page 35: Con Guring Source Settings
Operation Con guring Source Settings • Press “ ” or “ ” buttons to select an item. You can enables or disable selected source options. • Use “ ” or “ ” button to set an option. The TV will not switch to the disabled source options when “SOURCE”... -
Page 36: Other Features
Standby Search (optional): Use “ ” or “ ” button Teletext to select Standby Search and then press “ ” or “ Teletext system transmits information such as news, ” button to set this setting as On or Off. If you sports and weather on your TV. -
Page 37: Tips
Sound: You can not hear any sound. Did you perhaps Tips interrupt the sound, pressing the button? Sound is Screen Care: Clean the screen with a dry, soft cloth. coming from only one of the speakers. Is the balance Do not use abrasive solvents as they may damage the set to one extreme? See Sound Menu. -
Page 38: Appendix A: Pc Input Typical Display Modes
Appendix A: PC Input Typical Display Modes The display has a maximum resolution of 1920 x 1200. The following table is an illustration of some of the typical video display modes. Your TV may not support different resolutions. Supported resolution modes are listed below. If you switch your PC to an unsupported mode, a warning OSD should appear on the screen giving you 15 seconds to change back to your last setting. -
Page 39: Appendix B: Av And Hdmi Signal Compatibility (Input Signal Types)
Appendix B: AV and HDMI Signal Compatibility (Input Signal Types) Source Supported Signals Available PAL 50/60 NTSC 60 EXT-1 RGB 50 RGB 60 PAL 50/60 NTSC 60 EXT-2 RGB 50 RGB 60 PAL 50/60 (SIDE AV) NTSC 60 480I 60Hz 480P 60Hz 576I... -
Page 40: Appendix C: Supported Dvi Resolutions
Appendix C: Supported DVI Resolutions When connecting devices to your TV’s connectors by using DVI converter cables (not supplied), you can refer to the following resolution information. 24Hz 25Hz 30Hz 50Hz 60Hz 480i þ 480p þ 576i þ 576p þ 720p þ... -
Page 41: Appendix E: Software Upgrade
Appendix E: Software Upgrade • Your TV is capable of nding and updating new software upgrades over broadcast channels. • For broadcast channels search, TV looks the available channels stored in your settings. So before software upgrade search, it is advised to auto search and update all available channels. 1) Software upgrade search via user interface •... -
Page 42: Speci Cations
Digital Reception (DVB-T) Speci cations TV BROADCASTING Transmission Standards: PAL/SECAM B/G D/K K’ I/I’ L/L’ DVB-T, MPEG2,DVB-T, MPEG4 HD RECEIVING CHANNELS i. DEMODULATION VHF (BAND I/III) • -Symbol rate: COFDM with 2K/8K FFT mode. UHF (BAND U) • -Modulation: 16-QAM - 64-QAM FEC for all DVB modes (automatically found) HYPERBAND •... -
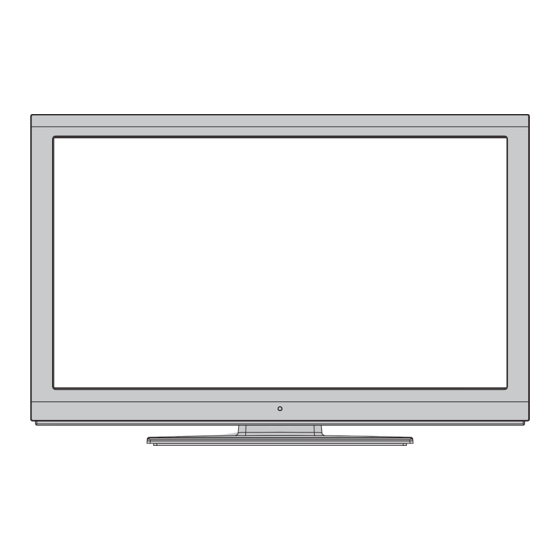
Page 43: Dimensional Drawings
Dimensional Drawings English - 42 -... -
Page 44: End Of Life Disposal
End of life disposal English - 43 -...