Whirlpool AKP 288 - Electric Oven Product Sheet
Also See for AKP 288:
- Instructions for use manual (8 pages) ,
- Datasheet (2 pages)
Advertisement
Table of Contents
Contents
- 1 OVERVIEW
- 2 ACCESSORIES
- 3 CONTROL PANEL
- 4 ANALOG CLOCK
- 5 MANUAL COOKING (without cooking start time or cooking duration)
- 6 MANUAL COOKING (with cooking start time but without cooking duration)
- 7 PROGRAMMED COOKING (with cooking start time and cooking duration)
- 8 PROGRAMMED COOKING (with cooking duration but without cooking start time)
- 9 COOKING TABLES
- 10 COOKING TABLE FOR GRILL FUNCTION
- 11 Documents / Resources
Whirlpool AKP 288 - Electric Oven Product Sheet
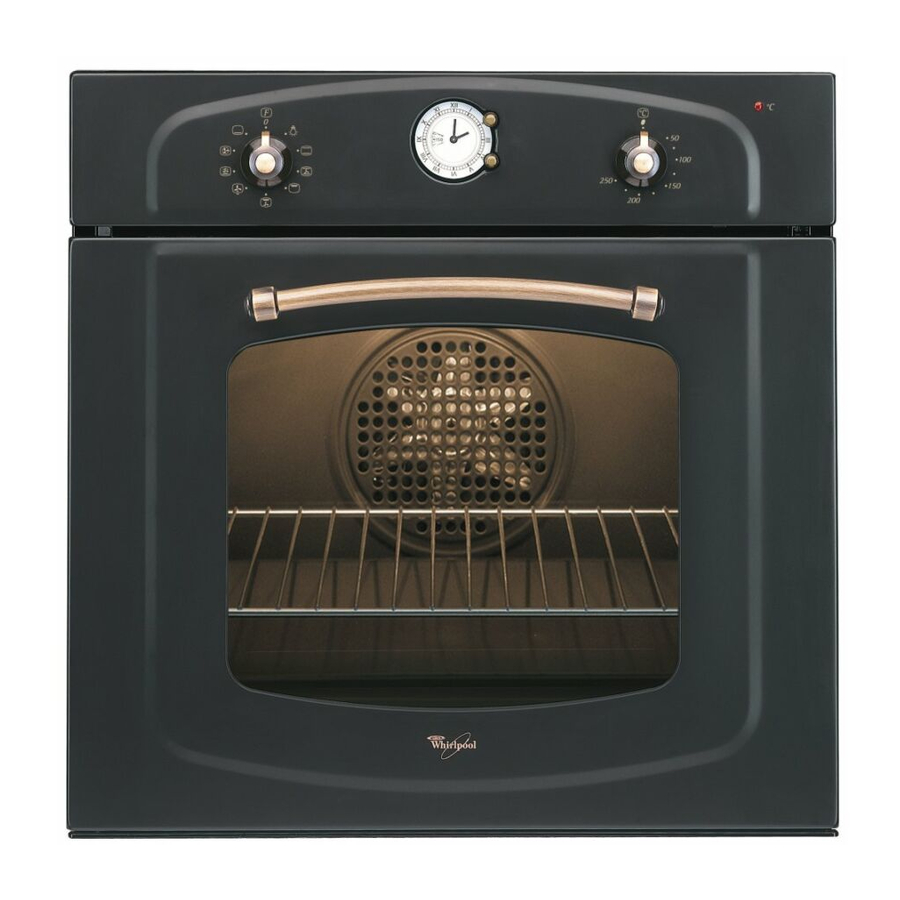
OVERVIEW

- Control panel
- Cooling fan (not visible)
- Upper heating element
- Grill heating element
- Rear oven lamp
- Circular heating element (not visible)
- Fan
- Lower heating element (hidden)
- Oven cool door
ACCESSORIES

CONTROL PANEL

- Function selector knob
- Analog clock
- Thermostat knob
- Red thermostat led
ANALOG CLOCK

The analog clock allows:
- Viewing the time of the day. To adjust the time of the day, pull the button (B) and turn it clockwise to set the time.
- Programming the cooking start time. The maximum programmed cooking start time is 12 hours.
- Programming the cooking time. Select the cooking time (available with any function) to turn the oven on for a specified period of time. At the end of the specified time the oven will switch off automatically. The maximum programmed cooking time is 180 minutes.
Make sure that the window (C) displays symbol 0 or  (OFF) at the start of cooking.

MANUAL COOKING (without cooking start time or cooking duration)
- Pull the button (A) and turn it until the hand (D) points to the time shown on the clock (hour hand).
- Turn the button (A) clockwise (without pulling), until the symbol | or
![]() is displayed in the window (C).
is displayed in the window (C). - Turn the selector knob to the required symbol. The oven light switches on.
- Turn the thermostat knob clockwise to the required temperature. The red thermostat indicator light switches on.
- At the end of cooking, turn the knobs (function selector and thermostat) to OFF-0 or • (depending on model).
- For going back to 0 or
![]() (OFF position), turn the button A clockwise.
(OFF position), turn the button A clockwise.
 is displayed in the window (C).
MANUAL COOKING (with cooking start time but without cooking duration)
- Pull the button (A) and turn it until the hand (D) points to the time at which cooking is to start. (e.g. in the figure: hours 6.00).
- Turn the button (A) clockwise (without pulling), until the symbol | or
![]() is displayed in the window (C).
is displayed in the window (C). - Turn the selector knob to the required symbol. The oven light will not switch on until the hands point to the same time as hand D.
- Turn the thermostat knob clockwise to the required temperature. The red thermostat indicator light will not switch on until the hands point to the same time as hand D.
- At the end of cooking, turn the knobs (function selector and thermostat) to OFF-0 or • (depending on model).
PROGRAMMED COOKING (with cooking start time and cooking duration)
- Pull the button (A) and turn it until the hand (D) points to the time at which cooking is to start. (e.g. in the figure: hours 6.00).
- Turn the button (A) clockwise (without pulling) until the required cooking duration is displayed in the window (C) (1 - 180 min.).
- Turn the selector knob to the required symbol. The oven light will not switch on until the hands point to the same time as hand D.
- Turn the thermostat knob clockwise to the required temperature. The red thermostat indicator light will not switch on until the hands point to the same time as hand D.
- At the end of the set cooking time an acoustic signal will sound and the oven will switch off automatically. To exclude the acoustic signal, turn button (A) clockwise (without pulling) until the symbol 0 or
![]() is displayed in the window.
is displayed in the window. - At the end of the set cooking time, cooking may be prolonged by following the instructions given above, or by using the manual cooking procedure.
PROGRAMMED COOKING (with cooking duration but without cooking start time)
- Pull the button (A) and turn it until the hand (D) points to the time shown on the clock (hour hand).
- Turn the button (A) clockwise (without pulling) until the required cooking duration is displayed in the window (C) (1 - 180 min.).
- Turn the selector knob to the required symbol. The oven light switches on.
- Turn the thermostat knob clockwise to the required temperature. The red thermostat indicator light switches on.
- At the end of the set cooking time an acoustic signal will sound and the oven will switch off automatically. To exclude the acoustic signal, turn button (A) clockwise (without pulling) until the symbol 0 or
![]() is displayed in the window.
is displayed in the window. - At the end of the set cooking time, cooking may be prolonged by following the instructions given above, or by using the manual cooking procedure.
COOKING TABLES


COOKING TABLE FOR GRILL FUNCTION

Note: Cooking times and temperatures are for guidance only.
Whirlpool is a registered trademark of Whirlpool USA
© Copyright Whirlpool Europe S.r.l. All rights reserved

Documents / ResourcesDownload manual
Here you can download full pdf version of manual, it may contain additional safety instructions, warranty information, FCC rules, etc.
Advertisement
Thank you! Your question has been received!


Need Assistance?
Do you have a question about the AKP 288 that isn't answered in the manual? Leave your question here.