Table of Contents
Advertisement
Quick Links
Operating Instructions
Dome IP Camera
Information on hazardous constituents as specified in rule 16(1) in electrical
and electronic equipment.
Declaration of Conformity with the requirements of the E-waste
(Management) Amendment Rules 2022 with the rule 16(1) limits with
respect to lead, mercury, cadmium, hexavalent chromium, polybrominated,
biphenyls, polybrominated biphenyls, polybrominated diphenyl
ethers.
The content of hazardous substance with the exemption of the
applications listed in SCHEDULE II of the E-Waste (management)
Amendment Rules 2023.
1. Lead(Pb)- not over 0.1% by weight;
2. Cadmium(Cd)- not over 0.01% by weight;
3. Mercury(Hg)- not over 0.1% by weight;
4. Hexavalent chromium(Cr6+)- not over 0.1% by weight;
5. Polybrominated biphenyls(PBBs) - not over 0.1% by weight;
6. Polybrominated diphenyl ethers(PBDEs)- not over 0.1% by weight;
For the purpose of recycling to facilitate effective utilization of
Resources, please return this product to a nearby authorised
collection center, registered dismantler or recycler, or
Panasonic service center when disposing of this product.
Please see the Panasonic website for further information on collection
centers, etc. or call the customer care toll free number.
Website: https://www.panasonic.com/in/corporate/e-
waste-management.html
English
Customer Care Number (Toll Free): 18004190373
E-mail: helpline@in.panasonic.com
Thank you for purchasing this Panasonic product.
Please read these instructions carefully before operating this
product and retain them for future reference.
The images shown in this manual are for illustrative purposes
only.
Model No.:
PI-DNA3PWA
Advertisement
Table of Contents

Related Manuals for Panasonic PI-DNA3PWA


Summary of Contents for Panasonic PI-DNA3PWA
- Page 1 Panasonic service center when disposing of this product. product and retain them for future reference. Please see the Panasonic website for further information on collection The images shown in this manual are for illustrative purposes centers, etc. or call the customer care toll free number.
- Page 2 Important Safeguards and Warnings Please read these instructions carefully. Please heed all warnings. Please follow all instructions. Do not use this apparatus near water. Please clean only with dry cloth. Do not block any ventilation openings, install in accordance with the manufacturer’s instructions.
- Page 3 Protect the power cord from being walked on or pinched particularly at plugs, convenience receptacles, and the point where they exit from the apparatus. 10. Only use attachments/ accessories specified by the manufacturer. 11. Use with cart, stand, tripod, bracket, or table only as specified by the manufacturer or sold with the apparatus.
- Page 4 Use of this product, the manual and the subsequent result shall be entirely the user's own responsibility. In no event shall Panasonic be liable for any special, consequential, incidental, or indirect damages, including, among others, damages for loss of business profits, business interruption, or loss of...
- Page 5 data or documentation, or product malfunction or information leakage caused by cyber-attack, hacking or virus in connection with the use of his product. The contents of this manual are subject to change without prior notice. Regular updates can be added to the new version of this manual. ...
-
Page 6: Table Of Contents
Contents Part I Product Introduction................ 1 Product Function ................... 1 Recommended PC Specifications ............2 Accessories .................... 3 Appearance ................... 4 Installation Precautions ................. 5 Installation Instructions ................. 6 Part II Local Network Access..............7 1. Powering and Networking ..............7 2. - Page 7 System Tool ..................40 System Information ................43 Do’s & Don’ts ..................45 Troubleshooting Points ................46 TECHNICAL SPECIFICATIONS ..............48...
-
Page 8: Part I Product Introduction
Part I Product Introduction Product Function 1. For Indoor use only. 2. PoE enabled. 3. Encode codec (H.264, H.265 & H.265+) 4. Full HD Video Quality (2304x1296) 3M. 5. Built-in microphone. 6. Built-in Wi-Fi. (2.4Ghz) 7. ONVIF Compliance. 8. Dual-Streaming. 9. -
Page 9: Recommended Pc Specifications
17. Video Blind Detection – Detect if camera lens is covered/blocked more than 60%. 18. Abnormality Detection – Detects abnormality alarms like IP Address Conflict, Network disconnect etc. 19. Sound Detection – Detects abnormal sound from the camera video input. 20. -
Page 10: Accessories
Accessories Mounting Sticker Screw & Wall Plug (x3) RJ45 Cap with sealing Ring Quick Installation Guide Warranty Card... -
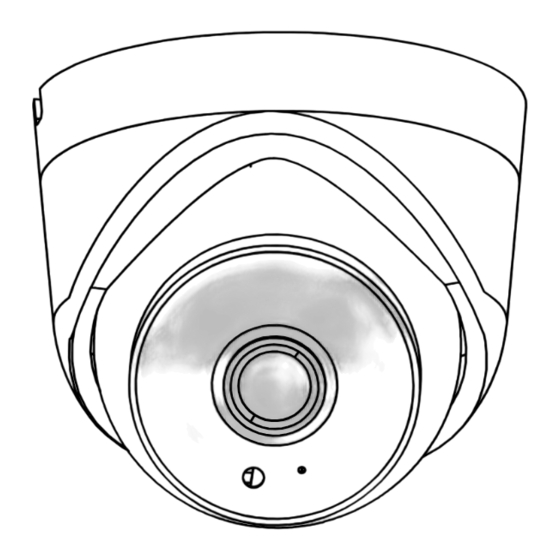
Page 11: Appearance
Appearance Rotate to open. -
Page 12: Installation Precautions
Installation Precautions Note: This camera is only for indoor usage. 1. This device should be mounted and maintained only by an experienced professional. If in doubt, consult the dealer. 2. Before mounting, determine the suitable location. The device must be fixed to a wooden or masonry/concrete wall or ceiling using fasteners that are appropriate for the mounting surface. -
Page 13: Installation Instructions
Installation Instructions 1. Place the mounting base of camera onto the selected location. 2. Using the template provided, Drill the 3 holes with a 6 mm drill bit. Insert the wall plugs for concrete walls. 3. Tuck the cable into the slot on the side of the wall bracket. 4. -
Page 14: Part Ii Local Network Access
Part II Local Network Access 1. Powering and Networking 1. Use PoE i.e., compliant with IEEE802.3af protocol. 2. Connect the PoE switch and cameras PoE connector. 3. Switch on the PoE switch. 4. Default IP address of the camera is 192.168.1.108 5. -
Page 15: Active X Installation Procedure
2. Active X Installation Procedure Install Active-x 1. Input username and password to log in (When first access for live view it is recommended to download the Active-X. - Page 16 2. Choose a language then enter the username and password to log in, then click on “Download ActiveX” to download the ActiveX setup file. 3. Then click on save button as shown below. 4. Then click on Run button. 5. Click on Next to finish the installation.
-
Page 17: Camera Configuration & Setup
3. Camera Configuration & Setup IP Address configuration. • Static – Default IP address of the IP camera is 192.168.1.108, we recommend changing the default IP address during 1st login. • Use the internet browser to access the camera, login screen will appear, login to the camera using username &... - Page 18 Click on [Config] > [Network] as shown below. • Change the IP address as per your router/NVR configuration then click on save button.
- Page 19 DHCP configuration • Click on [Config] > [Network] as shown below.
-
Page 20: About The Live Page & Icons
4. About the Live Page & Icons Select Mainstream to view high resolution video or Sub stream to low resolution video. Preview interface Turn on to hear the sound. Not applicable for this model. -
Page 21: About Playback
Record: Click to start/stop manual recordings and save them in C:\Record Click to capture the preview screen and save it in C:\Picture Click to capture three pictures in single shot and save them in C:\Picture Original resolution display Suitable for display resolution Full-screen display Fluency... -
Page 22: About Config
6. About Config Local Config Provide option to define path for local storage related to manual recording Snap/Video. Click on [Config] > [Local Config] as shown below... -
Page 23: Encode
Encode Encode setting are video image quality settings which includes compression, resolution, FPS, bitrate, I-Frame interval etc. Setting these correctly based on the network can save network bandwidth, HDD space, fix network lags etc. Click on [Config] > [Encode] as shown below. - Page 24 Audio Provide option to set audio encode settings, mic input, mic output (not applicable for this model) sensitivity. Click on [Config] > [Encode] > [Audio] as shown below.
- Page 25 Prev Mode OSD Setting provides an option to configure parameters related to on screen display during the live view, for example Time title, Channel title, week title etc. click on [Config] > [Prev Mode] > [OSD set] as shown below.
- Page 26 Image color provides an option to configure parameters related to image quality, for example Brightness, Contrast, Saturation, Tone & Sharpness for day & night profile. Click on [Config] > [Prev Mode] > [Display Config] > [Image Color] as shown below.
- Page 27 Camera provides an option to configure parameters related to Day/Night mode, day night control, IR cut, image flip, mirror image & IR reverse. Click on [Config] > [Prev Mode] > [Display Config] >[Camera] as shown below.
- Page 28 ISP provides an option to configure parameters related to Exposure mode, BLC, HLC, Profile, Anti flicker, Day/Night Noise filter, AE reference & AE sensitivity. Click on [Config] > [Prev Mode] > [Display Config] >[ISP] as shown below. Fill Light option not applicable for this camera model.
- Page 29 Profile Day & Night profile can be created and scheduled for different picture quality display during the live view. Click on [Config] > [Prev Mode] > [Profile] as shown below.
- Page 30 Privacy Masking Privacy masking is used to block a particular area or object to be viewed during the live camera view, user can create up-to 4 different zones to mask. Click on [Config] > [Prev Mode] > [Privacy Masking] as shown below.
- Page 31 Overlay This utility provides an option to configure text to be displayed over the live view. Click on [Config] > [Prev Mode] > [Overlay] as shown below.
-
Page 32: Network
Network Net Services Email provides an option to configure SMTP server for the email ID to send alarm notification by the camera in case of any configured event. Click on [Config] > [Net Service] > [Email] as shown below. DDNS provides an option to register with the DDNS server to obtain a domain name for your IP Camera and then access your IP Camera by visiting the domain name instead of an IP address (http://DDNS server address/IP Camera domain name) using a web browser. - Page 33 Click on [Config] > [Net Service] > [DDNS] as shown below. RTSP provides an option to access IP Camera video stream over any 3rd party device/media player. Click on [Config] > [Net Service] > [RTSP] as shown below.
- Page 34 FTP is not applicable for this model. Wi-Fi provides an option to configure the camera to connect with Wi-Fi network. Click on [Config] > [Net Service] > [Wi-Fi] as shown below. To use UPnP in your IP Camera, UPnP must be enabled in the connected router. With UPnP enabled for Network Address Translation (NAT), the ports on the IP Camera can be mapped automatically to the router, and computers can access IP Camera from WAN.
- Page 35 Click on [Config] > [Net Service] > [UPnP] as shown below. P2P Provide option to enable/disable cloud connectivity for remote access using mobile applications or desktop. User needs to click on Get Cloud ID, after the click camera will pop up message to reboot. After reboot cloud ID can be viewed at this option and camera can be configured in the app for remote monitoring.
-
Page 36: Record
IP Filter provides an option to secure connectivity and provide access to authorize users using blacklist and whitelist IP address table. Click on [Config] > [Net Service] > [IP Filter] as shown below. Record Record option not applicable for this model. -
Page 37: Alarm
Alarm Provide option to trigger notification/recording based on motion, human, video loss, video blind, abnormality & intelligent analytics. 1. Motion Once enabled a motion detection alarm occurs when an object inside the detection area moves, based on the settings notification can be sent on email. Click on [Config] >... - Page 38 2. Video Blind Once enabled a video blind alarm occurs when the camera view is blocked more than 60% by an object, based on the settings notification can be sent on email. Click on [Config] > [Alarm] > [Video Blind] as shown below. Note: SMTP settings should also be configured.
- Page 39 3. Abnormality Once enabled abnormality alarm occurs in the event of Network Loss, IP Conflict detection. based on the settings notification can be sent on email. Click on [Config] > [Alarm] > [Abnormality] as shown below. Note: SMTP settings should also be configured.
- Page 40 Analytics Once enabled an alarm occurs when the camera detects Area Intrusion, Line Crossing event in the defined region, based on the settings notification can be sent on email. Click on [Config] > [Alarm] > [Analytics] as shown below. Note: SMTP settings should also be configured.
- Page 41 5. Human Detection Once enabled an alarm occurs when the camera detects any human movement in the defined region, based on the settings notification can be sent on email. Click on [Config] > [Alarm] > [Human] as shown below. Note: SMTP settings should also be configured.
- Page 42 6. Sound Once enabled, it detects abnormal sound from the camera, based on the settings notification can be sent on email. Click on [Config] > [Alarm] > [Sound] as shown below. Note: SMTP settings should also be configured.
-
Page 43: System Configuration
System Configuration 1. System Configuration provides an option to configure Machine/Camera name and auto logout time setting. Note: HDD & Audio settings are not applicable for this product. Click on [Config] > [System Config] > [System Config] as shown below. - Page 44 2. General Configuration provides an option to configure language, date & time format & video format. Click on [Config] > [System Config] > [General Config] as shown below.
- Page 45 3. Time Settings provides an option to select time zone and configure time automatically using NTP server or manually (sync with local PC). Click on [Config] > [System Config] > [Time Setting] as shown below.
-
Page 46: Security
Security 1. Security provides an option to configure Onvif authentication (Password Requirement for the camera), RTSP authentication (Password Requirement for the camera) to basic or Digest. Click on [Config] > [System Config] > [Security] as shown below. -
Page 47: System Tool
System Tool 1. Users provides an option to configure additional users to login using different permissions as allowed by the configuration. Only admin can add, delete, or modify additional users and their permissions. Click on [Config] > [System Config] > [System Tool] >[User] as shown below. - Page 48 Click on [Config] > [System Config] > [System Tool] > [Auto Maintain] as shown below. 3. System tools provide an option to configure reboot, factory default &default settings of the camera. It also provides option to import or export the camera configuration file. Firmware upgrade option is also available, 1) local upgrade –...
- Page 49 Click on [Config] > [System Config] > [System Tool] > [System Tool] as shown below.
-
Page 50: System Information
System Information 1. Version information option displays like serial no, software build date, P2P status, & mac address. Click on [Config] > [System information] > [System info] as shown below. - Page 51 2. System logs provide the option to display the logs related to system, configuration, alarm event & Account. This also provides an option to manually clear/delete the logs. Click on [Config] > [System information] > [System Log] as shown below.
-
Page 52: Do's & Don'ts
Always dispose of products that have Do not donate old electronic items to reached end of life at Panasonic Life anybody. Solutions India Authorized Service Do not dispose of your product in garbage Centre. -
Page 53: Troubleshooting Points
Troubleshooting Points When troubleshooting IP Camera, there are several points you can consider identifying and resolve issues. Here are some troubleshooting steps you can follow: Check power and network connections: Ensure that the camera is properly powered and connected to the network. - Page 54 If you've gone through these troubleshooting steps and are still experiencing issues, it may be helpful to consult Panasonic technical support.
-
Page 55: Technical Specifications
TECHNICAL SPECIFICATIONS CAMERA 1/2.7” 3MP Progressive CMOS Sensor Image Sensor Effective Pixels 2304x1296 Minimum Illumination Color: 0.01 Lux @ (F1.2, AGC ON), B/W: 0 Lux with IR S/N Ratio >60dB IR Distance IR Distance 30m Shutter Speed Auto, Manual Mode: 1/50 sec~ 1/10000 sec 80db IR On/Off Control Auto/ Manual... - Page 56 Profiles Auto, Low Light Priority, High Light Priority Noise Filter Auto/ 1-5 Levels Digital Zoom Supports up to 64X (Area selection with Mouse) Anti-Flicker On/Off AE reference 1-255 Level AE Sensitivity 1-10 Level Flip Off / On IR reverse Support Mirror Off / On Text Overlay...
- Page 57 Web Viewer IE, Chrome, Firefox, Safari Management Software Panasonic VMS Smart Phone Supports Panasonic PHS for iPhone, Android INTERFACE Audio 1 Input Notes: Design and specification are subjected to change without notice. Weight and dimensions shown herein are approximate. The Graphics in this manual are only for reference.