Table of Contents
Advertisement
Quick Links
ORDER NO.PHAMOS0506022A3
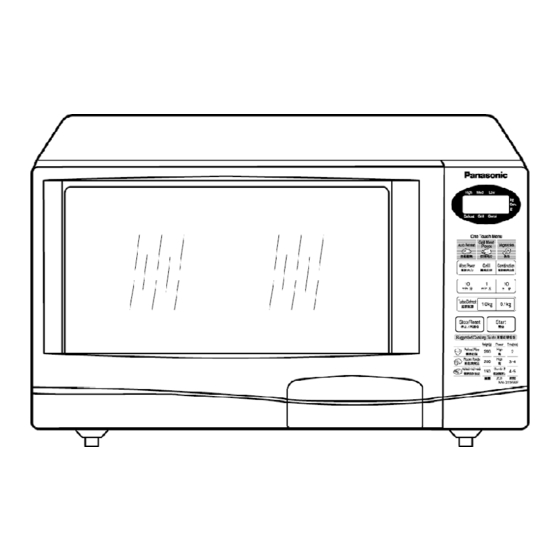
Microwave Oven
NN-G315WF / NN-G335WF / NN-G335MF / NN-G335BF /
HPE(Hong Kong)
LPK(Philippines)
YTE(Others)
KTE(UAE)
PTE( Iran)
ZPE(CIS Countries)
Please file and use this manual together with the service manual for
Model NN-S215/S235 (Order No.PHAMOS0506021C3).
SPECIFICATIONS
1
Advertisement
Table of Contents
Troubleshooting

Related Manuals for Panasonic NN-G335MF


Summary of Contents for Panasonic NN-G335MF
- Page 1 ORDER NO.PHAMOS0506022A3 Microwave Oven NN-G315WF / NN-G335WF / NN-G335MF / NN-G335BF / HPE(Hong Kong) LPK(Philippines) YTE(Others) KTE(UAE) PTE( Iran) ZPE(CIS Countries) Please file and use this manual together with the service manual for Model NN-S215/S235 (Order No.PHAMOS0506021C3). SPECIFICATIONS...
- Page 2 2005 Panasonic Home Appliances Microwave Oven (Shanghai) Co., Ltd. / All rights reserved. Unauthorized copying and distribution is a violation of law.
-
Page 4: Schematic Diagram
1. SCHEMATIC DIAGRAM 1.1. NN-G315 1.2. NN-G335... - Page 5 2. CAUTIONS TO BE OBSERVED WHEN TROUBLESHOOTING Unlike many other appliances, the microwave oven is high-voltage, high-current equipment. Though it is free from danger in ordinary use, extreme care should be taken during repair. CAUTION Servicemen should remove their watches whenever working close to or replacing the magnetron.
-
Page 6: Check The Grounding
2.1. Check the grounding Do not operate on a 2-wire extension cord. The microwave oven is designed to be grounded when used. It is imperative, therefore, to make sure it is grounded properly before beginning repair work. 2.2. Warning about the electric charge in the high voltage capacitor For about 30 seconds after the oven is turned off, an electric charge remains in the high voltage capacitor.When replacing or checking parts, remove the power plug from the outlet and short the terminal of the high voltage capacitor (terminal of lead wire from diode) to chassis ground... -
Page 7: Avoid Inserting Nails, Wire, Etc. Through Any Holes In The Unit During Operation
WARNING When the 8 Amp fuse is blown due to operation of the interlock monitor switch, you must replace all of the components (Primary latch switch, Door switch, Short switch and Power relay B (RY1)). 1. This is mandatory. Refer to “Adjustments and Measurement” for these switches. -
Page 8: Measurements And Adjustments
IMPORTANT NOTICE 1.The following components have potentials above 2000V while the appliance is operated. * Magnetron * High voltage transformer * High voltage diode * High voltage capacitor Pay special attention to these areas. 2.When the appliance is operated with the door hinge or magnetron adjusted incorrectly, the microwave leakage can exceed more than 5mW/cm . -
Page 9: Measurement Of Microwave Output
3.2. Measurement of microwave output The output power of the magnetron can be determined by performing IEC standard test procedures. However, due to the complexity of IEC test procedures, it is recommended to test the magnetron using the simple method outlined below. Necessary Equipment: - 1 liter beaker - Glass thermometer... -
Page 10: Exploded View And Parts List
TABLE (1L-1min.test) RATED OUTPUT TEMPERATURE RISE 800W Min.12.6°F(7.0°C) 4. EXPLODED VIEW AND PARTS LIST 4.1. EXPLODED VIEW 4.2. PARTS LIST NOTE: 1. When ordering replacement part(s), please use part number(s) shown in this part list. Do not use description of the part. 2. - Page 11 Ref. No. Part No. Part Name & Description Pcs/Set Remarks F01576R60HHP NAME PLATE G335WF HPE F01576R60HYT NAME PLATE G335WF YTE F01576R60HLP NAME PLATE G335WF LPK F01576R60HKT NAME PLATE G335WF KTE F01576R60HPT NAME PLATE G335WF PTE F01576R60HZP NAME PLATE G335WF ZPE F01576R60SZP NAME PLATE G335MF ZPE...
- Page 12 Ref. No. Part No. Part Name & Description Pcs/Set Remarks F61456N00AP THERMAL CUTOUT -20°C ON ,120°C OFF F60366S10XP CAPACITOR INSTALLATION BRACKET F11656S10XP REINFORCE BRACKET G335*F F11656R50XP REINFORCE BRACKET G315WF F60706S10XP INSULATE BRACKET F64605G50XN HEATER MOUNTING PLATE F630G6B90XN HEATER (AU) F66266R60XP THERMAL CUTOUT MOUNTING G335*F F66265G50XN...
-
Page 13: Packing And Accessories
Ref. No. Part No. Part Name & Description Pcs/Set Remarks F30186S10XP DOOR KEY A F301A6S10HXP DOOR A (U) G335WF F301A6S10HAP DOOR A (U) G315WF F301A6S10SXP DOOR A (U) G335MF F301A6S10BAP DOOR A (U) G335BF F302K6S10XP DOOR E (U) F30216S10XP DOOR KEY SPRING F30856S10XP DOOR C F31455G10XN... -
Page 14: Escutcheon Base Assembly
Ref. No. Part No. Part Name & Description Pcs/Set Remarks F00036R60HP INSTRUCTION MANUAL G335WF (HPE,YTE,LPK) F00036R60KP INSTRUCTION MANUAL G335WF (KTE,PTE) F00036R50ZP INSTRUCTION MANUAL G335WF/MF/BF (ZPE),G315WF (ZPE) F01026R60HHP PACKING CASE,PAPER G335WF (HPE,LPK) F01026R60HYT PACKING CASE,PAPER G335WF (YTE) F01026R60HKT PACKING CASE,PAPER G335WF (KTE,PTE) F01026R60HZP PACKING CASE,PAPER G335WF (ZPE) F01026R60SZP PACKING CASE,PAPER... -
Page 15: Wiring Materials
Ref. No. Part No. Part Name & Description Pcs/Set Remarks F603L6R60HP D.P.CIRCUIT (AU) G335WF( HPE,YTE) F603L6R60LP D.P.CIRCUIT (AU) G335WF (LPK) F603L6R60KT D.P.CIRCUIT (AU) G335WF (KTE,PTE) F603L6R60ZP D.P.CIRCUIT (AU) G335*F (ZPE) F630Y6R60HHP MEMBRANE SWITCH (U) G335WF (HPE,YTE,LPK) F630Y6R60HKT MEMBRANE SWITCH (U) G335WF (KTE,PTE) F630Y6R60HZP MEMBRANE SWITCH (U) G335WF (ZPE) - Page 16 Ref. No. Part No. Part Name & Description Pcs/Set Remarks F030A6R60XP LEAD WIRE HARNESS G335*F F030A6R50ZP LEAD WIRE HARNESS G315WF 5. DIGITAL PROGRAMMER CIRCUIT(NN-G335WF/MF/ 5.1. SCHEMATIC DIAGRAM...
- Page 17 5.2. PARTS LIST...
- Page 18 Ref. No. Part No. Part Name & Description Pcs/Set Remarks BZ210 AEFBAT2001WQ BUZZER 2.0KHz AECETS1V220B AL CHEM CAPACITOR F/35V AECETS1C220B AL CHEM CAPACITOR F/16V ECQU2A474BP7 CAPACITOR (G335*F ZPE) C2,C3 ECTJ10222ME CAPACITOR 0.0022 F/250V (G335*F ZPE) C11,C12,C223,C350,C351 F1H1E104A108 CHIP CAPACITOR F/25V C220,C221 F1H1A105A068 CHIP CAPACITOR...
- Page 19 ORDER NO.PHAMOS0506021C3 Microwave Oven NN-S215WF / NN-S215MF / NN-S235WF / NN-S235MF / NN- S235BF QPQ(Australia & New Zealand) HPE(Hong Kong) YPQ(Singapore) MPQ(Malaysia) TPE(Thailand, Indonesia) LPK(Philippines) YTE(Others) KTE(UAE) PTE( Iran) KPQ(Kuwait, Doha, Qatar, Oman, Bahrain, Pakistan) STM(Saudi Arabia) ZPE(CIS Countries) SPECIFICATIONS...
- Page 20 2005 Panasonic Home Appliances Microwave Oven (Shanghai) Co., Ltd. / All rights reserved. Unauthorized copying and distribution is a violation of law.
-
Page 22: Feature Chart
1. FEATURE CHART MODEL NN-S215WF/MF NN-S235WF/MF FEATURE Three Stage Cooking — Turbo Defrost — Auto Cook — Power Level Select — Variable Power Control — Child Safety Lock — 2. CONTROL PANEL 3. OPERATION AND DIGITAL PROGRAMMER CIRCUIT TEST PROCEDURE 3.1. - Page 23 OPERATION SCROLL DISPLAY 1. Plug the power supply cord into wall outlet. 2. Place a water load in the oven. 3. Press [Micro Power] Pad once to set high power. (1st stage) 4. Set for 10 Seconds. 5. Press [Micro Power] Pad 5 times to set low power.
-
Page 24: Turbo Defrost
3.2. Turbo Defrost OPERATION SCROLL DISPLAY 1. Press [Turbo Defrost1.0 kg] Pad to set the weight for 1.0kg. 2. Press [Start] pad. 3. Press [Stop/Reset] Pad twice, Oven shuts off. 3.3. Auto Cook OPERATION SCROLL DISPLAY 1. Press [Vegetables] pad thrice to set the weight for 300g. - Page 25 OPERATION SCROLL DISPLAY 1. Press [Auto Reheat] pad twice for 2 serving. 2. Press [Start] pad. 3. When cooking time has elapsed, Oven beeps 5 times and shuts off. 3.5. To Set Child Satety Lock OPERATION SCROLL DISPLAY 1. Press [Start] pad 3 times continuously.
- Page 26 4.2. NN-S215 (EXCEPT QPQ & ZPE)
- Page 27 4.3. NN-S235...
-
Page 28: Description Of Operating Sequence
5. DESCRIPTION OF OPERATING SEQUENCE 5.1. Variable power cooking control (NN-S235) The coil of power relay B (RY1) is energized intermittently by the digital programmer circuit, when the oven is set at any power selection except for High power position. The digital programmer circuit controls the ON-OFF time of power relay B contacts in order to vary the output power of the microwave oven from ”Low”... - Page 29 The ON/OFF time ratio does not correspond with the percentage of microwave power since approximately 2 seconds are required for heating of magnetron filament. OUTPUT ON-OFF TIME OF POWERSETTING POWER( POWER RELAY B (RY1) APPROX. ON(SEC) OFF(SEC) HIGH 100% MEDIUM-HIGH MEDIUM MEDIUM-LOW DEFROST...
-
Page 30: Cautions To Be Observed When Troubleshooting
1. The digital programmer circuit determines the power level and cooking time to complete cooking and indicates the operating state in the display window. / Table shows the corresponding cooking times for respective serving or weight by categories. 2. When cooking time in the display window has elapsed, the oven turns off automatically by a control signal from the digital programmer circuit. - Page 31 WARNING There is high-voltage present, with high-current capabilities in the circuits of the high voltage winding and filament winding of the high voltage transformer. It is extremely dangerous to work on or near these circuits with oven energized. / DO NOT measure the voltage in the high voltage circuit including filament voltage of magnetron.
-
Page 32: Disassembly And Parts Replacement
3. When replacing faulty switches, be sure mounting tabs are not bent, broken or otherwise deficient in their ability to hold the switches. 6.5. Avoid inserting nails, wire, etc. through any holes in the unit during operation. Never insert a wire, nail or any other metal object through the lamp holes on the cavity or any other holes or gaps, because such objects may work as an antenna and cause microwave leakage. -
Page 33: Digital Programmer Circuit (Dpc) And Membrane Key Board
PROCEDURE 7.1. Magnetron 1. Discharge the high voltage capacitor. 2. Remove 1 screw holding air guide A & reinforce bracket. 3. Disconnect 2 high voltage lead wires from magnetron filament terminals. 4. Remove 4 screws holding the magnetron. NOTE: After replacement of the magnetron,tighten mounting screws properly in an X pattern, making sure there is no gap between the waveguide and the magnetron to prevent microwave leakage. - Page 34 1. Release 1 flat cable from D.P.C board holding on the oven cavity. 2. Remove 1 screw holding escutcheon base and slide the escutcheon base upward slightly. 3. Remove 1 screws holding D.P.C board. 4. Separate D.P.C board from tabs on the escutcheon base and remove D.P.C board.
- Page 35 Be sure to ground any static electric charge built up on your body before handling the DPC. 1. Disconnect all connectors from D.P.C.. 2. Remove 2 screws holding D.P.C. board on the oven cavity. 3. Using solder wick or a desoldering tool and 30W soldering iron, carefully remove all solder from the terminal pins of the low voltage transformer and/or power relays.
- Page 36 7.5. Fan motor 1. Disconnect 2 lead wires from fan motor terminals. 2. Remove 1 screw holding diode (U) on side of the oven. 3. Disconnent 2 H.V. lead wires which linking to H.V. transformer from H.V. capacitor terminals. 4. Remove 3 screws holding orifice assy and detach the orifice assy from oven assy.
- Page 37 5. Open Door E at the opening angle of approximately 10°(Note: The door cannot be removed if the opening angle is greater than 10°). 6. Remove the door E from its hinges by pushing the door E's bottom upward and out. 7.
-
Page 38: Component Test Procedure
3. Remove the turntable motor by removing 1 screw. NOTE: After reinstalling the new turntable motor and reconnecting the 2 lead wires, reinstall the motor cover by rotating it around 180°, tucking the 2 tabs under the base into the 2 provided slots, then screw the single tab to the base using a screw. - Page 39 2. Unplug lead connectors to primary Latch switch and Door Switch. 3. Test the continuity of switches at door opened and closed positions with ohm meter (low scale). / Normal continuity readings should be as follows. 8.2. Short Switch & Monitor 1.
- Page 40 2. A normal capacitor will show continuity for a short time, and then indicate 9M once the capacitor is charged. 3. A shorted capacitor will show continuous continuity. 4. An open capacitor will show constant 9M . 5. Resistance between each terminal and chassis should be infinite. 8.5.
- Page 41 1. Select any power other than “High“ and start the oven. 2. Check continuity between both terminals of the variable power switch. 3. Variable power controller (timer and variable power switch) is working proporty it the ohm meter reads open and 0 within 30 ± 2 seconds interval as shown in table on P.9.
-
Page 42: Membrane Key Board (Membrane Switch Assembly)
directions. It is faulty if it shows continuity in one or both directions. 8.8. Membrane key board (Membrane switch assembly) Check continuity between switch terminals, by tapping an appropriate pad on the key board. The contacts assignment of the respective pads on the key board is as shown in digital programmer circuit. - Page 43 9.2. Measurement of microwave output The output power of the magnetron can be determined by performing IEC standard test procedures. However, due to the complexity of IEC test procedures, it is recommended to test the magnetron using the simple method outlined below. Necessary Equipment: - 1 liter beaker - Glass thermometer...
-
Page 44: Troubleshooting Guide
TABLE (1L-1min.test) RATED OUTPUT TEMPERATURE RISE 800W Min.12.6°F(7.0°C) 10. TROUBLESHOOTING GUIDE CAUTION 1. Check grounding before checking for trouble. 2. Be careful of high voltage circuit. 3. Discharge high voltage capacitor. 4. When checking the continuity of the switches or the high voltage transformer,disconnect one lead from these parts and then check continuity with the AC plug removed. -
Page 45: Trouble Related To Digital Programmer Circuit
10.1. Trouble related to Digital Programmer Circuit... -
Page 46: How To Check The Semiconductors Using An Ohm Meter
10.2. How To CHECK THE SEMICONDUCTORS USING AN OHM METER 11. EXPLODED VIEW AND PARTS LIST 11.1. EXPLODED VIEW... -
Page 47: Parts List
11.2. PARTS LIST NOTE: 1. When ordering replacement part(s), please use part number(s) shown in this part list. Do not use description of the part. 2. Important safety notice: Components identified by mark have special characteristics important for safety. When replacing any of these components, use only manufacture’s specified parts. - Page 48 Ref. No. Part No. Part Name & Description Pcs/Set Remarks F01576S10HQP NAME PLATE S215WF QPQ F01576S10HHP NAME PLATE S215WF HPE F01576S10HTP NAME PLATE S215WF TPE F01576S10STP NAME PLATE S215MF TPE F01576S10HYT NAME PLATE S215WF YTE F01576S10SYT NAME PLATE S215MF YTE F01576S10HMP NAME PLATE S215WF MPQ...
- Page 49 Ref. No. Part No. Part Name & Description Pcs/Set Remarks F612E5G50XN INCANDESCENT LAMP (U) EXCEPT HPE J61424T00AP MICRO SWITCH PRIMARY LATCH SWITCH J61424T00AP MICRO SWITCH SECONDARY LATCH SWITCH (S215WF/MF) J61414T00AP MICRO SWITCH SECONDARY LATCH SWITCH (S235WF/MF/BF) F61456S10XP THERMAL CUTOUT 60°C ON,180°C OFF J61784T00AP MICRO SWITCH SHORT SWITCH...
- Page 50 Ref. No. Part No. Part Name & Description Pcs/Set Remarks XTTFA4+6BN SCREW FOR CABINET BODY SIDE F02395E20KN CORD CAUTION LABEL KTE,PTE,KPQ,STM F60305G60HN INCANDESCENT LAMP F61525H00AP SOCKET F692Y6S10QP NOISE FILTER (U) S215WF (QPQ & ZPE) 11.3. DOOR ASSEMBLY Ref. No. Part No. Part Name &...
- Page 51 11.4. WIRING MATERIALS Ref. No. Part No. Part Name & Description Pcs/Set Remarks F030A-6S10 LEAD WIRE HARNESS S215WF (QPQ,ZPE) F030A6S10XP LEAD WIRE HARNESS S215WF/MF (EXCEPT QPQ & ZPE) F030A6S20XP LEAD WIRE HARNESS S235WF/MF/BF 11.5. PACKING AND ACCESSORIES...
- Page 52 Ref. No. Part No. Part Name & Description Pcs/Set Remarks F00036S10QP INSTRUCTION MANUAL F00036S10HP INSTRUCTION MANUAL HPE,TPE,YTE,MPQ,YPQ,LPK F00036S10KP INSTRUCTION MANUAL KTE,PTE,KPQ,STM F00036S10ZP INSTRUCTION MANUAL F01026S10HQP PACKING CASE,PAPER S215WF (QPQ) F01026S10HHP PACKING CASE,PAPER S215WF (HPE,TPE,MPQ,YPQ,LPK) F01026S10HYT PACKING CASE,PAPER S215WF (YTE) F01026S10HKT PACKING CASE,PAPER S215WF (KTE,PTE) F01026S10HKP PACKING CASE,PAPER S215WF (KPQ)
- Page 53 Ref. No. Part No. Part Name & Description Pcs/Set Remarks F603L6S20QP D.P.CIRCUIT (AU) S235WF (QPQ) F603L6S20HP D.P.CIRCUIT (AU) S235*F (HPE,TPE,YTE) F603L6S20MP D.P.CIRCUIT (AU) S235*F (MPQ,YPQ) F603L6S20LP D.P.CIRCUIT (AU) S235WF (LPK) F603L6S20KP D.P.CIRCUIT (AU) S235WF (KPQ) F603L6S20KT D.P.CIRCUIT (AU) S235WF (KTE,PTE) F603L6S20ST D.P.CIRCUIT (AU) S235WF (STM)
- Page 55 12.2. PARTS LIST...
- Page 56 Ref. No. Part No. Part Name & Description Pcs/Set Remarks BZ210 AEFBAT2001WQ BUZZER 2.0KHz AECETS1V221B AL CHEM CAPACITOR F/35V C222 AECUU06C101J CHIP CAPACITOR 100PF/50V C11,C12,C223,C350,C351 AECUT06F104Z CHIP CAPACITOR F/25V C220,C221 AECUN06F105Z CHIP CAPACITOR F/10V AECETS1C220B CHIP CAPACITOR F/16V ECQU2A474BP7 CAPACITOR F/250V C2,C3 ECTJ10222ME...