Table of Contents
Advertisement
This device complies with Part 15 of the FCC Rules. Operation is subject to the
following two conditions: (1) This device may not cause harmful interference, and
(2) this device must accept any interference received, including interference that
may cause undesired operation.
WARNING FCC Regulations state that any unauthorized changes or modifications
to this equipment not expressly approved by the manufacturer could void the user's
authority to operate this equipment.
Note: This equipment has been tested and found to comply with the limits for a
Class B digital device, pursuant to Part 15 of the FCC Rules.
These limits are designed to provide reasonable protection against harmful
interference in a residential installation. This equipment generates, uses, and can
radiate radio frequency energy and, if not installed and used in accordance with
the instructions, may cause harmful interference to radio communications.
However, there is no guarantee that interference will not occur in a particular
installation. If this equipment does cause harmful interference to radio or television
reception, which can be determined by turning the equipment off and on, the user
is encouraged to try to correct the interference by one or more of the following
measures:
– Reorient or relocate the receiving antenna.
– Increase the separation between the equipment and receiver.
– Connect the equipment into an outlet on a circuit different from that to which the
receiver is connected.
– Consult the dealer or an experienced radio/TV technician for help.
Note: A shielded interface cable is required to ensure compliance with FCC
regulations for Class B certification.
FOR YOUR RECORDS....
For your assistance in reporting this product in case of loss or theft, please record
the model number and serial number (located on the bottom of the case) below.
Please retain this information.
Model Number
Serial Number
Date of Purchase
Place of Purchase
Advertisement
Table of Contents

Related Manuals for Sharp YO-470


Summary of Contents for Sharp YO-470
- Page 1 This device complies with Part 15 of the FCC Rules. Operation is subject to the following two conditions: (1) This device may not cause harmful interference, and (2) this device must accept any interference received, including interference that may cause undesired operation. WARNING FCC Regulations state that any unauthorized changes or modifications to this equipment not expressly approved by the manufacturer could void the user's authority to operate this equipment.
-
Page 2: Limited Warranty
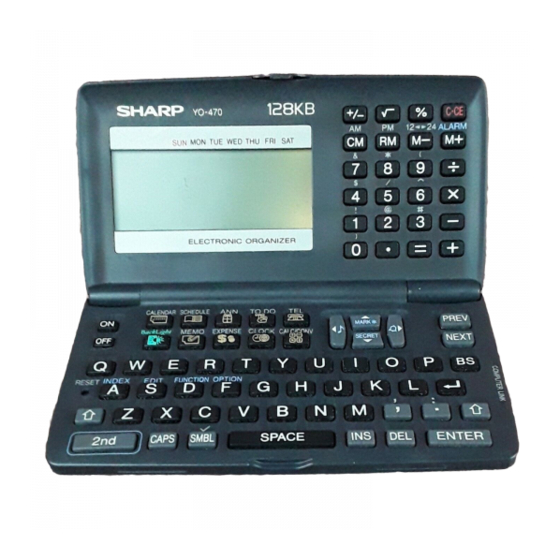
Product and shall constitute full satisfaction of all claims, whether based on contract, negligence, strict liability or otherwise. In no event shall Sharp be liable, or in any way responsible, for any damages or defects in TO OBTAIN SUPPLY, ACCESSORY OR PRODUCT INFORMATION, CALL 1-800-BE-SHARP. - Page 3 PARTS NAMES Display Command center Cursor movement keys Power on/off keys Search keys Return key Reset switch Option port (4-pin option jack) Enter key...
-
Page 4: Introduction
• SHARP assumes no responsibility, directly or indirectly, for financial losses or claims from third persons resulting from the use of this product and any of its functions, such as stolen credit card numbers, the loss or alteration of stored data, etc. -
Page 5: Table Of Contents
TABLE OF CONTENTS INTRODUCTION ... 2 BEFORE USE ... 3 GETTING STARTED ... 4 BASIC ENTRY PROCEDURES ... 5 USING THE HOME AND WORLD CLOCKS ... 6 USING THE CALENDAR FUNCTION ... 9 USING THE SCHEDULE FUNCTION ... 10 USING THE ANNIVERSARY FUNCTION ... 15 USING THE TELEPHONE DIRECTORY ... -
Page 6: Getting Started
AUTO POWER OFF function When none of the keys have been pressed for approximately 7 minutes, the Organizer automatically turns the power off to save the batteries. (The actual time may vary depending on the conditions of use.) Press to resume operation. Backlight Pressing once illuminates the display and the Backlight... -
Page 7: Basic Entry Procedures
Key notations This manual uses the following notations for key operations and functions: Notation CALENDAR Keys with only one function always CALENDAR appear in the manual with the function enclosed in a box. Keys with multiple functions appear in MARK the manual with only the contextually appropriate function boxed;... -
Page 8: Using The Home And World Clocks
Making corrections Misspellings and incorrect entries can be corrected using the cursor keys, , and as follows: Correcting misspellings 1. Press MEMO 2. Enter “NEW YARK”. 3. Press 4. Enter “O”. Inserting missing letters 1. Press • 2. Enter “NEW YRK”. 3. - Page 9 NOTES: • Between step 2 and step 4, the Organizer stops the clock. Be sure to set the correct time after setting or changing the HOME or WORLD city. • Some city names are abbreviated on the display as follows: HONG KONG ...
- Page 10 Registering a city name not found in the list For example, if you wish to set the city for the WORLD time to Rome (which is in zone number 12, but is not included in the city list): 1. Display the WORLD clock and enter the edit mode. CLOCK CLOCK EDIT...
-
Page 11: Using The Calendar Function
USING THE CALENDAR FUNCTION Displaying and changing the monthly calendar In the CALENDAR mode, the month can be changed by using , or designating the year and month. PREV Operations of during the monthly NEXT PREV calendar display The Organizer has a five-line display. The monthly calendar is displayed occasionally in two separate displays. -
Page 12: Using The Schedule Function
USING THE SCHEDULE FUNCTION Entering data in the SCHEDULE mode The date of a schedule item can be selected: 1. By selecting the desired date in the CALENDAR mode. 2. By selecting the desired date in the SCHEDULE mode with PREV 3. - Page 13 Selecting the date with NEXT This method is convenient for entering data into a nearby date. For example, to enter an item such as, “February 17, 3:00PM - 5:00PM Sales meeting”: 1. Press SCHEDULE 2. Recall “February 17”. PREV NEXT Press until “February PREV...
- Page 14 You may also recall February 19 in the CALENDAR mode by pressing , entering the date, and pressing • 3. Recall the schedule display. SCHEDULE Recalling scheduled items from the SCHEDULE mode with NEXT PREV For example, to recall the schedule for January 10, 1999 (today): 1.
- Page 15 NOTES: • The keyword search is not case sensitive. • To search for additional items containing the word “meeting”, press . When no more items containing the word “meeting” NEXT are scheduled, “NOT FOUND!” will appear on the display. • To browse back through the list of entries containing the keyword, press PREV Recalling scheduled items using the index display...
- Page 16 1. Recall the items scheduled for February 19 and enter the edit mode. 02 19 1999 SCHEDULE C CE C • • 2. Change the date. 03 05 (You can also change the entire date by pressing point and re-entering the entire date.) 3.
-
Page 17: Using The Anniversary Function
Setting the schedule alarm First display the schedule item for which you wish to set the alarm and press . “ ” appears to the left of the starting time for ALARM the scheduled item on the display, to indicate that the alarm has been set for that item. - Page 18 NOTE: To recall, edit, or delete anniversaries entered in ANN2 (with month, week, and day of the week specified), select in the procedures below. Recalling anniversaries In the ANNIVERSARY mode, anniversaries can be recalled with the sequential search or in the index display. Sequential search 1.
-
Page 19: Using The Telephone Directory
2. Delete the entry. 3. Press . (To retain the entry, press NOTE: You can also delete individual entries from the index display. Move the pointer “ ” to select the entry you want to delete and press Deleting all entries Refer to “Deleting all of the data in each function”... -
Page 20: Recalling Entries
Entering telephone entries into the TEL1 directory To enter the following sample entry into the TEL1 directory, follow steps 1 to 4 below: Edwards Bob 201-555-5600 President, ABC Co. 1. Select the TEL mode. Press repeatedly until the TEL1 directory name appears. 2. -
Page 21: Editing Entries
1. Press INDEX Up to five names can be displayed at a time. The first 18 characters of the first line of each entry are displayed. To display the first entry beginning with a particular character, press the desired character key. If there is no entry for that character, the first subsequent entry will be displayed. -
Page 22: Using The Memo Function
USING THE MEMO FUNCTION The Organizer’s memo function conveniently stores notes or other bits of information not appropriate for the schedule or other directories. Entering memos For example, to enter “X’mas presents list, Sweater for Jill, Ring for Mother”: 1. Select the MEMO mode. MEMO 2. -
Page 23: Editing Memos
NOTE: The memo being displayed when appear at the top of the list. Otherwise, the first memo will be displayed at the top. Editing memos Memo editing capabilities are similar to those in the SCHEDULE mode. To edit a memo, recall it, then press to delete characters. -
Page 24: Using The To Do Function
USING THE TO DO FUNCTION The TO DO function is a very convenient and efficient way to keep track of things you have to do. You can easily recall a list of all the things you have to do in order of priority. Entering things to do For example, if you have to “call Frank about a sales meeting”, but it is not the most important thing (priority 2), perform the steps below:... - Page 25 NEXT PREV to step through pages of entries. Press to move the pointer “ ” to select an entry, then press to display the details of the entry. ENTER NOTE: The listing starts from the entry being displayed when you press , or from the first entry if you are at the initial entry display.
-
Page 26: Using The Expense Function
USING THE EXPENSE FUNCTION The EXPENSE function is an easy-to-use method of tracking personal and business expense information. The expense summaries allow you to see the total expenses for a single day or for a certain period. Creating expense records For example, to create an Expense record, supposing the date is March 9, 1999, and you have just bought flight tickets for a business trip for $1,200:... - Page 27 The first 12 characters of the first line of each record are displayed. Press to move the pointer “ ” down or up, or to step to the next or previous page of five records. Press PREV to display details of the record. ENTER NOTE: The record being displayed when...
-
Page 28: Using The Calculator Function
USING THE CALCULATOR FUNCTION The Organizer’s built-in calculator can perform the four arithmetic calculations with up to 12 digits. Press CALC/CONV to use the calculator function. Before performing any calcula- tion, press twice to clear the display. • NOTES: • Non-zero numbers in the memory cause “-M-” to appear on the display. -
Page 29: Using The Conversion Function
USING THE CONVERSION FUNCTION The Organizer supports functions to convert denominations and units into others. Setting the currency rate 1. Press CALC/CONV CALC/CONV 2. To select the desired conversion display, press repeatedly. NEXT PREV 3. Press EDIT 4. Enter the conversion rate. 5. - Page 30 • If a password has been already registered, after press “ALLOW ACCESS TO SECRET DATA” will be displayed SECRET instead. Refer to “What to do if you forget the password” on page 29, and delete the previous password and all secret data. Encoding data as secret data and declassifying secret data Coding previously stored data as secret data...
- Page 31 Turning off the secret function 1. Recall the prompt to turn off the secret function. MEMO SECRET 2. Enter the password. (“1234” is an instance used in the previous example.) 1234 ENTER 3. “SECRET DATA ACCESSIBLE!” appears and the secret function is turned off.
-
Page 32: Using The Miscellaneous Function
USING THE MISCELLANEOUS FUNCTION The miscellaneous function menu supports functions for MEMORY CHECK, LCD CONTRAST, DATA DELETION, TEL FILE NAME, BACKLIGHT SETUP, DATE FORMAT, and FREE UP MEMORY. NOTE: The menu screen is displayed occasionally in two separate displays. Press to display the second screen. -
Page 33: Setting The Date Format
NOTE: When the secret function is turned on, “SECRET ON MODE” will be displayed. To delete all data relating to a function, be sure to turn off the secret function. (Refer to “Turning off the secret function” on page 29.) SCHEDULE and ANNIVERSARY 1. -
Page 34: Using The Option Function
DO YOU WANT TO FREE UP MEMORY ? ( Yes/No ) The Organizer can transfer data to/from SHARP Organizers and personal computers. The table below shows the models that can be connected with the Organizer, and data transfer allowed between the... - Page 35 MEMO/TO DO/EXPENSE/ANN1, 2) can be transferred between Organizers. NOTES: • Turn both of the Organizers off first before connecting them with the SHARP-specific cable (CE-300L, optionally available). • The following descriptions assume connections between the same models. • When an error occurs, the following error message is displayed on the receiving or transmitting unit, or both the units.
- Page 36 Organizer. Use CE-490W to secure your important data or share data in the Organizer with a PC. NOTE: SHARP’s CE-490W may not be available when you purchase the Organizer. Please contact an authorized SHARP dealer for more information or call SHARP at 800-BE-SHARP. to clear the •...
-
Page 37: Appendix
Raindrops, water spray, juice, coffee, steam, perspiration, etc. will also cause malfunction. • Do not carry the Organizer in your pocket or bag together with sharp or hard objects, because they may scratch the Organizer. -
Page 38: Troubleshooting
Troubleshooting If the Organizer malfunctions, go through the following checklist before sending it for repair. Problem Remedy • Adjust the display contrast (page 30) Nothing is displayed • Replace the batteries (page 36). after pressing Display contrast is • Adjust the display contrast (page 30). •... - Page 39 (Fig. 1) 3. Remove the used batteries by prying them out with a ball-point pen. (Fig. 2) Do not use a mechanical pencil or sharp pointed object. This may break and cause damage to the mechanical pencil and/or the Organizer.
- Page 40 3. Remove the memory backup battery seal. 4. Remove the used battery by prying it out with a ball-point pen. (Fig. 4) Do not use a mechanical pencil or sharp pointed object. 5. Install the new battery with the (+) side facing up.
-
Page 41: Specifications
TO DO mode Items, priority assignment EXPENSE mode Expense date, amount, description and summary Memory capacity YO-470 128 Kbytes (User area: Approx. 126 Kbytes) SCHEDULE mode capacity: Approx. 1990 entries TEL mode capacity: Approx. 3080 entries MEMO mode capacity: Approx. 920 entries •... - Page 42 Time system 12-hour or 24-hour World clock Display of date and time for the world cities function Enable/disable control for daylight saving time display function Common Power Main power supply: (DC) lithium batteries (CR2032 Memory backup power: (DC) lithium battery (CR2032 Power 0.1W consumption...
- Page 43 INDEX Character sorting order 19 Checking the memory capacity Alarms Schedule 14 Clock 6 Turning off 15 Contrast adjustment 30 All reset 35 Conversion function 27 Anniversary function 15 Correcting entries 6 Auto power off 4 Backlight 4, 31 Data transfer 32 BATT symbol 4, 37 DATA DELETION function 14, Batteries...
- Page 44 Rearranging memos 21 TEL FILE NAME function 17 Recalling Telephone Directory function Anniversaries 16 Expense records 24 TO DO function 22 Memos 20 Transferring data 32, 33, 34 Scheduled data 11 Telephone entries 18 Registering City names 8 Password 27 Troubleshooting 36 Replacing batteries 36 Turning on/off...
- Page 45 MEMO...
-
Page 46: Product Support
PRODUCT SUPPORT Sharp Electronics Corporation is dedicated to serving Customer needs. Please fill out and send the enclosed registration card so that we can keep you up-to-date as new products and services become available. If you have read the ORGANIZER operation manual, but you still require product support,...