
Related Manuals for Husqvarna HUV 4213-G 2008


Summary of Contents for Husqvarna HUV 4213-G 2008
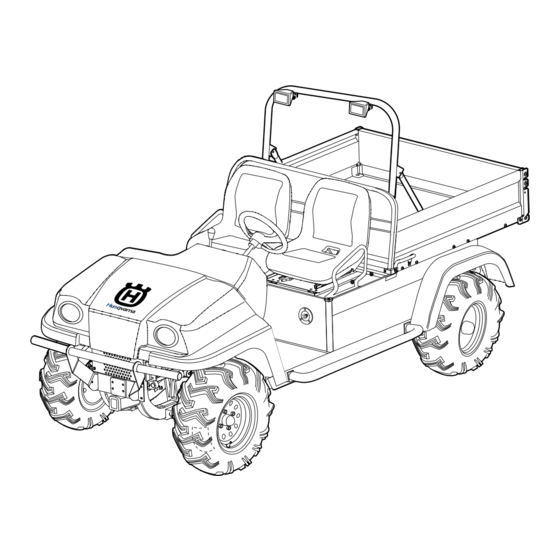
- Page 1 2008 HUV 4213-G and HUV 4213-GXP Owner’s Manual Gasoline Utility Vehicles Get other manuals https://www.bkmanuals.com...
- Page 2 Get other manuals https://www.bkmanuals.com...
- Page 3 Your authorized representative checked the vehicle before it was delivered to you and will provide you a copy of the completed vehicle warranty registration form. Husqvarna is not liable for errors in this manual or for incidental or consequential damages that result from the use of the material in this manual.
- Page 4 We hope you will consider this owner’s manual a permanent part of your Husqvarna vehicle. If you sell the vehicle, please include the manual so that the next owner will have the important operating, safety, and maintenance information it contains.
-
Page 5: Table Of Contents
TABLE OF CONTENTS Safety Decal and Feature Identification ........................4 Practice Safety ..............................7 Proposition 65 – State of California ........................7 Safety Details ............................... 8 General Warnings..............................9 Model Identification............................. 10 Controls and Indicators ............................11 Seat Latch and Adjustment ..........................16 Pre-Operation and Daily Safety Checklist ...................... -
Page 6: Safety Decal And Feature Identification
Safety Decal and Feature Identification SAFETY DECAL AND FEATURE IDENTIFICATION The following pages contain safety decal and feature identification information. For detailed information on specific features, read the appropriate section in this manual. Page 4 2008 HUV 4213-G and HUV 4213-GXP Owner’s Manual Get other manuals https://www.bkmanuals.com... - Page 7 Safety Decal and Feature Identification HUV 4213-G/4213-GXP Decal, Bed Loading Warning (on cargo bed or seat 101553901 102224301 Decal, Operating Instructions (on steering wheel) back) Decal, Crush Area Warning (behind seat, near 101609401 Serial Number cargo bed) 101825102 Decal, On/Off/Start Key Switch (above key switch) Fuel Shut-Off Valve Decal, Vehicle Loading Instructions (below 101960201...
- Page 8 Safety Decal and Feature Identification HUV 4213-G/4213-GXP Decal, Trailer Hitch Tongue Weight Notice (on Decal, Bed Latch Warning (on vehicle body, below 1011553 102459301 trailer/receiver hitch) bed latch) Decal, Gasoline Fuel Warning (at fuel fill or on 101547601 Forward/Reverse Control frame, near fuel tank) Decal, Frame Ground/Governor Warning (on 101915201...
-
Page 9: Practice Safety
Practice Safety PRACTICE SAFETY Figure 1 Practice Safety Safety signs like you see above may at first seem shocking, but their impact is mild compared with the reality of severe personal injury. Your safety and satisfaction are of the utmost importance to us. That is why before operating the vehicle, we urge you to review the information in this manual. -
Page 10: Safety Details
Safety Details SAFETY DETAILS WARNING • This owner’s manual should be read completely before attempting to drive or service the vehicle. Failure to follow the instructions in this manual could result in property damage, severe personal injury, or death. It is important to note that some vital statements throughout this manual and on the decals affixed to the vehicle are preceded by the words DANGER, WARNING, or CAUTION. -
Page 11: General Warnings
• The vehicle will not provide protection from lightning, flying objects, or other storm-related hazards. If caught in a storm while driving a Husqvarna vehicle, exit the vehicle and seek shelter in accordance with applicable safety guidelines for your location. -
Page 12: Model Identification
Model Identification WARNING • Follow the procedures exactly as stated in this manual, and heed all DANGER, WARNING, and CAUTION statements in this manual as well as those on the vehicle. • Do not leave children unattended on vehicle. • Prior to leaving the vehicle unattended or servicing the vehicle, set the park brake, place the Forward/Reverse handle in the NEUTRAL position, turn the key switch to the OFF position, and remove the key. -
Page 13: Controls And Indicators
Controls and Indicators SERIAL NUMBER HH0601-583947 7349 ST ATESVILLE RD. CHARLOTTE, NC 28269 Figure 3 Serial Number CONTROLS AND INDICATORS See General Warnings on page 9. WARNING • Before allowing anyone to drive the vehicle, make sure the driver is familiar with all controls and operating procedures. - Page 14 (NEUTRAL). The engine must be at idle before shifting the Forward/Reverse handle. See preceding WARNING and CAUTION. Husqvarna vehicles operate at a reduced speed in reverse. The reverse buzzer will sound as a warning when the Forward/Reverse handle is in the REVERSE position.
- Page 15 Controls and Indicators Figure 5 Forward/Reverse Handle ACCELERATOR PEDAL The accelerator pedal is the pedal on the right, with the word GO molded into it (Figure 6). With the engine running and the Forward/Reverse handle in the FORWARD or REVERSE position, vehicle speed will increase as the accelerator pedal is pressed.
- Page 16 Controls and Indicators BRAKE PEDAL The brake pedal is the large pedal on the left with the word STOP molded into it (Figure 6). To slow or stop the vehicle, press the brake pedal (Figure 7). PARK BRAKE The park brake handle is located between the driver and passenger seats. To engage the park brake, first apply pressure to the brake pedal, then pull up on the park brake handle until handle latches into place.
- Page 17 Controls and Indicators Figure 9 Choke Figure 10 Differential Lock DIFFERENTIAL LOCK WARNING • With the differential lock engaged, vehicle turning functions are greatly reduced. To prevent loss of vehicle control when differential lock is engaged, do not operate vehicle at speeds greater than half throttle and use caution when attempting to turn the vehicle.
-
Page 18: Seat Latch And Adjustment
Seat Latch and Adjustment Figure 11 Low Oil Warning Light FUEL GAUGE/HOUR METER A fuel gauge and hour meter are housed together at the lower left corner of the instrument panel. The fuel gauge operates when the key switch is in the ON position, and allows the operator to monitor the fuel level in the vehicle. The hour meter operates only when the engine is running, and should be used only by trained technicians to track vehicle usage and determine when periodic service procedures are required. -
Page 19: Pre-Operation And Daily Safety Checklist
• Make sure seat hinges and latch are securely engaged before operating vehicle. PRE-OPERATION AND DAILY SAFETY CHECKLIST Each Husqvarna vehicle has been thoroughly inspected and adjusted at the factory; however, upon receiving your new vehicle(s), you should become familiar with its controls, indicators, and operation. Carefully inspect each vehicle to ensure that it is in proper working condition before accepting delivery. -
Page 20: Driving Instructions
Driving Instructions Use the following checklist, in conjunction with the Pre-Operation and Daily Safety Checklist, as a guide to inspect the vehicle and check daily for proper operation. Any problems should be corrected by a Husqvarna distributor/dealer or a trained technician. - Page 21 Driving Instructions WARNING – Be sure all passengers are capable of securing themselves in a vehicle before allowing them to ride in one. • Do not shift the Forward/Reverse handle while the vehicle is in motion. • Stop the vehicle before shifting the Forward/Reverse handle. Engine must be at idle before shifting the Forward/Reverse handle.
- Page 22 Driving Instructions Release park brake. 10. Keeping brake engaged, place the Forward/Reverse handle in desired position (F = forward or R = reverse). Engine must be at idle before moving the shift handle. A buzzer will sound as a warning when the vehicle is in the REVERSE position.
-
Page 23: Bed Latch And Prop Rod
Bed Latch and Prop Rod BED LATCH AND PROP ROD See General Warnings on page 9. DANGER • Use caution when working under bed. Be sure prop rod is secure. Otherwise the bed will fall, resulting in severe personal injury or death. WARNING •... -
Page 24: Loading And Unloading
Loading and Unloading LOADING AND UNLOADING WARNING • Firmly engage park brake before loading vehicle. • Do not allow riders in the cargo bed. • Reduce vehicle load and speed when driving up or down slopes or on uneven terrain. •... -
Page 25: Towing With The Vehicle
• For use on public roads, the trailer must meet all federal, state, and local requirements such as taillights, brake lights, etc. • Never tow a Husqvarna vehicle behind a passenger vehicle or truck on a public road unless it is on an approved trailer. -
Page 26: Storage
Storage STORAGE See General Warnings on page 9. DANGER • Do not attempt to drain fuel when the engine is hot or while it is running. • Be sure to clean up any spilled gasoline before operating the vehicle. • Store fuel in an approved fuel container only. Store in a well-ventilated area away from sparks, open flames, heaters, or heat sources. - Page 27 Storage Disconnect the battery cables, negative (–) cable first. See WARNING “To avoid unintentionally starting...” in General Warnings on page 9. Batteries should be clean and free of corrosion. Wash tops and terminals of batteries with a solution of baking soda and water (1 cup (237 mL) baking soda per 1 gallon (3.8 L) of water).
-
Page 28: Maintenance
Any vehicle not functioning correctly should not be used until it is repaired. This will prevent further damage to the vehicle and avoid the possibility of injury due to unsafe conditions. Contact your local Husqvarna dealer for repairs, semiannual and annual periodic service. WARNING •... -
Page 29: Periodic Service Schedule
Periodic Service Schedule WARNING • To help avoid unintentionally starting the vehicle: – Disconnect battery cables, negative (–) cable first (Figure 2). – Disconnect the spark plug wire from the spark plug. • If wires are removed or replaced make sure wiring and wire harness are properly routed and secured. Failure to properly route and secure wiring could result in vehicle malfunction, property damage, personal injury, or death. - Page 30 Periodic Service Schedule PERIODIC SERVICE SCHEDULE REGULAR INTERVAL SERVICE See Pre-Operation and Daily Safety Pre-Operation and Daily Safety Checklist Checklist on page 17. Daily service by owner Performance Inspection See Performance Inspection on page 17. Check engine oil level; change as required. See Periodic Lubrication Schedule on page Engine Check engine cooling air intake;...
-
Page 31: Periodic Lubrication Schedule
Periodic Lubrication Schedule PERIODIC LUBRICATION SCHEDULE PERIODIC LUBRICATION SCHEDULE LUBRICATION REGULAR INTERVAL SERVICE RECOMMENDED LUBRICANT POINTS Brake pedal shaft bearings Dry Moly Lube (P/N 603 00 00-01) Semiannually by owner or trained technician (or every 50 Accelerator push rod pivots, mounts, Dry Moly Lube (P/N 603 00 00-01) hours of operation, whichever and shifter cable pivots... -
Page 32: Master Cylinder
Master Cylinder MASTER CYLINDER 1. Full Level 2. Safe Level 3. Low Level Figure 16 Brake Fluid Reservoir The master cylinder is located under the passenger seat toward the center of the vehicle (Figure 16). Raise or remove the seat to check the brake fluid level. When checking the brake fluid, also inspect the following: •... -
Page 33: Engine Oil
Engine Oil ENGINE OIL Even though the low oil warning light on the instrument panel should illuminate if oil becomes low, the engine oil level should be checked monthly. The vehicle should be on a level surface when checking oil. Do not overfill with oil. ENGINE OIL LEVEL CHECK Remove the oil level dipstick from the oil filler tube and wipe oil from dipstick (Figure 17). - Page 34 Engine Oil WARNING • For vehicles with cargo beds, remove all cargo before raising the bed or servicing the vehicle. If the vehicle is equipped with a prop rod, ensure that it is securely engaged while bed is raised. Do not close the bed until all persons are clear of cargo bed area.
- Page 35 (Figure 21). This will help seal the filter to the oil filter mounting bracket. See following NOTE. NOTE: Use only Husqvarna oil filters (P/N 603 00 00-06) designed for this engine. 1. Snubber Bracket 2. Snubber 3. Compress Down...
- Page 36 Engine Oil Figure 21 Coat Rubber Seal Figure 22 Add Engine Oil 13. Tighten the oil filter by hand until tight. Do not use a band wrench or channel lock plier to tighten. 14. Lower the vehicle and remove the floor jack from under the rear of the vehicle. 15.
-
Page 37: Fueling Instructions
Fueling Instructions NOTE: Using multi-grade oils (5W-20, 10W-30, and 10W-40) will increase oil consumption. Check oil level more frequently when using them. FUELING INSTRUCTIONS See General Warnings on page 9. DANGER • Turn the key switch to the OFF position before fueling. •... -
Page 38: Battery
Battery 1. Vent Tube 2. To Carburetor 3. Vent 4. Fuel Shut-off Valve 5. Fuel Tank Figure 24 Fuel Tank BATTERY See General Warnings on page 9. DANGER • Battery – Explosive gases! Do not smoke. Keep sparks and flames away from the vehicle and service area. - Page 39 Battery Access the engine compartment. See WARNING “For vehicles with cargo beds...” in General Warnings on page 9. Tilt the bed and ensure that the prop rod is properly engaged. Disconnect the battery cables, negative (–) cable first. See WARNING “To avoid unintentionally starting...” in General Warnings on page 9.
-
Page 40: Cleaning The Vehicle
See Safety Decal and Feature Identification on page 4. The winch kit available from Husqvarna includes a remote operation switch, which enables the operator to move away from the vehicle and cable. See following WARNING and CAUTION. -
Page 41: Subsequent Owner Registration
In the event a vehicle is bought as a used vehicle, we strongly urge the new owner to register the vehicle with Husqvarna. This will enable us to contact you if the need arises. Please send your name, address, and serial number of the vehicle to Husqvarna, 7349 Statesville Rd., Charlotte, NC 28269, Attention: Vehicle Registration. -
Page 42: Vehicle Specifications
Vehicle Specifications VEHICLE SPECIFICATIONS SPECIFICATIONS HUV4213-GXP HUV4213-G POWER SOURCE Engine: 4-cycle OHV, 400 cc, 13.0 maximum HP @3600 RPM (per SAE J 1940/1349), • single-cylinder, air-cooled, with pressure lubrication system Fuel system: Side-draft carburetor with float bowl, fixed jets, fuel filters, and impulse fuel •... - Page 43 Vehicle Specifications SPECIFICATIONS HUV4213-GXP HUV4213-G Curb clearance circle (diameter) 24 ft. 1 in. (734 cm) Turning radius (per SAE J 695) 139.6 in. (355 cm) Intersecting aisle clearance 112.2 in (285 cm) Floorboard height 17 in. (43 cm) Seat height 35 in.
-
Page 44: Warranties
Portable Refreshment Center, and all other original equipment options and accessories supplied by Husqvarna are warranted with respect to parts and labor against defects in material and workmanship for a period of one year or 1000 hours of operation, whichever first occurs, from the date of purchase. - Page 45 REPAIR OF THE DEFECTIVE VEHICLE OR COMPONENT THEREOF IS THE SOLE REMEDY OF THE PURCHASER. HUSQVARNA MAKES NO OTHER REPRESENTATION OR WARRANTY OF ANY KIND, AND NO REPRESENTATIVE, EMPLOYEE, OR DEALER OF HUSQVARNA HAS THE AUTHORITY TO MAKE OR IMPLY ANY REPRESENTATION, PROMISE OR AGREEMENT, WHICH IN ANY WAY VARIES THE TERMS OF THIS WARRANTY.
- Page 46 - As the vehicle engine owner, you are responsible for the performance of the required maintenance listed in your owner’s manual. Husqvarna recommends that you retain all receipts covering maintenance on your vehicle engine, but Husqvarna cannot deny warranty solely for the lack of receipts or for your failure to ensure the performance of all scheduled maintenance.
- Page 47 Husqvarna will not be liable to warrant failures of warranted parts caused by the use of a non-exempted add-on or modified part. *Husqvarna, its authorized dealers, or a service agency approved by Husqvarna.
- Page 48 5. NO CONSEQUENTIAL DAMAGES: In no event shall Husqvarna be liable for any incidental or consequential damages including, but not limited to, loss related to property other than the vehicle, loss of use, loss of time, inconvenience, or any other economic loss. This warranty is applicable only where the California or U.S.
- Page 49 Get other manuals https://www.bkmanuals.com...
- Page 50 Get other manuals https://www.bkmanuals.com...
- Page 51 Get other manuals https://www.bkmanuals.com...
- Page 52 Publication Part Number 603 00 43-23 Edition Code 0707C0608B Get other manuals https://www.bkmanuals.com...