Table of Contents
Advertisement
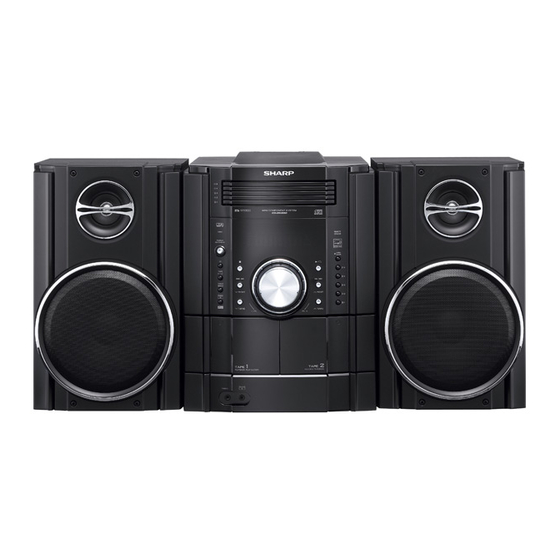
MINI COMPONENT SYSTEM
MODEL
CD-DK890N
OPERATION MANUAL
iPod is a registered trademark of Apple Inc.
Thank you for purchasing this SHARP product.
To obtain the best performance from this product, please read this
manual carefully. It will guide you in operating your SHARP product.
CD-DK890N Mini Component System consisting of CD-DK890N (main
unit), CP-DK890N (speaker system).
Accessories
Please confirm that only the following accessories are included.
Remote control
1
(RRMCGA173AWSA)
FM antenna
1
(92LFANT1535A)
AM loop antenna
1
(QANTL0010AWZZ)
®
iPod
adaptor
8
(UACRTA008AW01)
Advertisement
Table of Contents

Related Manuals for Sharp CD-DK890N


Summary of Contents for Sharp CD-DK890N
- Page 1 Thank you for purchasing this SHARP product. To obtain the best performance from this product, please read this manual carefully. It will guide you in operating your SHARP product. CD-DK890N Mini Component System consisting of CD-DK890N (main unit), CP-DK890N (speaker system).
- Page 2 NOTES It is the intent of Sharp that this product be used in full compliance with the copyright laws of the United States and that prior permission be obtained from copyright owners whenever necessary.
-
Page 3: Important Safety Instructions
IMPORTANT SAFETY INSTRUCTIONS Electricity is used to perform many useful functions, but it can also cause personal injuries and property damage if improperly handled. This product has been engineered and manufactured with the highest priority on safety. However, improper use can result in electric shock and/or fire. - Page 4 IMPORTANT SAFETY INSTRUCTIONS CD-DK890N 18) Damage Requiring Service - Unplug this product from the wall outlet and refer servicing to qualified service personnel under the following conditions : a) When the AC cord or plug is damaged, b) If liquid has been spilled, or objects have fallen into the product, c) If the product has been exposed to rain or water, d) If the product does not operate normally by following...
-
Page 5: Table Of Contents
(compact discs, digital versatile discs, semiconductor chips, hard drives, memory cards and the like). An independent license for such use is required. For details, please visit http://mp3licensing.com MPEG Layer-3 audio coding technology licensed from Fraunhofer IIS and Thomson. Contents General Information Precautions ... -
Page 6: Precautions
Using this product with a higher voltage other than that which is specified is dangerous and may result in a fire or other type of accident causing damage. SHARP will not be held responsible for any damage resulting from use of this unit with a voltage other than that which is specified. -
Page 7: Controls And Indicators
6. Tape (1 2) Button ... 32 7. Tuner (Band) Button ... 30 8. Audio In/iPod Button ... 39 9. CD or Tape Stop Button ... 22, 33 10. CD Track Down or Fast Reverse, Tape 2 Rewind, Tuner Preset Down, Time Down Button ...15, 19, 22, 31, 32, 33, 36 11. - Page 8 Controls and indicators (continued) CD-DK890N AC INPUT C INPUT 7 8 9 1. Disc Number Indicators ...23 2. MP3/WMA Folder Indicator ... 26 3. MP3/WMA Title Indicators ... 26 4. MP3 Indicator ... 21 5. WMA Indicator ...21 6. Sleep Indicator ... 38 7.
- Page 9 11. Tuner (Band) Button ... 30 12. Tape (1 2) Button ... 32 13. Audio In/iPod Button ... 39 14. Disc Track Up or Fast Forward, Tape 2 Fast Forward, Tuner Preset Up, Time Up, Cursor Right Button ... 15, 19, 22, 31, 32, 33, 36 15.
-
Page 10: System Connections
System connections CD-DK890N (s e AC INPUT C INPUT... - Page 11 Antenna connection Supplied FM antenna: Connect the FM antenna wire to the FM 75 OHMS jack and position the FM antenna antenna wire in the direction where the strongest signal can be received. Supplied AM loop antenna: Connect the AM loop antenna to the AM and GND terminals.
- Page 12 System connections (continued) CD-DK890N AC power connection After checking all the connections have been made correctly, plug the AC power cord of this unit into the AC outlet. If you plug in the unit first, the unit will enter the demonstration mode. AC INPUT C INPUT AC outlet...
-
Page 13: Remote Control
The remote control can be used within the range shown below: Press the ON/STAND-BY button. Does the power turn on? Now, you can enjoy the music. TIMER 8" - 20' (0.2 m - 6 m) PLAYBACK (PLAY & STOP) RECORD/PLAYBACK AUDIO PHONES CD-DK890N Remote sensor... -
Page 14: General Control
General control CD-DK890N POWER ON/ STAND-BY TIMER To turn the power on Press the ON/STAND-BY button to turn the power on. After use: Press the ON/STAND-BY button to enter the power stand-by mode. Display brightness control To dim the display brightness, hold down the CLEAR/DIMMER button on the remote control for 2 seconds or more. -
Page 15: Setting The Clock (Remote Control Only)
Setting the clock (Remote control only) In this example, the clock is set for the 12-hour (AM 12:00) display. Press the ON/STAND-BY button to turn the power on. Press the CLOCK/TIMER button. Within 10 seconds, press the select “CLOCK”, and press the MEMORY button. Press the button to select 12-hour or 24- hour display and then press the MEMORY button. -
Page 16: Listening To The Ipod
Please use the adaptor supplied with your iPod unit. If you have an iPod that does not have an iPod 30 Pin connector, you can use an audio cable to connect it to the AUDIO IN jack. Capacity 4GB & 6GB... - Page 17 To insert iPod adaptor 1. Press the ON/STAND-BY button to turn the power on. 2. Insert the iPod adaptor into the iPod dock and connect your iPod. iPod iPod (bottom) Dock connector iPod adaptor iPod dock iPod connector To remove iPod adaptor 1.
- Page 18 Listening to the iPod (continued) CD-DK890N Navigating the iPod menus with the remote control Press the [MENU] button to view the menu on iPod unit. Press it again to go back to previous menu. Use the TUNING ( menu and then press [ENTER] button. Note: The volume level is adjusted by pressing the VOL (+ or –) button on the main unit or the remote control.
- Page 19 Various iPod functions iPod Main unit Remote control Function Play Pause Track up/ down Fast forward/ reverse iPod Main unit Function Operation Back ____ light/TV Press in the pause mode. Press in the playback mode. Repeat ____ Press in the playback or Shuffle ____...
-
Page 20: Listening To A Cd Or Mp3/Wma Disc
This system can play back a standard CD, CD-R/RW in the CD format and CD-R/RW with MP3 or WMA files, but cannot record on them. Some audio CD-R and CD-RW discs may not be playable due to the state of the disc or the device that was used for recording. - Page 21 Press the ON/STAND-BY button to turn the power on. Press the CD button. Press the 1 button and within 5 seconds, press the OPEN/CLOSE button to open the disc tray 1. Place the disc on the disc tray 1, label side up. Be sure to place 3"...
- Page 22 Listening to a CD or MP3/WMA disc (continued) CD-DK890N Various disc functions Function Main unit Play Stop Pause Track up/ Track down Fast forward/ Fast reverse Notes for CD: Track up/track down is possible only within individual discs. Remote Operation Fast forward/fast reverse is possible only within individual discs.
-
Page 23: Advanced Cd Or Mp3/Wma Disc Playback
Advanced CD or MP3/WMA disc playback To specify a disc to play You can play a disc by specifying the disc number. Press one of the 5 buttons to select the desired disc. Selected disc number Within 5 seconds, press the button. - Page 24 Advanced CD or MP3/WMA disc playback (continued) CD-DK890N Repeat play Repeat play can play all 5 discs, all tracks on a chosen disc, or a programmed sequence continuously. To repeat one disc: Press the PLAY MODE button once. Press the button.
- Page 25 Programmed play You can choose up to 32 selections for playback in the order you like. While in the stop mode, press the MEMORY button to enter the programming save mode. Press one of the 5 buttons to select the desired disc. Press the direct search buttons on the remote control to select the desired track.
-
Page 26: Mp3/Wma Navigation (Only For Mp3/Wma Files)
MP3/WMA navigation (only for MP3/WMA files) CD-DK890N MP3/WMA navigation: You can search and play files by folder or title. For example, when you assign three titles to a file, enter genre (such as jazz) as title 1, album name as title 2, and music title as title 3 to search the file by any title. - Page 27 File search (by folder or title 1/2/3) You can search and play files by folder or title 1/2/3 within one MP3/ WMA disc. Press one of the 5 buttons to select a disc tray containing an MP3/WMA disc. Press the button, and the unit starts to read the MP3 disc.
- Page 28 MP3/WMA navigation (only for MP3/WMA files) (continued) CD-DK890N Character search (for folder or title 1/2/3) By entering a name, you can search files by folder or title 1/2/3 within one MP3/WMA disc. Perform steps 1 - 3 in “File search (by folder or title 1/2/3)” on page 27.
- Page 29 Programmed play (for folder, title 1/2/3) Folders or titles can be programmed within one MP3/WMA disc. Folder, title 1, title 2 and title 3 cannot be programmed together simultaneously. Perform steps 1 - 3 in “File search (by folder or title 1/2/3)” on page 27.
-
Page 30: Listening To The Radio
“TUNER” function is activated. button on the main unit: The unit turns on and playback of the last function starts (CD, TAPE, TUNER, AUDIO IN, iPod). Tuning Press the ON/STAND-BY button to turn the power on. - Page 31 Memorizing a station You can store 40 AM and FM stations in memory and recall them at the push of a button. (Preset tuning) Perform steps 1 - 3 in “Tuning” on page 30. Press the MEMORY button to enter the preset tuning saving mode.
-
Page 32: Tape Playback
(main unit): The unit turns on and playback of the last function starts (CD, TAPE, TUNER, AUDIO IN, iPod). Auto power off function: In the stop mode of tape operation, the main unit enters the stand-by mode after 15 minutes of inactivity. -
Page 33: Recording On A Cassette Tape
When recording important selections, make a preliminary test to Operation ensure that the desired material is properly recorded. SHARP is not liable for damage or loss of your recording arising Press in the stop from malfunction of this unit. mode. - Page 34 Recording on a cassette tape (continued) CD-DK890N POWER ON/ STAND-BY TIMER PLAYBACK (PLAY & STOP) AUDIO PHONES Recording from the iPod Press iPod button to go to iPod function. Insert iPod unit onto iPod dock. Load a cassette into the TAPE 2 cassette compartment with the side to be recorded on facing you.
- Page 35 Within 5 seconds, press the button to start recording. Recording is started from the selected disc. When the playback of the last track is finished or the end of the tape is reached, the disc and the cassette will stop automatically. Playback of the disc will start approximately 7 seconds after the tape starts.
-
Page 36: Timer And Sleep Operation (Remote Control Only)
Timer and sleep operation (Remote control only) CD-DK890N Timer playback: The unit turns on and plays the desired source (CD, tuner, tape, audio in, iPod) at a preset time. Timer recording: The unit turns on and starts recording from the tuner at the preset time. - Page 37 Set the time to finish as in steps 6 and 7 above. Switch input with the press the MEMORY button. To select the timer playback source: iPod, AUDIO IN, CD, TUNER, TAPE 1 or TAPE 2. To select the timer recording source: TUNER.
- Page 38 Note: When performing timer playback or recording using another unit connected to the AUDIO IN jack, select “AUDIO IN” in step 9. This unit will turn on or enter the power stand-by mode automatically, however, the connected unit will not turn on or off.
- Page 39 To the line output jack Listening to playback sounds of portable audio End time player, etc. Connect a portable audio player, etc. to the front AUDIO IN Desired time jack. Press the ON/STAND-BY button to turn the power on. Press the AUDIO IN button.
-
Page 40: Enhancing Your System
Many potential problems can be resolved by the owner without calling a service technician. If something is wrong with this product, check the following before calling your authorized SHARP dealer or service center. General The clock is not set to the correct time. - Page 41 Cassette deck Symptom Possible cause Cannot record. Is the erase-prevention tab removed? Cannot record tracks with Is it a normal tape? (You cannot proper sound quality. record on a metal or CrO tape.) Cannot erase completely. Sound skipping. Is there any slack? Cannot hear treble.
-
Page 42: Maintenance
Troubleshooting chart (continued) CD-DK890N Clearing all the memory (reset) 1 Press the ON/STAND-BY button to enter the power stand-by mode. 2 While pressing down the button and the button until “CLEAR ALL” appears. OPEN/ CLOSE Caution: This operation will erase all data stored in memory including clock, timer settings, tuner preset, and CD program. -
Page 43: Specifications
Specifications As part of our policy of continuous improvement, SHARP reserves the right to make design and specification changes for product improvement without prior notice. The performance specification figures indicated are nominal values of production units. There may be some deviations from these values in individual units. -
Page 44: Consumer Limited Warranty
Product, and shall constitute full satisfaction of all claims, whether based on contract, negligence, strict liability or otherwise. In no event shall Sharp be liable, or in any way responsible, for any damages or defects in the Product which were caused by repairs or attempted repairs performed by anyone other than an authorized servicer.